Are you ready to give your car’s steering wheel a fresh, personalized look? Starting to thread a needle for your steering wheel cover might sound tricky, but with the right steps, you can do it smoothly and confidently.
Imagine the satisfaction of wrapping your hands around a cover you installed yourself—neat, secure, and stylish. In this guide, you’ll discover simple, clear instructions that make threading the needle easy, even if you’ve never tried it before. Keep reading, and you’ll be on your way to upgrading your driving experience in no time.
Gather Necessary Materials
Gathering the right materials is the first step to start threading a needle for your steering wheel cover. Having everything ready makes the process smooth and less frustrating. Focus on selecting the correct thread, picking a suitable needle, and preparing the cover properly. These basics set the foundation for a neat and secure finish.
Select The Right Thread
Choose thread that is strong and durable. Nylon or polyester threads work well for steering wheel covers. They resist wear and tear from daily use. Pick a color that matches or complements your cover. Avoid thin threads that may break easily during stitching.
Choose A Suitable Needle
Use a needle that fits the thread size and material. A sharp, sturdy needle helps you sew through thick cover material. Look for needles labeled for leather or heavy fabric. A needle too small or weak may bend or break while sewing.
Prepare The Steering Wheel Cover
Lay the cover flat on a clean surface. Check for any folds or wrinkles and smooth them out. Mark your sewing path with chalk or a pencil for better guidance. Make sure the cover edges align properly before you begin threading the needle.

Credit: www.amazon.com
Prepare The Thread
Preparing the thread is the first key step to start threading a needle for your steering wheel cover. The thread must be ready to handle the stitching without tangling or breaking. This process makes sewing smoother and faster.
Choosing the right thread length and securing it properly saves time and effort. Follow simple steps to prepare the thread well. This helps you create a strong, neat stitch around your steering wheel cover.
Cut The Thread To Length
Cut a piece of thread about 18 to 24 inches long. Too long thread can tangle easily. Too short thread will make you stop often to add more. Use sharp scissors for a clean cut. Clean cut helps thread pass through the needle eye smoothly.
Thread The Needle Properly
Hold the thread tip firmly and push it through the needle eye. Wetting the thread end helps it slide through easily. Pull the thread until you have equal lengths on both sides. This makes sewing balanced and prevents one side from pulling too hard.
Secure The Thread End
Make a small knot at the thread end to stop it from slipping out. Wrap the thread around your finger twice and pull tight to form a knot. Test the knot by gently pulling the thread. A secure knot keeps your stitching strong as you sew the cover on.
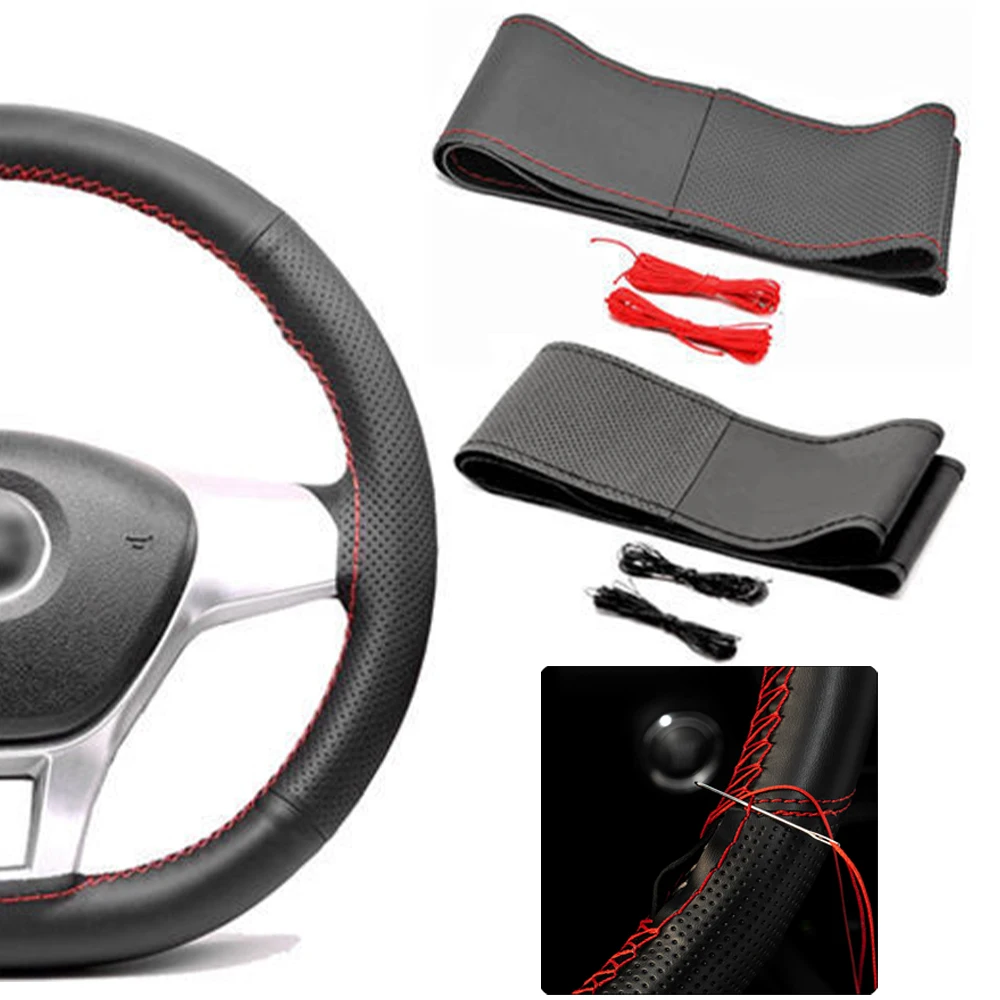
Position The Steering Wheel Cover
Positioning the steering wheel cover correctly is an important step. It sets the base for easy threading and a tight fit. Proper placement avoids wrinkles and uneven stitching. This section guides you to place the cover perfectly before sewing.
Align The Cover On The Wheel
Start by placing the cover over the top of the steering wheel. Make sure the cover’s seams match the wheel’s shape. Check that the cover edges meet evenly all around. Adjust the cover until it fits snugly without gaps. Proper alignment helps the cover stay in place during threading.
Hold The Cover Firmly
Grip the cover tightly against the wheel with both hands. Keep the cover steady to prevent slipping while you sew. Use clips or pins if the cover feels loose. Holding firmly ensures smooth stitching and a clean look. This step makes threading the needle easier and faster.
Credit: www.ebay.com
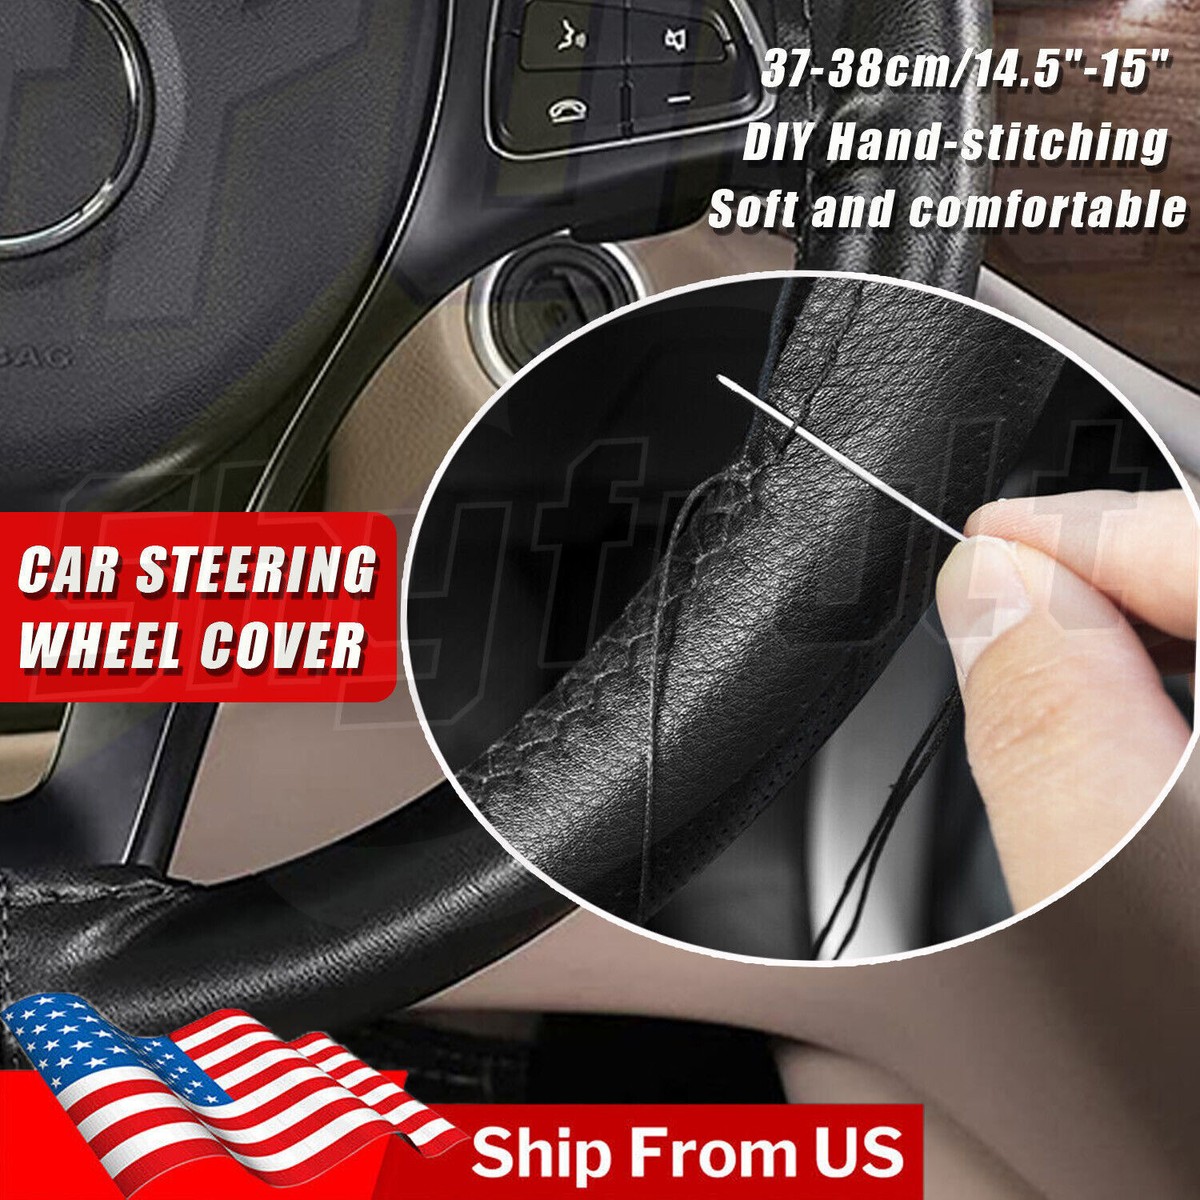
Start Threading The Needle
Starting to thread the needle is the first step in fitting your steering wheel cover. This step needs care and patience. A smooth start helps the entire process go faster. Follow these simple steps to get started.
Find The Starting Point
Look for a small hole or gap in the cover’s edge. This is where you will begin threading. Choose a spot that feels easy to access. Avoid tight corners or thick areas. This makes threading simpler and neat.
Insert The Needle Smoothly
Hold the needle firmly but gently. Push it through the starting hole slowly. Make sure the thread follows without tangling. A smooth entry keeps the thread strong and secure.
Pull The Thread Through
After the needle passes the hole, pull the thread gently. Leave a small tail to tie off later. Pulling too hard may break the thread. Keep the tension even for a clean stitch.
Maintain Tension And Stitching
Maintaining proper tension and stitching is key to a strong steering wheel cover. It keeps the cover tight and neat. Loose or uneven stitches can cause the cover to slip or wear out quickly. Focus on consistent tension and stitch style to ensure durability and a clean look.
Keep Even Thread Tension
Pull the thread gently but firmly with each stitch. Avoid pulling too hard, which can break the thread. Too loose, and the cover will not fit well. Aim for steady tension to keep the cover snug and secure.
Use Consistent Stitch Pattern
Choose a simple stitch style like a whipstitch or running stitch. Repeat the same pattern around the wheel for a balanced look. Consistent stitches make the cover stronger and more attractive. Skip irregular or random stitches to avoid weak spots.
Avoid Thread Tangling
Keep the thread straight and smooth as you sew. Stop often to check for knots or tangles. Untangle gently to prevent breaks. Using shorter thread lengths helps reduce tangling and saves time.
Secure And Finish The Threading
Start by tying a small knot at the end of the thread to keep it secure. Pull the thread tight after stitching each section to finish the threading neatly.
Securing and finishing the threading is vital for a strong steering wheel cover. This step stops the thread from loosening over time. It also gives your cover a neat, clean look. Proper finishing protects your work and makes it last longer.
Follow these steps carefully to tie off the thread, trim excess, and check your stitches. These small actions ensure your steering wheel cover stays tight and looks great.
Tie Off The Thread
After stitching, pull the thread tight to close the last stitch. Make a small knot close to the cover surface. Wrap the thread around the needle and pull it through the loop. Repeat this knot twice to secure it well.
Use slow, gentle movements to avoid damaging the material. A strong knot stops the thread from unraveling during use.
Trim Excess Thread
Cut the extra thread close to the knot. Leave about 2-3 millimeters to prevent the knot from loosening. Use sharp scissors for a clean cut. Avoid pulling or tugging on the thread while trimming.
Trimming excess thread keeps your cover tidy. It also prevents the thread from catching on objects or your hands.
Check The Finished Stitch
Examine all stitches carefully. Make sure each stitch is tight and even. Look for any loose threads or gaps. Fix any weak spots by stitching over them again.
A well-checked stitch ensures durability. Your steering wheel cover will stay secure and comfortable to use.
Credit: www.relations-publics.org
Frequently Asked Questions
How Do I Choose The Right Thread For Steering Wheel Cover?
Select a strong, durable thread like polyester or nylon. It resists wear and matches the cover’s color for a neat finish. Quality thread ensures secure stitching and longevity of the steering wheel cover.
What Is The Best Needle Size For Threading Steering Covers?
Use a needle size between 18 to 22. This size is thin enough for precision but strong enough to handle thick leather or fabric. Proper needle size prevents fabric damage and eases threading.
How Can I Easily Thread A Needle For Steering Wheel Cover?
Use a needle threader or trim the thread tip. Hold the thread steady and push it through the needle eye carefully. This method reduces frustration and speeds up the sewing process.
Why Is Threading The Needle Important For Steering Wheel Cover?
Proper threading ensures smooth stitching and strong seams. It prevents thread breakage and uneven stitching, which can damage the cover. Correct threading guarantees a professional, long-lasting steering wheel cover finish.
Conclusion
Starting to thread a needle for your steering wheel cover takes patience. Choose the right needle and thread for smooth stitching. Keep your hands steady and pull the thread gently. Take your time to avoid tangles or breaks. Practice helps you get better and faster.
Soon, stitching your cover will feel easy and natural. Enjoy a neat, secure finish that lasts long. Threading a needle well makes the whole project better. Keep these tips in mind for your next cover. Simple steps lead to great results.