
When it’s time to replace your brake pads, you might wonder if you should replace the rotors too. This is a common question that can save you money, improve your car’s safety, and extend the life of your brakes.
Understanding how to replace rotors correctly when changing brake pads can make a big difference in your driving experience. You’ll discover simple, step-by-step guidance to help you decide when and how to replace rotors. Keep reading to make sure your brakes work smoothly and keep you safe on the road.
Signs You Need New Rotors
Rotors work with brake pads to stop your car safely. Over time, rotors wear out and lose effectiveness. Knowing the signs helps you replace rotors on time. This keeps your brakes strong and your drives safe.
Common Rotor Wear Indicators
Rotors get thin after many stops. Thin rotors can crack or warp easily. Deep grooves or scoring on the rotor surface show wear. If rotors look uneven, they need replacing. Worn rotors reduce braking power and increase stopping distance.
Noise And Vibration Symptoms
Listen for squealing or grinding sounds while braking. These noises often mean rotor damage. Feel for vibration or pulsation in the brake pedal. Shaking steering wheel during stops also hints at bad rotors. These symptoms signal rotor problems that affect safety.
Visual Rotor Inspection Tips
Check rotors with clean hands or gloves. Look for cracks or rust spots on the surface. Uneven color or heat marks show rotor damage. Use a ruler to measure rotor thickness. Replace rotors below the minimum thickness stated by the manufacturer.
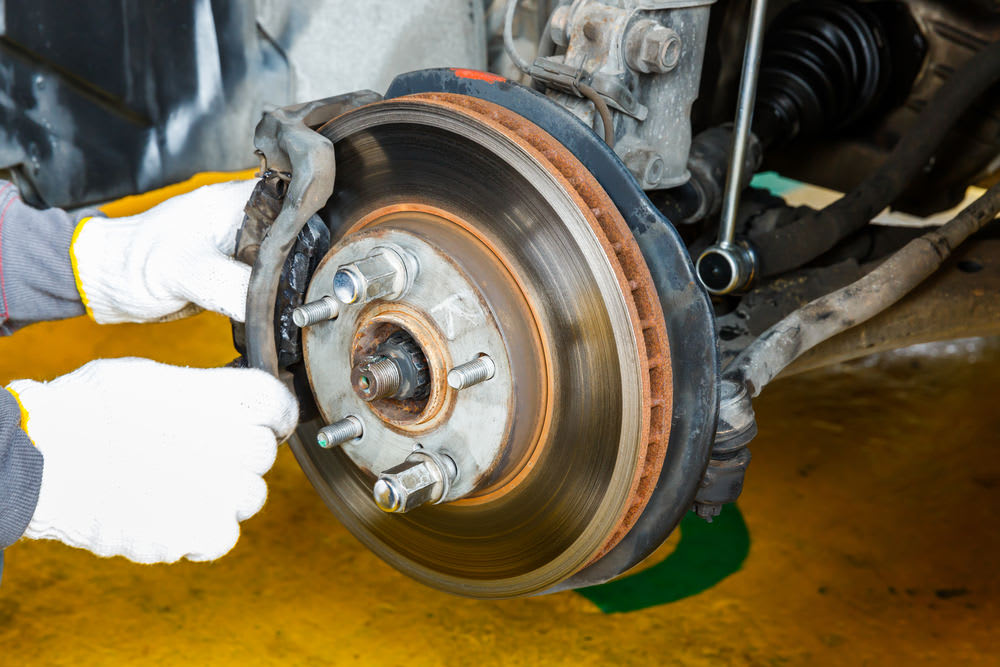
Credit: www.yourmechanic.com
Tools And Materials Required
Replacing brake rotors along with brake pads requires specific tools and materials. Having the right items ready makes the job easier and safer. This section lists all the necessary equipment for the task.
Prepare your workspace and gather these tools before starting. It saves time and avoids interruptions during the repair.
Essential Hand Tools
You need several basic hand tools to replace rotors. A lug wrench helps remove the wheel nuts. A socket set with ratchet fits various bolts. A C-clamp or brake caliper tool pushes the caliper piston back. A flathead screwdriver or pry bar assists in removing old parts. A torque wrench ensures bolts tighten to proper specs. These tools form the core set for rotor replacement.
Safety Equipment
Safety is critical during brake work. Wear safety glasses to protect your eyes from dust and debris. Use gloves to keep your hands clean and safe from sharp parts. A dust mask prevents inhaling brake dust, which can be harmful. Ensure the car is stable using jack stands after lifting it with a jack. These safety steps protect you throughout the process.
Replacement Parts Checklist
Have all replacement parts ready before you start. New brake rotors must match your vehicle’s specifications. Brake pads should be compatible with the new rotors. Anti-seize lubricant helps prevent bolts from sticking in the future. Brake cleaner removes dust and grime from rotors and calipers. Keep all parts organized for a smooth installation.
Preparing The Vehicle
Preparing the vehicle is the first step before replacing rotors and brake pads. It sets the stage for a safe and smooth repair process. Taking time to prepare helps avoid mistakes and ensures everything fits correctly. This section covers how to secure the car, remove the wheel, and clean the work area.
Securing The Car
Park the car on a flat surface. Engage the parking brake. Place wheel chocks behind the wheels. This stops the car from rolling.
Loosen lug nuts slightly before lifting the car. Use a jack to raise the car. Support it with jack stands. Never rely on the jack alone.
Removing The Wheel
Remove the lug nuts completely. Keep them in a safe place. Pull the wheel straight off the hub. Sometimes it needs a gentle tap to loosen.
Set the wheel aside carefully. Avoid damaging the tire or rim. This gives clear access to the brake assembly.
Cleaning The Work Area
Wipe dirt and dust from the brake area. Use a brake cleaner spray for best results. Clean surfaces help you see parts clearly.
Remove any grease or debris. This prevents contamination of brake components. A clean work area reduces the chance of errors.
Removing Old Brake Pads And Rotors
Removing old brake pads and rotors is a key step in brake repair. It helps ensure new parts fit well and work properly. Taking out these parts carefully prevents damage to the brake system. Follow each step to remove old components safely and easily.
Detaching Brake Caliper
Start by loosening the bolts holding the brake caliper. Use a wrench to remove them slowly. Carefully lift the caliper off the rotor. Avoid letting the caliper hang by the brake line. Use a hook or rest it on a stable surface to keep it safe.
Extracting Brake Pads
With the caliper off, the brake pads become visible. Slide them out from their slots gently. Check for any clips or pins holding the pads. Remove these parts if needed before taking out the pads. Dispose of old pads properly, as they wear down over time.
Taking Off The Rotor
Remove any screws or clips holding the rotor in place. If the rotor is stuck, tap it lightly with a rubber mallet. Pull the rotor straight off the wheel hub. Clean the hub surface to remove rust or dirt before installing new parts.
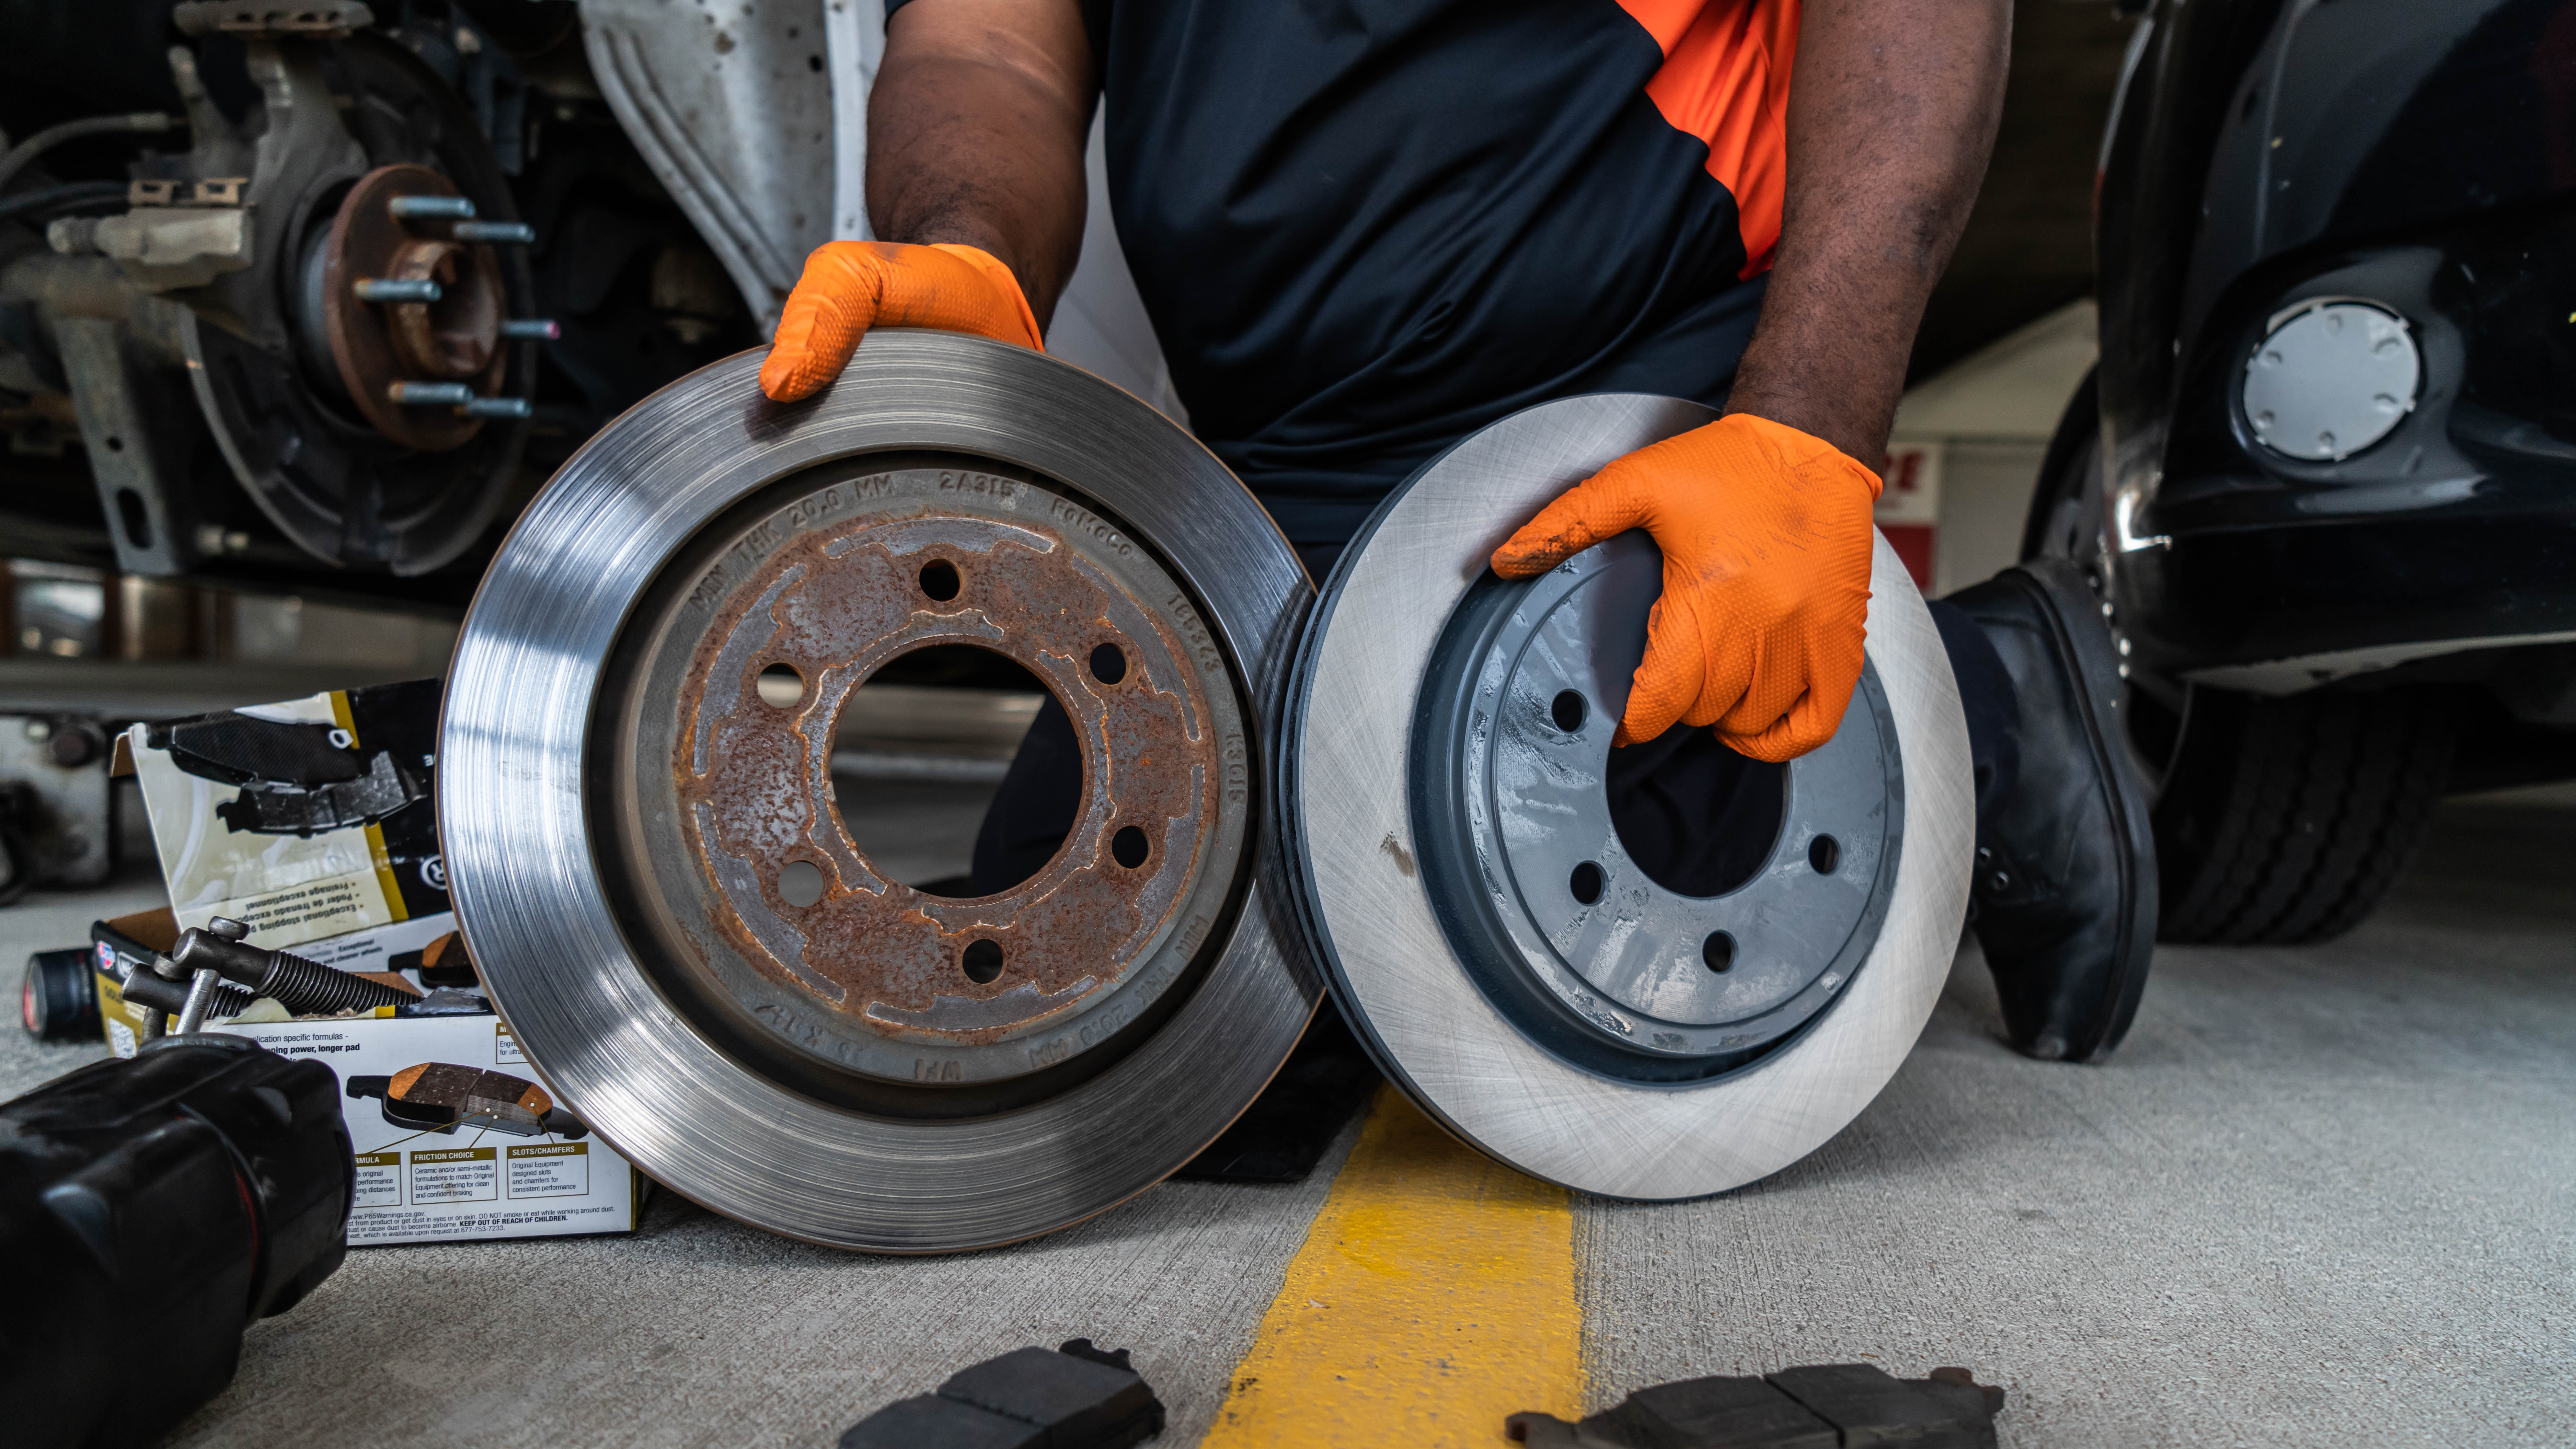
Inspecting And Preparing The New Rotors
Inspecting and preparing new rotors is an important step when replacing brake pads. Proper preparation ensures safety and improves brake performance. It helps the rotors last longer and prevents early wear.
Careful checks and cleaning make sure the rotors are ready for installation. Skipping this step can cause noise, vibration, or poor braking.
Cleaning The Rotors
New rotors often have a protective coating. This coating prevents rust during shipping. Clean the rotors with brake cleaner and a clean cloth. Avoid touching the surface with greasy hands. Dirt or oil can reduce braking power.
Checking Rotor Specifications
Verify the rotor size matches your vehicle’s requirements. Check the thickness against the minimum allowed limit. Thin rotors can warp or crack under stress. Also, confirm the rotor type fits your brake system. Incorrect rotors cause poor performance and damage.
Avoiding Common Mistakes
Do not install rotors without cleaning them first. Avoid reusing old hardware like screws or clips. Use the correct torque settings for bolts. Tighten bolts in a crisscross pattern to avoid warping. Never touch the rotor surface with bare hands after cleaning.
Installing The New Rotors And Pads
Installing new rotors and brake pads is a key step in brake maintenance. It ensures smooth braking and safety on the road. This process involves careful placement of parts and secure reassembly. Each part must fit perfectly for the brakes to work well.
Mounting The Rotor
Start by placing the new rotor onto the wheel hub. Align the holes on the rotor with the studs on the hub. Press the rotor firmly to sit flat against the hub. Use screws if needed to hold the rotor in place. Check that the rotor spins without wobbling.
Positioning New Brake Pads
Next, insert the new brake pads into the caliper bracket. Make sure the pads sit evenly on both sides of the rotor. The friction surface should face the rotor. Secure the pads with any clips or pins provided. Ensure the pads do not move out of place.
Reattaching The Caliper
Carefully lift the caliper over the new pads and rotor. Align it with the mounting points on the bracket. Insert and tighten the caliper bolts firmly. Check that the caliper moves slightly but holds the pads tight. This step helps the brake system work smoothly and safely.
Final Checks And Testing
After replacing the brake pads and rotors, final checks and testing are crucial. These steps ensure your brakes work properly and safely. Skipping them can cause brake failure or uneven wear. Take your time to complete each check carefully.
Torque Specifications
Tighten all bolts to the car maker’s torque specs. Use a torque wrench for accuracy. Over-tightening can damage parts. Under-tightening can cause loose components. Check the rotor and caliper bolts specifically. Follow the manual for exact numbers.
Brake System Bleeding
Air in the brake lines reduces braking power. Bleed the brake system to remove air bubbles. Use fresh brake fluid. Start with the wheel farthest from the master cylinder. Repeat until no air bubbles appear. This step improves brake response and safety.
Test Driving Tips
Drive slowly at first to test the brakes. Listen for strange noises or vibrations. Check if the car stops smoothly. Avoid heavy braking until the pads and rotors settle. Test on a quiet road with low traffic. This helps confirm the repair is successful.
.jpg)
Credit: www.cbac.com
Maintenance Tips For Longevity
Proper maintenance extends the life of brake rotors and pads. Taking simple steps helps keep your brakes working well for longer. Regular care avoids costly repairs and ensures safety on the road.
Follow these tips to protect your brake system and enjoy smooth stopping power.
Regular Inspections
Check brake pads and rotors often for wear or damage. Look for grooves, cracks, or thinning on rotors. Thin brake pads need quick replacement. Early detection prevents bigger problems. Inspect during oil changes or tire rotations.
Driving Habits To Protect Brakes
Avoid sudden stops and hard braking. Slow down gradually to save brake parts. Use engine braking when going downhill. Keep a safe distance from other vehicles. Smooth driving reduces heat and wear on rotors and pads.
When To Seek Professional Help
Listen for strange noises like squealing or grinding. Feel for vibrations when braking. These signs indicate rotor or pad issues. Visit a mechanic if you notice uneven braking or warning lights. Timely service keeps your brakes reliable and safe.
Credit: nubrakes.com
Frequently Asked Questions
When Should Rotors Be Replaced With Brake Pads?
Rotors should be replaced if they are warped, cracked, or below minimum thickness. Replacing them with pads ensures better braking performance and safety.
Can I Replace Brake Pads Without Changing Rotors?
Yes, if rotors are in good condition, you can replace pads alone. However, inspecting rotors for damage or wear is crucial before deciding.
How Do You Properly Replace Rotors During Brake Pad Change?
Remove the wheel, caliper, and old rotor. Clean hub surface, install new rotor, then reassemble caliper and wheel. Always torque bolts to manufacturer specs.
What Tools Are Needed To Replace Rotors With Brake Pads?
Common tools include a jack, lug wrench, socket set, C-clamp, and screwdriver. Additional tools may be needed depending on the vehicle model.
Conclusion
Replacing rotors while changing brake pads keeps your brakes working well. Clean the hub before placing new rotors for a smooth fit. Tighten bolts evenly to avoid wobbling or noise. Check the brake system after installation to ensure safety. Proper rotor replacement helps your car stop better and last longer.
Taking time to do this right saves money and trouble later. Simple steps can make a big difference in brake performance. Remember, safe brakes mean safer driving every day.


