
If you love keeping your car spotless, you’ve probably heard about foam cannons. But have you ever wondered how a foam cannon attaches to your pressure washer or hose?
Knowing this simple step can save you time and frustration, and make your car wash routine much easier and more effective. You’ll discover exactly how to connect your foam cannon quickly and securely, so you can get that perfect, thick foam every time.
Stick with me, and you’ll be ready to take your car cleaning game to the next level.
Choosing The Right Foam Cannon
Selecting the right foam cannon is important for a great cleaning experience. A good foam cannon fits your pressure washer and meets your cleaning needs. It should create thick foam easily and be easy to use.
Many types of foam cannons exist. Each type works differently and suits different tasks. Knowing the types helps you pick the best one for your car or home cleaning.
Types Of Foam Cannons
Foam cannons come in various designs. Some have adjustable nozzles to control foam thickness. Others have fixed nozzles for simple use. There are models with large soap tanks for bigger jobs. Small tanks work well for quick cleaning tasks. Choose a type that matches how often and what you clean.
Compatibility With Pressure Washers
Not all foam cannons fit every pressure washer. Check the connection type before buying. Most use a quick-connect fitting or a threaded connector. Match the foam cannon’s connector with your washer’s. Also, consider the pressure washer’s PSI and GPM. A foam cannon works best within the washer’s pressure limits. Using the right match ensures good foam and prevents damage.

Credit: www.reddit.com
Gathering Necessary Equipment
Gathering the right equipment is the first step to using a foam cannon. It helps make sure you attach it correctly and get great foam coverage. Having everything ready saves time and avoids frustration.
This section breaks down the key parts of a foam cannon and any extra tools you might need. Knowing these basics makes the setup easier and faster.
Foam Cannon Components
A foam cannon has a few main parts. The bottle holds the soap or foam solution. The nozzle sprays the foam in a thick layer. The connector attaches the cannon to a pressure washer or hose. Each part must fit well for proper use.
Most foam cannons have adjustable dials. These control foam thickness and spray pattern. Check the bottle size and connector type before buying. Some connectors fit only certain washers.
Additional Tools Needed
You may need a pressure washer or a hose with good water pressure. Foam cannons work best with high-pressure water. A wrench or pliers can help tighten the connector if needed. A funnel makes filling the bottle easier and cleaner.
Wear gloves to protect your hands from soap. Prepare a clean workspace to avoid dirt in the foam solution. Having these extra tools ready helps the foam cannon work smoothly.
Preparing The Pressure Washer
Preparing your pressure washer is a key step before attaching the foam cannon. This ensures the device works well and sprays foam evenly. Proper preparation also helps protect your equipment and gives the best cleaning results.
Checking Water Supply
Start by checking the water supply. Use clean water with good pressure. Avoid dirty or low-pressure water, as this can damage the pressure washer. Make sure the hose is connected tightly and there are no leaks. Turn on the water and let it flow freely before starting the machine.
Selecting The Correct Nozzle
Choose the right nozzle for your pressure washer. Foam cannons work best with low-pressure nozzles. Look for a nozzle with a wide spray angle, usually 25 degrees or more. This helps spread the foam evenly over the surface. Avoid high-pressure nozzles, as they can reduce foam and harm your washer.
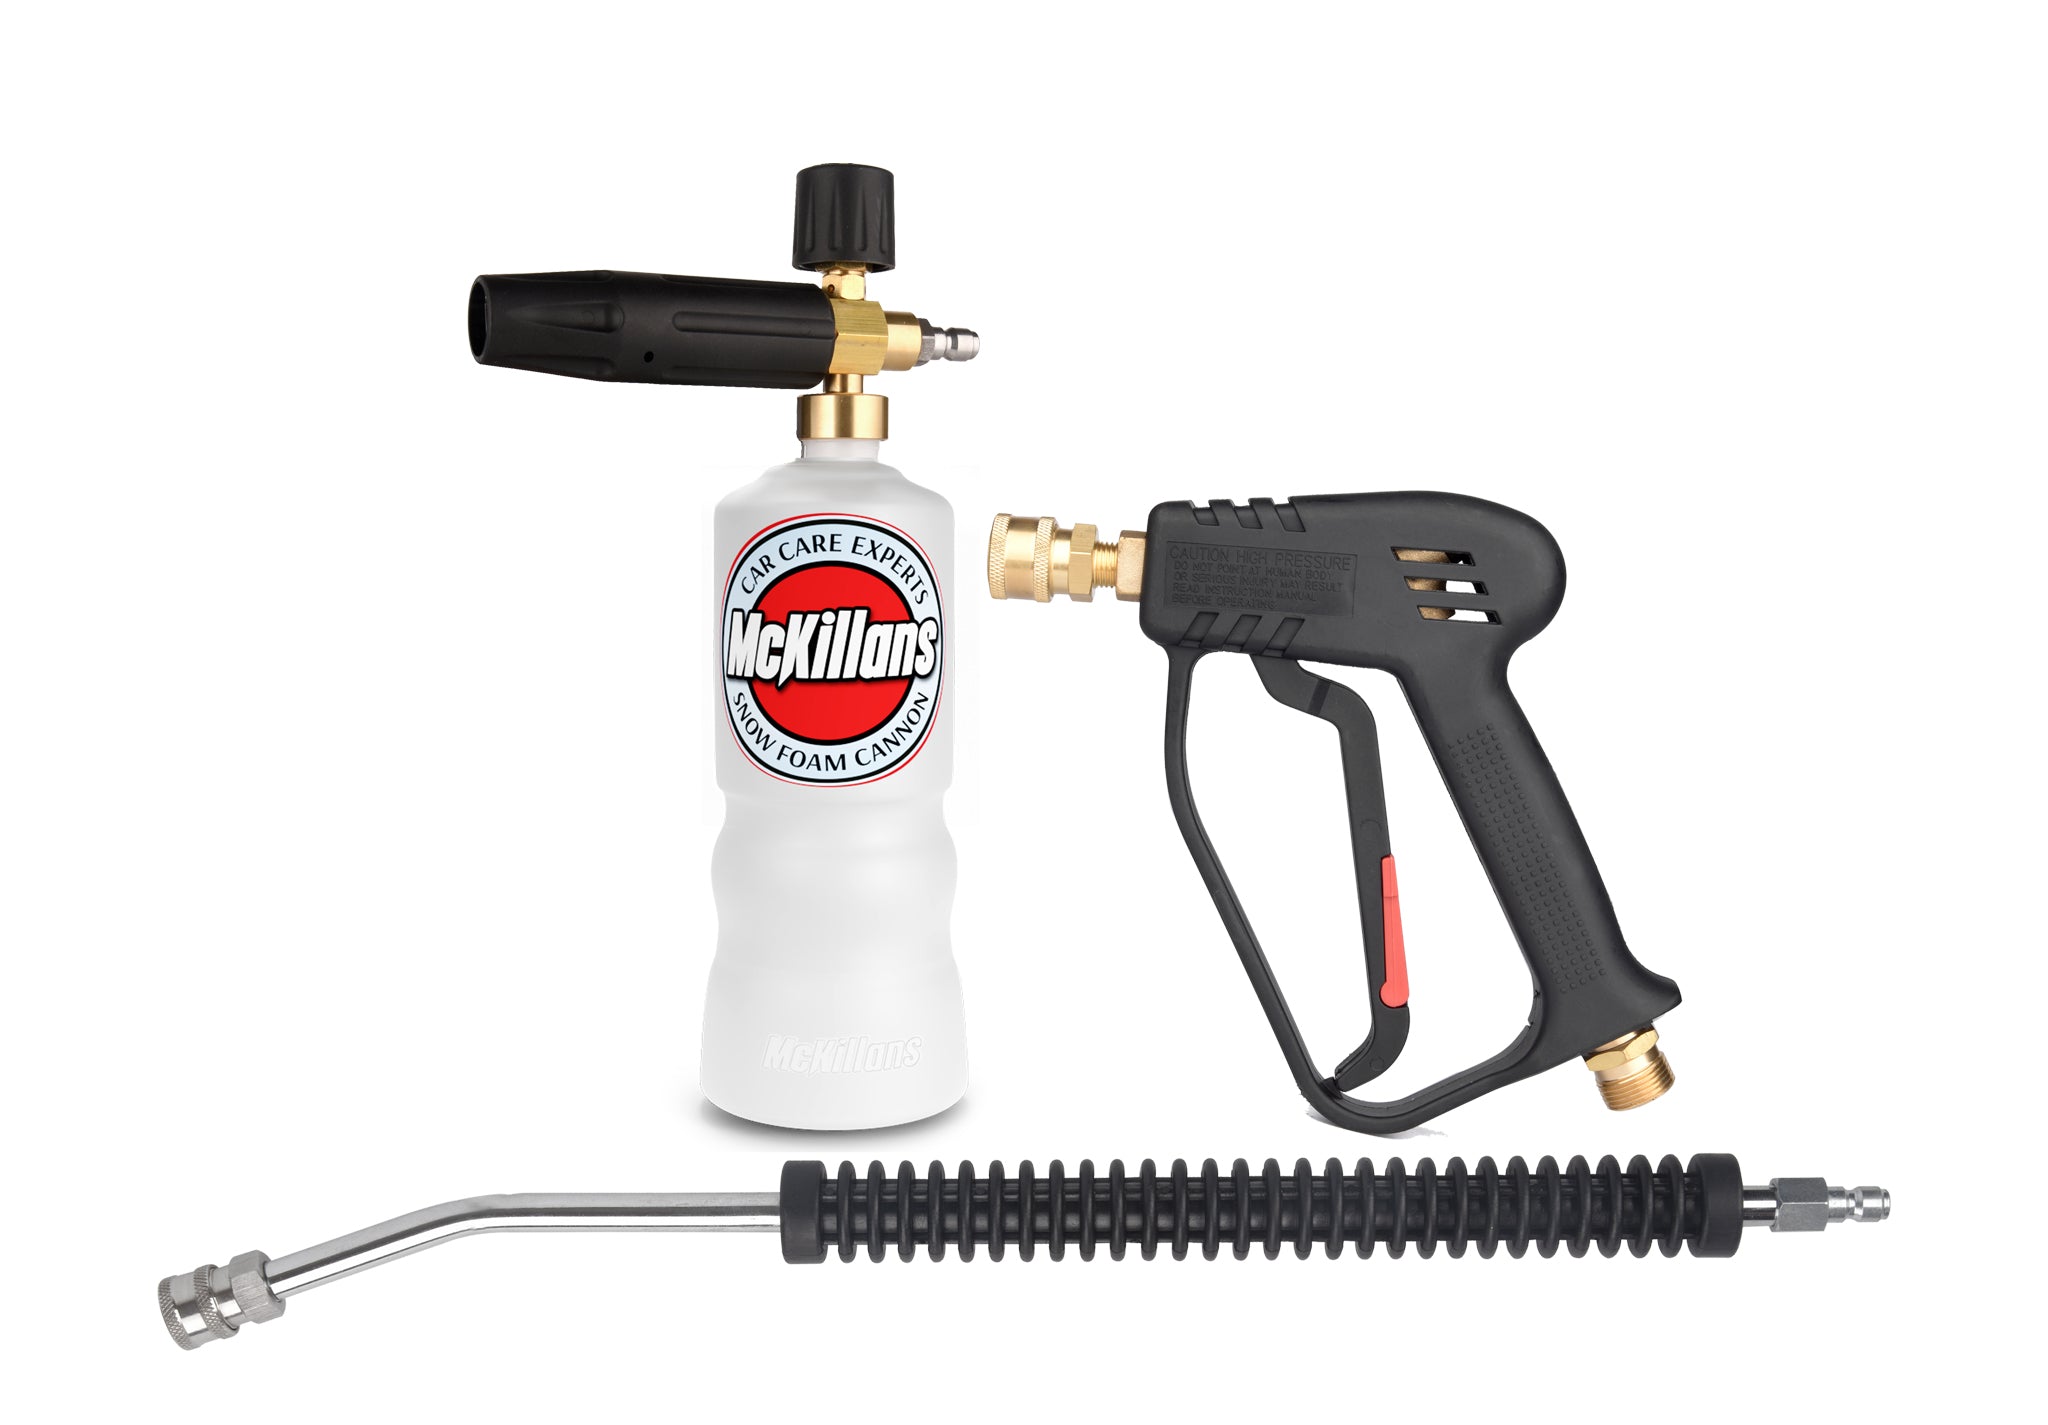
Credit: www.mckillans.com
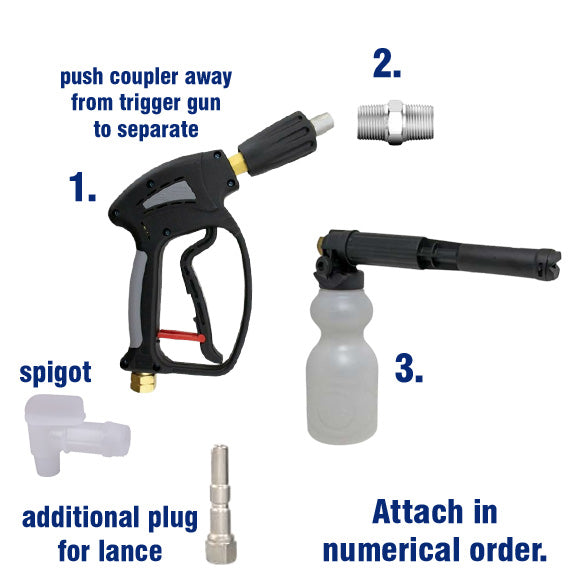
Attaching The Foam Cannon
Attaching the foam cannon is simple and quick. This step ensures you get thick, rich foam for cleaning. A proper connection prevents leaks and keeps water pressure strong. The process involves two main parts: connecting the foam cannon to the spray gun and securing it firmly. Follow these steps carefully for the best results.
Connecting To The Spray Gun
Start by checking the spray gun’s nozzle. Most foam cannons fit standard quick-connect couplers. Pull back the collar on the spray gun’s connector. Push the foam cannon’s fitting into the coupler. Release the collar to lock it in place. Give it a gentle tug to confirm it is secure. This connection allows water to flow through the foam cannon.
Securing The Foam Cannon
After connecting, check the foam cannon for any loose parts. Tighten the soap bottle and nozzle if needed. Make sure all seals and o-rings are in good condition. These parts prevent leaks and keep pressure stable. Tighten by hand only to avoid damage. A secure foam cannon ensures even foam coverage on your vehicle.
Mixing Soap Solution
Mixing the soap solution is a key step in using a foam cannon. It affects how well the foam forms and cleans your surfaces. The right mixture creates thick foam that clings to your car or bike. Too much soap or water can make the foam weak or watery. Follow simple steps to get the best results.
Start by choosing the right soap. Then, fill the foam cannon bottle correctly. These steps help you prepare the perfect cleaning solution.
Choosing The Right Soap
Pick a soap made for foam cannons or pressure washers. These soaps create thick foam and clean well. Avoid harsh detergents that can harm paint or surfaces. Look for pH-balanced or car wash soaps. They protect your vehicle’s finish while cleaning dirt away. Use soap that rinses off easily and does not leave streaks.
Filling The Foam Cannon Bottle
Pour water into the foam cannon bottle first. Use clean, cold water for best foam. Add soap after the water is in the bottle. Follow the soap maker’s instructions for the right amount. Usually, a small amount of soap makes plenty of foam. Close the bottle tightly and shake gently to mix. Avoid shaking too hard to prevent bubbles inside the bottle.
Adjusting Foam Settings
Adjusting foam settings on a foam cannon helps customize the cleaning process. You control how thick the foam is and how it sprays. These adjustments improve cleaning power and save soap and water. Each foam cannon model may have different knobs or dials for settings.
Controlling Foam Thickness
Foam thickness depends on the soap-to-water ratio. Use the adjustment knob to add more soap for thicker foam. Turn the knob the other way for thinner foam. Thick foam sticks better to surfaces. Thin foam rinses off easier. Choose foam thickness based on the job and surface type.
Adjusting Spray Pattern
Spray pattern controls how wide or narrow the foam spreads. Twist the spray head to change the pattern. A narrow spray covers smaller areas deeply. A wide spray covers large areas quickly. Select the pattern depending on the object size. Different patterns help reach corners and tight spots.
Testing And Using The Foam Cannon
Testing and using the foam cannon is an important step after attachment. It ensures the foam cannon works correctly and gives the desired foam output. This process helps spot any issues early and lets users adjust settings for better results.
Initial Foam Test
Start by filling the foam cannon with a proper soap mixture. Attach it firmly to the pressure washer. Spray a small area to see how thick the foam is. Check if the foam covers the surface evenly. If the foam is too thin or watery, the soap mix might need adjustment. This test helps confirm the foam cannon is ready for use.
Optimizing For Best Results
Adjust the foam cannon’s soap mixture for thicker foam. Turn the foam cannon’s nozzle to change the spray pattern. A wide spray covers more area quickly. A narrow spray targets specific spots well. Change the pressure washer’s settings if needed. Use the foam cannon at a safe distance from the surface. These steps improve foam quality and cleaning power.
Maintenance And Storage Tips
Proper care extends the life of your foam cannon. Regular maintenance keeps it working well. Storage also plays a big role in its durability. Follow these tips for cleaning and storing your foam cannon.
Cleaning After Use
Empty the soap solution from the foam cannon. Rinse the container with clean water. Run clean water through the nozzle to clear any soap residue. Use a soft brush to clean the nozzle if needed. Avoid harsh chemicals that can damage the parts. Dry the foam cannon before storing to prevent rust.
Proper Storage Practices
Store the foam cannon in a dry place. Avoid direct sunlight to protect plastic parts. Keep it away from freezing temperatures to prevent damage. Store it in a safe spot where it won’t get knocked over. Check the foam cannon before use after long storage. Proper storage keeps it ready for the next wash.
Credit: www.prolinewatertown.com
Frequently Asked Questions
How Does A Foam Cannon Attach To A Pressure Washer?
A foam cannon attaches to a pressure washer’s spray gun using a quick-connect fitting. This connection ensures a secure fit, allowing water and soap to mix properly. The foam cannon then sprays thick foam, improving cleaning efficiency and coverage on surfaces.
What Type Of Connector Does A Foam Cannon Use?
Most foam cannons use a 1/4-inch quick-connect fitting. This standard connector fits pressure washer spray guns easily. It allows fast attachment and removal, making the foam cannon convenient and user-friendly for car washing or other cleaning tasks.
Can I Use A Foam Cannon Without A Pressure Washer?
No, foam cannons require a pressure washer for proper operation. The pressure washer supplies high-pressure water needed to mix soap and create foam. Without it, the foam cannon cannot generate the thick foam needed for effective cleaning.
How Do I Secure The Foam Cannon To The Spray Gun?
To secure the foam cannon, align the quick-connect fitting with the spray gun’s connector. Push firmly until it clicks into place. This ensures a tight seal, preventing leaks and maintaining consistent foam output during cleaning.
Conclusion
Attaching a foam cannon is simple and quick. Connect it firmly to your pressure washer wand. Make sure all parts fit tight to avoid leaks. Use the right soap for thick foam. Adjust the spray nozzle to control foam spread.
Regular cleaning keeps your foam cannon working well. This tool makes washing cars and surfaces easier. Try it out for a cleaner, shinier finish every time.


