
If you want to give your car, laptop, or any surface a sleek, modern look, applying a carbon fiber vinyl wrap is one of the best ways to do it. But how do you make sure it looks smooth and professional, without bubbles or wrinkles?
You might feel unsure where to start or worry about making mistakes that waste your time and money. This guide will walk you through every step, showing you exactly how to apply carbon fiber vinyl wrap like a pro. By the end, you’ll have the confidence and know-how to transform your items with a stylish finish that turns heads.
Keep reading to discover the simple secrets that make all the difference.

Credit: www.youtube.com
Materials Needed
Before starting a carbon fiber vinyl wrap project, gather all necessary materials. Having the right items makes the process smoother and the results better. Proper preparation saves time and avoids frustration.
Choosing The Right Vinyl
Select high-quality carbon fiber vinyl for durability and appearance. Look for vinyl with strong adhesive backing. It should be flexible to wrap curves easily. Matte or glossy finishes are popular choices. Check the size to cover your entire surface.
Tools For Application
Use a squeegee to remove air bubbles and smooth the vinyl. A heat gun helps soften the vinyl for tight curves. Sharp utility knives cut clean edges without damaging surfaces. Microfiber cloths clean surfaces without scratching. Gloves keep fingerprints off the vinyl.
Preparing Your Workspace
Work in a clean, dust-free area to avoid dirt under the vinyl. A flat surface helps lay out the vinyl smoothly. Good lighting reveals imperfections early. Keep all tools within reach to stay efficient. Make sure the temperature is moderate for the vinyl to stick well.
Credit: www.youtube.com
Surface Preparation
Preparing the surface is the first step to a successful carbon fiber vinyl wrap. It affects how well the wrap sticks and lasts. A clean, smooth surface helps the vinyl look good and prevents bubbles or peeling. Take your time with this step for the best results.
Cleaning The Surface
Start by washing the area with soap and water. Remove all dirt, grease, and dust. Use a microfiber cloth to avoid scratches. After washing, wipe the surface with isopropyl alcohol. This removes oils that soap may leave behind. Let the surface dry completely before moving on.
Removing Old Wraps Or Paint
Old wraps can trap dirt and cause bumps. Peel off any vinyl wrap carefully. Use heat from a hairdryer to soften the adhesive. For old paint, sand the surface lightly. Remove loose or flaking paint. Clean the area again after sanding to clear dust.
Smoothing Imperfections
Check for dents, scratches, or rough spots. Fill dents with a suitable filler and let it dry. Sand filled areas smooth using fine-grit sandpaper. Wipe away dust with a clean cloth. A flat surface helps the wrap stick evenly and look great.
Measuring And Cutting
Measuring and cutting carbon fiber vinyl wrap is a key step in the application process. It ensures the wrap fits perfectly and looks smooth. Accurate measurements prevent waste and save time.
Cutting the vinyl carefully helps avoid mistakes and keeps the wrap clean. Planning the layout before cutting helps you place the wrap correctly on the surface.
Taking Accurate Measurements
Start by cleaning the surface to measure. Use a tape measure for precise length and width. Write down each measurement clearly. Double-check to avoid errors. Measure all curves and edges too. Accurate numbers help the vinyl fit well.
Cutting The Vinyl To Size
Place the vinyl on a flat surface. Use a sharp knife or scissors to cut. Cut slightly larger than the measurements. This extra margin allows for adjustments. Cut slowly to keep straight lines. Avoid jagged edges for a smooth finish.
Planning The Layout
Lay the cut vinyl on the target surface. Check how it fits before peeling the backing. Think about where seams will go. Avoid placing seams in visible areas. Plan for overlap to prevent gaps. Proper layout makes the wrap look professional.
Applying The Vinyl
Applying carbon fiber vinyl wrap needs care and patience. The process starts with preparing the vinyl and the surface. Each step ensures the wrap sticks well and looks great. Follow the steps below to apply the vinyl smoothly and avoid bubbles or creases.
Peeling The Backing
Peel the vinyl backing slowly. Pull it at a low angle to avoid stretching the film. Work on small sections to keep control. Do not touch the sticky side with fingers. This prevents dirt and oil from ruining the adhesive.
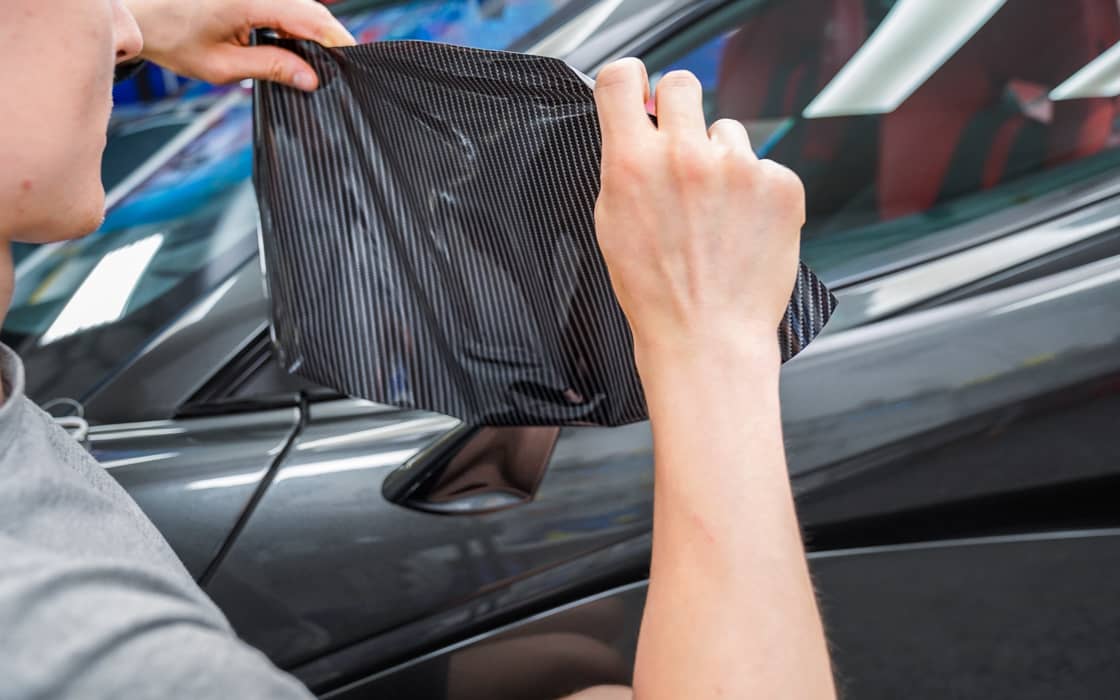
Positioning The Vinyl
Place the vinyl on the surface gently. Align it carefully to cover the area fully. Use magnets or tape to hold it in place. Check the edges and corners before pressing down. Adjust the position if needed to avoid wrinkles.
Using Heat And Pressure
Use a heat gun or hair dryer on low heat. Warm the vinyl to make it flexible. Press the vinyl down with a squeegee or soft cloth. Start from the center and move outwards. This removes air bubbles and ensures strong adhesion.
Smoothing And Stretching
Smoothing and stretching are key steps in applying carbon fiber vinyl wrap. These steps help the wrap fit perfectly on your surface. They also prevent bubbles and wrinkles. Proper technique ensures a clean, professional look. It takes patience and careful handling to get it right.
Eliminating Air Bubbles
Air bubbles ruin the smooth finish of vinyl wrap. Use a squeegee to push bubbles toward the edges. Start from the center and move outward. Small bubbles can be pierced gently with a pin. Press the air out slowly to avoid damage. Take your time to ensure a flat surface.
Handling Curves And Edges
Curves and edges need extra care. Heat the vinyl slightly with a heat gun or hairdryer. This makes the wrap more flexible. Gently press the vinyl onto the curve with a squeegee. Avoid stretching too much in one spot. For edges, tuck the vinyl carefully to prevent lifting later.
Stretching Without Damage
Stretching helps the vinyl fit tight surfaces. Warm the vinyl before stretching for better flexibility. Pull the vinyl slowly and evenly to avoid tears. Do not overstretch; it can cause warping or holes. Use your fingers to guide the vinyl smoothly over the surface.
Trimming Excess Vinyl
Trimming excess vinyl is a key step in applying carbon fiber vinyl wrap. It ensures the wrap fits perfectly on the surface. Removing extra material helps avoid wrinkles and bubbles. Careful trimming also improves the overall look of the wrap. Use the right tools and techniques to get clean edges and smooth curves.
Using Precision Knives
Use a sharp precision knife for accurate cuts. A fresh blade prevents tearing or jagged edges. Cut slowly and follow the outline of the surface. Hold the knife steady to avoid slips. Replace blades often for best results and safety.
Avoiding Cutting The Surface
Protect the surface under the vinyl while trimming. Use light pressure with the knife to avoid scratches. Place a cutting mat or soft board underneath. Keep the blade angle low to control depth. Take breaks to check your progress and prevent mistakes.
Finishing Edges Cleanly
After trimming, press edges firmly to secure the wrap. Use a squeegee or soft cloth to smooth edges. Heat edges gently with a heat gun for better adhesion. Avoid folding or bunching the vinyl at corners. Clean edges give a professional and neat finish.
Post-application Care
After applying a carbon fiber vinyl wrap, proper care is essential. It helps keep the wrap looking fresh and lasting longer. Taking care of the wrap right after application prevents damage and peeling. Follow these simple steps to protect your investment and enjoy the new look for months.
Curing Time
Allow the vinyl wrap to cure for at least 24 to 48 hours. During this time, avoid washing or exposing the wrap to harsh weather. The adhesive needs time to set firmly on the surface. Do not touch or stretch the wrap while it cures. Patience helps the wrap stick better and last longer.
Cleaning Tips
Clean the wrap gently using a soft cloth and mild soap. Avoid abrasive cleaners or strong chemicals that can damage the vinyl. Use cool or lukewarm water for washing. Do not use high-pressure water sprays close to the edges. Dry the surface softly to prevent scratches or lifting.
Maintaining The Wrap
Inspect the wrap regularly for any signs of lifting or peeling. Avoid parking under direct sunlight for long periods. Use a car cover when possible to protect from dust and UV rays. Avoid waxing the wrap as it can harm the texture. Follow these steps to keep the wrap looking new and sharp.
Credit: www.tintingchicago.com
Frequently Asked Questions
What Tools Are Needed For Carbon Fiber Vinyl Wrap?
You need a squeegee, heat gun, utility knife, cleaning solution, and microfiber cloth. These tools help apply and smooth the vinyl for a flawless finish. Proper tools ensure durability and professional results.
How Long Does Carbon Fiber Vinyl Wrap Last?
Carbon fiber vinyl wrap typically lasts 5 to 7 years with proper care. Longevity depends on quality, installation, and exposure to sun or harsh weather. Regular cleaning helps maintain its appearance.
Can I Apply Carbon Fiber Vinyl Wrap Myself?
Yes, with patience and the right tools, you can DIY carbon fiber wrap. Follow step-by-step instructions and practice on small areas first. Professional help is recommended for complex curves or large surfaces.
How Do I Prepare A Surface For Vinyl Wrapping?
Clean the surface thoroughly to remove dirt, grease, and wax. Use isopropyl alcohol and a lint-free cloth. A smooth, dry surface ensures better adhesion and prevents bubbles or peeling.
Conclusion
Applying carbon fiber vinyl wrap takes patience and care. Prepare your surface well and work slowly. Use a heat gun to smooth out wrinkles. Trim edges carefully for a clean look. Practice makes the process easier each time. Enjoy the fresh, sleek finish on your vehicle.
This simple upgrade can change your car’s style quickly. Try it yourself and see the difference!


