
If you own a Yamaha 90 outboard, keeping it running smoothly is probably a top priority for you. One of the easiest ways to protect your engine and avoid costly repairs is by changing the fuel filter regularly.
But if you’ve never done it before, the task might feel a bit intimidating. Don’t worry—this guide will walk you through each step clearly and simply. By the end, you’ll know exactly how to change your fuel filter quickly and confidently, so your boat stays ready for your next adventure.
Keep reading to learn the straightforward process that can save your engine and your day on the water.
Tools And Materials Needed
Changing the fuel filter on your Yamaha 90 outboard needs the right tools and materials. Having everything ready saves time and keeps the job safe and clean.
This list includes basic hand tools and specific parts. Each item helps you remove the old filter and install the new one correctly. Prepare these before you start.
Wrenches And Screwdrivers
Use a set of wrenches to loosen the fuel filter bolts. A flathead and Phillips screwdriver help remove clamps and covers.
Replacement Fuel Filter
Get a fuel filter designed for Yamaha 90 outboard motors. Using the correct filter ensures proper fuel flow and engine health.
Fuel Line Clamps
New clamps secure the fuel lines after filter replacement. They prevent leaks and keep the connection tight.
Fuel Container
Have a clean container ready to catch any fuel spills. This keeps your workspace safe and clean.
Rags And Gloves
Wear gloves to protect your hands. Use rags to wipe spills and keep the area tidy.
Locate The Fuel Filter
Locating the fuel filter on your Yamaha 90 outboard is the first step in changing it. Knowing its exact position saves time and prevents mistakes.
The fuel filter cleans dirt and particles from the fuel. It protects your engine and keeps it running smoothly. Finding it is simple with a clear guide.
Check Near The Fuel Line
The fuel filter usually sits along the fuel line. Follow the fuel hose from the tank toward the engine. You will see a small, clear or metal canister on the line. That is the fuel filter.
Look Close To The Engine
Another common spot is near the engine itself. The filter may be mounted on the side of the engine block or frame. It will be easy to spot because it connects directly to fuel hoses.
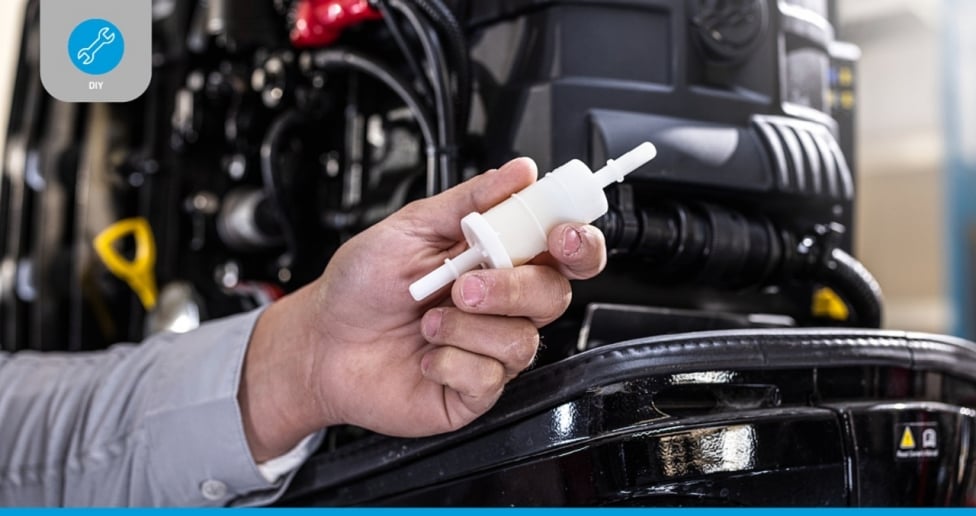
Identify The Filter Shape And Size
The Yamaha 90 outboard fuel filter is small and cylindrical. It often has a transparent bowl or a metal casing. This shape helps catch dirt and water in the fuel.
Prepare The Engine
Preparing the engine is the first step to changing the fuel filter on your Yamaha 90 outboard. This step ensures your safety and prevents damage to the engine. Taking the right precautions makes the process easier and safer.
Always work in a well-ventilated area. Keep a fire extinguisher nearby for safety. Now, let’s get the engine ready.
Turn Off The Engine
Switch off the engine completely. Let the engine cool down before starting any work. Hot engines can cause burns and other injuries. Make sure no one tries to start the engine during the process.
Disconnect The Battery
Remove the negative cable from the battery terminal first. This step stops any electrical sparks. Sparks can ignite fuel vapors and cause fire. After that, disconnect the positive cable. Keep the cables away from the terminals while you work.

Credit: www.youtube.com
Drain Fuel From The Filter
Start by placing a container under the fuel filter to catch the drained fuel. Open the drain valve slowly to let the fuel flow out completely. This step helps remove old fuel and debris before replacing the filter.
Why Drain Fuel From The Filter?
Draining fuel from the filter clears old fuel and dirt. This step stops clogs and keeps your engine running smooth. Clean fuel helps the outboard last longer and perform better.
Prepare The Area And Tools
Place a container under the fuel filter to catch drained fuel. Wear gloves to protect your hands from fuel. Have a rag ready to wipe spills. Safety first.
Release Fuel Pressure
Turn off the fuel valve to stop fuel flow. Squeeze the primer bulb until it feels soft. This action releases pressure in the fuel line. It makes draining easier and safer.
Open The Drain Valve
Locate the drain valve or plug on the filter. Slowly open it to let the fuel flow out. Watch the container fill with old fuel. Close the valve once draining is complete.
Dispose Of Old Fuel Properly
Do not pour drained fuel on the ground. Use an approved container to store old fuel. Take it to a recycling center or hazardous waste site. Keep the environment safe.
Remove The Old Fuel Filter
Removing the old fuel filter from your Yamaha 90 outboard is the first step in maintaining your engine’s fuel system. A clean fuel filter helps your motor run smoothly and prevents damage from dirt and debris. This process requires care and attention to avoid spills and ensure safety. Follow these steps to remove the filter properly.
Loosen The Fuel Lines
Start by loosening the fuel lines connected to the filter. Use a wrench or pliers to gently loosen the clamps. Be careful not to damage the lines. Have a small container or rag ready to catch any fuel that may leak. This step reduces pressure and prevents fuel spills.
Detach The Filter
Once the fuel lines are loose, carefully pull the filter away from the fittings. It may take a little wiggle to free it. Dispose of the old filter according to local regulations. Keep the area clean to avoid dirt entering the fuel system. Now your Yamaha 90 outboard is ready for a new fuel filter.

Credit: partsvu.com
Install The New Fuel Filter
Installing the new fuel filter on your Yamaha 90 outboard is a key step. It helps keep the engine running smoothly. A clean filter stops dirt from entering the fuel system. This section guides you through attaching the filter and reconnecting the fuel lines safely.
Attach The Filter
Start by placing the new fuel filter in the holder. Make sure it fits snugly and lines up with the mounting points. Tighten any clamps or screws to keep it secure. Avoid over-tightening to prevent damage. The filter must stay firm during engine operation.
Reconnect Fuel Lines
Next, connect the fuel lines to the filter’s inlet and outlet. Push the hoses firmly onto the filter nipples. Use clamps to secure the hoses in place. Check that there are no kinks or bends in the lines. Proper connection prevents fuel leaks and ensures steady flow.
Check For Leaks
Checking for leaks after changing the fuel filter on your Yamaha 90 outboard is very important. Leaks can cause fuel loss and engine problems. It also can be unsafe. Take your time to carefully check every connection and part around the fuel filter.
Look closely at the fuel lines and fittings. Even a small drip means a problem. Fixing leaks early keeps your engine running smoothly and saves you from bigger troubles later.
Inspect Fuel Lines And Connections
Examine all fuel lines connected to the filter. Make sure they are tight and secure. Look for cracks or signs of wear. Replace any damaged parts immediately. Loose connections can cause fuel to leak out.
Start The Engine And Observe
Turn on the engine and let it run for a few minutes. Watch the fuel filter area closely. Check for any wet spots or fuel dripping. Listen for unusual smells or sounds. These can signal a leak or a loose connection.
Use A Clean Cloth To Detect Leaks
Wipe around the fuel filter with a clean cloth. Check if the cloth gets wet with fuel. This simple method helps find leaks that are hard to see. Repeat this step a few times while the engine runs.
Prime The Fuel System
Priming the fuel system is an important step after changing the fuel filter on your Yamaha 90 outboard. This process removes air from the fuel line and fills it with fresh fuel. It helps your engine start smoothly and run without hiccups. Skipping this step can cause hard starting or engine stalling.
Priming ensures that fuel flows properly from the tank to the engine. It prepares the system for efficient combustion. Taking a few minutes to prime the fuel system saves time and frustration later on.
Locate The Primer Bulb
The primer bulb is usually found on the fuel line. It looks like a small, squeezable pump. Find it between the fuel tank and the engine. Check that it is not cracked or damaged before use.
Squeeze The Primer Bulb
Press the bulb several times to push fuel through the line. You will feel resistance as fuel moves. Keep squeezing until the bulb feels firm and no air bubbles appear. This means the fuel line is full.
Check For Fuel Leaks
After priming, inspect the fuel line and connections. Look for any signs of leaks or cracks. Tighten clamps or replace parts if needed. A leak can cause engine problems or fuel loss.
Start The Engine And Test
After changing the fuel filter on your Yamaha 90 outboard, start the engine to check everything. This step ensures the new filter works well and the engine runs smoothly. Testing the engine helps find any leaks or air pockets in the fuel line. Proper testing keeps your boat safe and ready for the water.
Prepare For Starting The Engine
Before you start, make sure all fuel lines are tight. Check the fuel filter connections for any loose clamps or fittings. Close the fuel valve if it is open. Ensure the engine is in neutral gear for safety. Clear the area around the engine to avoid accidents.
Start The Engine Slowly
Turn the key or pull the starter cord gently. Watch the engine as it starts. Listen for smooth sounds with no sputters or stalls. If the engine hesitates, it may need more time to purge air. Let it run for a few minutes at idle speed to stabilize.
Inspect For Leaks And Performance
Look closely at the fuel filter and fuel lines. Spot any wet spots or fuel drips immediately. Check the engine’s response when you increase throttle slowly. The engine should run steadily without losing power. If you see leaks or poor performance, turn off the engine and recheck connections.
Maintenance Tips
Keeping your Yamaha 90 outboard running smoothly needs regular care. Fuel filter maintenance is key. It protects the engine by keeping dirt and debris out of the fuel system. Follow these tips to avoid common problems and improve engine life.
Recommended Replacement Intervals
Change the fuel filter every 100 hours of operation. For seasonal use, replace it once a year. If you use your boat in dirty water, check the filter more often. Regular replacement prevents clogs and keeps fuel flowing freely.
Signs Of A Clogged Fuel Filter
Watch for these signs. The engine may sputter or lose power. It might be hard to start or stall unexpectedly. Fuel smell near the engine can also indicate a problem. If you notice any of these, check and replace the fuel filter right away.
Credit: www.quicksilver-products.com
Frequently Asked Questions
How Often Should I Change The Fuel Filter On Yamaha 90?
Change the fuel filter every 100 hours or annually. This keeps your engine running smoothly and prevents clogs.
What Tools Are Needed To Replace The Fuel Filter?
You need a screwdriver, pliers, and a new fuel filter. These tools help remove and install the filter easily.
Can I Change The Fuel Filter Without Removing The Engine?
Yes, you can change the fuel filter without engine removal. Just access the filter housing and replace it carefully.
How Do I Know If The Fuel Filter Is Clogged?
Signs include engine sputtering, stalling, or poor acceleration. These symptoms indicate the fuel filter needs replacement.
Conclusion
Changing the fuel filter on your Yamaha 90 outboard keeps the engine running smooth. Clean fuel helps avoid engine problems and saves money on repairs. Follow the steps carefully and take your time. Check the filter regularly to keep your boat ready for the water.
Simple maintenance like this makes a big difference. Keep your engine healthy and enjoy your time on the water without worries.


