You’ve just wrapped your car or a piece of furniture with vinyl, but those annoying bubbles have appeared, ruining the smooth finish. It’s frustrating, isn’t it?
You want your vinyl wrap to look flawless, but those pesky air pockets keep getting in the way. The good news is, you don’t have to live with them. In this guide, you’ll discover simple and effective ways to fix bubbles in your vinyl wrap quickly.
By the end, you’ll have the confidence to make your wrap look perfect and professional. Ready to get started? Let’s dive in!
Credit: metrorestyling.com
Causes Of Bubbles In Vinyl Wrap
Bubbles in vinyl wrap often ruin the smooth, sleek look you want. Understanding what causes these bubbles helps fix them quickly. Several factors lead to air pockets and wrinkles under the vinyl surface.
Trapped Air
Air trapped between the vinyl and the surface causes bubbles. This happens when the wrap is not applied evenly. Small pockets of air get stuck and form visible bubbles.
Surface Contamination
Dirt, dust, or grease on the surface stops vinyl from sticking properly. These contaminants create gaps where bubbles form. Cleaning the surface before wrapping is essential to avoid this.
Improper Application
Applying vinyl too fast or without care leads to bubbles. Stretching the vinyl incorrectly also causes air pockets. Taking time and using the right tools reduces these mistakes.
Temperature Effects
Extreme heat or cold changes the vinyl’s flexibility. Cold makes it stiff and hard to apply. Heat can cause the vinyl to expand and trap air. Applying vinyl at moderate temperatures is best.
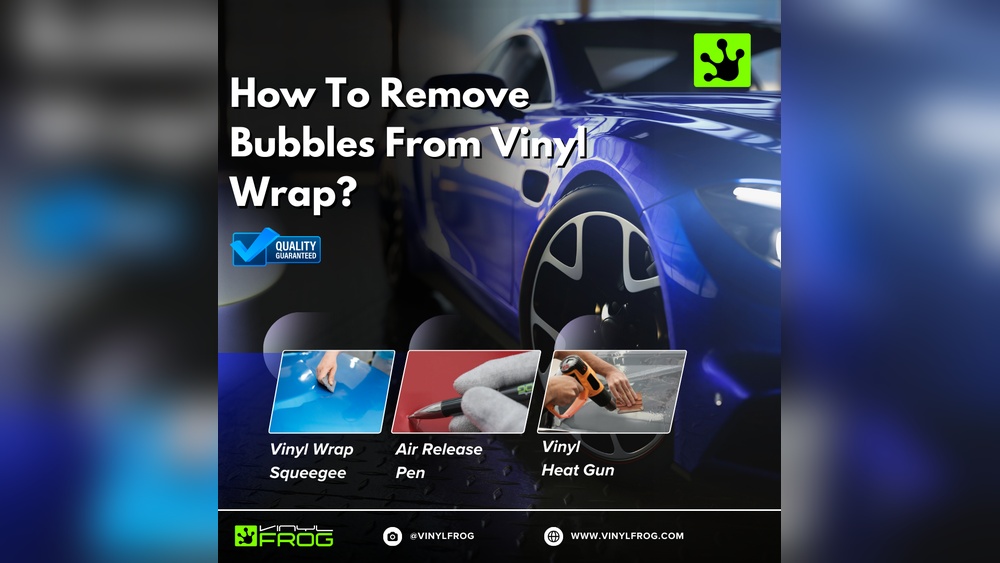
Tools Needed For Bubble Removal
Removing bubbles from vinyl wrap needs the right tools. Using proper tools helps fix bubbles quickly. It also prevents damage to the wrap and surface. These tools are simple and easy to find. Each tool plays a specific role in bubble removal.
Squeegee
A squeegee is a flat tool with a smooth edge. It pushes air and water out from under the vinyl. Use it gently to avoid tearing the wrap. Squeegees help smooth the surface for a clean finish.
Pin Or Needle
A pin or needle makes tiny holes in bubbles. This lets trapped air escape slowly. Choose a fine pin to avoid large marks. Work carefully to keep the wrap intact.
Heat Gun
A heat gun warms the vinyl wrap. Heat makes the vinyl soft and flexible. It helps the wrap stretch and settle better. Use low heat to prevent melting or warping.
Cleaning Supplies
Cleaning supplies prepare the surface before applying vinyl. Use soap and water to remove dirt and oils. Dry the area fully before wrapping. Clean surfaces help the vinyl stick well and reduce bubbles.
Preparing The Surface
Preparing the surface is the first step to fix bubbles in vinyl wrap. A clean and dry surface helps the wrap stick well. Dirt, dust, or moisture can cause bubbles to form again. Follow simple steps to get the surface ready for a smooth wrap.
Cleaning Techniques
Start by removing all dirt and grease. Use a mild soap and water solution. Gently scrub the surface with a soft cloth or sponge. Avoid harsh chemicals that can damage the vinyl or paint. Rinse the surface well to remove soap residue. Dirt left behind can trap air under the wrap.
Drying The Surface
Dry the surface completely before applying the wrap. Use a clean, dry cloth to wipe away all moisture. Let the surface air dry if needed. Moisture can create bubbles under the vinyl. A dry surface ensures better adhesion and fewer bubbles.
Temperature Checks
Check the temperature of the surface and the air. Ideal temperature is between 60°F and 80°F (15°C to 27°C). Cold or hot surfaces can cause the vinyl to stretch or shrink. This leads to bubbles or wrinkles. Work in a shaded area to keep the temperature steady.
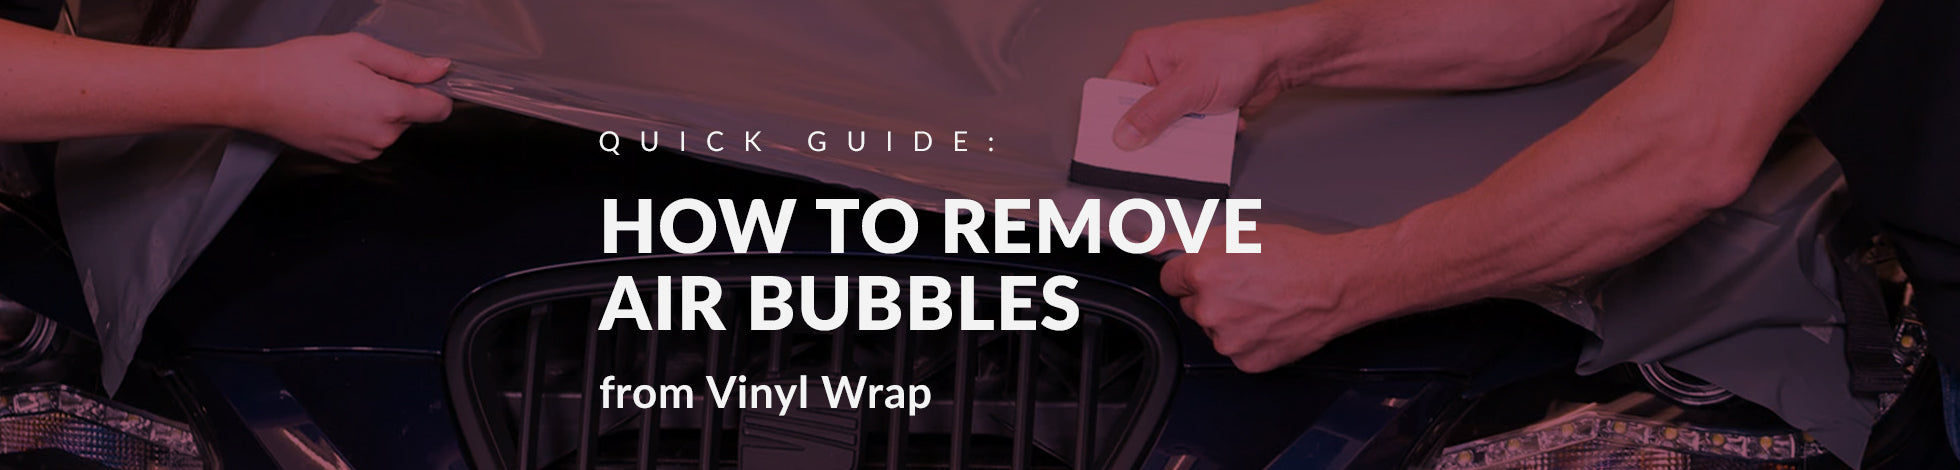
Step-by-step Bubble Removal
Bubbles in vinyl wrap can spoil the smooth look of your project. Fixing them is easier than you think. Follow these simple steps to remove bubbles and get a clean finish.
Locating Bubbles
Start by carefully checking the entire wrap. Look for small bumps or raised spots. Good lighting helps to see bubbles clearly. Mark the areas with bubbles for easy fixing.
Releasing Air With A Pin
Take a sharp pin or needle and gently prick the center of each bubble. This lets trapped air escape slowly. Be careful not to tear the vinyl. Prick just enough to release air.
Smoothing With A Squeegee
Use a soft squeegee or a plastic card to press the vinyl flat. Push from the bubble’s edge toward the pinhole. This moves air out and flattens the vinyl. Work slowly to avoid new bubbles.
Applying Heat For Flexibility
Warm the vinyl wrap with a heat gun or hairdryer. Keep it moving to avoid damage. Heat softens the vinyl, making it easier to smooth out. After heating, press the wrap again with the squeegee for best results.
Preventing Future Bubbles
Preventing bubbles in vinyl wrap saves time and effort. It keeps the wrap looking smooth and neat. Knowing how to prepare and apply the wrap properly helps avoid common issues. Also, working under the right conditions makes a big difference. Follow these tips to keep your vinyl wrap bubble-free for a long time.
Proper Surface Prep
Clean the surface well before applying the vinyl wrap. Use soap and water to remove dirt and grease. Then, wipe it with rubbing alcohol to remove oils. Make sure the surface is dry and smooth. Avoid dust and lint, as they cause bubbles under the wrap.
Correct Application Method
Start by peeling a small part of the vinyl backing. Stick it carefully to the surface, pressing out any air. Use a squeegee to push the vinyl from the center outwards. Work slowly and evenly to avoid trapping air. Stretch the vinyl gently around curves and edges.
Optimal Environmental Conditions
Apply vinyl wrap in a clean, dust-free area. The temperature should be between 60 and 80 degrees Fahrenheit. Too cold makes the vinyl stiff and hard to stretch. Too hot causes it to stretch too much or stick badly. Avoid windy or humid conditions to prevent dust and bubbles.

Credit: www.youtube.com
When To Seek Professional Help
Some vinyl wrap issues need more than simple DIY fixes. Knowing when to call a professional can save time and money. Experts have tools and skills to handle tough problems.
Severe Damage
Bubbles that cover large areas or cause tears show severe damage. These cannot be fixed by just pushing air out. Professionals can repair or replace damaged sections neatly. They prevent more damage and keep the wrap looking good.
Complex Wrap Designs
Wraps with patterns, logos, or multiple colors need careful handling. Removing bubbles without damaging designs is hard. Experts know how to work with complex wraps. They keep the design sharp and flawless.
Warranty Considerations
Many vinyl wraps come with warranties. DIY fixes can void these warranties. Professionals follow rules to keep the warranty valid. Getting help ensures repairs are safe and covered by warranty terms.

Credit: raxtify.com
Frequently Asked Questions
How Do I Remove Bubbles From Vinyl Wrap?
To remove bubbles, gently lift the wrap edge near the bubble. Use a squeegee to push air out. Small bubbles can be pierced with a pin and smoothed out carefully.
What Causes Bubbles In Vinyl Wrap Installation?
Bubbles form due to trapped air, dust, or improper surface cleaning. Wrapping on uneven surfaces or rushing the application can also cause bubbles.
Can Heat Help Fix Bubbles In Vinyl Wrap?
Yes, applying heat with a heat gun softens the vinyl. This allows air to escape and the wrap to adhere smoothly without bubbles.
How To Prevent Bubbles When Applying Vinyl Wrap?
Clean the surface thoroughly and apply the wrap slowly. Use a squeegee to smooth out air pockets as you work. Avoid stretching the vinyl excessively.
Conclusion
Fixing bubbles in vinyl wrap is easier than it seems. Gently push bubbles toward the edges with a soft tool. Use a pin to release trapped air in stubborn bubbles. Heat helps the vinyl become more flexible and smooth. Take your time to avoid damaging the wrap.
Small fixes can make a big difference in appearance. Keep your vinyl wrap looking fresh and smooth with simple care. Your vehicle will look neat and professional after these steps. Practice patience, and your vinyl wrap will last longer.