
Are you ready to give your car a fresh, new look with a vinyl wrap? Before you start, there’s one crucial step you can’t skip: preparing your car properly.
Getting your vehicle ready the right way makes all the difference between a smooth, flawless wrap and a frustrating, costly mess. In this guide, you’ll discover easy, step-by-step tips to clean, smooth, and protect your car’s surface so your vinyl wrap sticks perfectly and lasts longer.
Keep reading, and you’ll learn exactly how to set your car up for a stunning transformation you’ll love.
Credit: waxmanoftristate.com
Gather Necessary Tools
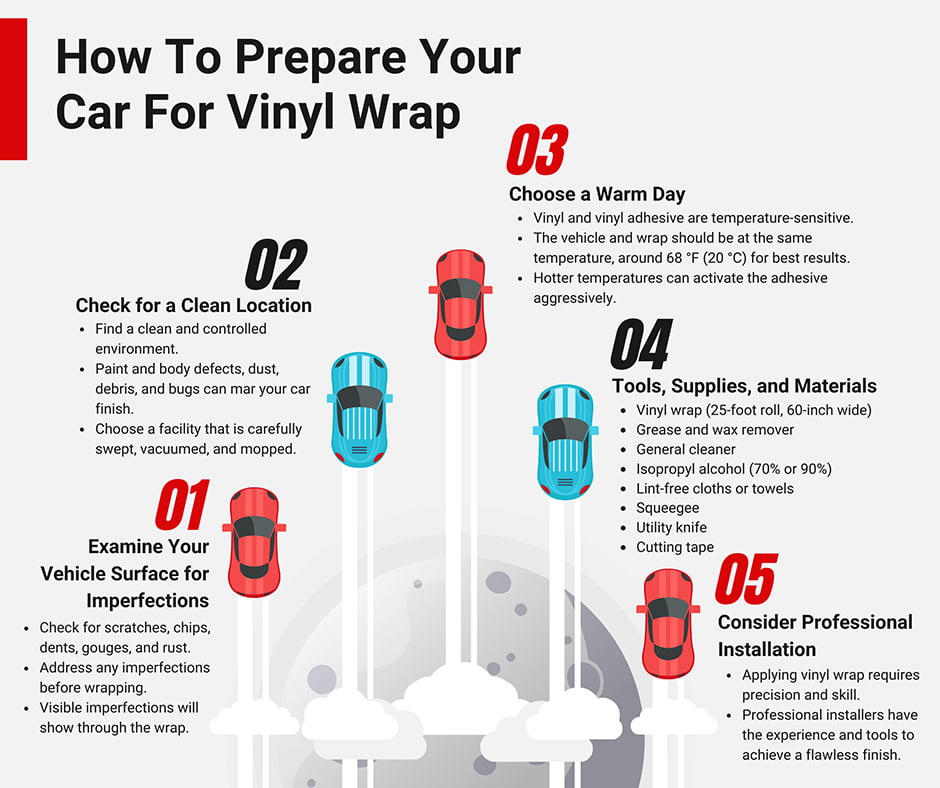
Preparing your car for a vinyl wrap starts with gathering the right tools. Having everything ready makes the process smoother and faster. Proper tools help avoid mistakes and ensure a clean, professional finish.
Vinyl Wrap Materials
Choose high-quality vinyl wrap sheets designed for cars. Pick the right colors and finishes for your design. Buy enough material to cover the entire car with extra for mistakes. Include primer and surface activator to improve vinyl adhesion.
Cleaning Supplies
Clean the car surface thoroughly before wrapping. Use soap and water to remove dirt and grease. Follow with isopropyl alcohol to eliminate oils and residues. Have microfiber cloths for wiping and drying without scratching.
Application Tools
Use a squeegee to smooth out air bubbles during application. A heat gun helps stretch vinyl around curves and corners. Have a sharp utility knife for trimming excess vinyl. Use gloves to avoid fingerprints on the sticky surface.
Credit: theartworks.com
Choose The Right Vinyl
Choosing the right vinyl is a key step before wrapping your car. The vinyl you pick affects how your car looks and lasts. It also changes how easy the wrap is to apply. Knowing about different vinyl types, colors, finishes, and durability helps you make a smart choice.
Types Of Vinyl
There are two main types of vinyl for car wraps: cast and calendared. Cast vinyl is thin and flexible. It fits curves and bends well. This type lasts longer and resists fading. Calendared vinyl is thicker and less flexible. It works best for flat surfaces. Calendared vinyl costs less but does not last as long.
Color And Finish Options
Vinyl wraps come in many colors and finishes. You can choose glossy, matte, satin, or textured looks. Glossy vinyl gives a shiny, new-car feel. Matte vinyl offers a smooth, flat look without shine. Satin vinyl is between matte and glossy. Textured vinyl adds patterns like carbon fiber or brushed metal. Choose a finish that matches your style and car design.
Durability Factors
Durability depends on vinyl quality and thickness. Cast vinyl usually lasts five to seven years. Calendared vinyl lasts two to three years. Some vinyl has extra UV protection to stop fading. Others resist scratches and dirt better. Check the vinyl’s warranty and care instructions to ensure long life.
Clean The Car Surface
Cleaning the car surface is the first step in preparing for a vinyl wrap. Dirt, dust, and grease can stop the wrap from sticking well. A clean surface helps the wrap stay smooth and last longer. Follow these simple steps to clean your car properly before starting the wrap.
Washing Techniques
Start by rinsing the car with water to remove loose dirt. Use a car soap and a soft sponge or cloth. Wash the car in sections to avoid soap drying on the paint. Use gentle, circular motions to clean the surface. Avoid strong detergents or household cleaners. Rinse well with clean water to remove all soap.
Removing Contaminants
After washing, check for grease, tar, or old wax. Use a clay bar or a specialized cleaner to remove these. Rub the clay bar gently over the surface. This removes tiny particles that washing misses. Wipe the surface with a microfiber cloth afterward. Ensure no oily or sticky spots remain before wrapping.
Drying Methods
Dry the car completely to prevent water spots. Use a clean microfiber towel for best results. Pat the surface instead of rubbing hard. Avoid air drying as it leaves marks. Make sure all curves and edges are dry. A dry surface helps the vinyl wrap stick without bubbles.
Remove Or Mask Trim
Preparing your car for a vinyl wrap starts with removing or masking the trim. This step ensures a smooth, clean surface for the wrap. It helps prevent damage and creates a professional look. Proper trim handling saves time and effort during application and removal.
Detaching Parts
Remove parts like door handles, badges, and side mirrors. Use the right tools to avoid scratching or breaking. Keep screws and clips safe for reassembly. Take your time to avoid damage. This step makes wrapping easier around edges and corners.
Protecting Sensitive Areas
Mask areas you cannot remove, such as rubber seals and glass. Use painter’s tape or plastic film for protection. Cover these parts tightly to stop glue or dirt from sticking. This prevents damage and keeps the wrap clean. Proper protection helps the wrap last longer.
Repair Surface Imperfections
Repairing surface imperfections is a key step before applying a vinyl wrap. A smooth surface helps the vinyl stick better and look great. Small scratches or dents can cause bubbles or wrinkles in the wrap. Fix these issues carefully to get the best results.
Fixing Scratches And Dents
Start by cleaning the area around scratches or dents. Use a mild soap and water to remove dirt. Dry the surface completely. For small scratches, use a scratch remover or rubbing compound. Apply it gently with a soft cloth in a circular motion. For dents, fill them with body filler. Spread the filler evenly and let it dry. Remove excess filler carefully.
Sanding And Smoothing
After filling dents or removing scratches, sand the area to smooth it. Use fine-grit sandpaper to avoid damaging the surface. Sand lightly until the surface feels even. Wipe away dust with a clean cloth. Smooth surfaces help the vinyl wrap stick without bubbles. Take your time to get the surface perfectly smooth.
Prepare The Work Environment
Preparing the work environment is key to a smooth car vinyl wrap process. A clean, controlled space helps the vinyl stick better. It also prevents dust and dirt from ruining the wrap. Proper lighting and the right climate make the job easier and more precise.
Temperature And Humidity Control
Keep the room temperature between 65°F and 75°F. Too hot or too cold can damage the vinyl. High humidity makes the vinyl less sticky. Low humidity can cause static, attracting dust. Use a heater, air conditioner, or dehumidifier to keep conditions steady.
Lighting Setup
Bright, even lighting helps spot dirt and bubbles. Use white LED lights to avoid color distortion. Avoid shadows and glare on the car surface. Position lights from different angles for full visibility. Good lighting saves time and improves the wrap quality.
Test Fit The Vinyl
Test fitting the vinyl wrap is a key step before applying it permanently. It helps you see how the vinyl fits on the car panels. This step prevents mistakes and saves time. It also lets you adjust the vinyl for the best look.
Measuring Panels
Start by measuring each car panel carefully. Use a tape measure to check the height and width. Write down the measurements for every part you plan to wrap. This step ensures you cut the vinyl to the right size. Always add a few extra inches for trimming and adjustments.
Positioning The Vinyl
Place the vinyl on the car panels without removing the backing. Check the alignment with edges, curves, and details. Move the vinyl around to find the best fit. Make sure it covers the entire panel evenly. Mark reference points with masking tape to guide the final application.

Credit: www.youtube.com
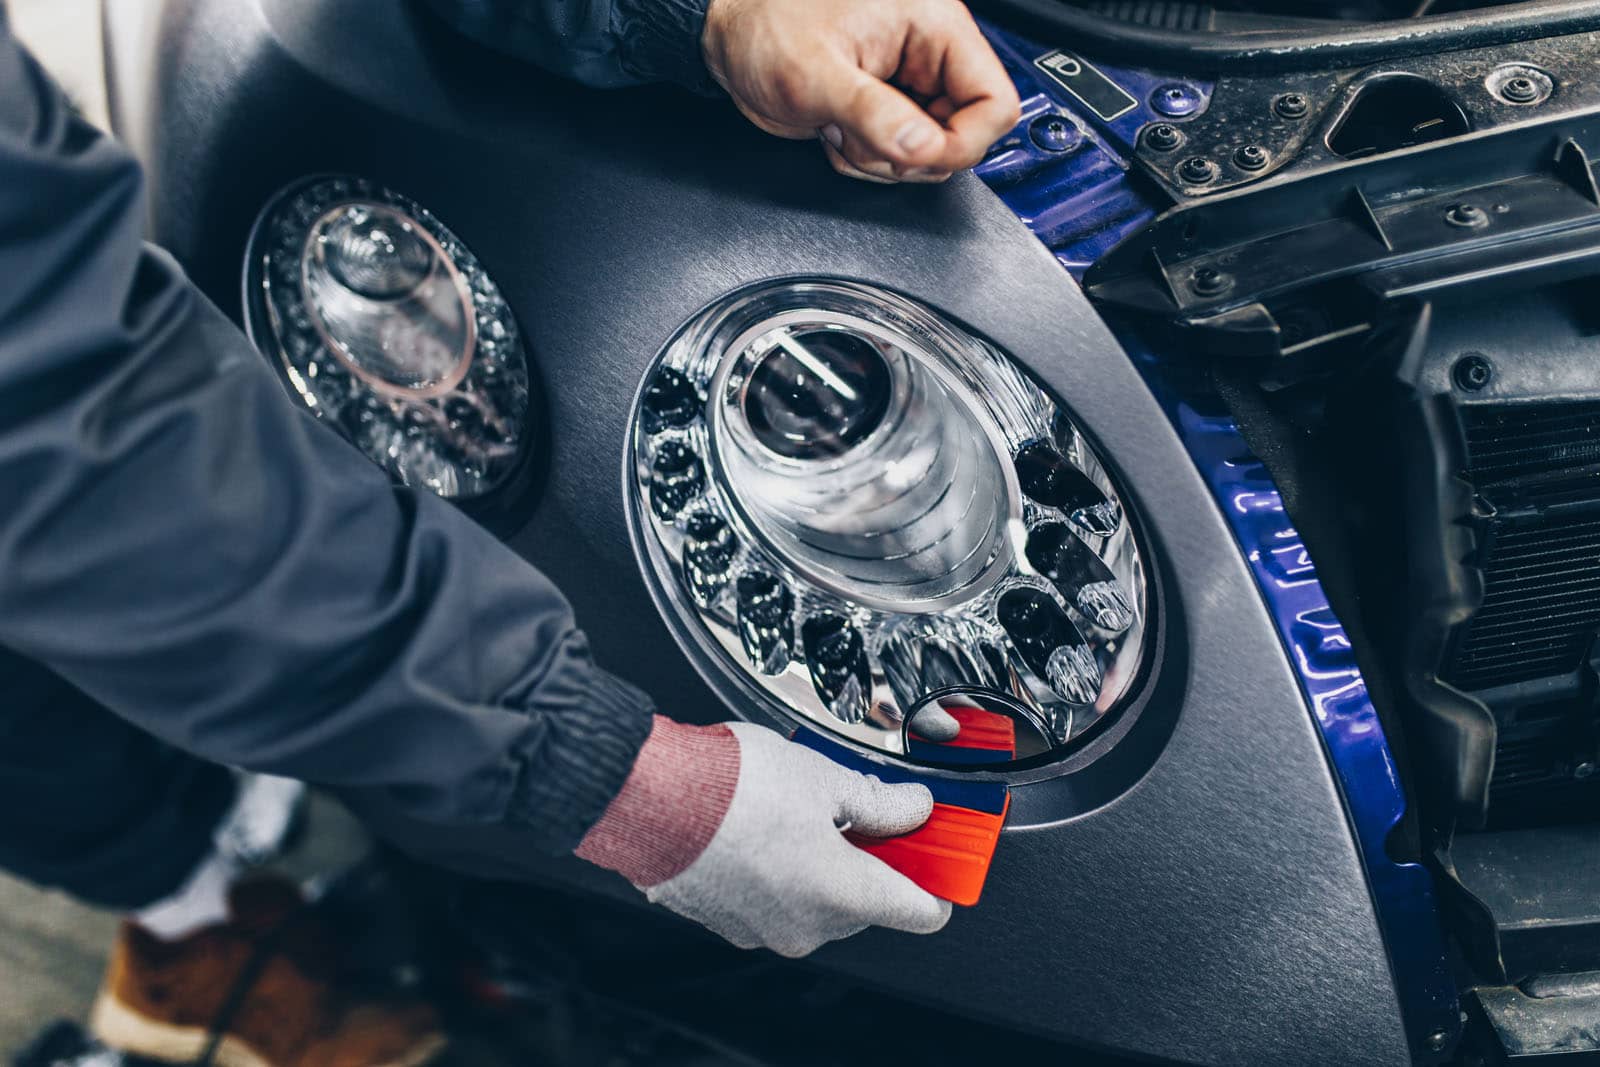
Apply The Vinyl Wrap
Applying the vinyl wrap is a key step in transforming your car’s look. This process needs care and patience for the best results. The vinyl must stick smoothly without bubbles or wrinkles. Follow these steps to apply the wrap correctly and achieve a clean finish.
Starting Point Selection
Choose a flat area to begin the wrap. Doors, hoods, or large panels work well. Start from the middle or edge, depending on the car’s shape. This helps control the vinyl and reduces mistakes. Align the wrap carefully before peeling the backing paper.
Using Heat Tools
Use a heat gun or hairdryer to warm the vinyl. Warm vinyl becomes soft and easier to stretch. Heat helps the wrap fit curves and corners better. Do not overheat. Keep the heat moving to avoid damage. Heat also activates the adhesive for stronger grip.
Smoothing And Stretching
Use a squeegee to smooth the vinyl from the center out. Push air bubbles and wrinkles toward the edges. Stretch the wrap gently on curves to avoid tearing. Work slowly and check your progress often. Proper smoothing ensures a clean, professional look.
Trim Excess Vinyl
Trimming excess vinyl is a key step in preparing your car for a vinyl wrap. Removing the extra material helps achieve a clean, smooth finish. This step prevents wrinkles and bubbles along the edges.
Careful trimming also protects your car’s paint from damage. It ensures the wrap fits perfectly around curves and corners. Proper trimming sets the stage for a professional look.
Cutting Techniques
Use a sharp blade or craft knife for precise cuts. Cut slowly and steadily to avoid mistakes. Follow the car’s edges closely without cutting into the paint. Keep the blade at a low angle for cleaner lines. Replace blades often for sharpness and safety. Avoid pulling the vinyl while cutting to reduce stretching. Trim small sections at a time for better control.
Edge Sealing
Edge sealing protects the vinyl from peeling. Apply edge sealant along all trimmed edges. Use a brush or applicator for even coverage. Sealant prevents water and dirt from getting under the wrap. It also helps the vinyl stay stuck longer. Let the sealant dry fully before moving the car. Proper edge sealing adds durability and a polished finish.
Final Inspection And Maintenance
Final inspection and maintenance are key steps after applying a vinyl wrap. These steps ensure your wrap looks perfect and lasts longer. Careful checking and cleaning keep the wrap in great condition. Simple maintenance helps avoid damage and keeps colors bright.
Checking For Bubbles And Wrinkles
Look closely at the wrapped surface for bubbles or wrinkles. Small air pockets can appear under the vinyl during installation. Press them gently with a soft squeegee to remove trapped air. Wrinkles may need careful heating and smoothing. Fixing these issues early stops them from getting worse.
Cleaning Wrapped Surfaces
Use a soft cloth and mild soap to clean the wrap. Avoid harsh chemicals or rough brushes that can damage the vinyl. Rinse with clean water to remove soap residues. Dry the surface with a soft towel to prevent water spots. Regular cleaning keeps the wrap bright and fresh.
Long-term Care Tips
Park your car in shaded areas to protect the wrap from sun damage. Avoid automatic car washes with strong brushes. Hand washing is gentler and safer for the wrap. Check the wrap regularly for any signs of peeling or damage. Early repairs help maintain the wrap’s appearance and durability.
Frequently Asked Questions
How Do I Clean My Car Before Vinyl Wrapping?
Thoroughly wash your car using soap and water. Remove all dirt, grease, and wax for better vinyl adhesion. Dry the surface completely with a microfiber cloth.
Why Is Surface Preparation Important For Vinyl Wrap?
Proper surface prep ensures strong vinyl adhesion and a smooth finish. It prevents bubbles, wrinkles, and peeling over time. Clean surfaces extend the wrap’s lifespan.
Can I Apply Vinyl Wrap On A Dusty Car?
No, applying vinyl on dust reduces adhesion. Dust particles create gaps causing bubbles and peeling. Always clean and dry your car before wrapping.
What Tools Are Needed To Prepare A Car For Vinyl Wrap?
Essential tools include soap, water, microfiber cloths, isopropyl alcohol, and a clay bar. These help clean and smooth the surface for optimal vinyl application.
Conclusion
Preparing your car well makes vinyl wrapping easier and longer-lasting. Clean the surface thoroughly to remove dirt and grease. Fix any dents or scratches for a smooth finish. Work in a dust-free, dry place for best results. Take your time and follow each step carefully.
This care helps the vinyl stick better and look great. Enjoy your car’s fresh, new style with confidence.

