
Have you ever noticed stubborn, dried-on car wax ruining the shine of your vehicle? It’s frustrating when your car’s surface looks dull or uneven, even after you’ve taken the time to apply wax.
But don’t worry—removing that dried wax is easier than you think. In this guide, you’ll learn simple, effective steps to get your car looking smooth and glossy again. Keep reading, and you’ll discover how to restore your car’s finish quickly, without damaging the paint or wasting time.
Signs Of Dried Car Wax
Dried car wax can harm your car’s paint and make it look dull. Knowing the signs of dried wax helps you remove it quickly. This keeps your car shiny and smooth.
Watch for changes in the paint surface and texture. Early detection prevents damage and saves effort later.
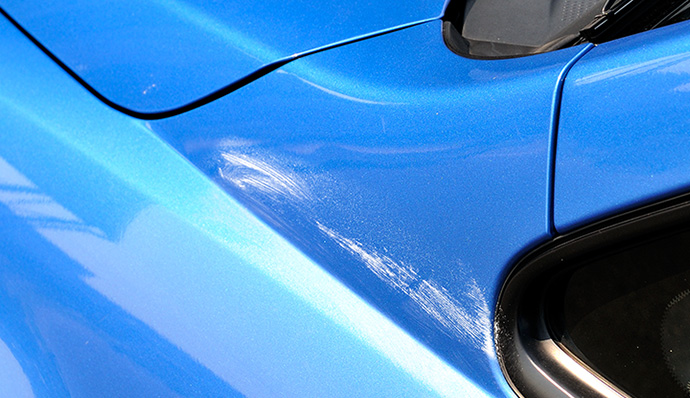
Identifying Residue On Paint
Dried wax leaves a cloudy or hazy look on the paint. It feels rough or sticky to touch. You may see white or chalky spots in sunlight. These residues do not wipe off easily with a cloth.
Residue often appears around edges or where wax was applied thickly. It can trap dirt and dust, making the surface look dirty. Dried wax reduces the paint’s shine and smoothness.
Common Causes Of Wax Drying
Wax dries when it is left on the paint too long without buffing. Applying wax in hot sun or on a hot surface speeds up drying. Using too much wax at once causes thick layers that harden fast.
Some wax products dry faster due to their chemical makeup. Skipping proper cleaning before waxing leaves dirt that affects wax drying. Poor technique and tools also cause wax to dry unevenly.
Tools And Materials Needed
Removing dried car wax needs the right tools and materials. Having these ready makes the process easier and faster. It also protects your car’s paint from damage.
Essential Cleaning Supplies
Start with soft microfiber cloths. They clean without scratching the paint. Use a plastic scraper to gently lift thick wax spots. A bucket with warm water helps rinse the cloths and the car.
Use a spray bottle filled with water to keep the wax soft. Have some old towels or rags for drying. Gloves protect your hands from chemicals. A foam applicator pad works well for applying cleaning products evenly.
Recommended Products For Wax Removal
Choose a dedicated wax remover or a gentle automotive cleaner. These products break down wax without harming your car’s finish. Look for ones labeled safe for all paint types.
Isopropyl alcohol diluted with water can help remove stubborn wax spots. A clay bar kit also works well to lift wax residue. Avoid harsh chemicals that can strip paint or cause dullness.
Preparing Your Car
Preparing your car before removing dried-on wax is important. It helps protect your paint and makes the process easier. A clean, dry surface ensures better results and prevents scratches. Follow these simple steps to get your car ready.
Washing And Drying
Start by washing your car thoroughly. Use car shampoo and water to remove dirt and dust. Avoid household cleaners that may damage the paint. Rinse the car well to clear all soap. Dry the surface with a soft microfiber towel. This step stops water spots and streaks.
Choosing The Right Environment
Work in a shaded area to protect your car from direct sunlight. Sunlight can dry the wax too fast, making removal harder. A cool, dry place is best for your task. Avoid windy spots that can blow dust onto the car. This keeps the surface clean during the wax removal.
Credit: www.soft99.co.jp
Removing Dried Wax Step-by-step
Removing dried wax from your car takes care and patience. Follow clear, simple steps to get the best results. This guide breaks down the process into easy parts to help you restore your car’s shine.
Applying Wax Remover Or Cleaner
Start by choosing a good wax remover or cleaner. Apply a small amount to the dried wax area. Let it sit for a few minutes. This softens the hardened wax. Avoid rubbing too hard, as it may damage the paint.
Work in small sections. Use gentle circular motions with your fingers or a soft applicator. Repeat if the wax does not come off easily. Be patient. Removing dried wax takes time.
Using Microfiber Cloths Correctly
Microfiber cloths work best to remove softened wax. Use a clean, dry cloth for wiping. Gently buff the area in a circular motion. Avoid pressing too hard to prevent scratches.
Use different cloths for applying remover and wiping off wax. Wash cloths regularly to keep them clean. Dirty cloths can spread wax residue and scratch paint.
Polishing After Wax Removal
After removing the wax, polishing helps restore shine. Apply a small amount of car polish to a clean microfiber cloth. Rub it gently on the treated area. Use circular, even strokes.
Allow the polish to dry, then buff with a clean cloth. This step smooths the paint and enhances gloss. Polishing also protects the surface from future damage.
Tips For Preventing Dried Wax
Preventing dried wax on your car saves time and effort. It keeps your vehicle looking smooth and shiny. Simple habits help stop wax from drying too fast or unevenly. These tips improve your waxing experience and protect your car’s paint.
Proper Wax Application Techniques
Apply wax in thin, even layers. Thick layers take longer to dry and can harden. Work in small sections to control drying time. Use a soft cloth or applicator pad for smooth spreading. Avoid waxing under direct sunlight or on hot surfaces. This prevents wax from drying too quickly. Follow the product’s instructions carefully for best results.
Regular Maintenance Practices
Wash your car regularly to remove dirt and old wax. Clean surfaces hold new wax better. Use a gentle car shampoo to avoid stripping wax. Inspect your car after waxing for any missed spots. Remove excess wax before it hardens. Keep your car in a shaded area after waxing. This slows down drying and helps wax set properly.

Credit: www.reddit.com
Dealing With Stubborn Wax Spots
Stubborn wax spots on your car can be tough to remove. These spots often dry hard and stick to the paint. They can ruin the smooth finish you want. Removing them carefully is important to avoid damaging your car’s surface. The right tools and methods help make this job easier.
Using Clay Bars
Clay bars are great for removing stuck wax spots. They gently lift contaminants from the paint. Start by washing your car to remove dirt. Spray a clay lubricant on the wax spot. Rub the clay bar over the spot with light pressure. The clay will pick up the dried wax. Wipe the area with a clean microfiber cloth. Repeat if needed but avoid pressing too hard. Clay bars work well without scratching the paint.
When To Seek Professional Help
Some wax spots are too tough to remove at home. Deep scratches or hardened wax may need special tools. Professionals have experience and better products. They can fix the problem safely and quickly. Choose a trusted detailer if the wax won’t come off. This can prevent paint damage and save time. Don’t risk harm by trying harsh methods yourself.

Credit: www.youtube.com
Frequently Asked Questions
How Do I Remove Dried Car Wax Safely?
Use a microfiber cloth and warm water with mild soap. Gently rub the wax in circular motions. Avoid harsh chemicals that may damage your car’s paint.
Can Vinegar Help Remove Dried Car Wax?
Yes, white vinegar can dissolve dried wax. Mix equal parts of vinegar and water, apply with a cloth, then wipe clean. Always test on a small area first.
What Household Items Remove Dried Car Wax Effectively?
Warm water, mild soap, and microfiber towels work well. Baking soda mixed with water can also help. Avoid abrasive materials to protect your car’s finish.
Is It Necessary To Polish After Removing Dried Wax?
Polishing restores shine and smooths the surface. It’s recommended after wax removal to enhance your car’s look. Use a gentle polish designed for automotive paint.
Conclusion
Removing dried-on car wax does not have to be hard. Use gentle products and soft cloths to protect your paint. Take your time and work carefully in small areas. Rinse well to avoid streaks or residue. Regular cleaning helps prevent wax buildup later.
Your car will look shiny and fresh again. Keep these tips in mind for easy wax removal next time. Simple steps can make a big difference in car care.
