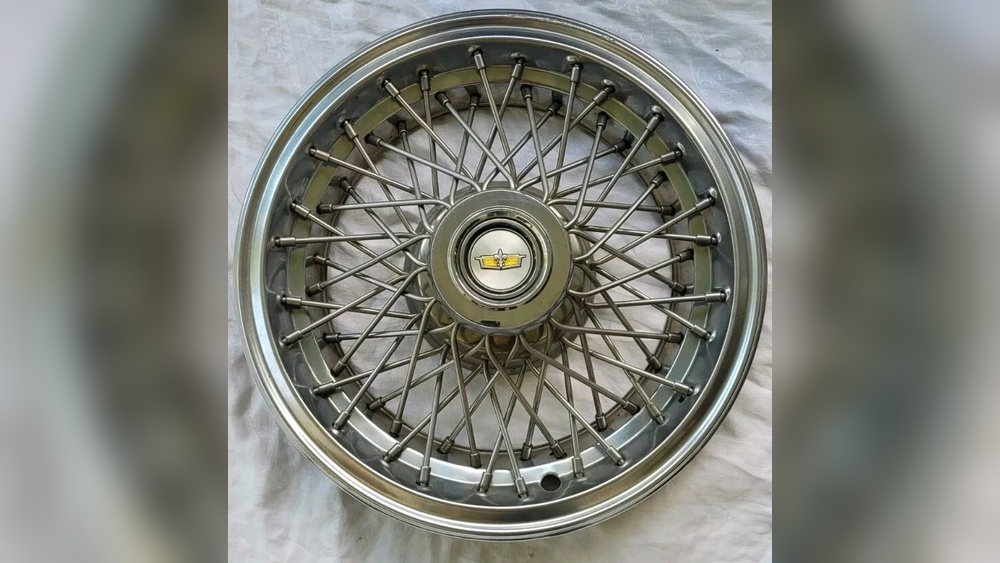
Are you struggling to remove your Eagle flight wheel covers without causing damage? You’re not alone.
These covers can be tricky to take off if you don’t know the right steps. But don’t worry—this guide will show you exactly how to remove your Eagle flight wheel covers quickly and safely. By the end, you’ll feel confident handling them yourself, saving time and avoiding costly mistakes.
Keep reading to learn simple, effective tips that work every time.

Credit: nicksopczakphotography.com
Tools Needed
Removing Eagle flight wheel covers requires a few simple tools. Having the right tools makes the job easier and safer. These tools help avoid damage to the wheel or cover during removal.
Most tools are common and easy to find. Some tools help pry the cover gently. Others help remove screws or clips holding the cover in place.
Flathead Screwdriver
A flathead screwdriver helps to pry the cover off carefully. Use it to lift the edges without scratching the wheel. Choose one with a comfortable grip for better control.
Plastic Trim Removal Tool
This tool prevents scratches on the wheel surface. It works like a wedge to loosen the cover gently. A plastic tool is safer than metal for delicate parts.
Socket Wrench Set
Some Eagle wheel covers have bolts or screws. A socket wrench set helps remove these fasteners easily. Use the correct socket size to avoid stripping bolts.
Gloves
Wear gloves to protect your hands from sharp edges. Gloves improve grip and keep your hands clean. Choose gloves that fit well and allow finger movement.

Credit: www.youtube.com
Prepare Your Vehicle
Start by parking your vehicle on a flat surface and turning off the engine. Use a cloth to protect the wheel while gently prying off the Eagle Flight wheel cover. Take care to avoid scratching the wheel or damaging the cover.
Clean The Wheel Covers
Start by cleaning the Eagle flight wheel covers. Dirt and grime can make removal harder. Use a soft cloth and mild soap with water. Wipe the covers gently to remove dust and debris. Clean surfaces help you see how the covers attach.
Park On A Flat Surface
Park your vehicle on a level spot. A flat surface keeps the car steady. This prevents the vehicle from moving during the removal. Use parking brakes to secure the car firmly. Safety first.
Gather Necessary Tools
Collect all needed tools before starting. A flathead screwdriver or a wheel cover removal tool works well. Have a pair of gloves ready to protect your hands. Being prepared saves time and effort.
Check Wheel Cover Type
Identify the type of Eagle flight wheel covers. Some covers snap on, others use lug nuts. Knowing the design helps plan the removal steps. This avoids damage to the cover or wheel.
Locate The Wheel Cover Clips
Locating the wheel cover clips is the first step in removing Eagle Flight wheel covers. These clips hold the cover firmly to the wheel rim. Knowing their positions helps you avoid damage during removal.
Most Eagle Flight wheel covers have several clips placed evenly around the edge. These clips snap into the rim to keep the cover secure. Identifying each clip makes the removal process smoother and safer.
Check The Outer Edge Of The Wheel Cover
Start by examining the outer edge of the wheel cover. Look for small notches or raised areas. These marks usually indicate where the clips are located. Use your fingers to feel for these spots.
Use A Flat Tool To Detect Clips
Use a flat tool like a plastic pry bar or a flathead screwdriver. Gently insert it between the wheel cover and the rim. Move the tool slowly around the edge to find where the clips hold tight.
Mark Clip Positions For Easy Removal
Once you find each clip, mark its spot with a small piece of tape or a marker. This helps you remember where to apply pressure during removal. Marking clips reduces the risk of breaking them.
Pry Off The Wheel Cover
Prying off the Eagle flight wheel cover is the first step to remove it safely. This process needs care to avoid damage to the cover or the wheel. Using the right tool and technique makes the task easier and safer.
Start by locating a small gap between the wheel cover and the wheel rim. This gap is where you will insert your tool to begin prying the cover off.
Use A Flathead Screwdriver
A flathead screwdriver works well to pry off the wheel cover. Choose one with a handle that feels comfortable in your hand. Insert the screwdriver blade gently into the gap between the wheel cover and rim.
Move the screwdriver slowly and carefully. Avoid pushing too hard to prevent scratching the wheel or bending the cover. Use the flat edge to lift the cover up a little bit at a time.
Apply Even Pressure
Applying even pressure is key to removing the cover without breaking it. Pry the cover a little on one side, then move to the opposite side. Repeat this back and forth motion gently.
This method loosens the cover evenly around the wheel. It prevents warping or cracking. Keep prying until the cover pops off easily.
Remove The Wheel Cover Completely
Removing the Eagle Flight wheel cover completely is a simple task. It needs care to avoid damage to the cover or the wheel. Follow these steps to take off the cover safely and fully.
Prepare Your Tools And Workspace
Find a flathead screwdriver or a plastic pry tool. Avoid sharp tools that can scratch the wheel. Park your car on a flat surface. This keeps the wheel steady during removal.
Locate The Clips Holding The Cover
Look behind the wheel cover for small clips or tabs. These clips keep the cover attached to the wheel. Knowing their position helps to release the cover easily.
Gently Pry The Cover Away
Insert the screwdriver or pry tool between the wheel and the cover. Push carefully to lift the cover without bending it. Work around the wheel to release all clips evenly.
Remove The Cover In One Piece
Once the clips are loose, pull the cover straight off. Avoid twisting or forcing it. Pulling gently keeps the cover intact and ready for future use.

Credit: www.gilgharda.com
Check For Damage
Checking for damage is an important step before removing Eagle Flight wheel covers. It helps you spot problems early and avoid extra repair costs. Careful inspection can protect your wheels and keep your vehicle safe.
Look closely at the wheel cover for any cracks or dents. Even small damage can cause issues during removal. A damaged cover might break apart or scratch the wheel if not handled carefully.
Check the edges of the cover. These areas often show wear and tear first. Sharp edges or missing pieces signal damage that needs attention before removal.
Inspect For Cracks And Breaks
Cracks weaken the wheel cover’s structure. Tap gently to listen for hollow sounds. Hollow areas may mean hidden damage beneath the surface. Replace covers with major cracks to avoid accidents.
Look For Scratches And Scuffs
Scratches might seem minor but can hide deeper damage. Scuffs show signs of impact or friction. Clean the cover and examine these marks closely. They can affect the cover’s fit and function.
Check The Mounting Clips
Mounting clips hold the cover in place. Broken or bent clips can cause the cover to fall off. Test each clip by gently pressing and pulling. Replace any damaged clips before removing the cover.
Assess Rust Or Corrosion
Rust or corrosion weakens metal parts of the wheel cover. It can make removal harder and damage the wheel itself. Look for discoloration or rough spots. Treat or replace rusty covers to protect your wheels.
Tips For Reinstallation
Reinstalling Eagle Flight wheel covers is simple with the right steps. Proper reinstallation keeps your covers secure and looking great. Follow these tips for a smooth process.
Clean The Wheel Surface
Remove dirt and grime from the wheel before reattaching the cover. Use a damp cloth to wipe the surface. Clean wheels help covers stick better and last longer.
Align The Cover Correctly
Match the wheel cover’s holes with the wheel bolts. Proper alignment prevents damage and ensures a tight fit. Take your time to position it right.
Press Firmly But Gently
Push the cover onto the wheel evenly. Avoid using too much force to prevent cracks. A steady, even press secures the cover without damage.
Check For Secure Fit
After pressing, check all edges of the cover. Make sure it snaps or fits tightly all around. A loose cover can fall off while driving.
Frequently Asked Questions
How Do I Safely Remove Eagle Flight Wheel Covers?
To safely remove Eagle Flight wheel covers, use a flat plastic pry tool. Insert it gently between the cover and rim. Pry slowly to avoid damage. Avoid metal tools that can scratch or dent the wheel surface.
What Tools Are Needed To Remove Wheel Covers?
You typically need a flat plastic pry tool or a flathead screwdriver wrapped in tape. These tools help prevent scratches. No special tools are usually required. Ensure you work carefully to avoid damaging the covers or wheels.
Can I Remove Wheel Covers Without Damaging Them?
Yes, removing wheel covers without damage is possible. Use proper tools and gentle pressure. Avoid forcing or prying too hard. Slowly work your way around the cover to loosen it evenly. This prevents cracks or breaks.
How Often Should Eagle Flight Wheel Covers Be Removed?
Remove Eagle Flight wheel covers only when necessary. Common reasons include cleaning, maintenance, or replacement. Frequent removal can increase wear and risk damage. Handle with care each time to maintain their condition.
Conclusion
Removing Eagle flight wheel covers is simple with the right steps. Take your time and follow each instruction carefully. Using the right tools makes the job easier and safer. Avoid forcing the cover off to prevent damage. After removal, check the wheel for any needed cleaning or repairs.
Now, you can replace or clean your wheel covers with confidence. Regular care helps keep your wheels looking good and working well. Keep practicing these steps for faster and smoother removal next time.