
If you have an old vinyl car wrap that’s starting to peel, fade, or just doesn’t match your style anymore, you’re probably wondering how to remove it without damaging your car’s paint. Removing a vinyl wrap might seem tricky, but with the right approach, you can do it yourself and save money.
In this guide, you’ll discover simple, step-by-step tips to safely peel off that old wrap and get your car looking fresh again. Ready to learn how to make your car shine without the hassle? Keep reading—your car will thank you.
Tools You’ll Need
Removing old vinyl car wrap needs the right tools. These tools make the job easier and faster. Using proper tools helps protect your car’s paint. Also, it prevents damage to the vinyl. Here is a list of tools you will need.
Heat Gun
A heat gun softens the vinyl adhesive. It makes peeling the wrap easier. Use it carefully to avoid burning the paint. Keep the heat moving across the surface.
Plastic Scraper
A plastic scraper lifts the edges of the wrap. It does not scratch the car’s surface. Metal tools can damage the paint. Plastic scrapers work gently and effectively.
Adhesive Remover
Adhesive remover cleans leftover glue on the car. Use one safe for automotive paint. Spray or apply it after peeling the wrap. Wipe with a soft cloth for best results.
Microfiber Cloths
Microfiber cloths help clean and dry the surface. They do not leave lint or scratches. Use them to wipe off adhesive remover and dirt. Keep several cloths handy for the process.
Gloves
Gloves protect your hands from heat and chemicals. Use work gloves or disposable ones. They keep your hands clean and safe during removal.
Preparing Your Workspace
Preparing your workspace is the first step to remove an old vinyl car wrap safely. A clean, organized area helps you work faster and avoid damage to your vehicle. Taking time to set up makes the whole process easier and less stressful.
Choose a well-lit space with enough room to move around your car freely. Good lighting helps you spot edges and bubbles in the wrap. Outdoor shade or a garage with open doors work well to avoid direct sunlight, which can make the vinyl too hot.
Clear The Area Around Your Vehicle
Remove any objects near your car that might get in the way. Tools, chairs, and other items should be moved away. A clutter-free space prevents accidents and gives you space to lay out your tools.
Gather Necessary Tools And Materials
Have all tools ready before you start. You will need a heat gun, plastic scraper, gloves, and cleaning supplies. Keeping tools close saves time and keeps the process smooth.
Protect Your Car And Yourself
Cover parts of the car that you don’t want to damage, like windows and mirrors. Wear gloves to protect your hands from heat and sharp edges. Safety first prevents injuries and protects your vehicle’s finish.
Check Weather Conditions
Pick a day with mild weather and low wind. Strong wind can blow debris onto your car or make the wrap harder to remove. Mild temperatures help the vinyl peel off easier without sticking too much.
Heating The Vinyl Wrap
Heating the vinyl wrap is an important step in removing old car wrap. Heat softens the adhesive, making the vinyl easier to peel off. Without heat, the wrap may tear or leave residue on the car’s surface. Using the right temperature protects the paint underneath.
Use a heat gun or a strong hairdryer for this process. Keep the heat source moving to avoid damage. Heat the vinyl in small sections for better control. This method makes the removal smoother and less stressful.
Choosing The Right Heat Source
Pick a heat gun or a hairdryer with high heat settings. Avoid open flames or overly hot tools. Heat guns offer consistent warmth, ideal for removing vinyl. Hairdryers work but may take longer to soften the wrap.
Maintaining Safe Distance
Keep the heat source about 6 to 8 inches from the surface. Too close can burn the vinyl or paint. Too far will not soften the adhesive well. Move the tool steadily for even heating.
Heating In Small Sections
Work on 6 to 12 inch sections of the wrap. Heat one area before peeling it off. This approach keeps the vinyl soft and flexible. It prevents tearing and reduces adhesive residue.
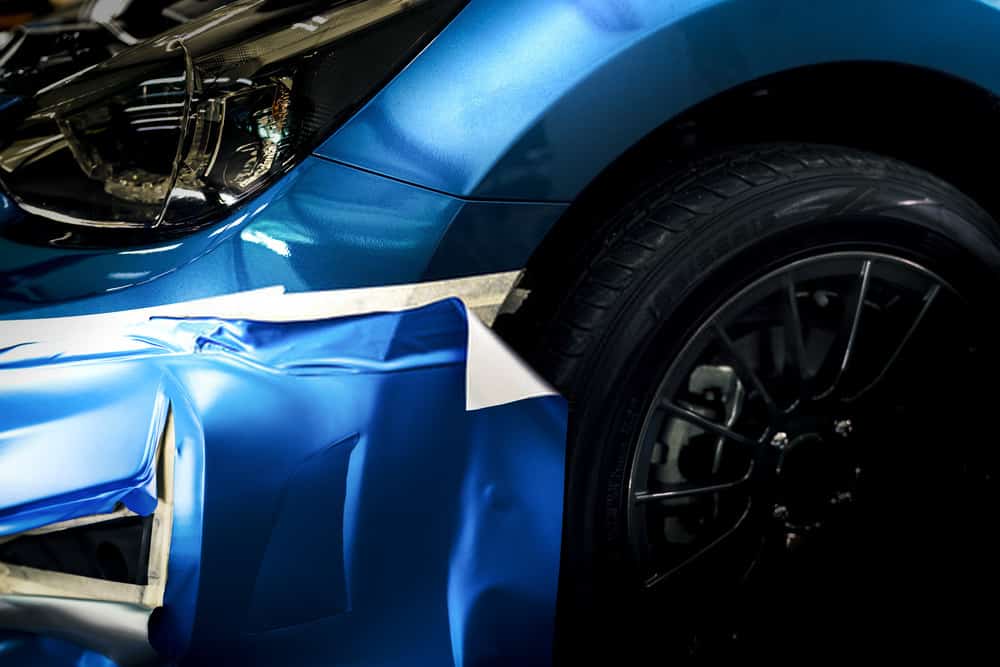
Peeling Off The Vinyl
Removing old vinyl car wrap starts with warming the surface to soften the adhesive. Slowly peel the vinyl at a steady angle to avoid damage. Clean any leftover glue with a gentle cleaner for a smooth finish.
Preparing The Edges
Start by finding a corner or edge of the vinyl wrap. Use your fingernail or a plastic scraper to lift it gently. Be careful not to scratch the car’s paint. Take your time to avoid tearing the vinyl.
Peeling Slowly And Evenly
Pull the vinyl back slowly. Keep the wrap close to the car’s surface as you peel. This reduces stress on the vinyl and stops it from breaking. Try to pull at a 45-degree angle for best results.
Using Heat To Soften Adhesive
Apply gentle heat with a heat gun or hairdryer. Heat softens the glue under the vinyl. Move the heat source evenly across the area. Do not hold heat too long in one spot to avoid damage.
Handling Stubborn Sections
Some parts may stick more than others. Use heat again on these spots. Peel in small sections rather than all at once. Patience helps prevent tears and makes removal easier.
Cleaning Residual Adhesive
After peeling, sticky glue may remain on the car. Use adhesive remover or rubbing alcohol on a soft cloth. Rub gently to avoid harming the paint. Clean all residue for a smooth finish.
Removing Adhesive Residue
After removing an old vinyl car wrap, sticky adhesive residue often remains. This residue can attract dirt and make the car look messy. Removing it carefully protects your car’s paint and restores a clean surface. There are different ways to remove adhesive residue safely and effectively. Choose the method that fits your tools and comfort level.
Using Adhesive Remover
Adhesive removers are made to dissolve sticky residue quickly. Apply a small amount on a clean cloth. Rub gently on the sticky areas without pressing too hard. Let the remover sit for a few minutes to loosen the glue. Wipe away the residue with a soft cloth. Repeat if needed, but avoid harsh scrubbing to protect the paint.
Always test the remover on a hidden spot first. Some chemicals can damage certain paint finishes. Use in a well-ventilated area and wear gloves for safety. Clean the surface with soap and water after removing all residue.
Natural Alternatives
Natural products can work well to remove adhesive residue. Cooking oil, such as olive or vegetable oil, softens glue without harsh chemicals. Put a small amount on the residue and let it soak for five minutes. Gently rub with a cloth to lift the sticky material. Wipe clean with soap and water afterward.
Another option is white vinegar, which breaks down adhesive bonds. Apply vinegar with a cloth and let it sit briefly. Rub off the residue carefully. Warm soapy water can also help remove light adhesive traces. These natural methods take more time but are gentle on paint and safe for the environment.
Credit: precisionsigntulsa.com
Cleaning The Car Surface
Cleaning the car surface is a key step after removing old vinyl wrap. Dirt and adhesive residue can stay on the paint. These leftovers can damage the car’s look or stop new wraps from sticking well.
Proper cleaning helps the paint stay smooth and shiny. It also makes sure the surface is ready for any next steps. Taking time to clean well makes a big difference.
Gathering The Right Cleaning Materials
Use a soft microfiber cloth to avoid scratches. A gentle car soap helps remove dirt without harming paint. Adhesive remover or rubbing alcohol breaks down sticky residue. Have warm water ready for rinsing. Avoid harsh chemicals that can hurt the car’s finish.
Removing Loose Dirt And Dust
Rinse the car surface with warm water. Use the microfiber cloth with car soap to wipe dirt away. Clean in small sections for better control. Dry the area with a clean cloth to see any sticky spots clearly.
Eliminating Adhesive Residue
Apply adhesive remover or rubbing alcohol on a cloth. Gently rub the sticky areas in a circular motion. Keep wiping until the residue disappears. Avoid scrubbing hard to protect the paint. Rinse with water and dry the surface again.
Final Surface Inspection
Look closely for any remaining dirt or glue. Use a flashlight to spot shiny or sticky patches. If needed, repeat the cleaning steps. The surface should feel smooth and clean to touch. A clean surface ensures better results for new wraps or paint care.
Tips For Avoiding Damage
Removing an old vinyl car wrap requires care to protect your vehicle’s paint. Damage can happen if you rush or use wrong tools. Follow these tips to keep your car safe and the job easier.
Use A Heat Gun Or Hair Dryer
Heat softens the vinyl adhesive. It helps peel the wrap without tearing. Move the heat source slowly and keep it at a safe distance. Avoid overheating one spot to protect the paint underneath.
Peel Slowly And Steadily
Pull the vinyl gently at a 45-degree angle. Quick or sharp pulls can damage the paint. Patience is key. Take breaks to avoid fatigue and mistakes.
Apply A Plastic Scraper
Use a plastic scraper to lift edges carefully. Metal tools can scratch your car’s surface. Work under the vinyl to separate it from the paint without harm.
Clean Residue With Mild Solvent
After removing the wrap, some glue may remain. Use a mild adhesive remover safe for car paint. Test it on a small area first. Wipe gently with a soft cloth to avoid scratches.
Work In A Shaded Area
Sunlight can heat the vinyl too fast or dry the adhesive too much. A shaded or cool place gives better control. It helps keep the vinyl soft and easier to remove.
Credit: precisionsigntulsa.com
When To Seek Professional Help
Removing an old vinyl car wrap can be tricky. Some situations call for expert help. Knowing when to ask a professional can save time and prevent damage.
Professionals have the right tools and skills. They can handle tough spots and stubborn glue safely.
Complex Or Large Wraps
Big wraps take more effort and patience. Professionals can remove them faster without harming the paint.
Damaged Or Fragile Paint
If your car’s paint is old or weak, experts know how to protect it. They use gentle techniques to avoid peeling or scratches.
Stubborn Adhesive Residue
Some glue does not come off easily. Professionals use special solvents and tools to clear sticky residue safely.
Limited Time Or Tools
Removing vinyl wrap needs patience and the right equipment. Professionals have both, making the job easier and faster.
Desire For Perfect Finish
Experts ensure a smooth, clean surface after removal. This is important if you plan to rewrap or sell the car.

Credit: www.youtube.com
Frequently Asked Questions
How Do I Remove Old Vinyl Car Wrap Safely?
To remove old vinyl car wrap safely, heat the wrap with a heat gun or hair dryer. Peel slowly to avoid damaging paint. Use adhesive remover to clean residue. Work in a shaded area for best results.
What Tools Are Needed To Remove Vinyl Car Wrap?
You need a heat gun or hair dryer, plastic scraper, adhesive remover, microfiber cloth, and gloves. These tools help remove the wrap without harming your car’s surface.
How Long Does It Take To Remove Old Car Wrap?
Removing old car wrap usually takes 1 to 3 hours, depending on the car size and wrap condition. Patience is key to avoid damage.
Can I Remove Vinyl Car Wrap Myself?
Yes, you can remove vinyl car wrap yourself. Follow proper heating and peeling techniques. Use adhesive remover for residue. If unsure, consult a professional.
Conclusion
Removing old vinyl car wrap takes patience and the right steps. Start by warming the wrap to soften the adhesive. Peel slowly to avoid damaging your car’s paint. Clean any leftover glue with a gentle solvent. Take your time and work carefully to get the best results.
With these simple tips, your car will look fresh and clean again. Remember, safety and patience make the process easier and safer. Keep your car’s surface smooth and ready for a new look.


