Are your wheel stud covers looking worn out or damaged? Removing them might seem tricky if you’ve never done it before.
But don’t worry—you can get it done quickly and safely with the right steps. You’ll learn exactly how to remove your wheel stud covers without causing any damage to your wheels or studs. Keep reading, and you’ll save time and avoid costly mistakes on your next wheel maintenance.
Tools Needed
Removing wheel stud covers is a simple task that needs the right tools. Having the proper tools makes the job easier and safer. This section lists the basic tools and optional equipment you might need. Use what fits your situation best.
Basic Tools
A flathead screwdriver is essential for prying off the covers. Use it carefully to avoid damage. A pair of gloves protects your hands from sharp edges. A small hammer can help tap the screwdriver gently if the covers are tight. A clean cloth keeps the covers and studs free from dirt.
Optional Equipment
A plastic pry tool is useful to avoid scratching the wheel. Needle-nose pliers can grab covers that are hard to remove by hand. A lubricant spray loosens stuck covers and makes removal smoother. A flashlight helps you see clearly, especially in low light.
Credit: www.visualsp.com
Prepare Your Vehicle
Preparing your vehicle is the first step to remove wheel stud covers safely. You need a stable and secure setup before starting. This helps avoid accidents and makes the process easier.
Follow these simple steps to get your vehicle ready. Taking time here saves effort later.
Park Safely
Find a flat, even surface to park your vehicle. Avoid slopes or uneven ground that can cause rolling. Turn off the engine and apply the parking brake firmly. This keeps your vehicle still during work.
Use wheel chocks on the opposite wheels. This adds extra safety by preventing movement. Make sure there is enough space around the wheel for easy access.
Secure The Wheel
Before removing the stud covers, ensure the wheel is stable. Use a jack stand to lift the vehicle if needed. Never rely only on a jack; it can slip or fail.
Tighten the wheel nuts slightly after lifting. This stops the wheel from turning while you work. Check that the vehicle does not wobble or move.
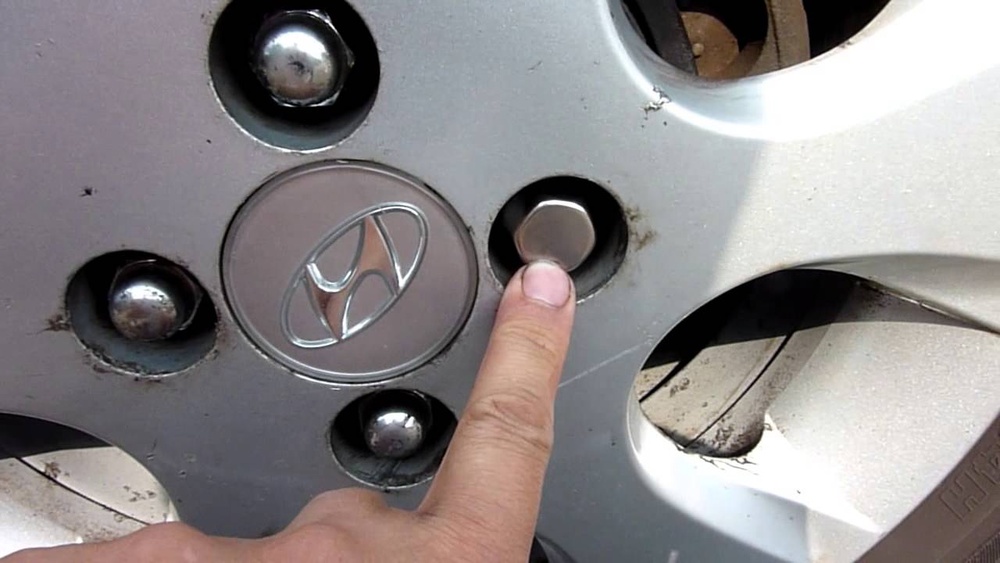
Locate The Wheel Stud Covers
Locating the wheel stud covers is the first step in removing them safely. These covers protect the wheel studs from dirt and rust. Finding them helps you know where to start the removal process.
Wheel stud covers usually sit right on the wheel’s lug nuts. They can look like small caps or rings around each lug nut. Sometimes, they blend with the wheel color, so look closely.
Knowing the exact position of the covers helps avoid damage. It also makes the removal faster and easier. Take a moment to study your wheel before you begin.
Check Around The Lug Nuts
Look carefully at each lug nut on the wheel. The covers fit tightly over these nuts. They may be plastic or metal and might have a slight gap at the edges.
Identify Different Types Of Covers
Some covers are flat caps, others are raised or have a decorative design. Recognizing the type helps decide the best removal method. Take note of how they attach to the wheel.
Use Good Lighting
Bright light helps you see the covers clearly. Use a flashlight or work in daylight. Shadows can hide the edges and make finding the covers hard.
Feel For Texture Changes
Run your fingers over the lug nuts. Covers may feel smoother or have a different texture. This touch test confirms where the covers start and end.
Remove The Covers
Removing wheel stud covers is a simple task that anyone can do. These covers protect the wheel studs but may need removal for maintenance or replacement. This section explains easy ways to take them off safely.
Choose the best method based on your tools and the cover type. Some covers come off by hand, while others need tools for a smooth removal.
Manual Removal
Start by trying to pull the cover off by hand. Grip the cover firmly and pull straight out. Sometimes, a little wiggle helps loosen the cover. Avoid using too much force to prevent damage. If the cover feels stuck, do not force it. Move to the next method for safer removal.
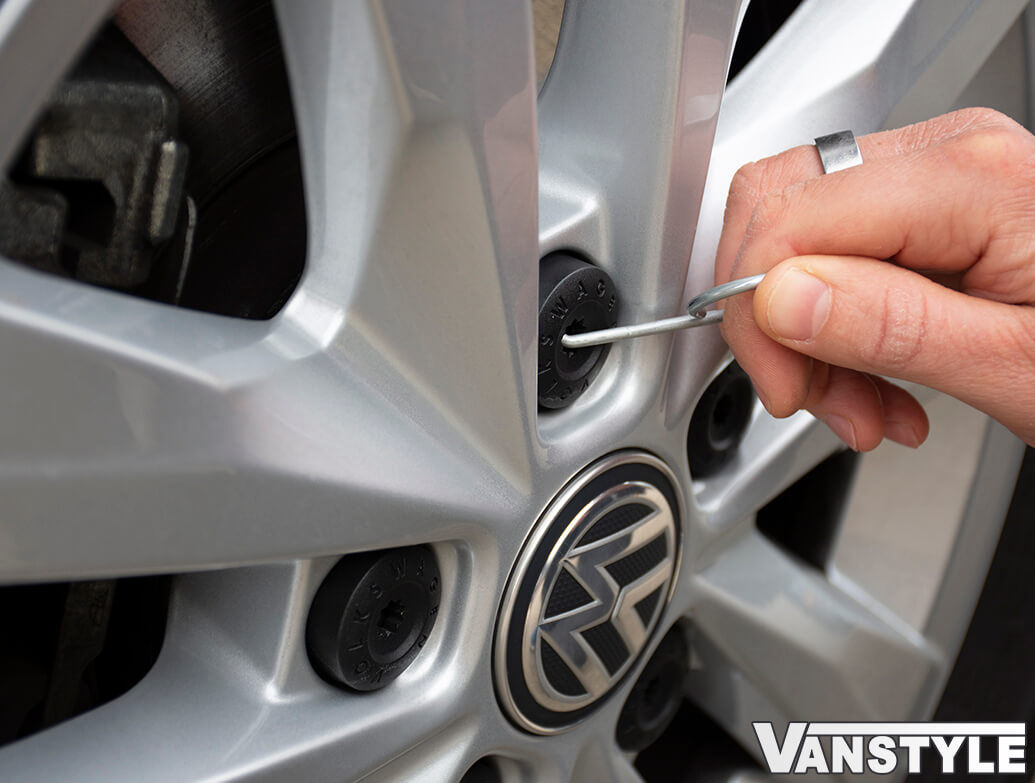
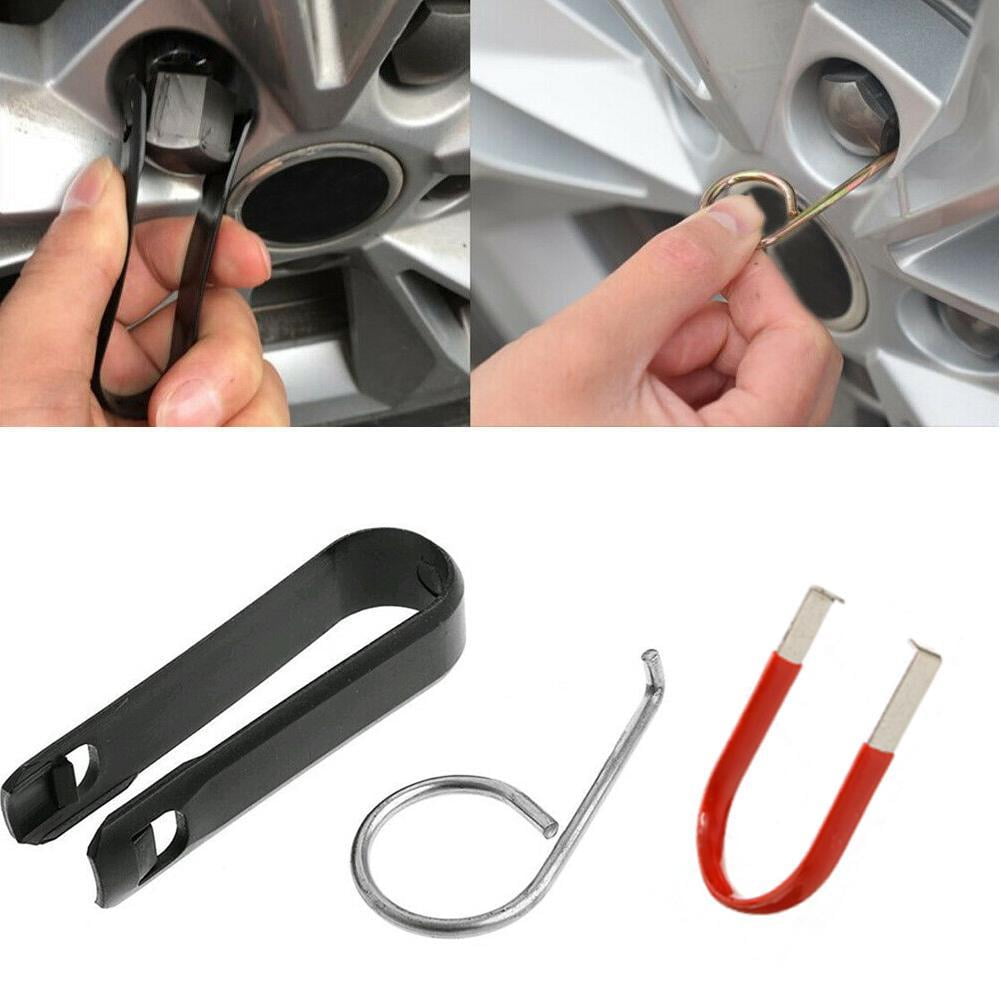
Using Pliers Or Pry Tools
Use pliers or a flat pry tool for tight covers. Wrap the pliers with tape to avoid scratching the cover. Gently grip the edge of the cover with the pliers. Slowly pry the cover away from the wheel stud. Work around the cover evenly to loosen it. Take care not to damage the wheel or cover. This method works well for stubborn covers.
Clean The Wheel Studs
Cleaning the wheel studs is an important step after removing the wheel stud covers. It helps keep the studs in good shape and makes it easier to put the covers back on. Clean wheel studs also prevent rust and damage that can cause problems later.
Remove Dirt And Debris
Start by brushing off any loose dirt or dust on the wheel studs. Use a stiff brush or a cloth to wipe away mud and grime. For stubborn dirt, a little water and mild soap can help. Dry the studs completely after cleaning to stop rust from forming.
Check For Damage
Look closely at each wheel stud for cracks or bends. Damaged studs can cause the wheel to fit poorly or come loose. Replace any stud that looks worn out or broken. Clean and strong wheel studs keep your wheels safe and secure.
Reinstall Or Replace Covers
After removing wheel stud covers, it is important to reinstall or replace them properly. This keeps your wheels protected and maintains their look. You can choose to put the same covers back or use new ones. Either way, careful handling helps avoid damage and ensures a good fit.
Aligning The Covers
Start by matching the cover with the wheel stud shape. Look for notches or grooves on the cover. These help guide the cover onto the stud correctly. Place the cover gently over the stud. Make sure it sits evenly and does not tilt. Proper alignment prevents the cover from falling off during driving.
Securing Properly
Press the cover firmly onto the stud. Use even pressure around the edges. Avoid pushing too hard in one spot. Covers should click or snap into place. Check if the cover feels tight and secure. Loose covers can cause noise or get lost on the road. Use a soft cloth to protect the cover while pressing if needed.
Common Issues And Fixes
Removing wheel stud covers can be tricky. Some common problems may stop you from doing it easily. Knowing these issues helps you fix them fast. This section covers common problems and simple fixes.
Stuck Covers
Wheel stud covers often get stuck due to dirt or rust. Try spraying a little lubricant around the cover. Let it sit for five to ten minutes. Use a flat tool, like a screwdriver, to gently pry the cover off. Avoid using too much force to prevent damage. If it stays stuck, try tapping the tool lightly with a small hammer. This can loosen the cover without breaking it.
Damaged Studs
Sometimes, the studs get damaged while removing covers. Bent or stripped studs make it hard to put covers back on. Check each stud for damage before removing the cover. Use pliers carefully to straighten bent studs. Replace any studs that are too damaged to fix. Keeping studs in good shape helps wheel covers fit properly and stay safe.
Credit: www.walmart.com

Credit: www.youtube.com
Frequently Asked Questions
What Tools Do I Need To Remove Wheel Stud Covers?
You typically need a flathead screwdriver or a pry tool. A rubber mallet can help loosen stubborn covers. Gloves protect your hands during removal. These tools prevent damage to your wheel or cover.
How To Safely Remove Stubborn Wheel Stud Covers?
Apply penetrating oil around the cover base. Let it sit for 5-10 minutes. Use a pry tool gently to avoid scratching. Work slowly and steadily for best results.
Can I Reuse Wheel Stud Covers After Removal?
Yes, if the covers are undamaged and clean. Inspect for cracks or wear before reinstallation. Proper removal helps maintain their condition for reuse.
How Long Does It Take To Remove Wheel Stud Covers?
Removing one cover takes about 2-5 minutes. Time varies based on cover type and condition. Being patient reduces the risk of damage.
Conclusion
Removing wheel stud covers is easier than it seems. Start with the right tools and be gentle. Take your time to avoid damage. Clean the studs after removal for better maintenance. Reinstall covers carefully to keep your wheels safe. Regular checks help spot any issues early.
Now you can handle this task with confidence. Keep your vehicle looking neat and well cared for. Simple steps make a big difference in car upkeep.


