
Are you tired of your worn-out Ford steering wheel slipping through your hands or looking dull? Imagine giving it a fresh, custom look that feels great every time you drive.
Stitching your own Ford steering wheel cover is easier than you think, and it can save you money while adding a personal touch to your car. In this guide, you’ll learn simple steps to create a perfect fit that looks professional and lasts long.
Keep reading, and discover how you can transform your driving experience with just a needle, thread, and a little patience.

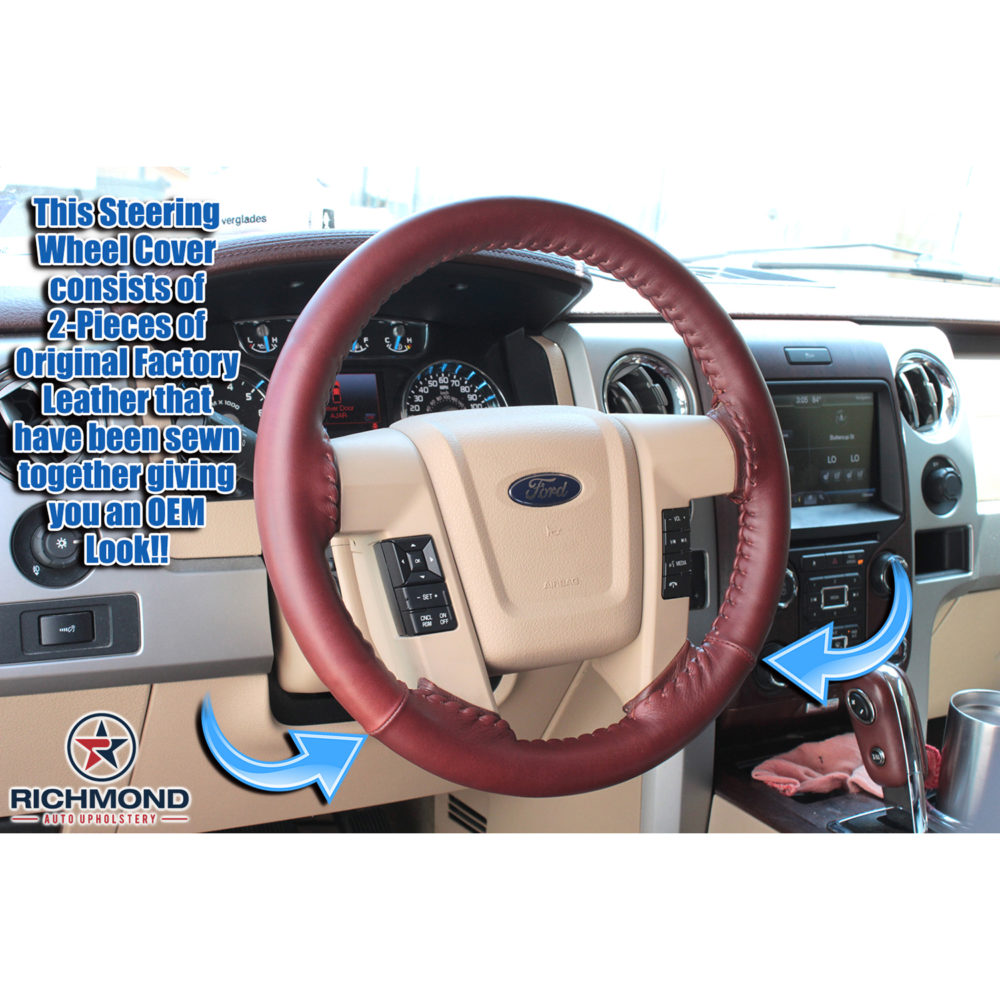
Credit: www.amazon.com
Tools And Materials Needed
Stitching a Ford steering wheel cover needs the right tools and materials. This makes the process smooth and the cover durable. Preparing these items before starting saves time and avoids frustration.
Choosing The Right Cover Material
Select a material that feels good and lasts long. Leather and synthetic leather are popular for their grip and look. Neoprene offers a soft, cushioned touch and resists water. Pick a material that matches your style and comfort needs.
Essential Sewing Tools
You need a strong needle made for thick fabrics. A heavy-duty thread, such as nylon or polyester, works best. Scissors should be sharp to cut through the cover material easily. A thimble can protect your finger while stitching tight spots.
Additional Supplies
Marking tools like chalk or fabric pens help guide your stitches. Clips or small clamps hold the cover in place as you sew. Measuring tape ensures the cover fits your steering wheel perfectly. A small pair of pliers can pull the needle through tough spots.
Preparing The Steering Wheel
Preparing the steering wheel is the first step before stitching a new Ford steering wheel cover. This step ensures the cover fits well and stays in place. A clean and smooth surface helps the stitching process go smoothly. Proper preparation also improves the cover’s look and durability.
Take time to remove any old covers and clean the wheel. This makes sure no dirt or residue blocks the new cover from fitting tightly. A well-prepared steering wheel makes stitching easier and results in a neat finish.
Cleaning The Surface
Start by wiping the steering wheel with a damp cloth. Use mild soap and water to remove dirt and oils. Avoid harsh chemicals that can damage the wheel’s material. Dry the wheel completely with a clean towel.
Check for any sticky spots or dust. Use rubbing alcohol on a cloth to clean these areas. This helps the new cover grip the wheel better. A clean surface prevents slipping and uneven stitching.
Removing Old Covers
Carefully pull off any old steering wheel covers. Avoid using sharp tools that can scratch the wheel. If the cover is glued, gently peel it off without damaging the wheel surface.
Remove leftover adhesive with a soft cloth and rubbing alcohol. Make sure the wheel is smooth and free from bumps. This prepares the wheel for a perfect fit of the new cover.
Measuring And Cutting The Cover
Measuring and cutting the steering wheel cover is the first key step. It sets the stage for a perfect fit. Precise measurements ensure the cover fits snugly on your Ford’s steering wheel. Cutting the material correctly saves time and effort during stitching. Follow these simple steps for accurate results.
Taking Accurate Measurements
Start by measuring the steering wheel’s diameter. Use a flexible tape measure for best results. Wrap it around the wheel to get the circumference. Note the thickness of the steering wheel too. Record both measurements carefully. Double-check the numbers to avoid mistakes.
Cutting The Material
Place the cover material on a flat surface. Use the measurements to draw cutting lines. Leave extra space for stitching allowance. Use sharp scissors or a rotary cutter. Cut slowly along the lines to keep edges neat. Avoid jagged cuts for a clean finish.
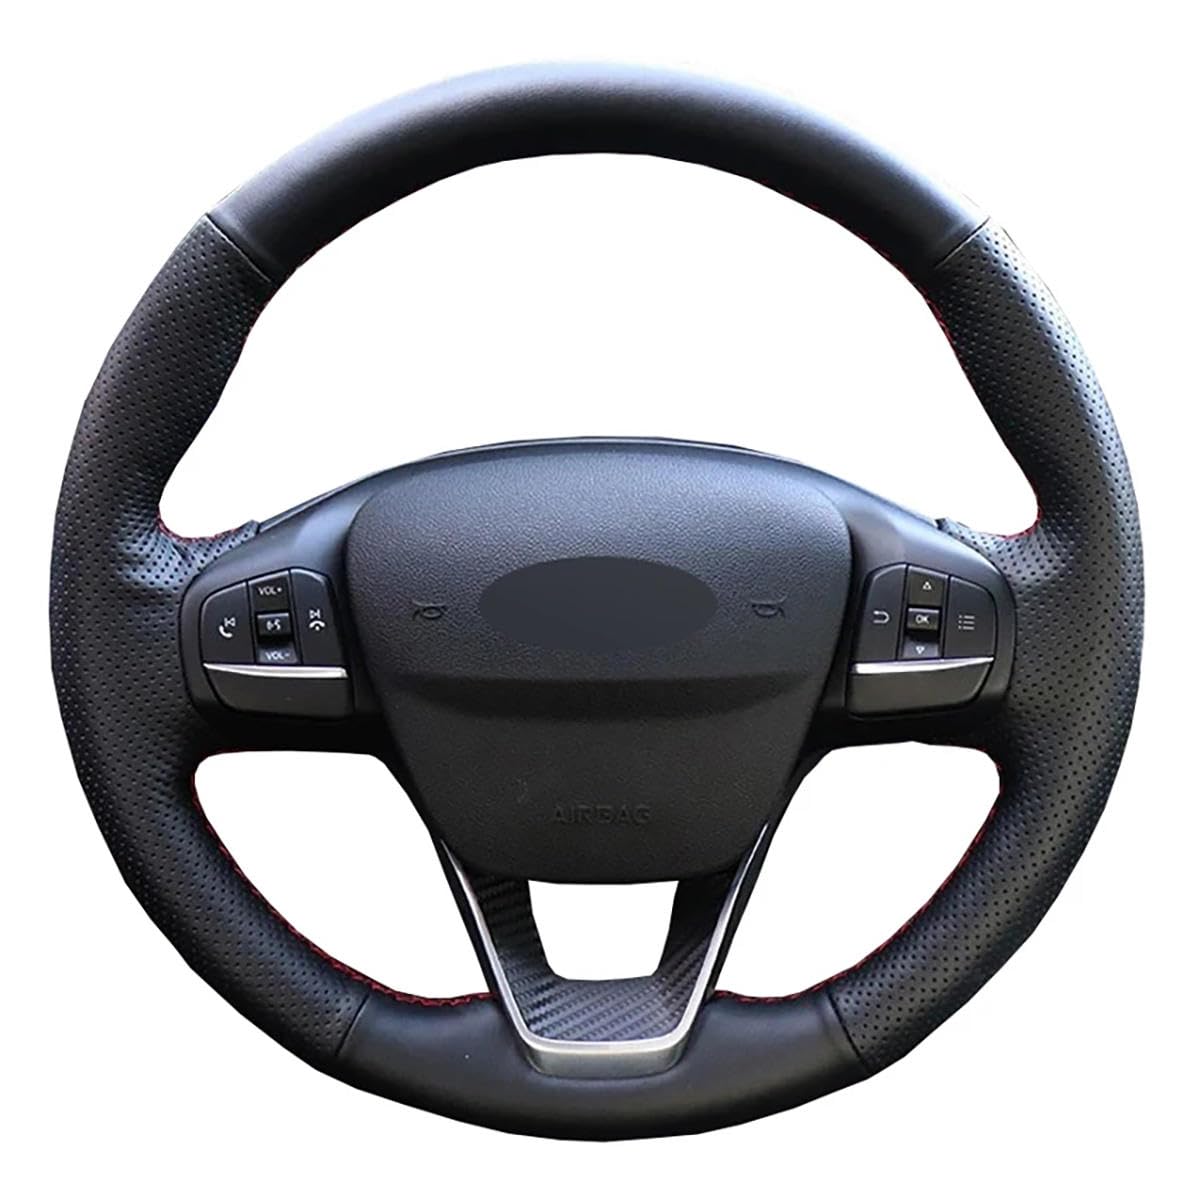
Credit: leather-auto-seats.com
Stitching Techniques
Stitching techniques play a key role in making a Ford steering wheel cover look good and last long. Strong and neat stitches hold the cover tightly and prevent it from slipping. Choosing the right stitch type helps improve both comfort and style.
Using the right tools and methods makes stitching easier and more effective. Simple steps can lead to professional results. This section explains basic stitch types and how to use needle and thread correctly.
Basic Stitch Types
The most common stitch types for steering wheel covers are running stitch and whip stitch. Running stitch is a straight, simple stitch that goes in and out of the material. It is fast and works well for basic covers.
Whip stitch wraps around the edge of the cover. It is stronger and keeps edges neat. This stitch helps avoid fraying and adds a clean finish. Both stitches are easy to learn and suit different cover styles.
Using The Needle And Thread
Choose a strong needle that fits the thread size. A thicker needle is best for leather or thick materials. Use polyester or nylon thread for durability and stretch.
Thread the needle and tie a knot at the end. Start stitching from the inside to hide the knot. Pull the thread tight but not too tight to avoid puckering. Keep stitches even and close for a uniform look.
Take your time. Smooth and careful stitches last longer and look better on your Ford steering wheel cover.
Attaching The Cover To The Wheel
Attaching the cover to the steering wheel is a key step in this process. It ensures the cover fits tightly and looks neat. This part needs patience and care for the best results.
Aligning The Cover
First, place the cover over the wheel. Make sure the seams match the wheel’s shape. Check that the cover is centered properly. This helps avoid bunching or slipping later.
Stretch the cover gently but firmly. The material should sit snug against the wheel. Take your time to adjust it evenly all around. Proper alignment creates a smooth, professional finish.
Securing The Stitching
Use a strong thread and a needle made for leather or thick fabric. Start stitching from the top center of the wheel. Pull the thread tight after every stitch. This keeps the cover firmly in place.
Sew in a consistent pattern, either cross-stitch or whip stitch. This strengthens the hold and looks tidy. Check your work often to avoid loose sections. Secure the thread with a knot once done.
Finishing Touches
Finishing touches give your Ford steering wheel cover a neat, polished look. This step ensures the cover fits well and lasts longer. Small details make a big difference in comfort and style. Take your time to finish the stitching carefully.
Trimming Excess Thread
Cut any extra thread close to the knots. Leave a little thread to avoid unraveling. Use sharp scissors for a clean cut. Avoid pulling the thread too hard. Check all seams for loose ends. Neat threads keep the cover looking tidy.
Checking For Fit And Comfort
Slide the cover onto the steering wheel. Move it around to check tightness. The cover should not slip or feel loose. Make sure the stitching does not irritate your hands. Adjust if needed by tightening or loosening stitches. A good fit improves driving comfort and safety.
Maintenance Tips
Maintaining your Ford steering wheel cover keeps it looking new and lasting longer. Proper care prevents wear and tear. Simple steps protect your investment and keep the cover comfortable.
Cleaning The Cover
Dust and dirt can build up on the steering wheel cover. Use a soft cloth to wipe it regularly. For deeper cleaning, use mild soap and water. Avoid harsh chemicals that damage the material. Gently scrub the cover and rinse with a damp cloth. Let it air dry completely before use. Regular cleaning stops stains and bad smells.
Repairing Minor Damages
Small tears or loose stitches can appear over time. Fix minor damage quickly to prevent it from worsening. Use a needle and thread matching the cover’s color. Stitch carefully along the damaged area. Avoid pulling the thread too tight. For leather covers, apply a small amount of leather conditioner after repair. This keeps the material soft and flexible.
Credit: www.amazon.com
Frequently Asked Questions
How Do I Prepare A Ford Steering Wheel For Stitching?
Clean the wheel thoroughly and remove any old covers. Use a cloth and mild cleaner to ensure no dirt or oils remain. This helps the new cover adhere better and makes stitching easier.
What Materials Are Needed To Stitch A Steering Wheel Cover?
You will need leather or fabric cover material, strong thread, a stitching needle, and scissors. Optionally, use a stitching awl or pliers to help pull the thread through tight spots.
How Long Does It Take To Stitch A Steering Wheel Cover?
Stitching a steering wheel cover typically takes 1 to 2 hours. Time varies based on skill level and wheel size. Patience ensures neat and durable stitching.
Can I Stitch A Ford Steering Wheel Cover Without Special Tools?
Yes, basic tools like a strong needle and thread suffice. However, a stitching awl or pliers make the process easier and cleaner, especially for thick materials.
Conclusion
Stitching a Ford steering wheel cover takes patience and care. Each step builds a stronger, better fit for your wheel. Use the right tools and follow the thread pattern closely. Your steering wheel will feel more comfortable and look neat.
This simple task saves money and adds a personal touch. Keep practicing, and your skills will improve quickly. Enjoy your newly stitched cover every time you drive.
