
Are you tired of your car’s interior looking dull or outdated? Imagine giving your vehicle a fresh, stylish makeover without spending a fortune.
Vinyl wrapping your interior trim is an easy and affordable way to transform your car’s look instantly. In this guide, you’ll discover simple, step-by-step instructions to help you wrap your interior trim like a pro. Ready to unlock a whole new level of customization and make your car truly yours?
Keep reading—your dream interior is just a few steps away.
Choosing Vinyl Wrap Materials
Choosing the right vinyl wrap materials is key to a successful interior trim project. The material affects the look, feel, and durability of the wrap. It also determines how easy the wrap will be to apply and maintain.
Understanding different types of vinyl and finishes helps you pick the best option. Having the right tools ready makes the job smoother and faster.
Types Of Vinyl Wraps
Vinyl wraps come in several types. Cast vinyl is flexible and lasts longer. It is great for curved surfaces. Calendered vinyl is thicker and cheaper. It works well on flat surfaces but may crack on curves. There is also textured vinyl, which adds a unique feel to the trim.
Selecting The Right Finish
Vinyl finishes change the look of the interior trim. Glossy finishes shine and reflect light. Matte finishes give a smooth, non-reflective look. Satin finishes sit between glossy and matte, offering a soft shine. Choose a finish that matches your car’s style and interior theme.
Tools And Accessories Needed
Having the right tools is essential for a clean wrap. A heat gun helps stretch and mold the vinyl around curves. A squeegee removes bubbles and ensures smooth adhesion. Sharp utility knives trim excess vinyl accurately. Surface cleaner prepares the trim by removing dirt and oils. Use gloves to avoid fingerprints on the vinyl.

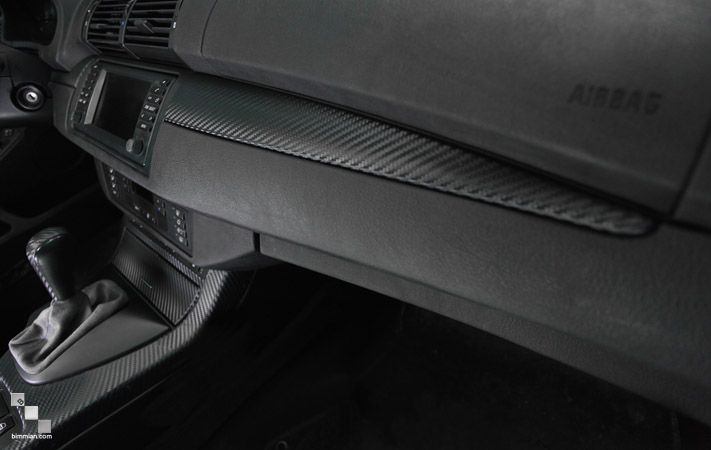
Credit: www.youtube.com
Preparing Interior Trim For Wrapping
Preparing the interior trim for vinyl wrapping is the key to a smooth finish. This step ensures the wrap sticks well and looks perfect. Proper preparation helps avoid bubbles, wrinkles, or peeling later on.
Take your time during this phase. A clean, smooth surface makes the wrapping process easier and the results better.
Cleaning And Removing Dirt
Start by cleaning the trim thoroughly. Use a mild soap and water mix to wipe off dust and grease. Dirt and oil stop the vinyl from sticking properly. Dry the trim fully with a clean cloth. Avoid any residue that could block adhesion.
Sanding And Smoothing Surfaces
Lightly sand the trim with fine-grit sandpaper. This roughens glossy surfaces and helps the vinyl grip better. Sand in small, gentle circles to avoid damage. After sanding, wipe the trim with a damp cloth to remove dust. Let it dry before moving to the next step.
Removing Trim Pieces
Remove trim pieces carefully if possible. This makes wrapping easier and cleaner. Use the right tools to avoid breaking clips or scratching surfaces. Label each piece to remember where it goes. Smaller parts are simpler to wrap and reattach later.
Cutting And Measuring Vinyl Wrap
Cutting and measuring vinyl wrap is a key step in wrapping interior trim. It ensures the wrap fits perfectly and looks smooth. Careful measuring and cutting prevent waste and mistakes. Taking time here makes the whole process easier and the results better.
Taking Accurate Measurements
Measure the trim piece carefully using a tape measure. Note the length, width, and any curves or angles. Write down all numbers before cutting. Double-check the measurements to avoid errors. Adding a small extra margin helps during application.
Cutting Techniques
Use a sharp utility knife or vinyl cutter for clean cuts. Cut on a flat surface to keep lines straight. Start with larger pieces, then trim edges as needed. Avoid cutting too close to the edge at first. Smooth cuts prevent peeling and wrinkles later.
Planning For Curves And Edges
Trim edges and curves need special attention. Score the vinyl lightly on bends to help it wrap smoothly. Stretch the vinyl gently over curves, but do not overstretch. Cut small slits if needed to fit tight corners. Careful planning avoids bubbles and wrinkles.
Credit: www.instructables.com
Applying Vinyl Wrap To Trim
Applying vinyl wrap to interior trim gives your car a fresh, custom look. It protects the surface and hides old scratches. The process needs care and patience to get smooth, neat results. Follow these steps to wrap your trim like a pro.
Positioning The Vinyl
Start by cutting the vinyl slightly larger than the trim piece. Peel the backing slowly. Hold the vinyl above the trim. Align it carefully to cover all edges. Avoid touching the sticky side too much. Positioning right the first time saves time later.
Using Heat For Flexibility
Use a heat gun or hairdryer to warm the vinyl. Heat makes the vinyl soft and stretchable. Move the heat source evenly over the vinyl. Do not overheat; keep the temperature moderate. Warm vinyl bends easily around curves and corners.
Smoothing And Stretching
Use a squeegee or soft cloth to smooth the vinyl. Start from the center and push out air bubbles. Stretch gently to fit around curves and edges. Work slowly to prevent wrinkles or tears. Trim extra vinyl with a sharp blade for a clean finish.
Finishing Touches
The finishing touches are key to a clean and professional vinyl wrap job. These steps make sure the wrap fits perfectly and lasts long. Pay close attention to details for the best results.
Trimming Excess Vinyl
Start by trimming extra vinyl with a sharp blade. Cut close to the edges but avoid cutting the trim itself. Use slow, careful movements to prevent mistakes. Small, precise cuts help the wrap look neat.
Sealing Edges
Seal the edges to stop peeling and lifting. Use heat from a heat gun or hairdryer to soften the vinyl edges. Press edges firmly with a squeegee or cloth. This makes the wrap stick well and stay smooth.
Reinstalling Trim Pieces
Put the trim pieces back carefully after wrapping. Check for any loose edges and press them again. Tighten screws or clips to secure the trim. The trim should look like new and fit perfectly.
Credit: www.reddit.com
Maintenance And Care Tips
Keeping your vinyl wrapped interior trim in good shape needs some care. Proper maintenance helps the wrap look fresh and last longer. Follow simple steps to clean, protect, and preserve your vinyl wrap easily.
Cleaning Wrapped Surfaces
Use a soft cloth or sponge to clean the wrap. Mild soap mixed with water works best. Avoid harsh chemicals or abrasive cleaners. Rinse well with clean water to remove soap. Dry with a soft towel to prevent water spots. Clean regularly to stop dirt build-up.
Avoiding Damage
Do not use sharp tools or rough materials on the wrap. Avoid scratching or peeling the edges. Keep away from harsh sunlight for long periods. Avoid smoking inside the car to prevent stains. Be careful when loading objects near the trim. Small damages can spread if not fixed.
Longevity Tips
Park in shaded areas or use sunshades to reduce heat. Wax the wrap with products designed for vinyl. Check the wrap edges often and press them down gently. Fix small bubbles or tears quickly. Regular care keeps the wrap looking new for years.
Frequently Asked Questions
What Materials Are Best For Vinyl Wrapping Interior Trim?
High-quality, air-release vinyl with a matte or gloss finish works best. Choose vinyl designed specifically for automotive interiors to ensure durability and easy application.
How Do I Prepare Interior Trim Before Vinyl Wrapping?
Clean the trim thoroughly with isopropyl alcohol. Remove dust, grease, and old adhesives to ensure the vinyl sticks properly and lasts longer.
Can Vinyl Wrap Be Removed Without Damage?
Yes, vinyl wrap can be safely removed if heated gently. Use a heat gun or warm air to soften the adhesive before peeling it off slowly.
How Long Does Vinyl Wrap Last On Interior Trim?
Properly applied vinyl wrap lasts between 5 to 7 years. Longevity depends on quality vinyl and careful maintenance of the interior surfaces.
Conclusion
Vinyl wrapping interior trim can change your car’s look fast. It protects surfaces and adds style without big costs. Take time to clean and measure well before starting. Use steady hands to apply the vinyl smoothly. Small bubbles or wrinkles?
Smooth them out gently. Practice makes perfect, so don’t rush. With care, your interior will look fresh and neat. Enjoy the new style you created yourself.


