
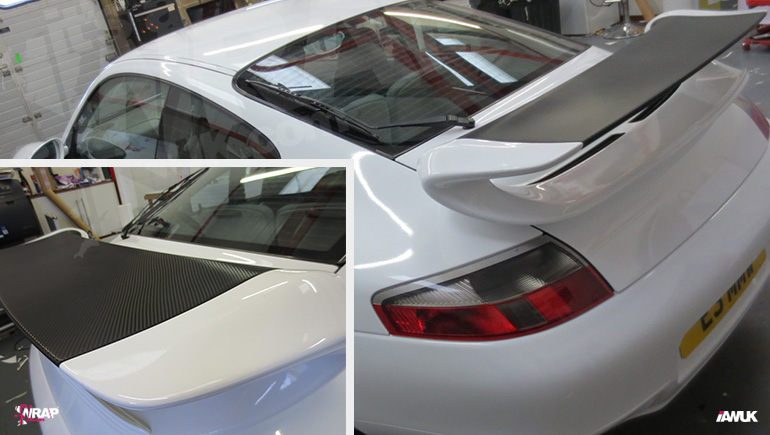
Are you looking to give your car’s spoiler a fresh, stylish look without spending a fortune? Vinyl wrapping your spoiler is a smart way to change its color, protect it from scratches, and make your ride stand out.
But if you’ve never tried it before, the process might seem tricky. Don’t worry—this guide will walk you through each step, making it simple and doable for you. By the end, you’ll know exactly how to vinyl wrap your spoiler like a pro, saving money and turning heads on the road.
Ready to transform your car? Let’s get started!
Credit: www.itsawrapuk.com
Materials Needed
Before starting to vinyl wrap your spoiler, gather all necessary materials. This step saves time and prevents frustration. Having the right vinyl and tools ensures a smooth, professional finish.
Choosing The Right Vinyl
Select vinyl designed for automotive use. It should be flexible and durable. Glossy or matte finishes suit different styles. Pick a color that matches your car’s look. Choose vinyl with air-release technology to avoid bubbles. Quality vinyl lasts longer and resists fading.
Essential Tools
Prepare basic tools for a clean wrap. A heat gun helps stretch and mold the vinyl. Use a squeegee to smooth out air bubbles. A sharp utility knife cuts vinyl precisely. Clean cloths or microfiber towels remove dust before wrapping. Use gloves to avoid fingerprints on the vinyl.
Preparing The Spoiler
Preparing the spoiler is the first and most important step in vinyl wrapping. A clean, smooth surface helps the vinyl stick better and last longer. Take your time to get the spoiler ready. This will make the wrapping process easier and give better results.
Cleaning And Drying
Start by washing the spoiler with soap and water. Remove all dirt, dust, and grease. Use a soft cloth or sponge to avoid scratches. Rinse well with clean water to remove soap. Let the spoiler dry completely. Any water left can cause bubbles under the vinyl.
Removing Old Wrap Or Paint
Check the spoiler for old wrap or peeling paint. Remove any old vinyl carefully using a plastic scraper. For old paint, sand the surface lightly to make it smooth. Clean the dust after sanding with a tack cloth. A smooth surface prevents bumps and wrinkles under the new vinyl.
Measuring And Cutting Vinyl
Measuring and cutting vinyl for your spoiler is a key step. It ensures a clean, smooth wrap without wrinkles or bubbles. Taking precise measurements and cutting the vinyl correctly saves time and materials. It also helps the vinyl fit perfectly around curves and edges.
Taking Accurate Measurements
Start by cleaning the spoiler surface. Use a soft cloth and mild cleaner. Dry the surface well before measuring.
Use a flexible measuring tape. Measure the length and width of the spoiler. Include any curves or edges in your measurements. Write down the numbers clearly. Double-check each measurement to avoid mistakes.
Measure twice to prevent cutting errors. Mark the longest points and the widest parts. This helps cover the whole spoiler with vinyl.
Cutting The Vinyl To Size
Place the vinyl on a flat, clean surface. Smooth out any wrinkles or folds. Use scissors or a sharp craft knife to cut.
Cut the vinyl slightly larger than your measurements. Leave extra material to wrap around edges. This extra vinyl helps with a tight, secure fit.
Cut slowly and carefully. Follow straight lines and curves as needed. Keep the edges clean and smooth to avoid peeling later.

Credit: www.cruxmoto.com
Applying The Vinyl Wrap
Applying the vinyl wrap to your spoiler takes patience and care. This step changes how your car looks. It protects the surface and adds color or texture. Follow these simple actions to get smooth, clean results.
Positioning The Vinyl
Place the vinyl carefully over the spoiler. Start from one edge and align it properly. Make sure the wrap covers all areas you want to change. Avoid stretching the vinyl at this stage. Adjust the position until it fits perfectly.
Smoothing Out Bubbles
Use a soft squeegee or cloth to press the vinyl down. Move from the center outward to push air out. Small bubbles may appear. Gently lift the vinyl if needed and smooth again. This step prevents wrinkles and lifts.
Heating And Stretching
Use a heat gun or hair dryer on low heat. Warm the vinyl slowly to make it flexible. Stretch the vinyl gently over curves and edges. Do not overheat or stretch too much. Let the vinyl cool to keep its shape.
Trimming Excess Vinyl
Trimming excess vinyl is a key step in wrapping a spoiler. It makes the wrap look neat and fits perfectly. Too much vinyl can cause bubbles and wrinkles. Removing the extra vinyl helps the wrap stay smooth and last longer.
Using Precision Tools
Use sharp tools like a craft knife or a vinyl cutter. These tools give clean, straight cuts. Dull blades can tear the vinyl or leave rough edges. Cut slowly and carefully for the best results. Always keep the blade at a low angle to avoid cutting too deep.
Avoiding Damage To The Spoiler
Protect the spoiler surface during trimming. Place a soft cloth or tape under the vinyl edges. This stops the blade from scratching the paint. Do not press too hard with the knife. Small, gentle cuts work better and reduce risk of damage. Take your time to avoid mistakes.
Finishing Touches
Finishing touches make your vinyl wrap look clean and last longer. This step is key to avoid peeling and keep the wrap tight on the spoiler. A smooth finish shows off your hard work and protects the vinyl from damage.
Sealing Edges
Use a heat gun to warm the edges gently. This helps the adhesive bond better to the spoiler. Press the edges down with a squeegee or your fingers. Make sure no air bubbles or wrinkles remain near the edges. Trim any excess vinyl carefully with a sharp blade. Sealing edges well stops water and dirt from getting under the wrap.
Final Inspection
Check the entire spoiler for any loose spots or bubbles. Look closely at the edges and corners. Press down any areas that need extra adhesion. Use a clean cloth to wipe the surface and remove dust. A thorough final inspection ensures a smooth, flawless finish. Your spoiler is now ready to shine.
Common Mistakes To Avoid
Vinyl wrapping a spoiler can change your car’s look quickly and affordably. Mistakes during the process can cause poor results and wasted material. Avoiding common errors helps achieve a smooth, lasting finish.
Careful work and patience are key. Understanding what to avoid improves your chances of success and saves time.
Improper Surface Preparation
Clean the spoiler thoroughly before wrapping. Dirt, dust, or grease stops vinyl from sticking well. Use soap and water first, then wipe with rubbing alcohol.
Skipping this step causes bubbles and peeling later. Make sure the surface is dry and smooth. Check for old wax or polish and remove it completely.
Rushing The Application
Take your time applying the vinyl. Pulling or stretching too hard can distort the material. Smooth the vinyl slowly from the center outward to avoid air pockets.
Heat the vinyl gently with a heat gun for better flexibility. Do not rush or force the vinyl into shape. Patience prevents wrinkles and sharp edges.

Credit: www.youtube.com
Frequently Asked Questions
What Materials Do I Need To Vinyl Wrap A Spoiler?
You need vinyl wrap film, a heat gun, a squeegee, a knife, and cleaning supplies. Quality materials ensure a smooth finish and better adhesion.
How Long Does It Take To Vinyl Wrap A Spoiler?
Vinyl wrapping a spoiler typically takes 1 to 3 hours. Time varies based on experience and spoiler complexity.
Can I Vinyl Wrap My Spoiler Myself?
Yes, with patience and proper tools, you can DIY vinyl wrap your spoiler. Follow step-by-step instructions for best results.
How Do I Prepare A Spoiler Before Vinyl Wrapping?
Clean the spoiler thoroughly and remove dirt, grease, and wax. A smooth, dry surface helps vinyl stick properly.
Conclusion
Vinyl wrapping a spoiler can change your car’s look easily. Take your time and follow each step carefully. Clean the surface well before starting the wrap. Use heat to shape the vinyl around curves. Work slowly to avoid bubbles and wrinkles.
A neat wrap lasts longer and looks better. Practice helps improve your skill and speed. Enjoy your refreshed spoiler and the new style it brings. Keep these tips in mind for a smooth wrapping experience.


