If you drive a Mazda 3, knowing how to change your brake pads and rotors can save you time and money. Imagine stopping safely without worrying about worn brakes or costly repairs.
In this guide, you’ll learn simple steps to replace these parts yourself, even if you’ve never done it before. By the end, you’ll feel confident handling your car’s brakes and keeping your Mazda 3 running smoothly. Ready to take control of your vehicle’s safety?
Let’s get started.
Tools And Materials Needed
Changing brake pads and rotors on a Mazda 3 requires the right tools and materials. Having everything ready makes the job easier and safer. This section covers what you need before starting the work.
Basic Hand Tools
You need a socket set with various sizes to remove bolts. A wrench set helps with tight spots. A flathead screwdriver assists in prying parts gently. A C-clamp or brake caliper tool is essential to compress the caliper piston.
Replacement Parts
New brake pads fit your Mazda 3 model precisely. Rotors must match the size and type for your car. Choose high-quality parts for durability and safety.
Safety Equipment
Wear safety glasses to protect your eyes from dust and debris. Use gloves to keep your hands clean and safe. A jack and jack stands will hold the car securely off the ground.
Additional Supplies
Brake cleaner helps remove dust and grime from parts. A wire brush cleans rust from the rotor surface and caliper bracket. Anti-seize lubricant prevents bolts from sticking in the future.
Preparing The Vehicle
Preparing your Mazda 3 before changing brake pads and rotors is essential. Proper preparation ensures a smooth and safe repair process. Take your time to set up the vehicle correctly.
This step helps avoid accidents and damage to your car parts. Follow the instructions carefully to prepare your car for the brake job.
Safety Precautions
Start by parking your Mazda 3 on a flat surface. Engage the parking brake firmly to stop the car from moving. Wear safety gloves and glasses to protect your hands and eyes. Use wheel chocks on the opposite wheels to secure the vehicle. Double-check that the engine is off and the keys are removed from the ignition.
Lifting The Car
Locate the jacking points under your Mazda 3. Use a hydraulic jack to lift the car slowly. Raise it just enough to remove the wheel safely. Place jack stands under the car for extra support. Never rely on the jack alone to hold the car up. Lower the car gently onto the jack stands for stability.
Removing The Wheel
Loosen the lug nuts with a wrench before lifting the car. Once lifted, remove the lug nuts completely. Pull the wheel straight off the hub. Place the wheel aside safely where it won’t roll away. Inspect the wheel and brake area for any obvious damage or dirt before continuing.
Removing Old Brake Pads And Rotors
Removing old brake pads and rotors is the first step in brake maintenance for your Mazda 3. This task helps keep your car safe and stops wear on new parts. You need to work carefully and follow the right steps. This guide will help you remove the brake parts with ease.
Accessing The Brake Assembly
Start by parking your Mazda 3 on a flat surface. Use a jack to lift the car and secure it with stands. Remove the wheel with a lug wrench. This gives you access to the brake assembly where the pads and rotors sit.
Removing Brake Caliper
Locate the brake caliper attached to the rotor. Use a socket wrench to remove the bolts holding the caliper. Carefully slide the caliper off the rotor. Support the caliper with a hanger or rope to avoid stress on the brake line.
Taking Out Old Brake Pads
Once the caliper is off, pull out the old brake pads. They usually sit in the caliper bracket. Check the pads for wear before removal. Use a screwdriver if needed to pry them out gently. Avoid damaging the bracket or other parts.
Removing The Rotor
After removing the pads, the rotor is free to come off. Sometimes, the rotor may stick due to rust. Tap the rotor gently with a rubber mallet to loosen it. Pull the rotor straight off the wheel hub. Clean the area before installing new parts.

Credit: www.youtube.com
Installing New Rotors
Installing new rotors on your Mazda 3 is a key step in brake maintenance. Proper installation ensures smooth braking and longer part life. Follow each step carefully for best results.
Cleaning The Hub
Start by cleaning the hub surface. Use a wire brush or sandpaper to remove rust and dirt. A clean hub helps the rotor sit flat and prevents wobbling. Wipe the area with a clean cloth after scrubbing. This step is crucial for proper rotor alignment and safety.
Positioning The New Rotor
Place the new rotor onto the hub carefully. Align the holes on the rotor with the lug studs. Push the rotor firmly against the hub surface. Make sure it sits flush and does not move. Proper positioning avoids brake noise and uneven wear.
Installing New Brake Pads
Installing new brake pads on your Mazda 3 is a key step in brake maintenance. Proper installation ensures safe driving and good brake performance. This section guides you through the process of applying brake grease, inserting new pads, and compressing the caliper piston.
Applying Brake Grease
Start by applying brake grease to the back of the new brake pads. This reduces noise and vibration during braking. Use a small amount and spread it evenly. Avoid getting grease on the pad surface or rotor. Clean areas first to ensure good contact and smooth operation.
Inserting New Pads
Place the new brake pads into the caliper bracket. Make sure they fit snugly and align with the rotor. The friction material should face the rotor. Press the pads firmly but gently into place. Check that they are secure and do not move around.
Compressing The Caliper Piston
Use a brake caliper tool or C-clamp to push the piston back into its housing. This creates space for the new, thicker brake pads. Turn the tool slowly and watch the piston move. Stop when the piston is fully retracted. This step is crucial for proper pad fit and brake function.
Reassembling The Brake System
Reassembling the brake system on your Mazda 3 is a key step after changing the brake pads and rotors. This process ensures your brakes work safely and effectively. Take your time and follow each step carefully.
Reattaching The Caliper
Start by placing the caliper back over the new brake pads and rotor. Make sure the pads sit correctly on the rotor. Gently slide the caliper into position. Avoid forcing it to prevent damage. Align the caliper with the mounting bracket. This alignment is crucial for smooth brake operation.
Securing All Bolts
Use the correct size wrench or socket to tighten the caliper bolts. Tighten bolts evenly and firmly to avoid looseness. Check the vehicle’s manual for the exact torque specifications. Proper torque ensures safety and prevents brake noise. Double-check all bolts before moving on. Loose bolts can cause brake failure and accidents.
Finishing Up
After replacing the brake pads and rotors on your Mazda 3, the final steps are crucial. These actions ensure everything is safe and ready for the road. Take your time to complete each step carefully.
Reinstalling The Wheel
Place the wheel back onto the hub. Align the holes and slide the lug nuts onto the bolts. Tighten the lug nuts by hand first. This keeps the wheel in place. Use a wrench to snug them up in a star pattern. Do not fully tighten the lug nuts until the car is lowered.
Lowering The Vehicle
Slowly lower the Mazda 3 using the jack. Make sure the car sits firmly on the ground. Remove the jack and any blocks under the car. Now, use a torque wrench to tighten the lug nuts fully. Follow the recommended torque setting in the manual. Tightening in a star pattern ensures even pressure.
Testing The Brakes
Press the brake pedal several times before driving. This sets the brake pads against the rotors. Start the car and drive slowly in a safe area. Test the brakes by pressing gently and then harder. Listen for unusual noises and feel for smooth braking. If everything feels right, your brake job is complete.

Credit: www.reddit.com
Tips For Maintenance And Safety
Changing brake pads and rotors on your Mazda 3 needs care and attention. Proper maintenance and safety tips help protect you and your car. These simple steps keep brakes working well and last longer.
Safe handling and regular checks make the job easier and safer. Follow these tips to avoid mistakes and ensure smooth brake performance.
Wear Protective Gear
Always wear gloves and safety glasses. Brake dust can harm your skin and eyes. A mask can protect your lungs from dust particles. Safety first keeps you safe from injuries.
Use The Right Tools
Choose tools designed for brake work. Using proper tools avoids damage to parts. It also helps complete the job faster and correctly.
Secure The Vehicle
Park on a flat surface and use wheel chocks. Always apply the parking brake. Use jack stands to support the car, never rely on just the jack. This prevents accidents while you work.
Clean Brake Parts Thoroughly
Remove dust and debris from rotors and pads. Clean parts help brakes work better and reduce noise. Use brake cleaner spray for safe cleaning.
Check Brake Fluid Level
Low brake fluid can cause poor brake response. Check the fluid level before and after replacing parts. Top off with the correct type if needed.
Test Brakes After Installation
Press the brake pedal several times to set the pads. Test brakes at low speed in a safe area. Confirm brakes respond smoothly and quietly before driving normally.

Credit: mazdashop.ca
Frequently Asked Questions
How Often Should I Change Mazda 3 Brake Pads?
Brake pads typically need replacement every 30,000 to 70,000 miles. Inspect them regularly for wear and noise. Replace sooner if you notice squeaking or reduced braking performance.
Can I Replace Brake Rotors And Pads Myself?
Yes, if you have basic tools and mechanical skills. Follow safety precautions and a step-by-step guide specific to the Mazda 3. If unsure, consult a professional mechanic.
What Tools Are Needed To Change Brake Pads And Rotors?
You’ll need a jack, lug wrench, socket set, C-clamp, and brake cleaner. Also, have new brake pads, rotors, and possibly brake grease on hand.
How To Know If Mazda 3 Rotors Need Replacement?
Signs include vibration when braking, deep grooves, or excessive rust on rotors. If rotors are below minimum thickness, replace them to ensure safety.
Conclusion
Changing brake pads and rotors on your Mazda 3 is simple with the right steps. Take your time and follow each part carefully. Check your work before driving to stay safe. Regular brake care helps your car stop well and lasts longer.
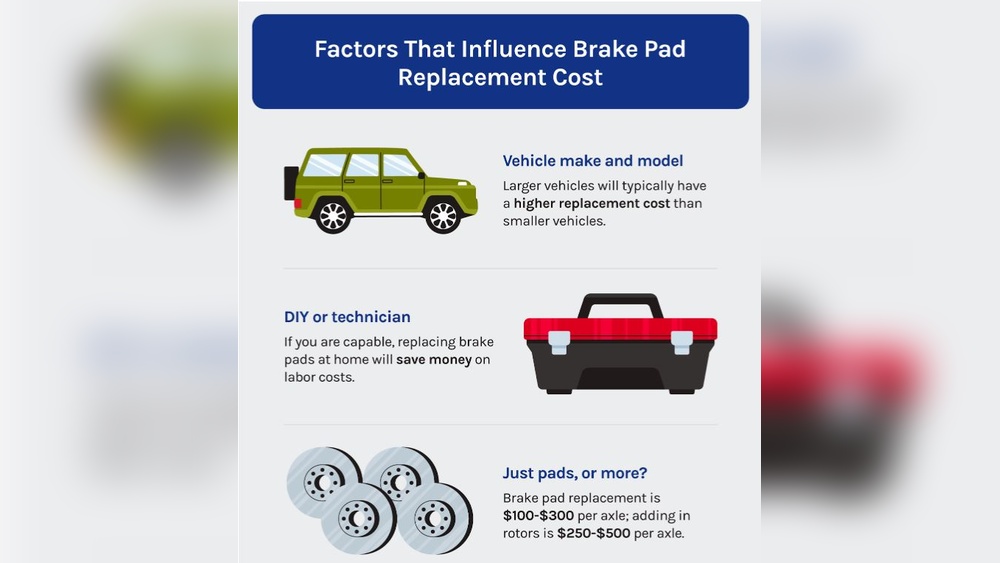
You can save money by doing this yourself. Keep your Mazda 3 running smooth and safe on the road. Don’t rush; safety matters most. Now, you know how to handle this job with confidence.