If you’ve noticed squeaking brakes or a longer stopping distance, it might be time to replace your rear brake pads and rotors. Doing this yourself can save you money and give you confidence in your car’s safety.
In this guide, you’ll learn simple, step-by-step instructions to get the job done right. By the end, you’ll know exactly how to restore your brakes for a smoother, safer ride. Ready to take control of your car’s maintenance? Let’s dive in.
Tools And Materials Needed
Replacing rear brake pads and rotors requires the right tools and materials. Having everything ready makes the job easier and safer. This section lists the key items needed for a smooth brake replacement.
Essential Tools
You need a jack and jack stands to lift and secure the car. A lug wrench helps remove the wheel nuts. A socket set with ratchets fits bolts and screws. A C-clamp or brake caliper tool pushes the brake piston back. A flathead screwdriver assists in removing clips and retaining springs. A torque wrench ensures bolts are tightened to the correct level.
Brake Pads And Rotors
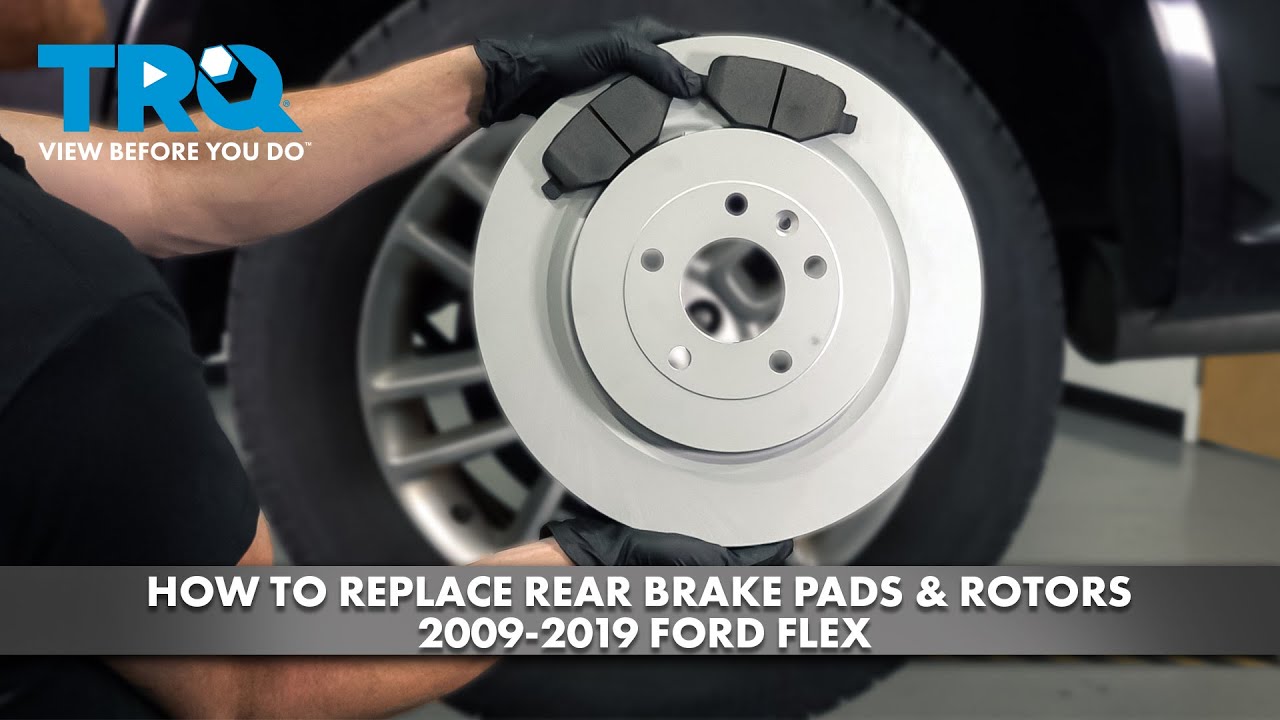
Purchase brake pads and rotors that match your vehicle model. Quality parts improve braking performance and last longer. Some kits include both pads and rotors for convenience. Check the specifications to avoid compatibility issues. Always replace brake pads and rotors in pairs on the same axle.
Safety Equipment
Wear safety glasses to protect your eyes from dust and debris. Use gloves to keep your hands clean and safe from sharp edges. A dust mask helps prevent inhalation of brake dust. Work in a well-ventilated area to avoid fumes. Have a fire extinguisher nearby for emergencies.
Preparing Your Vehicle
Preparing your vehicle is the first step to replace rear brake pads and rotors. It helps ensure safety and makes the job easier. Follow clear steps to get your car ready before starting work.
Parking And Securing
Park your car on a flat, solid surface. Avoid soft ground or slopes. Use the parking brake to stop the car from moving. Place wheel chocks in front of the front wheels. This stops the car from rolling. Turn off the engine and remove the keys. Safety first.
Removing The Wheel
Loosen the lug nuts slightly before lifting the car. Use a jack to raise the rear of the vehicle. Secure the car with jack stands under the frame. Never work under a car only supported by a jack. Remove the lug nuts completely. Take off the wheel and set it aside safely.
Removing Old Brake Components
Removing old brake components is the first step to replace rear brake pads and rotors. This process requires care and the right tools. Each part must come off cleanly to install new parts safely. Follow these steps to remove the old brake parts efficiently.
Accessing The Brake Caliper
Start by lifting the vehicle and removing the wheel. This exposes the brake caliper. Check for any clips or covers that block access. Use a wrench to loosen the caliper bolts. Keep the tools ready for the next steps.
Removing The Caliper
Once bolts are loose, carefully pull the caliper away from the rotor. Do not let it hang by the brake hose. Use a wire or a hook to hang the caliper on the suspension. This prevents damage to the brake line.
Taking Out Old Brake Pads
Look inside the caliper bracket to find the brake pads. Slide the old pads out gently. Sometimes, pads stick due to rust or grime. Use a screwdriver to pry them free, but avoid damaging the caliper.
Removing The Rotor
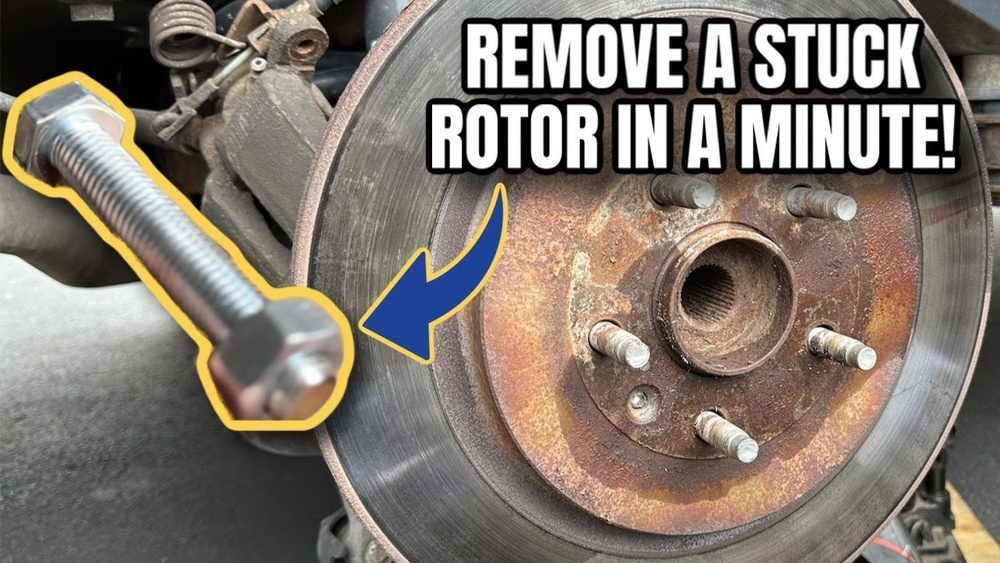
The rotor sits behind the brake pads. Check for retaining screws or clips on the rotor surface. Remove these with a screwdriver. If the rotor is stuck, tap it lightly with a rubber mallet. Pull the rotor straight off the hub once loose.

Credit: www.2carpros.com
Installing New Brake Parts
Installing new brake parts is a key step in replacing rear brake pads and rotors. Proper installation ensures your brakes work safely and smoothly. Follow each step carefully to avoid mistakes and keep your vehicle in good shape.
Cleaning The Hub
Start by cleaning the hub surface. Remove rust and dirt with a wire brush. A clean hub helps the rotor sit flat. This prevents noise and uneven wear.
Placing The New Rotor
Place the new rotor on the hub carefully. Align the holes for the wheel bolts. Make sure the rotor fits snugly and does not wobble. Tighten the rotor if needed to hold it in place.
Inserting New Brake Pads
Next, insert the new brake pads into the caliper bracket. Check that the pads fit well and move easily. Use brake grease on the back of the pads to reduce noise. Do not get grease on the pad surface.
Reattaching The Caliper
Finally, put the caliper back over the new pads and rotor. Slide it carefully to avoid damaging the pads. Tighten the caliper bolts to the correct torque. Check that everything is secure before moving on.
Finishing Up
After installing the new rear brake pads and rotors, the final steps ensure safety and proper function. These steps complete the job and prepare your vehicle for the road. Follow each carefully to avoid issues and confirm the brakes work well.
Reinstalling The Wheel
Place the wheel back on the hub carefully. Align the holes with the wheel studs. Hand-tighten the lug nuts in a star pattern. This prevents the wheel from sitting unevenly. Use a wrench to snug the nuts, but do not fully tighten yet.
Lowering The Vehicle
Slowly lower the car using the jack. Make sure the vehicle sits firmly on the ground. Remove the jack and stands safely. Now, tighten the lug nuts fully with a torque wrench. Follow the vehicle’s manual for the correct torque setting.
Testing The Brakes
Before driving, press the brake pedal several times. This helps the pads settle against the rotors. Listen for any unusual noises or vibrations. Drive slowly at first and test the brakes gently. Confirm the brakes respond smoothly and stop the car safely.

Credit: www.youtube.com
Tips For Brake Maintenance
Proper brake maintenance keeps your car safe and stops it well. It helps your brakes last longer and work better. Simple steps can avoid costly repairs and accidents.
Follow these tips after you replace your rear brake pads and rotors. They help you keep brakes in good shape and improve your driving experience.
Brake Bed-in Process
New brake pads and rotors need time to work well together. Drive slowly and gently press the brake pedal several times. This helps the pads and rotors match perfectly. Avoid hard stops for the first 200 miles. This step improves brake performance and reduces noise.
Regular Inspections
Check your brakes often for any problems. Look at the brake pads, rotors, and brake fluid level. Listen for unusual sounds like squealing or grinding. Regular checks catch issues early and keep brakes working safely. Use a flashlight to see brake parts clearly.
Signs Of Wear
Watch for signs that brakes need attention. Thin brake pads mean it is time to replace them. Vibrations or pulsing when braking can signal warped rotors. A soft or spongy brake pedal may show air in brake lines. Address these signs quickly to avoid brake failure.
Credit: www.amazon.com
Frequently Asked Questions
How Often Should Rear Brake Pads Be Replaced?
Rear brake pads typically need replacement every 30,000 to 70,000 miles. However, this varies based on driving habits and conditions. Regular inspection helps ensure safety and optimal brake performance.
What Tools Are Needed To Replace Brake Pads And Rotors?
You will need a jack, lug wrench, C-clamp, socket set, brake cleaner, and new pads and rotors. Having a torque wrench and gloves enhances safety and efficiency during the replacement process.
Can I Replace Rear Brake Pads And Rotors Myself?
Yes, if you have basic mechanical skills and tools, you can replace them yourself. Follow a step-by-step guide carefully to ensure proper installation and brake safety.
How Do I Know When Rear Rotors Need Replacing?
Rotors need replacement if they are warped, cracked, or below minimum thickness. Uneven brake wear and vibrations during braking are signs rotors should be checked.
Conclusion
Replacing rear brake pads and rotors helps keep your car safe. You save money by doing it yourself. Follow each step carefully and take your time. Check your work before driving. Clean parts and use the right tools for best results.
Regular brake maintenance stops bigger problems later. Stay patient and ask for help if needed. Your brakes will work better and last longer. Keep your car ready for the road. Safety first, always.