

Are you ready to give your outdoor posts a fresh, stylish look with vinyl wraps? Cutting vinyl post wrap might seem tricky at first, but with the right steps, you can do it quickly and neatly.
Imagine a clean, professional finish that makes your posts stand out—without spending a fortune or hiring a pro. In this guide, you’ll learn exactly how to cut vinyl post wrap with ease, so your project looks flawless from start to finish.
Keep reading, and you’ll discover simple tips that save time and avoid common mistakes. Your posts deserve to look their best, and you’re just a few steps away from making that happen!
Tools Needed
Cutting vinyl post wrap requires the right tools. Using proper tools ensures clean cuts and a smooth finish. It also saves time and reduces mistakes. Below are the key tools needed for this task.
Essential Cutting Tools
A sharp utility knife is the most important tool. It cuts through vinyl smoothly. A pair of heavy-duty scissors helps trim edges. A straight edge or metal ruler guides straight cuts. These tools work together for precise results.
Measuring Instruments
Accurate measurements are vital. A tape measure helps get the exact length of vinyl needed. A pencil or chalk marks cutting lines on the vinyl. This prevents cutting errors and waste.
Safety Gear
Safety is key while cutting vinyl. Wear gloves to protect your hands from sharp tools. Safety glasses shield your eyes from small vinyl pieces. These simple items keep you safe during the work.
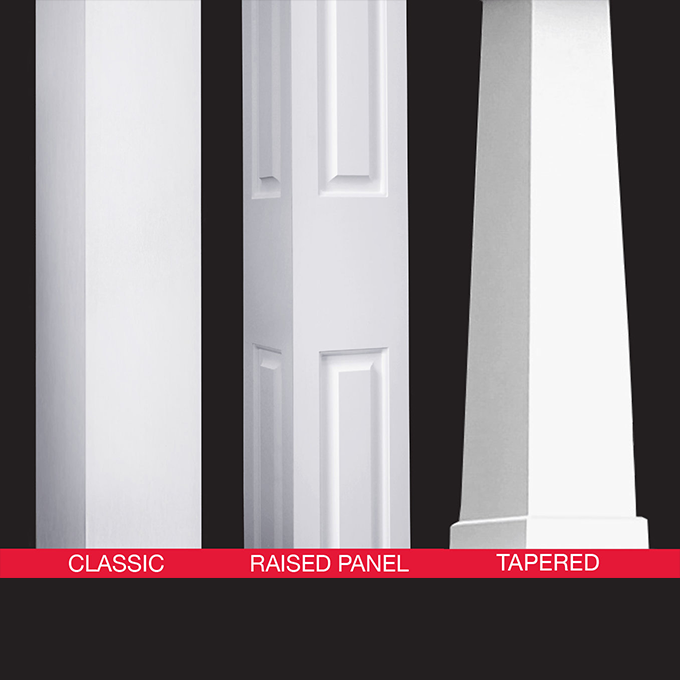
Credit: versatex.com
Preparing The Post
Preparing the post is the first step to cut vinyl post wrap correctly. This step helps the wrap stick well and look neat. Take time to prepare the surface carefully. It makes the whole process easier and lasts longer.
Cleaning The Surface
Start by cleaning the post surface. Remove dirt, dust, and grease. Use soap and water or a mild cleaner. Wipe the post with a clean cloth. Let it dry completely before moving on. A clean surface helps the vinyl wrap stick better.
Measuring The Post Dimensions
Measure the post carefully. Measure the height and all sides. Use a tape measure for accuracy. Write down the numbers to avoid mistakes. Add a little extra length for trimming. Proper measurements ensure a perfect fit for the wrap.
Measuring And Marking
Measuring and marking are the first steps to cut vinyl post wrap correctly. These steps help avoid mistakes and save materials. Careful measurement ensures the wrap fits the post perfectly. Clear markings guide the cutting process for smooth edges.
Accurate Measurement Techniques
Start by measuring the post’s height and width precisely. Use a metal tape measure for better accuracy. Measure twice to confirm the size. Write down the numbers to avoid forgetting them. For round posts, measure the circumference instead of width.
Keep the tape straight and tight against the post. Avoid bending or twisting the tape measure. Note any unique shapes or angles on the post. These details affect how you cut the vinyl wrap. Small errors in measurement can cause big fitting problems.
Marking Cut Lines Clearly
Use a pencil or chalk to mark the cut lines. Light marks help avoid visible stains on the vinyl. Draw straight lines using a ruler or a straight edge. Mark both the length and width clearly on the vinyl sheet. Double-check the marks before cutting.
Label each piece if you cut multiple sections. This avoids confusion during installation. Clear marks speed up the cutting process. They ensure each piece fits the post without gaps or overlaps.
Cutting Techniques
Cutting vinyl post wrap requires careful techniques to get clean and precise edges. The right cutting method helps the vinyl fit perfectly on posts. Different shapes need different cutting styles. The main cutting techniques include straight cuts and curved or detailed cuts. Each technique uses special tools and steps to ensure a smooth finish.
Straight Cuts
Straight cuts are the simplest type of cut. Use a sharp utility knife or a vinyl cutter for best results. Measure the length needed and mark it clearly on the vinyl. Place the vinyl on a flat surface for stability. Cut slowly along the marked line to avoid jagged edges. Use a ruler or straight edge as a guide for accuracy. Make sure the blade is sharp to prevent tearing. This technique works well for edges and corners of posts.
Curved And Detailed Cuts
Curved cuts require a steady hand and the right tools. A pair of sharp scissors or a craft knife works well. Trace the desired curve or shape lightly on the vinyl first. Cut slowly along the lines, turning the vinyl as needed. Small, precise snips help maintain smooth curves. For intricate details, use a craft knife with a fine tip. Keep your hand steady and avoid rushing. This technique is ideal for decorative edges or fitting around post designs.
Achieving A Smooth Edge
Achieving a smooth edge on vinyl post wrap is key for a neat, professional look. Rough edges can cause peeling and reduce the wrap’s lifespan. Taking time to finish the edges properly improves durability. It also makes the post look clean and polished. Two simple methods help create smooth edges: sanding and trimming, and using heat for sealing.
Sanding And Trimming
Start by trimming excess vinyl with a sharp utility knife. Cut slowly and follow the post’s shape closely. Avoid jagged cuts by using a straight edge for guidance.
After trimming, lightly sand the edges with fine-grit sandpaper. Sanding removes small burrs and rough spots. It helps the vinyl lay flat and stick better. Use gentle strokes to prevent damage. Clean the dust off before moving on.
Using Heat For Sealing
Heat softens the vinyl edges, allowing them to seal tightly. Use a heat gun on low setting. Keep the heat source moving to avoid melting or burning.
Apply heat evenly along the trimmed edges. This shrinks the vinyl slightly, sealing the edge. It stops moisture and dirt from entering. Heat sealing also improves the wrap’s grip on the post. Let the vinyl cool before touching it.

Credit: www.amazon.com
Common Mistakes To Avoid
Cutting vinyl post wrap may seem simple, but many make common mistakes. These errors can waste material and cause frustration. Avoiding these mistakes helps achieve a clean, professional look. Keep focus and patience during the process.
Cutting Without Proper Measurement
Not measuring correctly wastes vinyl and time. Always measure twice to be sure. Use a tape measure and mark the vinyl clearly. Cut slowly along the marked lines. Rushing leads to uneven edges and poor fit. Accurate measurement ensures the wrap fits perfectly around posts.
Ignoring Safety Precautions
Handling sharp tools carelessly causes injuries. Always wear gloves to protect your hands. Use a sharp utility knife for smooth cuts. Cut on a stable surface to avoid slips. Keep fingers away from the blade path. Taking safety steps prevents accidents during cutting.
Tips For A Perfect Finish
Achieving a perfect finish when cutting vinyl post wrap requires attention to detail. Small steps can make a big difference in your final look. Clean cuts and smooth edges help the wrap appear neat and professional. Follow simple tips to avoid mistakes and save time.
Maintaining Clean Work Area
Start with a tidy workspace. Dust and dirt can stick to the vinyl and ruin the finish. Clear your table and floor before unrolling the vinyl. Use a soft cloth to wipe surfaces if needed. Keep tools organized and close at hand. This reduces distractions and allows steady cutting. A clean area helps avoid unwanted marks on the vinyl wrap.
Using The Right Adhesive
Select an adhesive made for vinyl wraps. Poor glue may cause peeling or bubbling later. Choose a pressure-sensitive adhesive for easy repositioning. Apply glue evenly for smooth adhesion. Test a small piece first to check stickiness and drying time. Using the right adhesive ensures a strong, lasting bond. This step keeps your wrap looking sharp and secure.

Credit: www.youtube.com
Frequently Asked Questions
How Do You Measure Vinyl Post Wrap Accurately?
Measure the post height and width precisely before cutting. Use a tape measure and mark the vinyl with a pencil. Accurate measurements ensure a snug fit and professional appearance. Double-check your marks to avoid mistakes during cutting or installation.
What Tools Are Needed To Cut Vinyl Post Wrap?
You need a utility knife, measuring tape, straightedge, and marker. A sharp blade ensures clean cuts without tearing the vinyl. A straightedge helps guide the knife for precise lines. These tools make cutting vinyl post wrap easier and more accurate.
Can I Cut Vinyl Post Wrap Without Damaging It?
Yes, use a sharp utility knife and steady hands. Cut slowly along marked lines to avoid jagged edges. Support the vinyl properly to prevent bending or tearing. Taking your time and using the right tools minimizes damage during cutting.
How To Ensure Vinyl Wrap Fits Around Corners Perfectly?
Make precise measurements and score the vinyl gently at corners. Use angled cuts or small notches to allow flexibility. Fold the vinyl carefully around the post corners for a smooth fit. This technique prevents bunching or gaps at edges.
Conclusion
Cutting vinyl post wrap is simple with the right tools and steps. Measure carefully to avoid mistakes. Use a sharp blade for clean, straight cuts. Take your time and work slowly for best results. Proper cutting makes installation easier and looks better.
Practice on scrap pieces to build confidence. This helps you finish your project neatly and quickly. Follow these tips to handle vinyl post wrap like a pro. Your posts will look smooth and well-finished every time.


