
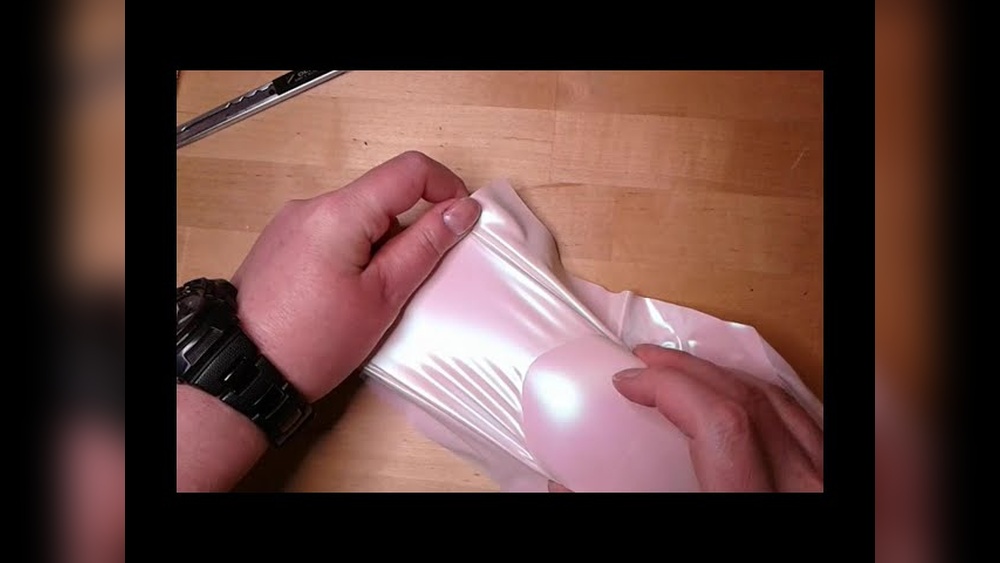
Have you ever tried to vinyl wrap a round object and ended up with bubbles, wrinkles, or uneven edges? You’re not alone.
Wrapping curved surfaces can be tricky, but with the right approach, you can achieve a smooth, professional finish every time. In this guide, you’ll discover simple, practical steps to master vinyl wrapping on round shapes. Whether you’re customizing a helmet, a bottle, or any other curved item, these tips will save you time and frustration.
Ready to transform your projects with flawless vinyl wraps? Keep reading—you’re about to learn how to make it happen.
Choosing The Right Vinyl
Choosing the right vinyl is key for wrapping round objects smoothly. The vinyl must stretch and bend without tearing. It should stick well and keep its look for a long time. Picking the proper vinyl makes the wrapping process easier and the result better.
Types Of Vinyl For Curved Surfaces
Cast vinyl works best for curves and rounded shapes. It stretches evenly and stays strong. Calendared vinyl is thicker and less flexible. It suits flat or slightly curved surfaces. For round objects, cast vinyl offers a smoother finish and less risk of wrinkles.
Selecting The Best Adhesive
Strong adhesive helps vinyl stay in place on round objects. Permanent adhesive provides a lasting bond but can be hard to remove. Removable adhesive allows changes but may peel off early. Choose adhesive based on how long the wrap should last and the object’s material.
Color And Finish Options
Vinyl comes in many colors and finishes. Glossy finishes reflect light and look shiny. Matte finishes reduce glare and hide fingerprints. Satin finishes offer a soft shine. Pick a finish that matches the object’s use and your style preference.

Credit: teckwrap.com
Preparing The Surface
Preparing the surface is the first step in vinyl wrapping round objects. A clean and smooth surface helps the vinyl stick well. It also makes the wrap look neat and last longer. Take your time to prepare the surface carefully. This part is very important for a good result.
Cleaning And Drying
Start by cleaning the object with soap and water. Remove all dirt, dust, and grease. Use a soft cloth or sponge to avoid scratches. After cleaning, dry the surface completely. A dry surface helps the vinyl stick better. Avoid using oily or waxy cleaners.
Removing Old Wrapping Or Paint
Check if there is old vinyl or paint on the object. Remove old vinyl slowly to avoid damage. Use a heat gun or hair dryer to soften the vinyl. Peel off the vinyl carefully. For old paint, sand the surface lightly until smooth. Clean again after removal to clear dust or residue.
Smoothing Imperfections
Look for bumps, scratches, or dents on the surface. Sand rough areas with fine sandpaper to smooth them. Fill deep scratches or holes with a putty or filler. Let it dry and sand again for a flat surface. Smooth surfaces help the vinyl wrap look perfect and last longer.
Tools Needed
Wrapping round objects with vinyl needs the right tools. These tools help you apply the vinyl smoothly and avoid wrinkles or bubbles. Having the correct equipment makes the process easier and gives better results.
Essential Wrapping Tools
Start with a clean surface and a high-quality vinyl roll. A squeegee is necessary to press the vinyl down firmly. Use gloves to avoid fingerprints and dirt on the vinyl. A measuring tape helps to cut the vinyl to the right size.
Heat Guns And Their Role
A heat gun softens the vinyl, making it easier to wrap around curves. It helps the vinyl stretch and fit tightly on round shapes. Use the heat gun carefully to avoid burning the vinyl. Heat also activates the adhesive for better stickiness.
Cutting And Smoothing Accessories
A sharp utility knife or craft blade trims excess vinyl cleanly. Use a cutting mat to protect surfaces during cutting. Soft cloth or felt-edged tools smooth the vinyl without scratching. These tools help finish the wrap neatly and professionally.

Credit: thegirlonabike.com
Techniques For Wrapping Round Objects
Wrapping round objects with vinyl can be tricky but rewarding. The curves and edges need careful attention to avoid bubbles and wrinkles. This section explains key techniques to wrap round shapes smoothly. Follow these steps for a clean and tight finish.
Measuring And Cutting Vinyl
Start by measuring the object’s full circumference and height. Add extra inches for overlap and trimming. Use a ruler or tape measure for accuracy. Cut the vinyl with sharp scissors or a craft knife. Make straight cuts to prevent jagged edges. Precise cutting helps the vinyl fit better around curves.
Applying Heat And Stretching
Heat softens the vinyl, making it easier to stretch. Use a heat gun or hair dryer on low heat. Warm the vinyl evenly without burning it. Gently stretch the vinyl over the object’s surface. Move slowly to avoid tears and bubbles. Heat and stretch help the vinyl conform to curves smoothly.
Handling Seams And Edges
Seams need careful alignment for a seamless look. Overlap edges slightly and press firmly. Use a squeegee to smooth seams and edges. Heat edges to make them pliable and stick better. Trim excess vinyl close to the edge. Clean edges prevent peeling and create a neat finish.
Common Challenges And Solutions
Vinyl wrapping round objects can be tricky. The material needs to stretch and stick perfectly to curved surfaces. Many face problems like wrinkles, bubbles, and fitting tight curves. These issues can spoil the look and waste material. Knowing common challenges helps avoid mistakes. Simple solutions make the process smoother and the result better.
Avoiding Wrinkles And Bubbles
Wrinkles and bubbles happen when the vinyl does not lay flat. Start with a clean, dry surface. Use a heat gun to make the vinyl more flexible. Stretch the vinyl gently over the object. Use a squeegee to press out air pockets. Work slowly from the center outward. Small bubbles can be popped with a pin and smoothed out. Patience keeps the wrap wrinkle-free.
Dealing With Tight Curves
Tight curves can cause the vinyl to fold or crease. Cut small slits or “relief cuts” in the vinyl to help it bend. Use heat to soften the vinyl before stretching it over curves. Pull the vinyl gently but firmly. Avoid overstretching to prevent damage. Work in sections to maintain control. This method helps the vinyl fit snugly and smoothly.
Fixing Mistakes Without Damage
Mistakes happen, but they do not ruin the wrap. Use a heat gun to warm the vinyl. Carefully peel back the area with problems. Smooth the vinyl again before it cools. Avoid pulling too hard to prevent tears. Small wrinkles or bubbles can be fixed by reheating and pressing. This approach saves time and keeps the wrap intact.
Maintenance Tips
Maintaining a vinyl wrap on round objects is simple with the right care. Proper upkeep keeps the wrap looking fresh and lasting longer. Follow these easy steps to protect your investment and enjoy the vibrant look of your wrap.
Cleaning Wrapped Surfaces
Use a soft cloth and mild soap to clean the vinyl. Avoid harsh chemicals or abrasive materials. Gently wipe the surface to remove dirt and dust. Rinse with clean water and dry with a soft towel. Regular cleaning prevents buildup and keeps the wrap shiny.
Protecting The Vinyl Wrap
Keep the wrapped object away from direct sunlight for long periods. UV rays can fade the vinyl color over time. Store the object in a cool, dry place when not in use. Avoid sharp tools or rough handling near the wrap. A clear protective film can add extra defense against scratches.
Repairing Minor Damage
Small scratches or bubbles can happen during use. Use a heat gun to gently warm the vinyl and smooth out bubbles. For tiny scratches, a vinyl repair kit works well. Replace damaged sections only when necessary to keep the wrap intact. Quick repairs prevent damage from spreading.

Credit: www.youtube.com
Frequently Asked Questions
What Tools Do I Need To Vinyl Wrap Round Objects?
You need vinyl wrap film, a squeegee, a heat gun, scissors, and gloves. These tools help you apply the wrap smoothly and avoid bubbles or wrinkles.
How Do I Prepare A Round Object For Vinyl Wrapping?
Clean the surface thoroughly to remove dirt, grease, and dust. Use rubbing alcohol and a lint-free cloth to ensure proper adhesion.
Can Vinyl Wrap Stretch Around Curved Surfaces?
Yes, vinyl wrap has some stretch. Heating the vinyl with a heat gun softens it, allowing it to conform to curves and round shapes.
How Do I Avoid Air Bubbles When Wrapping Round Objects?
Use a squeegee to press the vinyl firmly from the center outward. Heat the vinyl slightly to improve flexibility and reduce trapped air.
Conclusion
Vinyl wrapping round objects takes patience and careful steps. Use the right tools and take your time. Stretch the vinyl gently to avoid wrinkles or bubbles. Small cuts help the vinyl fit curves smoothly. Practice on simple shapes before trying complex ones.
This skill improves with each project you try. Enjoy the process and the fresh look you create. Vinyl wrapping can be a fun and creative task. Keep these tips in mind to get good results.

