Thinking about tackling your brakes and rotors yourself? You might wonder, “How hard can it really be?” Changing brakes and rotors is a job that many car owners consider, but it can feel overwhelming if you’re not sure what to expect.
The good news is, with the right guidance and tools, it’s more doable than you might think. You’ll discover exactly what’s involved, how challenging the process really is, and tips to make it easier. Keep reading—you might just save time, money, and gain confidence in your car skills.

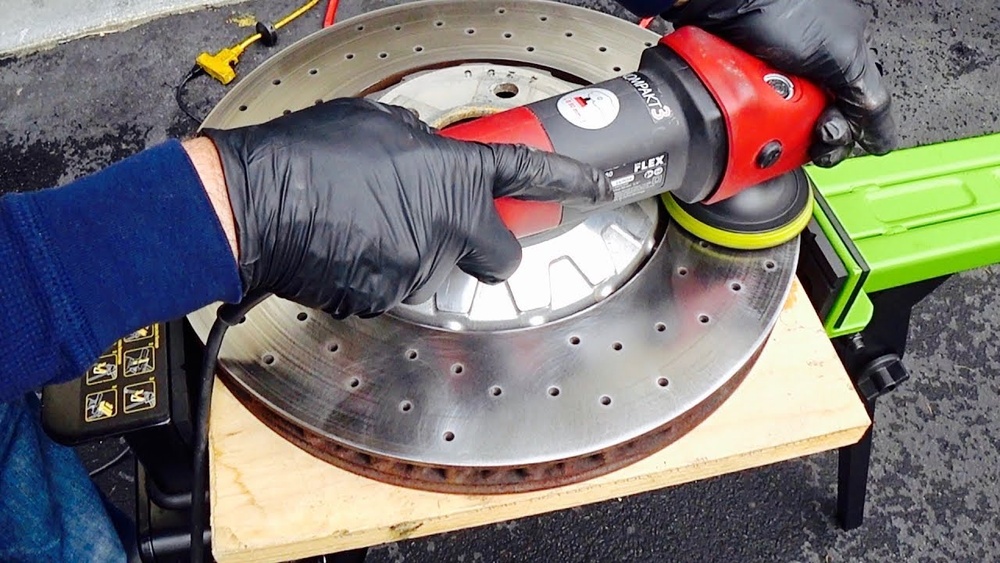
Credit: www.youtube.com
Tools Needed
Replacing brakes and rotors requires the right tools. Having proper tools makes the job easier and safer. Some tools are common in every toolbox. Others are made just for brake work. Safety gear is also very important during this task. This section lists the essential tools needed for brake and rotor replacement.
Basic Hand Tools
Start with basic hand tools. A lug wrench helps remove wheel nuts. A jack and jack stands lift and support the car. Socket sets fit bolts on brakes and rotors. A ratchet speeds up loosening and tightening. Screwdrivers help remove small clips or covers. Pliers can grip or pull small parts. These tools form the foundation for brake work.
Specialized Brake Tools
Some tools are made only for brakes. A brake caliper tool pushes pistons back inside the caliper. A brake bleeder kit helps remove air from brake lines. A rotor puller removes stuck rotors safely. A torque wrench ensures bolts are tightened to the right level. These tools improve accuracy and protect brake parts.
Safety Gear
Safety gear protects you during brake work. Wear safety glasses to shield your eyes from dust and debris. Gloves protect your hands from sharp edges and chemicals. A dust mask stops brake dust from entering your lungs. Good lighting helps you see small parts clearly. Safety gear keeps the work safe and clean.
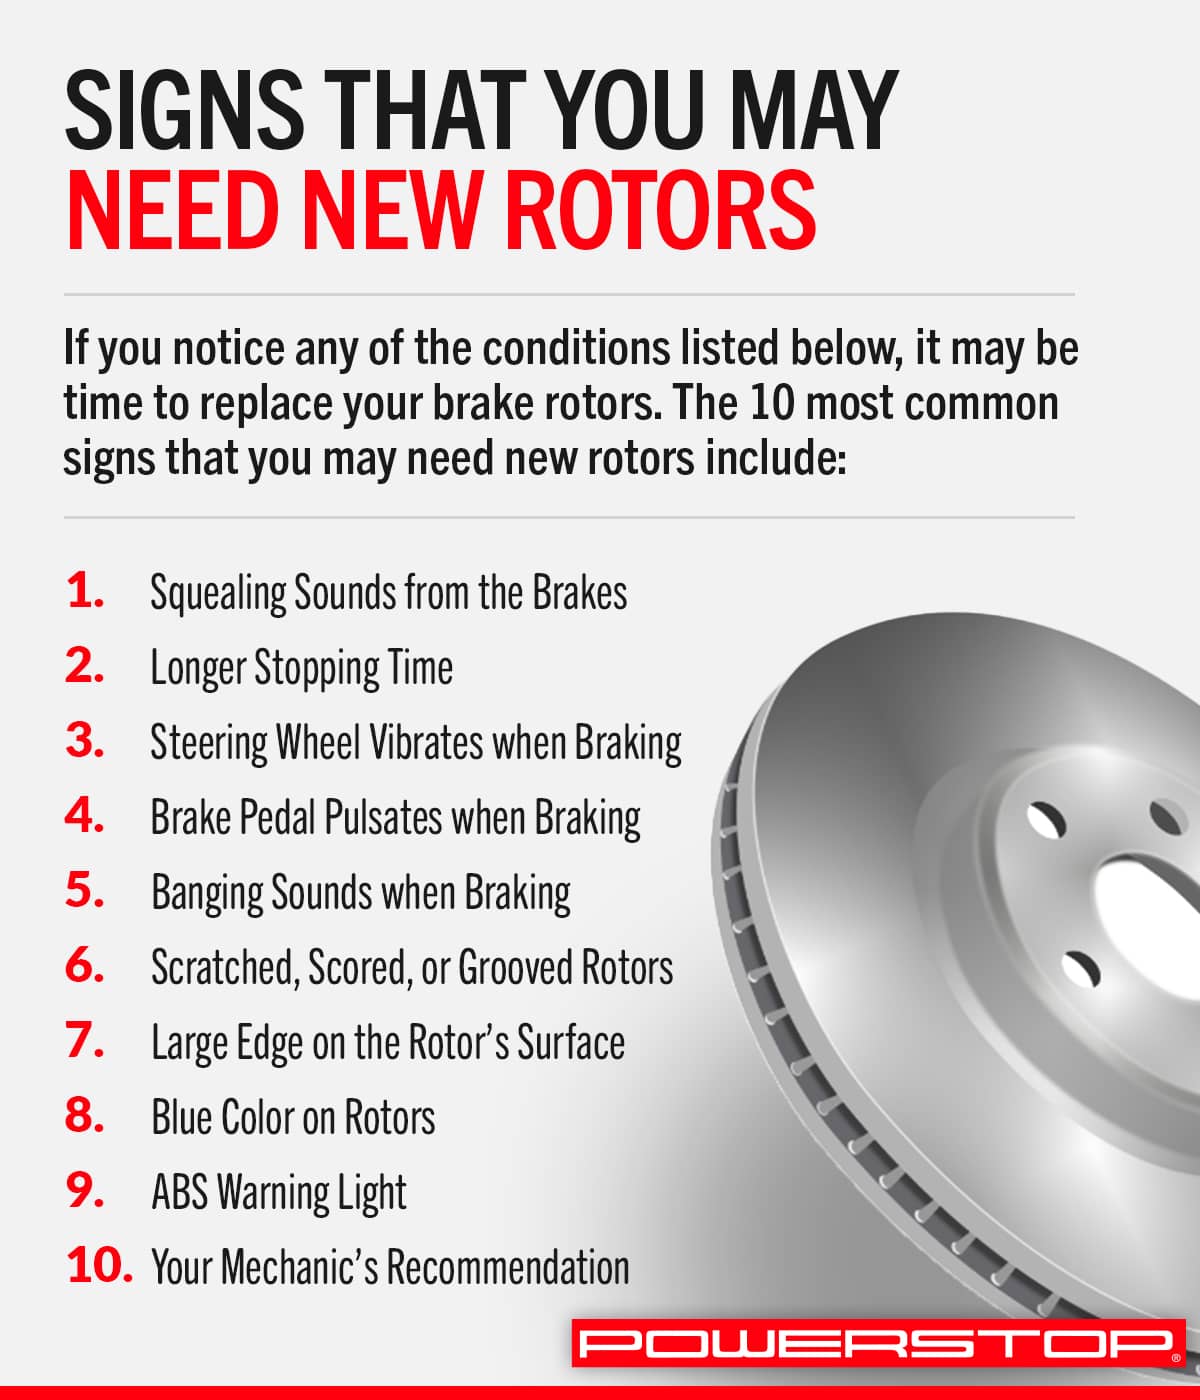
Credit: www.powerstop.com
Preparing Your Vehicle
Preparing your vehicle is the first step in changing brakes and rotors. This process makes the job safer and easier. Proper preparation helps avoid accidents and damage. Follow simple steps to get your car ready.
Lifting And Securing The Car
Start by parking the car on a flat surface. Use wheel chocks to block the wheels that stay on the ground. Find the correct jacking points under your car. Place the jack under these points to lift the vehicle.
Lift the car slowly until the wheel is off the ground. Use jack stands to support the car. Never rely on the jack alone. Make sure the car is stable before working underneath.
Removing The Wheels
Loosen the lug nuts slightly before lifting the car. After lifting, remove the lug nuts completely. Take the wheel off and set it aside carefully. Keep the lug nuts in a safe place.
Check the brake area for dirt or rust. Clean it gently to see all parts clearly. This step helps during the brake and rotor replacement.
Removing Old Brakes And Rotors
Removing old brakes and rotors is a key step in brake repair. This process needs care and the right tools. It ensures the new parts fit well and work safely. The old parts can be stuck or rusty, so patience helps.
Detaching The Brake Caliper
Start by loosening the bolts holding the brake caliper. Use a socket wrench for a firm grip. Carefully slide the caliper off the rotor. Support the caliper with a hanger or rope. Avoid letting it hang by the brake hose. This prevents damage to the hose or brake system.
Taking Off The Rotor
Check for screws or clips holding the rotor in place. Remove these with the right screwdriver. The rotor may be stuck due to rust. Tap gently with a rubber mallet to free it. Pull the rotor straight off the wheel hub. Clean the hub surface before installing the new rotor.

Credit: vatire.com
Inspecting Brake Components
Inspecting brake components is a key step in maintaining vehicle safety. Proper checks help catch problems early. This avoids costly repairs and keeps your brakes working well. Understanding how to inspect brakes makes the process easier and safer.
Checking Brake Pads
Brake pads wear down over time. Thin pads reduce stopping power. Look through the wheel spokes to see the pad thickness. A healthy pad is at least 1/4 inch thick. Replace pads that look thin or cracked. Listen for squealing sounds, a sign of worn pads. Regular checks prevent brake failure and improve safety.
Examining Rotors For Damage
Rotors work with brake pads to stop your car. Check rotors for grooves, cracks, or rust. Smooth surfaces indicate good condition. Deep grooves mean the rotor needs attention. Rust can cause brake noise and reduce performance. Warped rotors cause vibration during braking. Replacing or resurfacing damaged rotors is essential for safe driving.
Installing New Rotors And Pads
Installing new rotors and brake pads is a key part of brake maintenance. It helps your car stop safely and smoothly. This process requires care and attention to detail. Each step affects how well your brakes will work. Understanding these steps makes the job easier and safer.
Cleaning And Preparing Surfaces
Start by cleaning the hub and rotor surfaces. Remove rust and dirt with a wire brush or sandpaper. Clean surfaces help the rotor sit flat and secure. Use brake cleaner spray to remove oil and grease. Dry the parts thoroughly before moving on.
Mounting The Rotor
Place the new rotor on the hub carefully. Align the holes with the wheel studs. Make sure the rotor fits flush against the hub. Avoid forcing the rotor to prevent damage. Secure it lightly with a lug nut to hold it in place.
Installing Brake Pads
Remove the old brake pads from the caliper. Check the caliper for damage or wear. Place the new brake pads into the caliper bracket. Ensure they fit snugly and face the rotor correctly. Compress the caliper piston before reinstalling the caliper. Tighten all bolts to the correct torque. Double-check everything before finishing the job.
Reassembling And Testing
Reassembling and testing brakes and rotors is an important step. It ensures your car stops safely and works well. Taking your time during this process can prevent problems later.
Each part must be put back carefully. Testing confirms everything functions as it should. This section explains key steps in reassembling and testing brakes.
Reattaching Calipers
Start by placing the caliper over the new rotor. Align it carefully with the mounting holes. Insert the bolts and tighten them firmly. Use a torque wrench to match the car’s specs. Loose calipers can cause noise or brake failure.
Bleeding The Brakes
Brake bleeding removes air from the brake lines. Air reduces braking power and causes a soft pedal. Open the bleeder valve on the caliper. Have a helper press the brake pedal slowly. Watch for air bubbles and keep fluid topped up. Close the valve when only clean brake fluid flows out.
Test Driving Tips
Drive slowly in a safe area first. Check how the brakes respond and listen for noises. Press the brake pedal firmly but gently. The car should stop smoothly without pulling to one side. Gradually increase speed and test again. Stop and check the brakes if you feel any vibration or unusual sounds.
Common Challenges
Changing brakes and rotors can be tricky for many people. Several common problems can slow down the process or cause mistakes. Knowing these challenges helps prepare you better for the job.
Stubborn Bolts
Old bolts often get stuck or rusted tight. They need strong tools and good grip to remove. Sometimes, using a penetrating spray helps loosen them. Applying too much force can break the bolt, causing more trouble.
Brake Fluid Issues
Brake fluid leaks or spills are common during brake work. This fluid can harm car paint and parts. It is important to handle it carefully and check the fluid level afterward. Air trapped in the brake lines can cause soft brakes. Bleeding the brakes removes this air and keeps brakes firm.
Proper Torque Settings
Bolts must be tightened with the right force. Too loose bolts can come off while driving. Too tight bolts may damage parts or strip threads. Using a torque wrench ensures bolts are tightened just right. Following manufacturer specs keeps the brakes safe and reliable.
When To Seek Professional Help
Brakes and rotors are vital for safe driving. Some repairs are easy, but others need expert skills. Knowing when to call a professional can save time and money. It also keeps you safe on the road.
Signs Of Brake Problems
Loud noises when braking point to trouble. Squeaking or grinding sounds mean worn parts. A soft or spongy brake pedal shows air or fluid issues. Strange smells during braking can indicate overheating.
Complex Repairs Beyond Basic Replacement
Rotors need precise measurements and adjustments. Warped or deeply scored rotors require special tools. Brake caliper issues often need professional tools and knowledge. Electrical components in brake systems need expert handling.
Safety Risks And Liability
Poor brake repair can cause accidents. Professionals follow safety standards strictly. Mistakes during DIY repairs can lead to brake failure. It’s better to trust trained mechanics for critical tasks.
Time And Equipment Constraints
Brake jobs take time and specific tools. Professionals have the right equipment ready. DIY attempts might lead to delays and extra costs. Mechanics work efficiently to get you back on road quickly.
Frequently Asked Questions
How Difficult Is It To Replace Brakes And Rotors?
Replacing brakes and rotors requires basic mechanical skills and proper tools. It can be moderately challenging for beginners but manageable with clear instructions and safety precautions. Experience with car maintenance helps speed up the process and ensures accurate installation.
What Tools Do I Need For Brake And Rotor Replacement?
You need a jack, lug wrench, socket set, C-clamp, and brake cleaner. A torque wrench and brake grease also help. Having all tools ready before starting makes the job easier and safer.
How Long Does It Take To Change Brakes And Rotors?
Typically, it takes about 1 to 2 hours for one axle. Time varies with experience, vehicle model, and tool availability. Beginners might need extra time to ensure proper installation and safety checks.
Can I Replace Brakes And Rotors Without Professional Help?
Yes, you can if you have basic mechanical knowledge and the right tools. Follow a detailed guide and safety tips carefully. However, if unsure, consulting a professional is safer and ensures quality.
Conclusion
Changing brakes and rotors is not as hard as it seems. With basic tools and patience, many can do it at home. Taking your time helps avoid mistakes and keeps you safe. Always follow instructions and double-check your work. Remember, practice makes the task easier over time.
This job saves money and teaches useful skills. Give yourself space and focus on one step at a time. You might find it more doable than you thought.