Are your bike’s disc brake rotors making noise or not working smoothly? Misaligned rotors can cause annoying squeaks, uneven braking, and even wear down your brake pads faster.
But don’t worry—you can fix this yourself with a few simple steps. In this guide, you’ll learn exactly how to align your disc brake rotors so your brakes feel sharp and reliable every time you ride. Keep reading, and soon you’ll enjoy smoother, safer stops without paying for a mechanic.

Credit: www.youtube.com
Signs Of Misaligned Rotors
Disc brake rotors must be properly aligned for safe riding. Misaligned rotors cause problems that affect braking. Spotting signs early helps fix the issue fast. This section explains how to recognize misaligned rotors clearly.
Common Symptoms
Listen for unusual noises like squeaking or grinding sounds. Feel for vibrations or pulsing in the brake lever or pedal. Notice if the brake lever feels soft or spongy. Watch for uneven wear or scoring on the rotor surface. Check if the rotor rubs against brake pads constantly.
Impact On Braking Performance
Misaligned rotors reduce braking power and increase stopping distance. Brakes may grab suddenly or feel weak and inconsistent. This causes unsafe riding conditions, especially in wet or downhill situations. Poor rotor alignment also wears brake pads faster. Timely adjustment improves safety and brake life.
Credit: worldwidecyclery.com
Tools Needed For Alignment
Aligning disc brake rotors requires the right tools. These tools help make the process smooth and accurate. Using proper equipment ensures safety and better bike performance.
Some tools are essential and must be used. Others are optional but help improve precision. Knowing the difference saves time and effort.
Essential Equipment
- Allen wrenches: Needed to loosen and tighten bolts.
- Torque wrench: Ensures bolts are tightened to the correct force.
- Bike stand: Holds the bike steady during alignment.
- Clean cloth: Used to wipe the rotor and caliper clean.
- Marker or tape: Marks rotor position for reference.
Optional Tools For Precision
- Dial indicator gauge: Measures rotor runout with high accuracy.
- Feeler gauge: Checks the gap between rotor and brake pads.
- Caliper alignment tool: Helps position the brake caliper perfectly.
- Magnifying glass: Inspects rotor edges for small bends.
- Rubber mallet: Gently taps rotor to correct minor bends.
Preparing The Bike For Alignment
Preparing your bike for disc brake rotor alignment is a crucial first step. It helps ensure the brakes work smoothly and safely. Taking time to clean and check parts avoids problems later. Proper preparation makes the alignment process easier and more effective.
Cleaning The Rotors
Start by cleaning the brake rotors carefully. Dirt, oil, and dust reduce braking power. Use a clean cloth with rubbing alcohol or a rotor cleaner. Wipe both sides of the rotor until it shines. Avoid touching the rotor with your bare hands. Clean rotors help the brake pads grip better and stop the bike faster.
Checking Brake Pads
Next, inspect the brake pads for wear or damage. Look for thin or uneven pads. Replace pads that are worn down to less than 3 millimeters. Check for any dirt or debris stuck on the pads. Clean them gently with a soft brush if needed. Healthy brake pads improve stopping power and protect the rotors from damage.
Step-by-step Rotor Alignment
Aligning disc brake rotors is key for smooth and safe braking. Proper alignment stops noise and uneven wear. Follow these simple steps to get your rotors aligned perfectly.
Loosening The Caliper Bolts
Start by loosening the caliper bolts. Use the right size wrench or Allen key. Do not remove the bolts completely. Just loosen them enough to move the caliper.
Centering The Caliper
Next, center the caliper over the rotor. Spin the wheel slowly to check the rotor’s position. Adjust the caliper until it sits evenly on both sides of the rotor. The rotor should not rub the pads.
Tightening Bolts Correctly
Tighten the caliper bolts firmly but gently. Use a torque wrench if possible. This keeps the caliper in place without damage. Check the rotor spin again after tightening. Make sure it moves freely without noise.
Fine-tuning For Optimal Braking
Fine-tuning your disc brake rotors is key to smooth and safe rides. Small adjustments make a big difference in braking power and feel. Proper alignment reduces noise and wear on your brakes.
This step ensures your bike stops exactly when you want it to. It also extends the life of your brake parts. A well-tuned rotor keeps your ride quiet and efficient.
Adjusting Pad Clearance
Pad clearance means the space between the brake pads and the rotor. Too close, and the pads rub constantly. Too far, and braking feels weak or slow.
Loosen the caliper bolts slightly. Squeeze the brake lever to center the caliper over the rotor. Hold the lever and tighten the bolts again. This method sets even pad clearance automatically.
Test the brake lever for proper feel. There should be no rubbing but a firm bite on the rotor.
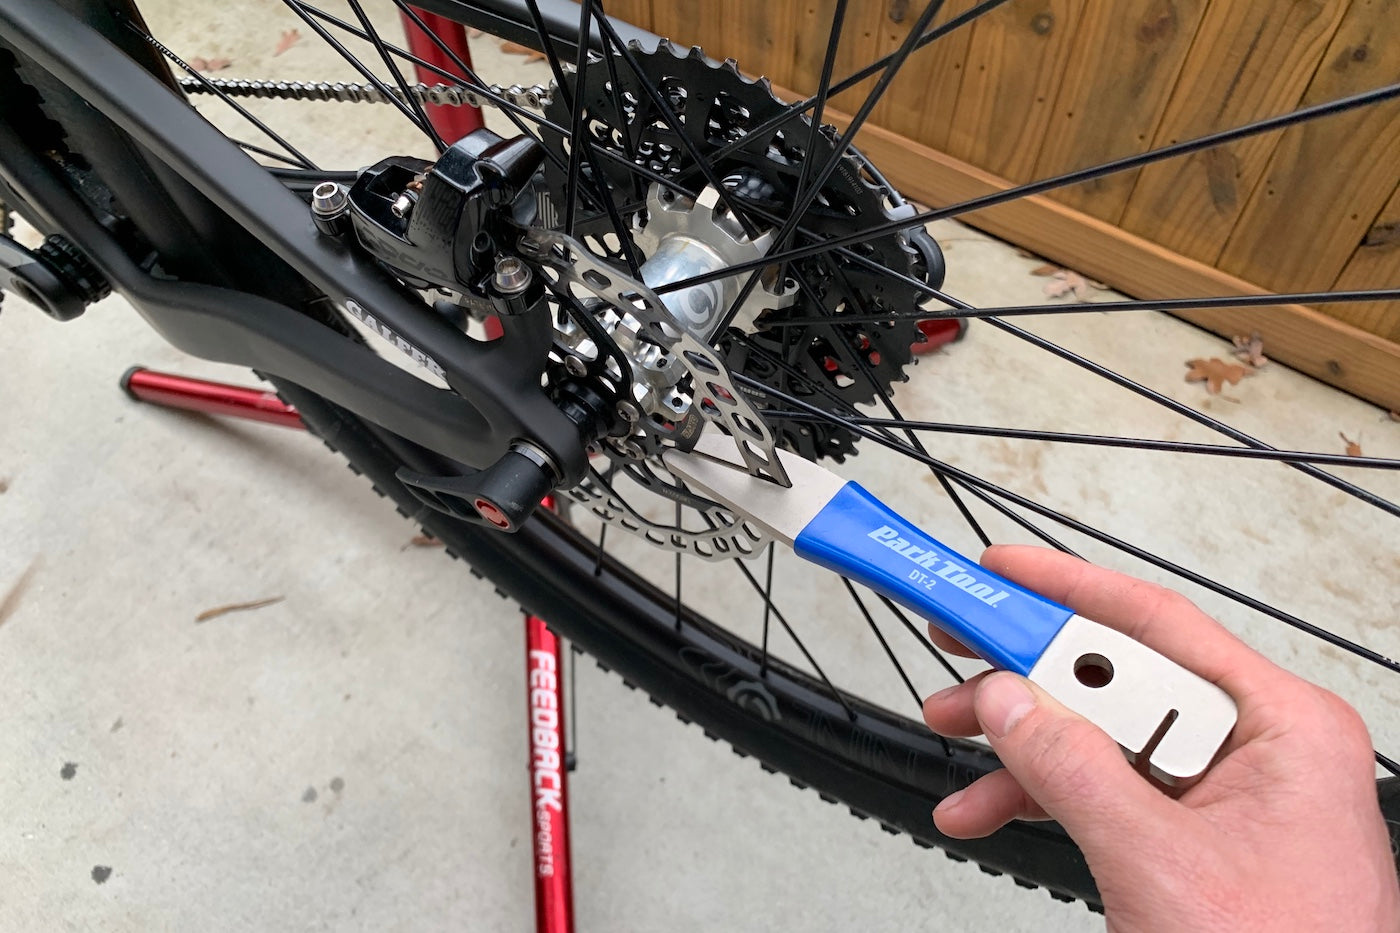
Eliminating Rotor Rub
Rotor rub happens when the rotor touches the pads without braking. It causes noise and wastes energy.
Check if the rotor is bent. Spin the wheel and watch the rotor pass through the caliper. Notice any side-to-side wobble.
Use a rotor truing tool or an adjustable wrench. Gently bend the rotor back to straight. Do this in small steps. Check often to avoid over-bending.
After straightening, re-center the caliper. This stops rubbing and restores smooth braking.

Credit: www.parktool.com
Preventive Maintenance Tips
Preventive maintenance keeps disc brake rotors working smoothly. It stops problems before they start. Small checks and good care save time and money. They also keep rides safe and quiet. Follow these tips to maintain rotor alignment and performance.
Regular Inspections
Check rotors often for wear and damage. Look for cracks, warping, or deep grooves. Spin the wheel and watch rotor movement. It should be even without wobbling. Tighten loose bolts to avoid rotor shifts. Clean rotors to remove dirt and oil. Regular checks catch problems early.
Rotor Care Best Practices
Keep rotors dry and clean after rides. Use a soft cloth and mild cleaner only. Avoid harsh chemicals that can damage metal. Replace brake pads before they wear out. Worn pads can damage rotors quickly. Avoid hard braking to reduce rotor heat. Store the bike in a dry place to prevent rust. Good care extends rotor life and keeps brakes strong.
Frequently Asked Questions
How Do I Know If My Disc Brake Rotor Is Misaligned?
You may hear squeaking or rubbing noises while braking. Uneven brake pad wear or vibrations also indicate rotor misalignment. Visual inspection can reveal rotor wobble or uneven gaps.
What Tools Are Needed To Align Disc Brake Rotors?
Basic tools include a hex wrench, torque wrench, and a rotor truing tool. A bike stand helps for stability. These tools assist in precise adjustments and alignment.
Can I Align Disc Brake Rotors Myself At Home?
Yes, with proper tools and guidance, you can align rotors at home. Follow step-by-step instructions carefully to avoid damage. Regular maintenance improves brake performance and safety.
How Often Should I Check Disc Brake Rotor Alignment?
Check rotor alignment every 3 to 6 months, or after rough rides. Frequent inspection prevents brake noise and improves braking efficiency. Prompt adjustments extend rotor and pad life.
Conclusion
Properly aligned disc brake rotors improve bike safety and performance. Small adjustments can stop rubbing and noise issues quickly. Regular checks keep brakes working smoothly over time. Take your time and follow each step carefully. This helps avoid costly repairs and keeps rides comfortable.
Practice makes perfect—soon, alignment will feel easy. Keep your bike in top shape and enjoy every ride.