
Are you looking to give your table a fresh, stylish look without spending a fortune? Applying a vinyl wrap on your table is a simple and effective way to transform its appearance instantly.
Whether you want to hide scratches, update the design, or protect the surface, vinyl wrapping lets you do it all with just a few easy steps. In this guide, you’ll discover exactly how to apply vinyl wrap on your table like a pro—no experience needed.
Keep reading, and you’ll learn the secrets to a smooth, bubble-free finish that will make your table stand out.
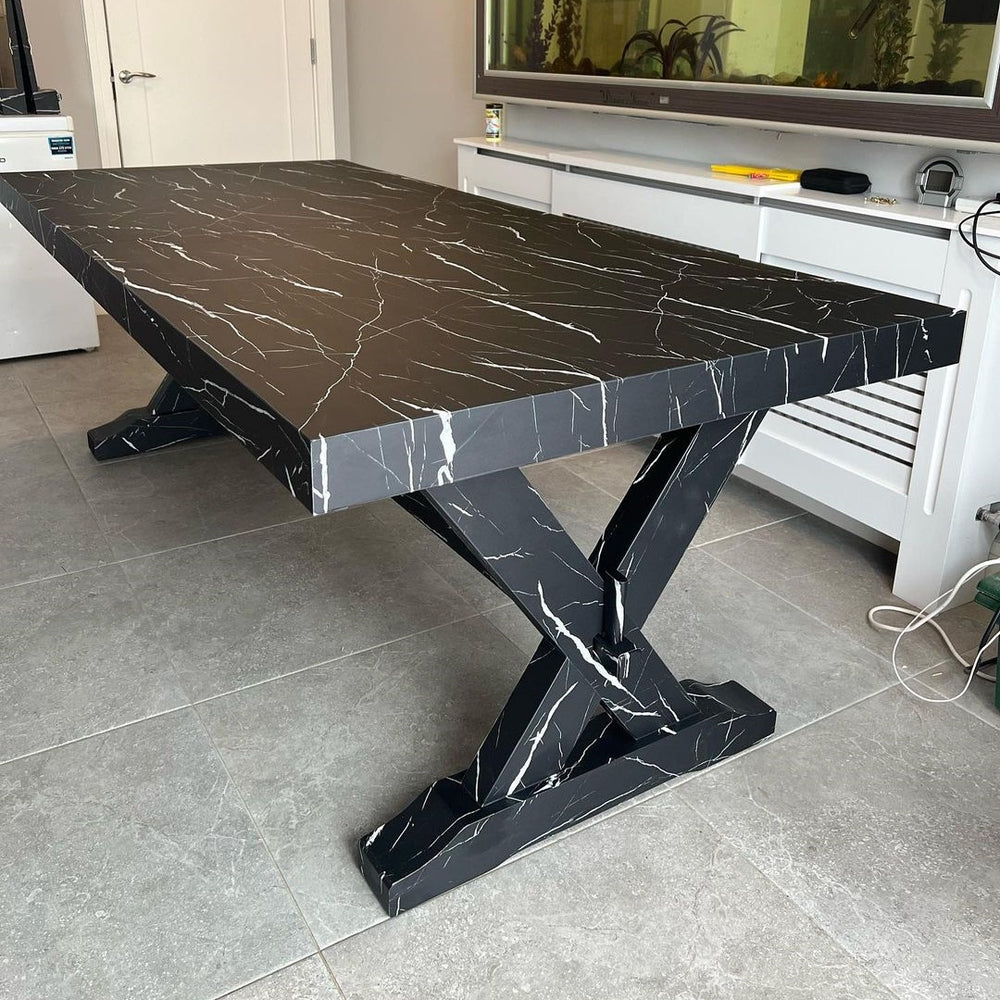
Credit: layed.com
Preparing The Table Surface
Preparing the table surface is the first step to a perfect vinyl wrap. A clean, smooth, and even surface helps the vinyl stick well. It also prevents bubbles and wrinkles. Taking time here saves effort later.
Cleaning And Drying
Start by removing dust and dirt with a soft cloth. Use a mild soap and water mix to clean the table. Avoid harsh chemicals that can damage the surface. After cleaning, dry the table completely. Moisture can stop the vinyl from sticking properly.
Sanding For Smoothness
Lightly sand the table to create a smooth surface. Use fine-grit sandpaper for this step. Sanding removes any shiny finish that can block adhesion. Wipe away dust with a dry cloth after sanding. A smooth surface helps the vinyl lay flat and stick better.
Repairing Imperfections
Check for scratches, dents, or holes on the table. Fill small holes or cracks with wood filler or putty. Let the filler dry fully before sanding it smooth. Fixing these flaws prevents bumps under the vinyl. The result looks cleaner and more professional.
Choosing The Right Vinyl Wrap
Choosing the right vinyl wrap for your table is important for a great finish. It affects how the wrap looks and lasts. Picking the correct type, size, and design makes the process easier. This guide helps you select the best vinyl wrap for your table project.
Types Of Vinyl Wraps
Vinyl wraps come in many types. Glossy wraps give a shiny and smooth surface. Matte wraps offer a flat, non-reflective look. Textured wraps can feel like wood or metal. Each type changes the table’s style and feel. Choose a type that fits your room and use.
Measuring For Accuracy
Measure your table carefully before buying vinyl. Use a tape measure to get length and width. Note any edges or curves. Add a little extra to cover mistakes or overlap. Accurate measurement saves money and prevents gaps or bubbles.
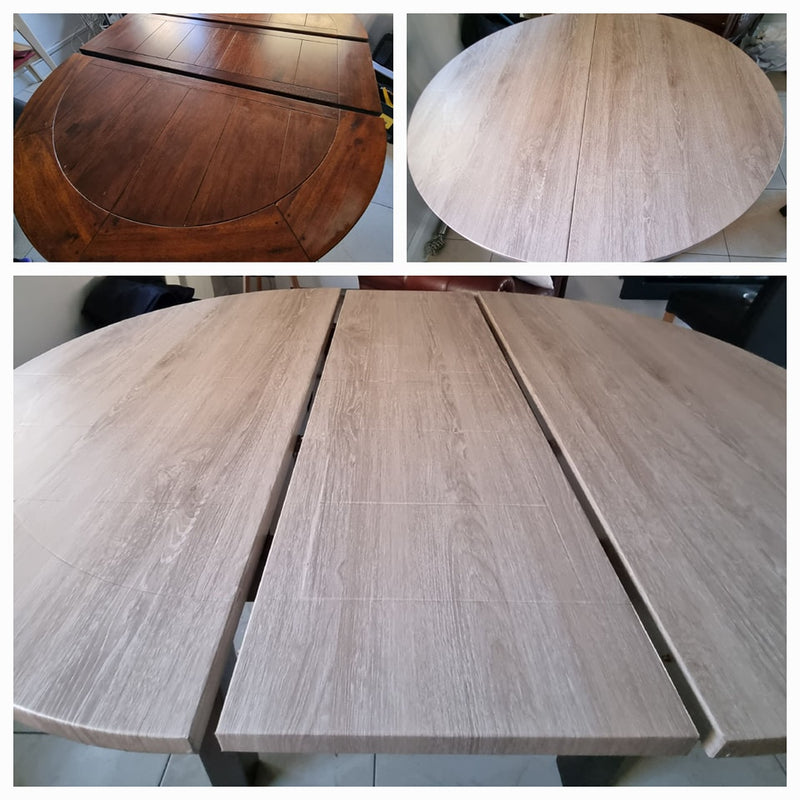
Selecting Colors And Patterns
Colors and patterns create the table’s personality. Bright colors make it stand out. Neutral tones blend in with the room. Patterns like wood grain or marble add a natural look. Pick a color and pattern that match your style and furniture.
Gathering Necessary Tools
Before starting to apply vinyl wrap on your table, gather all the tools you need. Having everything ready makes the process smoother. It helps avoid mistakes and saves time. Below is a list of essential and optional tools to prepare.
Essential Tools List
- Vinyl wrap film – choose the right size and color
- Measuring tape – for accurate measurements
- Utility knife – to cut vinyl precisely
- Squeegee – to smooth out air bubbles
- Heat gun or hairdryer – for softening vinyl and shaping
- Cleaning cloth – to remove dust and dirt from the table
- Rubbing alcohol – to clean the surface before applying vinyl
Optional Accessories
- Gloves – to avoid fingerprints on the vinyl
- Masking tape – to hold vinyl in place during application
- Soft brush – to remove small dust particles
- Plastic scraper – for stubborn air bubbles or creases
- Cutting mat – to protect surfaces while cutting vinyl
Cutting And Positioning The Vinyl
Cutting and positioning the vinyl wrap on a table is a crucial step. It ensures the wrap fits perfectly and looks smooth. Taking time with this step prevents wrinkles and bubbles later.
Start with careful measurements, then cut the vinyl accurately. After cutting, position it on the table surface. Finally, secure it temporarily to check the fit before final application.
Measuring And Cutting
Measure the table surface carefully using a tape measure. Include extra inches for wrapping edges around the table. Mark the vinyl with a pencil or marker.
Cut the vinyl slowly with a sharp utility knife or scissors. Straight, clean cuts help the wrap fit nicely. Avoid cutting too small; leave room for adjustments.
Aligning The Wrap
Place the vinyl on the table top gently. Align the edges with the table corners and sides. Make sure patterns or textures match the table’s shape.
Check for even spacing along all edges. Adjust the vinyl so it sits flat with no folds. Smooth it carefully with your hands or a soft cloth.
Temporary Fixing
Use masking tape to hold the vinyl in place temporarily. Tape the edges lightly to avoid shifting during final adjustments. This step helps you see how the wrap fits.
Check all sides again for perfect alignment. Make small changes if needed before peeling off the backing. Temporary fixing keeps the vinyl secure without damage.
Applying The Vinyl Wrap
Applying vinyl wrap on a table needs care and patience. The process starts with preparing the vinyl and the surface. Each step must be done carefully to avoid mistakes. This guide explains how to apply vinyl wrap smoothly and neatly.
Peeling Backing Paper
Peel the backing paper slowly from one edge. Hold the vinyl firmly and pull the paper away. Avoid touching the sticky side too much. This keeps the adhesive clean and ready to stick. Peel a small section at first to control placement.
Smoothing Techniques
Use a soft cloth or a squeegee to smooth the vinyl. Start from the center and move outward. Press gently to push the vinyl onto the table. This helps remove air and ensures good contact. Work slowly to avoid stretching the vinyl.
Managing Bubbles And Wrinkles
If bubbles or wrinkles appear, lift the vinyl carefully. Smooth the area again with a squeegee or cloth. Use a pin to prick large bubbles and press out the air. Small wrinkles can be smoothed with heat from a hairdryer. Take time to fix these for a clean finish.
Credit: layed.com
Trimming Excess Vinyl
Trimming excess vinyl is a key step in applying a vinyl wrap on a table. It gives the table a clean, neat look. Removing the extra vinyl prevents peeling and keeps the wrap tight. Careful trimming also protects the table edges from damage. Take your time to cut smoothly along the edges for the best result.
Using Precision Knives
Precision knives are perfect for trimming vinyl. Their sharp blades make clean, straight cuts. Use a fresh blade to avoid tearing the vinyl. Hold the knife at a slight angle for better control. Cut slowly along the edge of the table or any seams. Replace blades often to maintain sharpness and accuracy.
Safe Cutting Practices
Safety matters during trimming. Always cut away from your body to avoid injury. Use a cutting mat to protect your work surface. Keep your fingers clear of the blade path. Store knives safely when not in use. Wear gloves if needed for extra grip and protection. Stay focused to prevent accidents while trimming.
Sealing And Finishing Touches
Sealing and finishing touches are key steps in vinyl wrapping a table. These steps ensure the wrap stays smooth and lasts long. Proper sealing prevents edges from peeling and dirt from entering. Finishing touches help give the table a clean, polished look.
Applying Heat For Adhesion
Heat helps the vinyl stick tightly to the table surface. Use a heat gun or hairdryer at low heat. Move the heat source slowly over the vinyl. This softens the material and activates the adhesive. Heat also removes small air bubbles for a smooth finish. Be careful not to overheat and damage the vinyl.
Edge Sealing Methods
Edges are the most vulnerable to lifting or peeling. Press edges firmly with a squeegee or your fingers. Use a small amount of vinyl edge sealer to protect corners. The sealer acts like glue and keeps edges secure. Trim any extra vinyl for a neat edge. This step prevents dust and moisture from getting under the wrap.
Final Inspection
Look closely at the entire table after wrapping. Check for any wrinkles, bubbles, or loose edges. Smooth out any imperfections with a squeegee or heat gun. Make sure all edges are sealed tight. Clean the surface gently with a soft cloth. This final check ensures your vinyl wrap looks great and lasts long.

Credit: www.youtube.com
Maintaining The Vinyl-wrapped Table
Maintaining a vinyl-wrapped table keeps it looking fresh and new for longer. Proper care helps protect the vinyl from scratches, dirt, and wear. Small efforts make a big difference in preserving its appearance and durability.
Cleaning Tips
Use a soft cloth to clean the surface. Avoid abrasive materials that can scratch the vinyl. Mild soap and water work best for removing dirt. Wipe gently and dry with a clean cloth to prevent water spots. Avoid harsh chemicals or solvents that may damage the wrap.
Avoiding Damage
Keep sharp objects away from the table. Use coasters or mats to protect from heat and spills. Avoid placing heavy items that can cause dents or creases. Prevent direct sunlight exposure to reduce fading and peeling. Handle the table carefully to maintain the vinyl’s smooth finish.
Repairing Minor Issues
Small scratches can be fixed with a vinyl repair kit. Gently clean the area before applying the repair solution. For tiny bubbles, use a pin to release trapped air. Press the vinyl flat after removing the bubble. Replace large damaged sections to keep the table looking good.
Frequently Asked Questions
What Materials Are Needed To Apply Vinyl Wrap On A Table?
You need vinyl wrap sheets, a squeegee, a utility knife, cleaning cloth, and a heat gun. These tools help achieve a smooth, bubble-free finish.
How Do You Prepare A Table Before Vinyl Wrapping?
Clean the table thoroughly to remove dust, grease, and dirt. Sand any rough spots for better vinyl adhesion.
Can Vinyl Wrap Be Applied On All Table Surfaces?
Vinyl wrap works best on smooth, clean, and non-porous surfaces like wood, metal, and plastic. Rough or textured surfaces may cause bubbles.
How Long Does Vinyl Wrap Last On A Table?
With proper application and care, vinyl wrap on tables lasts 5 to 7 years. Avoid sharp objects and harsh cleaning chemicals.
Conclusion
Applying vinyl wrap on a table can change its look fast. Clean the surface well for good stick. Take your time to smooth out bubbles. Use a heat gun carefully to shape the wrap. Small mistakes can be fixed with gentle patience.
This simple project can refresh old furniture easily. Try it yourself and enjoy the new style. Practice makes the process easier and more fun. A fresh table can brighten your whole room.

