If you want to make your car wash faster and more effective, attaching a foam cannon to your AR AR240 is a smart move. Foam cannons help you cover your vehicle in thick, soapy foam that loosens dirt and grime with less effort.
But if you’re unsure how to connect your foam cannon properly, you might end up wasting time or even damaging your equipment. You’ll learn simple, step-by-step instructions to attach your foam cannon to the AR AR240 quickly and safely. By the end, you’ll be ready to enjoy a sparkling clean car with less hassle.
Keep reading to master this easy setup and take your car cleaning to the next level!

Credit: www.walmart.com
Choosing The Right Foam Cannon
Choosing the right foam cannon is important for a good car wash experience. The foam cannon attaches to the AR AR240 pressure washer. This tool sprays thick foam on your car. The foam helps remove dirt and grime easily. Picking a compatible foam cannon ensures better performance and less hassle.
Different foam cannons have different features. Some work better with the AR AR240 than others. Knowing which types fit well can save time and money. Also, certain features make the foam cannon easier and more effective to use.
Types Of Foam Cannons Compatible With Ar Ar240
The AR AR240 works best with foam cannons that fit its spray gun. Look for foam cannons with a 1/4-inch quick-connect fitting. These connect easily to the AR AR240 without extra adapters. Foam cannons made by AR or similar brands usually fit well.
Foam cannons can be made from plastic or metal. Metal foam cannons last longer and handle pressure better. Plastic ones are lighter but can wear out faster. Choose based on how often you wash and your budget.
Key Features To Look For
Adjustable foam thickness is a must-have feature. It lets you control how thick the foam sprays. A good foam cannon should also have a wide spray pattern. This covers more surface area and cleans faster.
Check the foam cannon’s soap bottle size. Larger bottles hold more soap and need less refilling. Look for easy-to-clean bottles to avoid clogging. Durable materials and secure fittings help prevent leaks and breakage.
Preparing The Ar Ar240
Preparing the AR AR240 is a key step before attaching a foam cannon. You must check its connections and water flow. This ensures the foam cannon works well and safely. Taking time now saves problems later.
Follow simple steps to get the AR AR240 ready. Keep tools and parts close. This makes the process smooth and fast.
Checking The Pressure Washer Connection
Start by inspecting the pressure washer connection. Make sure the hose fits tightly to avoid leaks. Loose connections reduce water pressure. Clean any dirt or debris on the connector. Dirt can block water and damage parts. Use a cloth to wipe the area clean.
Check the quick-connect fittings for wear or cracks. Replace damaged parts before use. Proper connection keeps water flowing strong and steady. Secure the hose firmly to the AR AR240 inlet.
Ensuring Proper Water Flow
Turn on the water supply to test flow. Watch the stream to see if it is steady. Weak water flow can cause poor foam output. Check for kinks or bends in the hose. Straighten the hose to improve water movement.
Open the pressure washer valve fully. Partial opening limits water and reduces pressure. Confirm the water pressure matches the foam cannon’s needs. Adjust settings on the AR AR240 if needed. Good water flow means better foam and cleaning power.
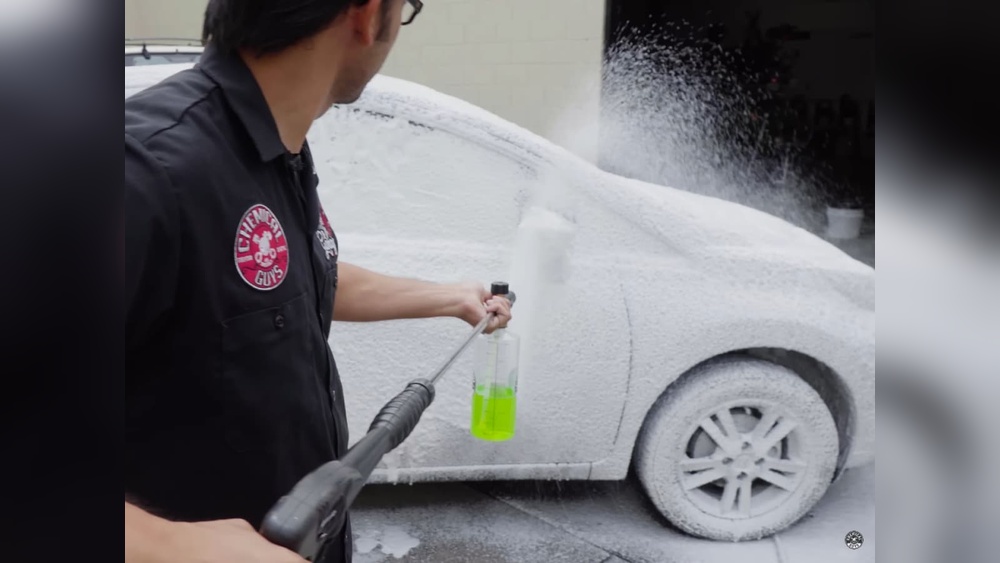
Attaching The Foam Cannon
Attaching the foam cannon to your AR AR240 is simple and quick. This step lets you use soap efficiently for cleaning. Proper attachment ensures a strong foam spray and better washing results.
Connecting The Foam Cannon To The Pressure Washer
Start by turning off your AR AR240 pressure washer. Find the spray wand where the foam cannon will attach. Push the foam cannon’s connector onto the wand’s tip. Twist it slightly to lock it in place. Make sure it fits snugly without gaps. This secure connection stops leaks and foam loss.
Securing The Connection
Check the connection by pulling gently on the foam cannon. It should not come off easily. Tighten any fittings if needed to avoid slipping. Inspect the O-ring inside the connector for damage. Replace it if worn to keep the seal tight. A secure connection helps keep pressure steady for thick foam.
Adjusting Foam Settings
Adjusting foam settings on your AR AR240 helps you get the best cleaning results. Proper adjustment controls how thick and strong the foam will be. This step is important for effective washing and saving soap.
Setting The Soap Concentration
The soap concentration controls how much soap mixes with water. Start with a small amount of soap in the foam cannon. Use the dial or knob on the cannon to increase or decrease the soap level. Lower soap levels create lighter foam and use less soap. Higher levels make thicker foam but use more soap. Adjust slowly and test the foam on a small area. Stop when you see the foam is thick enough to cover surfaces well.
Controlling Foam Thickness
Foam thickness depends on air and water mix inside the cannon. The foam cannon has an air intake valve to control this. Open the valve more to add air and make the foam thicker. Close it to reduce air and make foam thinner. Water pressure also affects foam thickness. Higher water pressure creates better foam. Adjust the air valve and soap concentration together to get the perfect foam. Try different settings to match the cleaning job.
Testing The Foam Cannon
Testing the foam cannon after attaching it to the AR AR240 is essential. This step ensures the equipment works safely and effectively. Proper testing helps avoid damage to the cannon or the AR240. It also guarantees a smooth cleaning process.
Performing A Safety Check
Begin by inspecting all connections between the foam cannon and the AR240. Make sure the foam cannon is tightly secured. Check for any leaks or loose parts. Verify the pressure settings on the AR240. Confirm that the foam solution is properly mixed. Wear protective gear such as gloves and goggles before starting.
Initial Spray Test
Turn on the AR240 with the foam cannon attached. Spray a small amount of foam onto a test surface. Observe the foam pattern and thickness carefully. Adjust the nozzle to control the spray if needed. Stop and check for any unusual noises or leaks. Repeat the spray test until the foam spreads evenly.

Credit: arblueclean.com
Troubleshooting Common Issues
Troubleshooting common issues helps you get the best performance from your foam cannon and AR AR240. Simple fixes can save time and avoid frustration. This guide covers two common problems you might face.
Leaks And Loose Connections
Leaks often come from loose fittings or worn seals. Check all connections between the foam cannon and the AR AR240 carefully. Tighten any loose nuts or screws by hand. Avoid overtightening, which can damage threads.
Inspect the O-rings or rubber seals inside the connectors. Replace any damaged or cracked seals. A small leak can reduce foam pressure and make your cleaning less effective.
Weak Foam Output
Weak foam may result from low water pressure or incorrect soap mixture. Ensure the water supply is strong and consistent. Clean any clogged nozzles or filters in the foam cannon.
Use the right soap concentration. Too little soap creates weak foam. Follow the soap maker’s instructions for the best mix. Adjust the foam cannon’s dial to control foam thickness.
Maintenance Tips
Proper maintenance keeps your foam cannon working well. It also helps it last longer. Follow simple steps after each use. These steps prevent clogs and damage. Care is easy but important.
Cleaning After Use
Rinse the foam cannon with clean water. Run water through the nozzle and bottle. This removes soap and dirt inside. Do not let soap dry inside the cannon. Dry all parts with a clean cloth. Check for any leftover dirt or debris. Clean again if needed.
Storing The Foam Cannon Properly
Store the foam cannon in a cool, dry place. Avoid direct sunlight and extreme heat. Keep it away from freezing temperatures. Store it disassembled if possible. This stops parts from sticking or breaking. Use a protective case or box. It prevents dust and damage during storage.

Credit: www.walmart.com
Frequently Asked Questions
How Do I Connect A Foam Cannon To Ar Ar240?
To connect a foam cannon to the Ar AR240, attach the cannon’s quick-connect fitting to the pressure washer wand. Ensure a secure fit by pushing until it clicks. Then, adjust the foam cannon’s soap mixture before use for optimal foam output.
What Is The Ideal Soap Mixture For Ar Ar240 Foam Cannon?
Use a 1:10 soap-to-water ratio for the Ar AR240 foam cannon. Mix the soap concentrate with water in the foam cannon reservoir. This ratio provides thick foam without clogging the nozzle, ensuring effective and efficient cleaning performance.
Can I Use Any Soap With Ar Ar240 Foam Cannon?
It is best to use pH-neutral or car wash-specific soaps with the Ar AR240 foam cannon. Avoid harsh detergents as they can damage the foam cannon and pressure washer. Proper soap ensures safe cleaning and preserves equipment longevity.
How Do I Adjust Foam Thickness On Ar Ar240 Foam Cannon?
Adjust the foam thickness by turning the foam cannon’s soap mixture knob. Increase soap concentration for thicker foam or add more water for lighter foam. Fine-tuning improves cleaning results depending on surface dirt levels.
Conclusion
Attaching a foam cannon to your AR AR240 is simple and quick. Follow the steps carefully to avoid mistakes. Ensure all parts fit tightly to prevent leaks. Test the foam spray before starting a full wash. Cleaning your vehicle becomes easier with the foam cannon.
Keep your AR AR240 ready for the next use. Enjoy a cleaner and shinier vehicle with less effort. This setup saves time and water during car washes. Try it yourself and see the difference today.