
If you’ve ever wanted a plant that’s both beautiful and easy to care for, your Pilea plant is the perfect choice. These charming little greens can brighten up any room, but they do need the right care to thrive.
Imagine coming home to lush, vibrant leaves that make your space feel alive and fresh. You might be wondering how to keep your Pilea healthy and growing strong. Don’t worry—you’re about to discover simple, effective tips that will help your Pilea flourish, whether you’re a beginner or a seasoned plant lover.
Keep reading, and you’ll learn exactly what your Pilea needs to stay happy and healthy.
Choosing The Right Pilea
Choosing the right Pilea plant is the first step to growing a happy, healthy green friend. Each type of Pilea has its own look and care needs. Picking the right one helps you enjoy your plant more. It also makes caring for it easier and more fun.
Popular Pilea Varieties
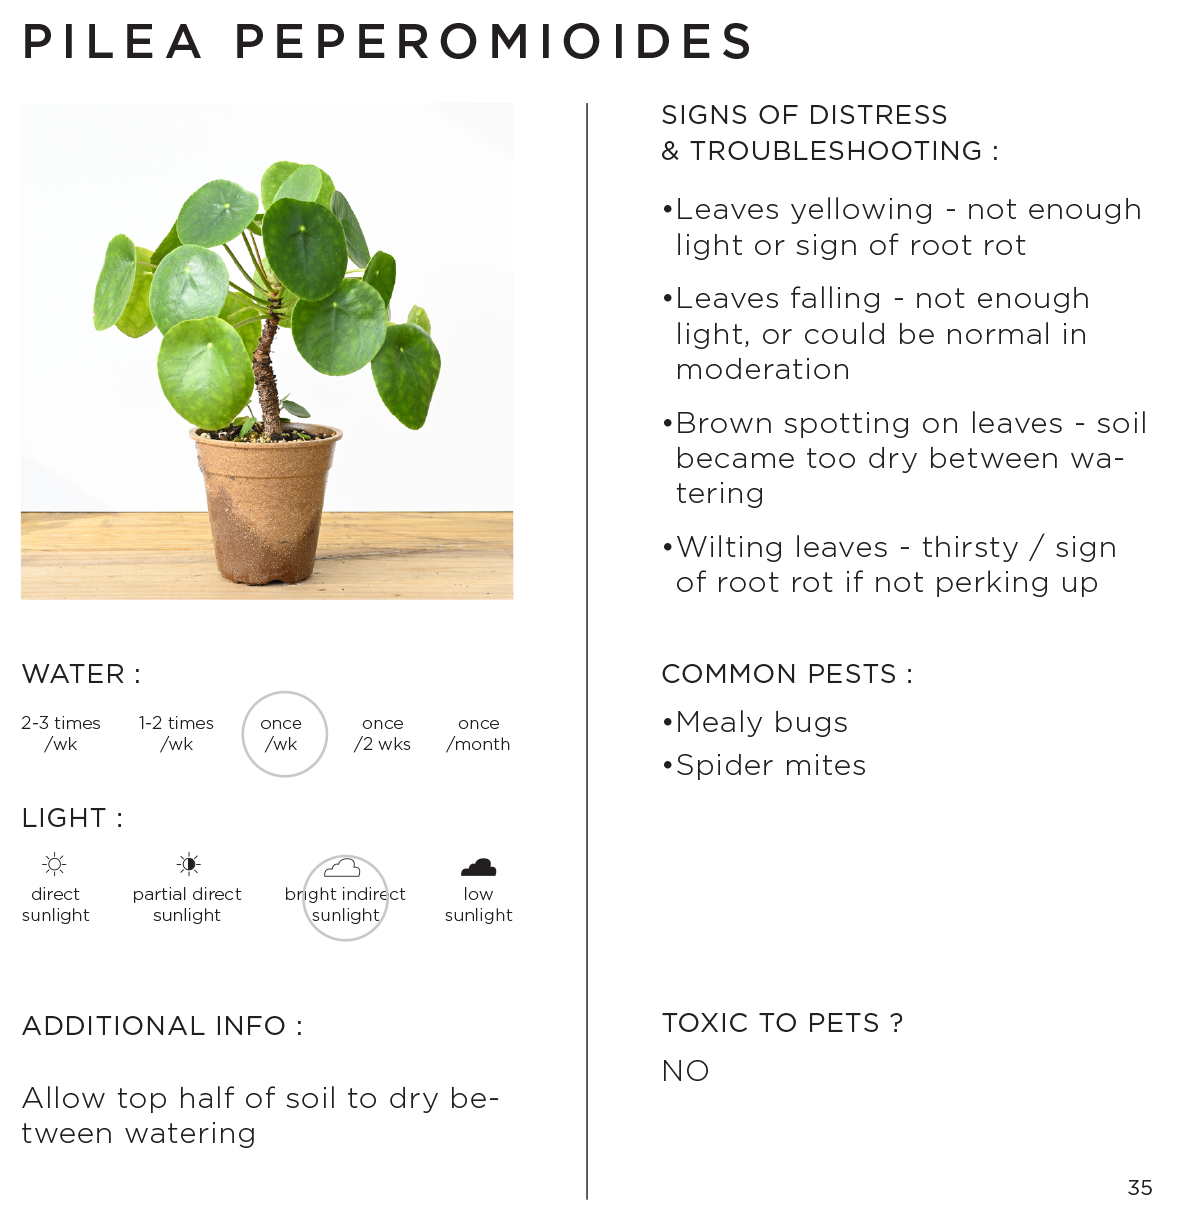
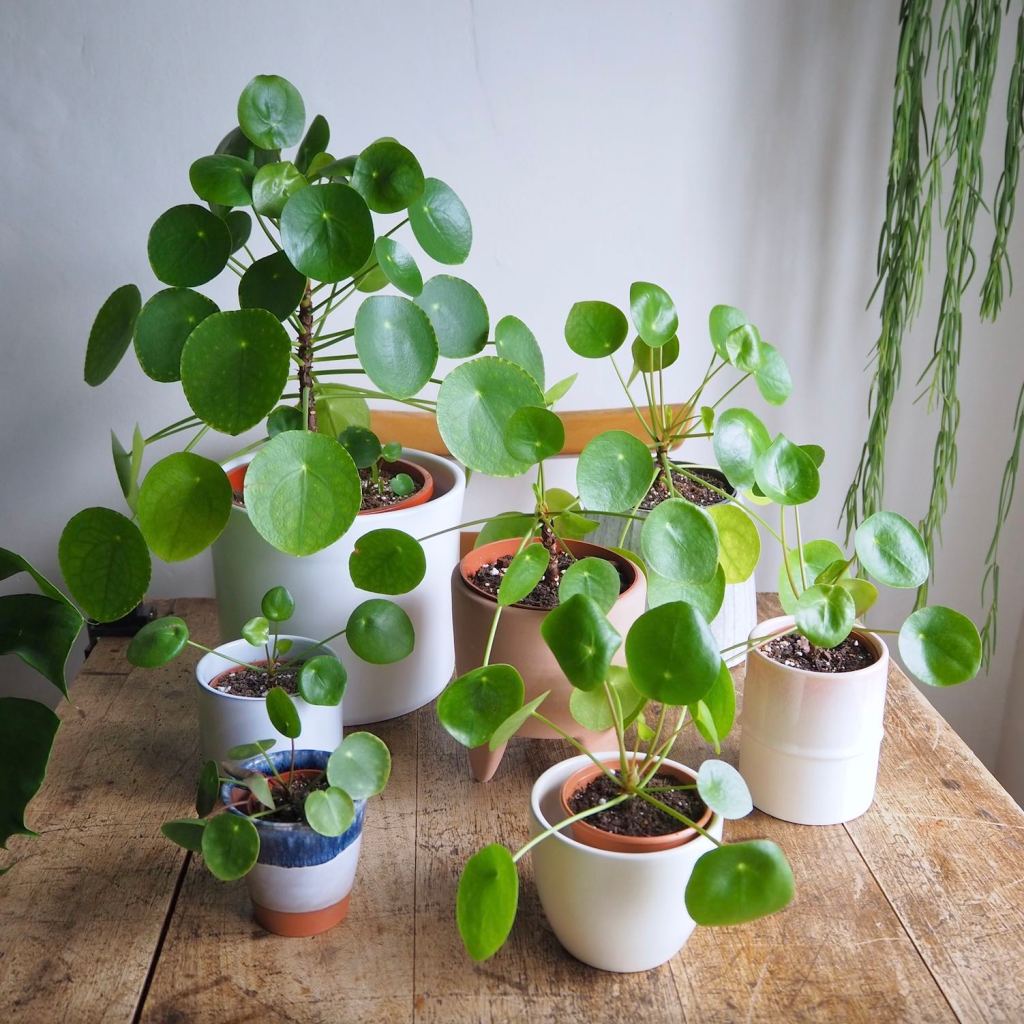
Pilea peperomioides, also called the Chinese Money Plant, is very popular. It has round, flat leaves and grows well indoors. Pilea cadierei, or Aluminum Plant, has shiny leaves with silver patterns. Pilea involucrata, known as Friendship Plant, has textured, dark green leaves. Each variety adds a unique style to your home.
Selecting Healthy Plants
Choose plants with firm, bright green leaves. Avoid plants with yellow or brown spots. Check the stems for strength and no signs of damage. Look for new growth, which shows the plant is healthy. Make sure the soil is moist but not soggy. A healthy Pilea will grow well in your home.
Ideal Light Conditions
Pilea plants thrive best with the right light. Light affects their growth and leaf color. Too little light makes them weak. Too much light can burn their leaves. Finding the perfect balance is key to healthy plants.
Best Indoor Lighting
Pilea plants do well in bright, indirect light. A spot near a north or east window works great. These places give gentle light without harsh rays. You can also use sheer curtains to soften strong light. This helps leaves stay green and full.
Avoiding Direct Sunlight
Direct sunlight can harm Pilea leaves. It may cause brown or yellow spots. Keep your plant away from south or west windows. If direct sun hits, move the plant to a shaded area. Protecting leaves from burns keeps your Pilea healthy and happy.
Watering Tips
Watering is key to keeping your Pilea plant healthy and happy. Too much or too little water can harm its growth. Knowing how often and how much to water helps your plant thrive. Watch your plant’s needs carefully to give it the right care.
Frequency And Amount
Water your Pilea once a week during warm months. Reduce watering in winter to every two weeks. Check the soil before watering. If the top inch feels dry, it’s time to water. Pour water slowly until it drains from the pot’s bottom. Avoid letting your plant sit in water to prevent root rot.
Signs Of Overwatering
Yellowing leaves often show your Pilea gets too much water. Soft, mushy stems also mean overwatering. The soil may smell bad or stay wet for days. Roots can start to rot, causing the plant to droop. Cut back on watering and let soil dry to save your plant.
Credit: stumpplants.com
Soil And Potting
Soil and potting play a big role in keeping your Pilea plant healthy. The right soil helps roots get air and water. The pot size and material also affect plant growth. Choose well to help your Pilea thrive.
Best Soil Mix
Pilea plants need soil that drains well. Use a mix of potting soil, peat moss, and perlite. This blend holds moisture but does not stay soggy. Avoid heavy soils that trap water. Good drainage stops root rot and keeps roots happy.
Choosing The Right Pot
Pick a pot with drainage holes. Water must flow out to prevent waterlogging. Clay pots are a good choice because they breathe. Plastic pots hold moisture longer but need careful watering. Choose a pot slightly larger than the root ball. Too big can cause water to sit too long.
Humidity And Temperature
Pilea plants thrive best when their environment matches their natural habitat. Humidity and temperature play key roles in their health and growth. Maintaining proper conditions helps keep their leaves vibrant and prevents stress. Understanding these needs ensures your Pilea stays strong and beautiful.
Optimal Humidity Levels
Pilea plants prefer moderate to high humidity. Aim for humidity levels between 40% and 60%. Low humidity can cause leaf edges to brown and curl. To raise humidity, place a water tray nearby or mist the leaves gently. Grouping plants together can also boost moisture in the air.
Temperature Range For Growth
Pilea plants grow best in temperatures from 60°F to 75°F (15°C to 24°C). Avoid sudden temperature drops or cold drafts. Temperatures below 50°F (10°C) can harm the plant. Keep Pilea away from heaters and air conditioners to prevent stress. Stable, warm temperatures encourage steady growth and healthy leaves.

Credit: www.youtube.com
Fertilizing Your Pilea
Fertilizing your Pilea is key to keeping it healthy and vibrant. It helps the plant grow new leaves and stay green. Knowing the right type of fertilizer and how often to feed your Pilea makes a big difference.
Type Of Fertilizer
Choose a balanced, water-soluble fertilizer for your Pilea. Look for a formula with equal parts nitrogen, phosphorus, and potassium. A 10-10-10 or 20-20-20 fertilizer works well. Avoid strong fertilizers that can burn the roots. Organic options like fish emulsion are gentle and effective.
Feeding Schedule
Feed your Pilea once a month during the growing season. This is usually spring through early fall. Use half the recommended strength to avoid overfeeding. Skip fertilizing in winter when the plant rests. Regular feeding supports steady, healthy growth.
Pruning And Maintenance
Pruning and maintenance keep Pilea plants healthy and attractive. Regular care stops the plant from getting too leggy or messy. It also helps the plant grow stronger and fuller.
Trimming Tips
Use clean scissors or pruning shears. Cut just above a leaf node to encourage new growth. Remove any yellow or dead leaves. Trim long stems to keep the shape neat. Do this every few weeks for best results.
Encouraging Bushy Growth
Pinch the tips of the stems with your fingers. This stops the plant from growing tall and thin. It encourages side shoots to grow. More side shoots mean a fuller, bushier plant. Repeat pinching every few weeks during growing seasons.
Credit: houseplanthouse.com
Propagation Methods
Propagation is a great way to grow new Pilea plants from your existing ones. It helps you multiply your collection without buying new plants. There are two popular methods for Pilea propagation. Both are simple and work well for beginners.
Stem Cuttings
Stem cuttings are a fast way to grow new Pilea plants. Choose a healthy stem with several leaves. Cut it just below a leaf node using clean scissors. Remove the lower leaves to avoid rot. Place the cutting in water or moist soil. Change water every few days if rooting in water. Roots will start growing in one to two weeks. Once roots are a few inches long, plant the cutting in soil. Keep the soil moist and provide indirect light. New growth should appear soon.
Leaf Propagation
Leaf propagation works by using a single leaf to grow a new plant. Select a healthy leaf and cut it close to the stem. Place the leaf flat on moist soil or slightly bury the leaf’s base. Keep the soil damp but not soggy. Roots and tiny baby plants will grow from the base of the leaf. This process takes longer than stem cuttings but is rewarding. Provide indirect sunlight and patience. After a few weeks, small plants will be ready to transplant.
Common Pests And Issues
Pilea plants are popular for their unique, round leaves and easy care. Still, they can face problems from common pests. These pests damage leaves and stunt growth. Spotting issues early keeps your plant healthy. Learn to find signs of pests and treat them quickly.
Identifying Pests
Watch for tiny bugs on leaves and stems. Spider mites are small and create fine webs. Aphids cluster on new shoots and leaf undersides. Mealybugs look like white cotton spots. Scale insects appear as small brown bumps. Yellowing or curling leaves often mean pest presence. Sticky residue on leaves signals aphids or mealybugs. Check your plant regularly for these signs.
Treatment Options
Remove pests by wiping leaves with a damp cloth. Use insecticidal soap to spray affected areas. Neem oil works well against many common pests. Repeat treatments every few days for best results. Isolate infected plants to stop pest spread. Prune heavily damaged leaves to boost recovery. Keep your plant clean and healthy to prevent pests.
Troubleshooting Problems
Taking care of Pilea plants can be simple, but sometimes problems arise. Knowing how to spot and fix common issues helps keep your plant healthy. This section covers common problems and easy solutions for your Pilea.
Yellow Leaves
Yellow leaves often mean too much water. Pilea likes its soil moist but not wet. Check the soil by touching it. If it feels soggy, reduce watering. Overwatering can cause root rot and kill the plant.
Yellow leaves can also appear from poor light. Pilea prefers bright, indirect light. Too much direct sun can burn the leaves, causing yellow spots. Move your plant to a spot with gentle light.
Wilting And Drooping
Wilting usually means the plant is thirsty. Dry soil causes leaves to droop and curl. Water your Pilea deeply, letting water drain out the pot’s holes. Avoid letting the plant sit in water.
Drooping can also come from cold drafts or sudden temperature changes. Keep your Pilea in a warm, stable spot. Avoid placing it near heaters or open windows during cold weather.
Frequently Asked Questions
How Often Should I Water My Pilea Plant?
Water your Pilea when the top inch of soil feels dry. Usually, this means watering once a week. Avoid overwatering to prevent root rot. Ensure the pot has good drainage for healthy growth.
What Light Conditions Does Pilea Prefer?
Pilea plants thrive in bright, indirect light. Avoid direct sunlight as it can burn the leaves. Low light can slow growth but won’t kill the plant. A north or east-facing window is ideal.
How Do I Propagate A Pilea Plant?
Propagate Pilea by taking stem cuttings with a few leaves. Place cuttings in water or moist soil until roots develop. This usually takes 2-4 weeks. Once rooted, transplant into a pot with well-draining soil.
What Is The Best Soil For Pilea Plants?
Use a well-draining potting mix rich in organic matter. A blend of peat, perlite, and potting soil works well. Good drainage prevents waterlogging and root rot. Avoid heavy soils that retain too much moisture.
Conclusion
Caring for Pilea plants is simple and rewarding. Give them bright, indirect light and water when the soil feels dry. Keep the air humid and avoid cold drafts. Trim yellow leaves to keep plants healthy. Watch for pests and treat them quickly.
With regular care, your Pilea will grow lush and strong. Enjoy their unique charm and fresh green look in your home. Small efforts bring big rewards. Try these tips and see your Pilea thrive.

