
If you rely on your vehicle or equipment every day, keeping your fuel system clean is crucial. A water separating fuel filter plays a key role in protecting your engine from damage caused by water and contaminants.
But when was the last time you changed yours? Knowing how to change this filter yourself can save you time, money, and unexpected breakdowns. In this guide, you’ll learn simple, step-by-step instructions to replace your water separating fuel filter quickly and safely—so you can get back on the road with confidence.
Keep reading to ensure your engine runs smoothly and lasts longer.
Signs Of A Clogged Fuel Filter
A clogged fuel filter can cause serious problems for your vehicle. It stops fuel from flowing smoothly to the engine. This can make your car run poorly and waste fuel. Recognizing the signs early helps you fix the problem fast. Here are key signs to watch for.
Engine Performance Issues
Your engine may run rough or hesitate during acceleration. It might stall or have trouble starting. A clogged fuel filter reduces fuel flow, causing these issues. You could also hear sputtering or feel a loss of power while driving.
Fuel Efficiency Drop
Your car may use more fuel than usual. A dirty filter forces the engine to work harder. This lowers fuel economy and wastes money. Notice if your mileage drops without other reasons like heavy traffic or extra weight.
Warning Lights
The check engine light might turn on. This light signals a problem with your vehicle. A clogged fuel filter can trigger sensors to send warnings. Don’t ignore these lights. They help prevent bigger engine damage.

Credit: www.youtube.com
Tools And Materials Needed
Changing a water separating fuel filter requires the right tools and materials. Having everything ready makes the job faster and easier. It also helps avoid mistakes and keeps you safe. Below are the main items you need for this task.
Essential Tools
You need a wrench or socket set to remove the old filter. A screwdriver might be necessary to open the filter housing. A drain pan helps catch any spilled fuel or water. Clean rags are useful for wiping up drips and spills. A small container can hold any fuel drained from the filter.
Replacement Filter Types
Choose a filter that fits your vehicle model. Water separating fuel filters come in paper or synthetic types. Paper filters are common and affordable. Synthetic filters last longer and trap smaller particles. Check the filter’s specifications to match your engine’s needs.
Safety Gear
Wear gloves to protect your skin from fuel. Safety glasses shield your eyes from splashes. Work in a well-ventilated area to avoid inhaling fumes. Keep a fire extinguisher nearby for emergencies. Proper gear ensures you stay safe during the process.
Preparing Your Vehicle
Start by parking your vehicle on a flat surface and turning off the engine. Gather tools and a new water-separating fuel filter before beginning the replacement. Wear gloves to protect your hands during the process.
Park And Cool Down
Start by parking your vehicle on a flat, safe surface. Turn off the engine and let it cool down for at least 30 minutes. This prevents burns and makes the job safer. Avoid working on a hot engine or near open flames.
Locate The Fuel Filter
Find the water separating fuel filter under the hood or near the fuel tank. Check your vehicle’s manual for the exact location. It usually looks like a small canister with fuel lines attached. Clean the area around it to avoid dirt getting inside.
Relieve Fuel System Pressure
Release the fuel system pressure to avoid fuel spray. Remove the fuel pump fuse or relay and start the engine. Let it run until it stops. This uses up leftover fuel pressure. Be careful and wear safety glasses during this step.
Removing The Old Fuel Filter
Removing the old fuel filter is a key step in changing a water separating fuel filter. This part collects water and dirt from fuel. Over time, it can get clogged and need replacement. Doing this carefully keeps your engine running smoothly.
Start by preparing your workspace. Make sure the engine is off and cool. Have a container ready to catch any fuel spills. Wear gloves to protect your hands from fuel.
Disconnecting Fuel Lines
First, locate the fuel lines connected to the filter. Use a wrench to loosen the clamps or fittings. Gently pull the fuel lines off the filter. Avoid pulling too hard to stop damage. Keep track of how the lines connect for reassembly.
Handling Fuel Spills
Fuel may spill out when disconnecting lines. Use a rag or absorbent pad to catch drips. Have a container nearby to collect excess fuel. Clean any spills immediately to prevent hazards. Dispose of rags safely after use.
Removing The Filter
Once the lines are off, loosen the mounting bracket or screws holding the filter. Carefully remove the old filter from its holder. Check for any remaining fuel inside the filter. Place the old filter in a safe container for disposal. Avoid tilting the filter to limit spills.
Installing The New Fuel Filter
Installing the new fuel filter is a crucial step after removing the old one. It ensures your engine runs smoothly without fuel contamination. Follow each step carefully to avoid leaks and damage.
Positioning The Filter Correctly
Hold the new filter upright. Check for any arrows showing fuel flow direction. The arrow should point toward the engine. Place the filter in the mounting bracket. Make sure it fits snugly and straight.
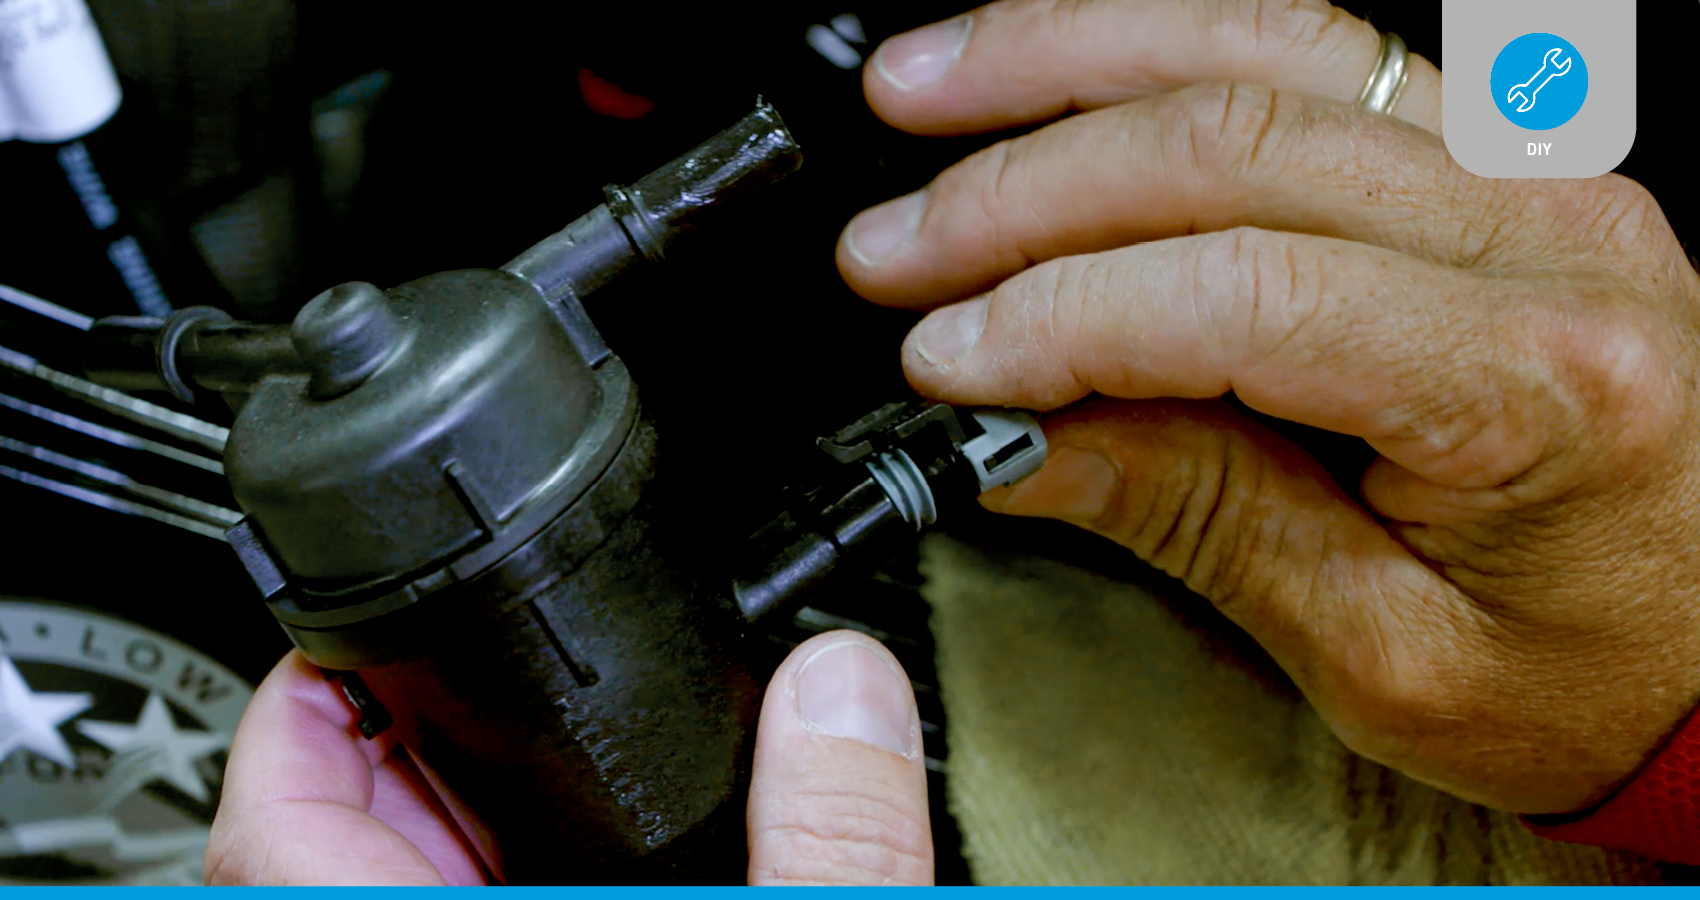
Reconnecting Fuel Lines
Attach the fuel lines to the filter’s inlet and outlet ports. Push the connectors firmly until you hear a click. Double-check for tight connections. Loose lines can cause fuel leaks and poor engine performance.
Securing The Filter
Use the clamp or bracket to hold the filter in place. Tighten screws or bolts securely but avoid overtightening. The filter must not move or rattle during engine operation. A firm hold prevents damage and keeps fuel flow steady.

Credit: www.youtube.com
Post-installation Steps
After installing a new water separating fuel filter, some important steps follow. These steps ensure the filter works well and your engine runs smoothly. Careful attention now helps avoid problems later.
Checking For Leaks
Look closely around the filter and fuel lines. Check all connections for any signs of fuel leaks. Use a clean cloth to spot wet areas. Tighten fittings gently if you see leaks. Never start the engine with a leak present. Safety first.
Priming The Fuel System
Priming pushes air out and fills the filter with fuel. Use the manual primer pump if your system has one. Pump slowly until you feel resistance. This means fuel has filled the filter. Without priming, the engine may not start easily.
Starting The Engine
Turn the key and start the engine. Listen for any unusual noises or rough running. Let the engine run for a few minutes. Watch the fuel filter area again for leaks. If the engine stalls, repeat the priming step.
Maintenance Tips For Fuel Filters
Fuel filters keep your engine safe from dirt and water. They stop harmful particles from reaching the fuel system. Proper maintenance helps your vehicle run smoothly and avoid damage. Here are some useful tips to keep your fuel filter in good shape.
Replacement Frequency
Check your vehicle manual for the recommended replacement time. Usually, change the fuel filter every 20,000 to 40,000 miles. More frequent changes may be needed if you drive in dusty or wet areas. Regular replacement prevents clogging and fuel flow problems.
Signs To Watch For
Notice if your engine stalls or hesitates during acceleration. Look for a rough idle or loss of power. These may mean the fuel filter is dirty or clogged. Also, check for unusual smells or leaks near the filter. Early detection helps avoid costly repairs.
Preventive Measures
Use clean, high-quality fuel to reduce filter wear. Keep your fuel tank at least a quarter full to prevent water buildup. Avoid running your vehicle in extreme conditions without maintenance. Regularly inspect the filter and fuel lines for damage or leaks.
Credit: www.quicksilver-products.com
Frequently Asked Questions
What Is A Water Separating Fuel Filter?
A water separating fuel filter removes water and contaminants from diesel fuel. It protects the engine from damage and improves performance. This filter prevents corrosion and fuel system issues caused by water in the fuel.
How Often Should I Change The Fuel Filter?
Change the fuel filter every 10,000 to 15,000 miles or as recommended by your vehicle manual. Regular replacement ensures optimal engine function and avoids fuel contamination problems. Check the filter more frequently if you use poor-quality fuel.
What Tools Do I Need To Replace The Filter?
You need a wrench, a container for old fuel, gloves, and a new fuel filter. Some vehicles may require additional tools like screwdrivers or pliers. Always refer to your vehicle’s manual for specific tool requirements.
Can I Change The Filter Myself Safely?
Yes, you can change the filter safely by following the correct steps and precautions. Wear gloves and eye protection, work in a well-ventilated area, and properly dispose of old fuel. Follow the vehicle manual instructions carefully.
Conclusion
Changing a water separating fuel filter keeps your engine running well. It helps stop water from damaging parts inside. Follow each step carefully to avoid mistakes. Use the right tools and a new filter every time. Check for leaks after you finish the job.
Regular filter changes save you money and trouble later. Taking care of this small part makes a big difference. Keep your vehicle safe and efficient with simple maintenance. You can do it yourself with patience and care.


