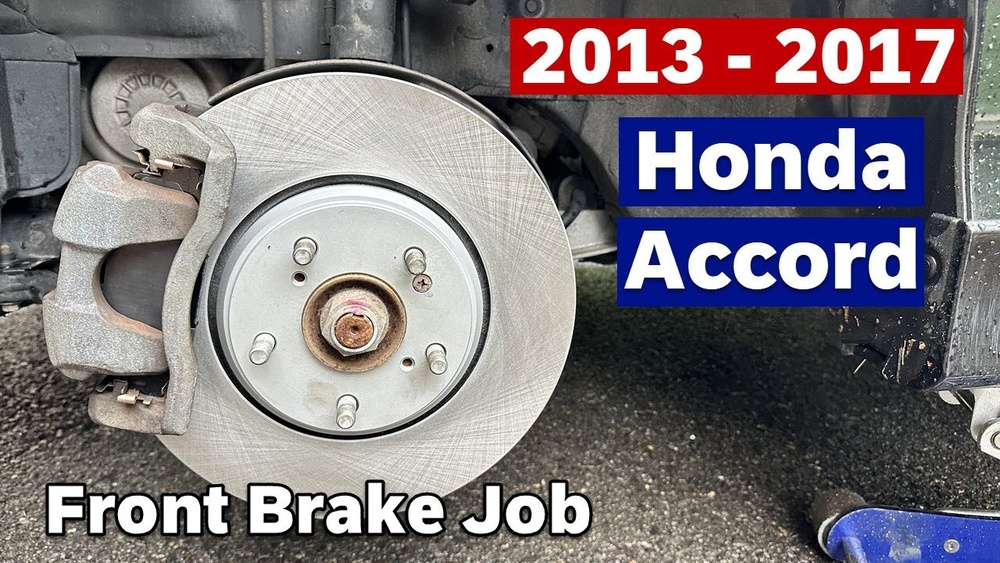
If you drive a Honda Accord, knowing how to change your brake pads and rotors can save you time and money. Worn-out brakes don’t just affect your car’s performance—they put your safety at risk.
Imagine the confidence you’ll feel once you learn this simple skill and can handle brake repairs yourself. In this guide, you’ll get clear, step-by-step instructions that anyone can follow, even if you’re not a car expert. Ready to take control of your car’s maintenance and keep your Honda Accord stopping smoothly?
Let’s dive in.

Credit: www.amazon.com
Tools And Materials Needed
Changing brake pads and rotors on a Honda Accord requires specific tools and materials. Having the right items makes the job easier and safer. Preparing everything before starting saves time and avoids frustration.
Below are the essential tools and materials needed for this task. Use this list to gather everything before you begin the repair.
Basic Hand Tools
You will need a socket wrench set with various sizes. A breaker bar helps loosen tight bolts. A C-clamp or brake caliper tool is necessary to compress the caliper piston. A flat-head screwdriver assists in removing clips or prying parts.
Replacement Parts
New brake pads designed for Honda Accord are required. Choose high-quality rotors that fit your model year. Some kits include both pads and rotors for convenience.
Safety Gear
Wear safety glasses to protect your eyes from dust and debris. Use gloves to keep your hands clean and safe. Consider a dust mask to avoid inhaling brake dust.
Additional Supplies
Brake cleaner spray removes grease and dirt from parts. Brake grease lubricates caliper pins to prevent noise. A torque wrench ensures bolts are tightened to the correct specifications.
Preparing Your Vehicle
Preparing your Honda Accord before changing brake pads and rotors is important. It makes the job safer and easier. Proper preparation helps avoid accidents and damage. Follow these steps carefully to get ready.
Safety Precautions
Start by parking your car on a flat surface. Engage the parking brake to stop the car from moving. Wear gloves and safety glasses to protect your hands and eyes. Make sure the engine is off and keys are out of the ignition. Keep a fire extinguisher nearby just in case.
Lifting The Car
Find the correct lifting points under your Honda Accord. Use a sturdy car jack to raise the vehicle slowly. Place jack stands under the car for extra support. Never rely only on the jack. Check stability before working under the car.
Removing The Wheel
Loosen the lug nuts with a wrench before lifting the car. After lifting, remove the lug nuts completely. Take the wheel off carefully and set it aside. Keep the lug nuts in a safe place to avoid losing them.
Removing Old Brake Pads
Removing old brake pads is an essential step in maintaining your Honda Accord’s braking system. Worn-out pads can reduce stopping power and cause damage to the rotors. This section guides you through the process of taking out the old brake pads safely and effectively. Follow each step carefully to avoid any damage to your vehicle.
Locating The Brake Caliper
Start by locating the brake caliper on your Honda Accord. It sits over the rotor and holds the brake pads in place. The caliper is usually easy to spot behind the wheel. Removing the wheel can give you better access. Make sure your car is secure and lifted before you begin.
Removing Caliper Bolts
Next, find the bolts that hold the caliper. They are typically on the back side of the caliper. Use the correct size socket or wrench to loosen and remove these bolts. Keep them safe as you will need them later. Take care not to drop the caliper once the bolts are removed.
Taking Out Brake Pads
Once the caliper is loose, gently pull it away from the rotor. The brake pads will be visible inside the caliper bracket. Slide the old brake pads out carefully. Note how they sit inside the bracket for easier installation of new pads. Do not force the pads out; they should come out smoothly.

Credit: www.amazon.com
Replacing Brake Rotors
Replacing brake rotors on a Honda Accord is a key part of brake maintenance. New rotors improve braking performance and safety. This process involves removing the old rotor and fitting a new one.
Follow these clear steps to replace your brake rotors properly. Take your time and work carefully for the best results.
Removing Caliper Bracket
Start by loosening the bolts that hold the caliper bracket. Use a socket wrench to remove them. Carefully lift the caliper and support it with a hanger or wire. Avoid letting the caliper hang by the brake hose. Remove the caliper bracket completely to access the rotor.
Taking Off Old Rotor
Check if the old rotor is stuck due to rust. Tap it gently with a rubber mallet to loosen it. Pull the rotor straight off the hub. If it is hard to remove, use a screwdriver to pry it carefully. Clean the hub surface to remove dirt and rust.
Installing New Rotor
Place the new rotor onto the hub, aligning it with the holes. Ensure it sits flush and does not wobble. Reinstall the caliper bracket and tighten the bolts securely. Double-check all parts for proper fit before moving on. This step ensures safe and smooth braking after replacement.
Installing New Brake Pads
Installing new brake pads on your Honda Accord is a key step for safe driving. This process requires careful attention to ensure the brakes work properly. Start by preparing the caliper and brake area. Follow each step in order for the best results.
Compressing The Caliper Piston
Use a C-clamp or a brake piston tool to push the piston back. This creates space for the new, thicker brake pads. Place the tool on the piston and tighten slowly. Check that the piston moves smoothly without damage. This step prevents brake drag and allows proper pad fit.
Placing New Pads
Position the new brake pads in the caliper bracket. Make sure the friction surface faces the rotor. Align the pads with the clips and pins. They should fit snugly without force. Proper placement ensures even wear and good braking performance.
Reassembling The Caliper
Slide the caliper back over the new pads and rotor. Secure it with the bolts removed earlier. Tighten the bolts firmly but avoid overtightening. Check for any movement or gaps. Reassembling correctly restores brake function and safety.
Final Steps
After installing new brake pads and rotors on your Honda Accord, the final steps are crucial. These steps ensure safety and proper function of your brakes. Take your time to complete them carefully.
Reattaching The Wheel
Place the wheel back onto the hub. Align the holes with the wheel studs. Hand-tighten the lug nuts to keep the wheel in place. Use a wrench to snug them up in a star pattern. This prevents the wheel from sitting unevenly.
Lowering The Vehicle
Carefully lower your car using the jack. Remove the jack stands before fully lowering. Let the car rest on the ground. Tighten the lug nuts with a torque wrench. Follow the torque specs for your Honda Accord. This step prevents wheel wobble and keeps you safe on the road.
Testing The Brakes
Press the brake pedal several times. This builds pressure in the brake system. Check for firmness in the pedal feel. Drive slowly in a safe area. Test the brakes gently to ensure they work well. Listen for any unusual sounds. Confirm smooth stopping before driving normally.
Maintenance Tips
Maintaining your Honda Accord’s brake pads and rotors is key for safe driving. Proper care helps your brakes last longer. It also keeps your stopping power strong and steady.
Simple steps can prevent costly repairs. Paying attention to small signs can save you time and money.
Regular Inspection Of Brake Components
Check brake pads and rotors every 10,000 miles or during oil changes. Look for wear, cracks, or grooves on rotors. Thin brake pads need replacement to avoid damage.
Keep Brake Parts Clean
Brake dust and dirt reduce brake efficiency. Use a brake cleaner spray to remove buildup. Clean parts improve braking and reduce noise.
Use Quality Brake Parts
Choose brake pads and rotors made for Honda Accord. Good quality parts last longer and perform better. Avoid cheap parts that wear quickly.
Proper Bedding-in Of New Pads And Rotors
After replacing, gently brake for the first 100 miles. This helps the pads and rotors settle. Proper bedding prevents uneven wear and noise.
Check Brake Fluid Regularly
Brake fluid affects braking power. Check fluid levels monthly and top up if low. Replace old brake fluid every two years to keep brakes responsive.

Credit: www.youtube.com
Frequently Asked Questions
How Often Should I Change Brake Pads On A Honda Accord?
Brake pads on a Honda Accord typically need replacement every 30,000 to 70,000 miles. Factors like driving habits and road conditions affect this. Regular inspection ensures safety and optimal braking performance.
What Tools Are Required To Change Brake Rotors And Pads?
You need a jack, lug wrench, socket set, C-clamp, and brake cleaner. Additionally, gloves and safety glasses are recommended for protection during the replacement process.
Can I Replace Brake Pads And Rotors Myself?
Yes, with basic mechanical skills and proper tools, you can replace them. Follow safety steps carefully and consult your Honda Accord’s manual for guidance.
How Do I Know If Brake Rotors Need Replacement?
Signs include vibration when braking, squealing noises, or visible grooves on rotors. If thickness is below the manufacturer’s limit, replacement is necessary for safety.
Conclusion
Changing brake pads and rotors on your Honda Accord saves money and keeps you safe. Take your time and follow each step carefully. Use the right tools and work in a clean space. Check your work before driving. Regular brake maintenance helps your car run smoothly.
You can do this job with patience and care. Stay safe on the road with fresh brakes. Simple steps make a big difference. Keep your Honda Accord stopping strong.