If you own a 90 HP Mercury outboard, keeping it in top shape is key to smooth rides and trouble-free days on the water. One simple but crucial task is changing your fuel filter regularly.
Doing this yourself saves you time and money, and it’s easier than you might think. In this guide, you’ll find clear, step-by-step instructions to change your fuel filter quickly and safely. By the end, you’ll feel confident maintaining your engine and avoiding costly problems before they start.
Ready to get started? Let’s dive in!
Tools And Materials Needed
Changing the fuel filter on a 90 Hp Mercury Outboard requires the right tools and materials. These items help make the job easier and faster. Having everything ready before starting saves time and prevents frustration.
This section covers the essential tools, the right fuel filter to choose, and the safety gear needed for the task. Prepare well to ensure a smooth fuel filter change.
Essential Tools
- Flathead screwdriver
- Phillips screwdriver
- Pliers
- Fuel line clamps
- Drain pan
- Rags or paper towels
- Socket wrench set
These tools allow you to remove clamps, screws, and old fuel filters easily. The drain pan helps catch fuel spills, keeping your workspace clean.
Choosing The Right Fuel Filter
Pick a fuel filter that matches the 90 Hp Mercury Outboard model. Using the correct filter ensures proper fuel flow and engine performance. Check the owner’s manual or ask a marine parts dealer for the exact filter type.
Quality matters. Choose a filter made for marine engines. It will resist corrosion and last longer.
Safety Gear
Fuel handling can be risky. Wear safety glasses to protect your eyes from splashes. Gloves keep your hands safe from fuel and dirt.
Work in a well-ventilated area to avoid inhaling fuel fumes. Keep a fire extinguisher nearby as a precaution.
Preparing The Boat
Preparing the boat before changing the fuel filter on a 90 HP Mercury outboard is very important. This step helps keep you safe and makes the process easier. You need to get the motor ready, stop the fuel flow, and clean the area where you will work. These simple tasks protect your engine and prevent accidents.
Securing The Outboard Motor
Start by making sure the outboard motor is stable. Use the boat’s clamps or mounts to hold the motor firmly. This stops the motor from moving while you work. A steady motor helps you change the fuel filter faster and safer.
Turning Off The Fuel Supply
Next, turn off the fuel supply to the motor. Find the fuel valve or switch on the fuel line and close it. This stops fuel from leaking during the filter change. It also lowers the risk of fire and spills.
Cleaning The Work Area
Clear the space around the motor and fuel lines. Remove dirt, dust, and any debris. A clean work area prevents dirt from entering the fuel system. It also helps you find tools and parts easily while working.
Locating The Fuel Filter
Finding the fuel filter on a 90 hp Mercury outboard is the first step to changing it. Knowing its exact location saves time and avoids confusion. This part helps keep dirt and debris out of the engine. Regular checks keep your outboard running smoothly. Below are simple steps to find the fuel filter easily.
Fuel Line Identification
The fuel filter is connected to the fuel lines. These lines carry gasoline from the tank to the engine. Typically, the fuel line is a thick, black hose. It is usually marked or has clamps at the ends. Follow the fuel line from the fuel tank or primer bulb. The filter sits somewhere along this path. Spotting the fuel line helps you locate the filter quickly.
Accessing The Filter Housing
The fuel filter is inside a small housing or casing. This housing protects the filter and keeps it secure. On the 90 hp Mercury outboard, it is near the engine block. Look near the base of the engine or close to the fuel pump. Sometimes, it is behind a plastic cover or shield. Remove any covers carefully to reach the filter housing. Make sure the engine is off and cool before touching any parts.

Credit: www.youtube.com
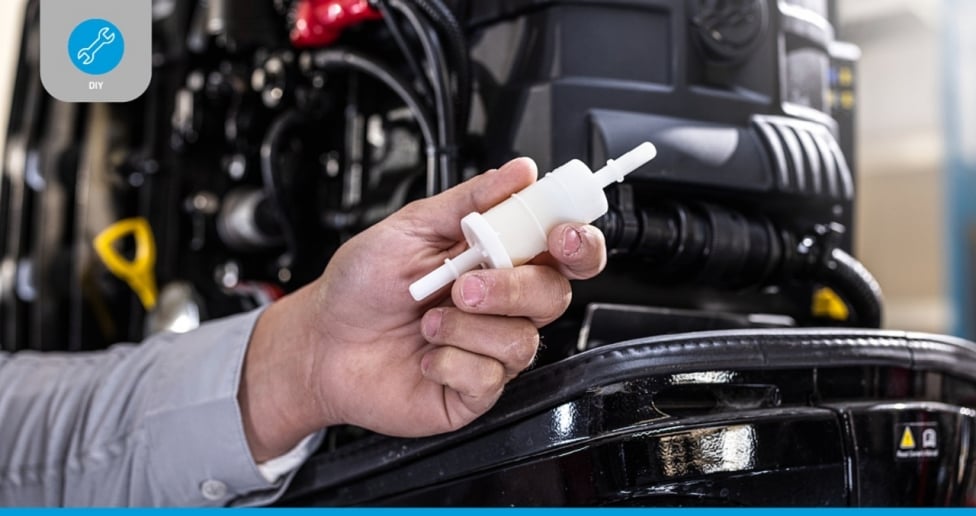
Removing The Old Fuel Filter
Removing the old fuel filter on a 90 HP Mercury Outboard is an important step. It ensures your engine runs clean and smooth. This process helps avoid fuel flow problems and keeps the motor in good shape.
Start carefully. Take your time to do each step right. This section guides you through releasing fuel pressure, disconnecting fuel lines, and removing the filter. Follow these steps for a safe and clean replacement.
Releasing Fuel Pressure
Fuel pressure builds up in the system. It can cause spills when you remove the filter. First, turn off the engine. Then, locate the fuel pump or primer bulb. Squeeze the primer bulb several times to release pressure. This stops fuel from spraying out.
Disconnecting Fuel Lines
Next, find the fuel lines connected to the filter. Use pliers to loosen clamps if needed. Gently pull the lines off the filter. Be ready with a cloth to catch any fuel drips. Avoid twisting the lines to prevent damage.
Removing The Filter
Now, the filter is free from fuel lines. Check for any screws or clips holding it in place. Unscrew or unclip carefully. Pull the old filter straight out. Dispose of it properly to avoid spills or fire risks.
Installing The New Fuel Filter
Installing the new fuel filter on your 90 HP Mercury outboard is a simple task. It improves your engine’s performance and fuel flow. Follow clear steps to place the filter correctly and secure the fuel lines. Check for leaks to ensure safety and efficiency.
Positioning The Filter Correctly
Hold the new fuel filter upright. Make sure the arrow on the filter points toward the engine. This shows the direction of fuel flow. Place the filter in the bracket or clip. It should fit snugly without forcing it.
Reconnecting Fuel Lines
Attach the fuel lines to the filter’s inlet and outlet ports. Push the hoses firmly onto the fittings. Use clamps to secure the connections tightly. Avoid loose or twisted hoses to prevent leaks or blockages.
Checking For Leaks
Turn on the fuel valve slowly. Observe the filter and connections for any fuel drips. Tighten clamps if you spot leaks. Run the engine briefly and watch again. Stop immediately if leaks appear and fix the problem.
Credit: www.quicksilver-products.com
Post-installation Checks
After changing the fuel filter on your 90 Hp Mercury Outboard, it is important to perform some checks. These checks ensure the engine runs smoothly and safely. Proper post-installation steps prevent damage and improve performance.
Priming The Fuel System
Start by priming the fuel system. This action removes air from the fuel lines. Use the primer bulb located on the fuel line. Squeeze it until it feels firm. This ensures fuel reaches the engine without air pockets.
Starting The Engine
Next, start the engine carefully. Turn the key and listen for any unusual sounds. The engine should start quickly and run smoothly. If it struggles, check the fuel connections and primer again.
Monitoring Performance
Watch the engine’s performance for a few minutes. Look for steady idling and no stalling. Check for leaks around the fuel filter. Proper performance means the filter was installed correctly.
Maintenance Tips
Proper maintenance of your 90 Hp Mercury outboard fuel filter keeps your engine running smoothly. Regular care prevents breakdowns and saves money. Follow these simple tips to ensure your fuel system stays in top shape.
When To Replace The Filter
Change the fuel filter every 100 hours of use or once a year. Replace it sooner if you use your boat in dirty water or dusty areas. A clean filter keeps fuel flowing well and protects the engine parts.
Signs Of Fuel System Issues
Watch for engine problems like rough idling, slow acceleration, or stalling. These can mean the fuel filter is clogged or dirty. Fuel smells or leaks near the engine also signal trouble. Fix these issues quickly to avoid big repairs.
Preventive Measures
Use fresh, clean fuel and add a fuel stabilizer if storing the boat. Keep the fuel tank clean and sealed to stop dirt from entering. Regularly inspect fuel lines and connections for cracks or leaks. Good habits extend the life of your fuel filter and engine.

Credit: cfdn.fr
Frequently Asked Questions
How Often Should I Change The Fuel Filter On A 90 Hp Mercury Outboard?
Change the fuel filter every 100 hours or once per season. Regular replacement prevents clogs and ensures optimal engine performance.
What Tools Do I Need To Replace The Fuel Filter?
You need a screwdriver, pliers, a new fuel filter, and a container to catch fuel. These tools make the replacement quick and safe.
Can I Change The Fuel Filter Myself Safely?
Yes, with proper precautions and instructions, you can safely replace the filter. Always work in a well-ventilated area and avoid open flames.
What Are Signs Of A Clogged Fuel Filter On My Outboard?
Symptoms include engine stalling, rough idling, and reduced power. These signs indicate the fuel filter needs immediate replacement.
Conclusion
Changing the fuel filter on your 90 hp Mercury outboard keeps your engine running smooth. Regular filter changes help avoid engine problems and save money. The process is simple and does not take much time. With the right tools and steps, you can do it yourself easily.
Keep your boat ready for the water and enjoy your trips without worry. Remember, clean fuel means better performance and longer engine life. Check your fuel filter often and replace it as needed. Your engine will thank you.


