
Thinking about giving your car a fresh, new look without the high cost of a paint job? You’re in the right place.
Vinyl wrapping is a smart and stylish way to transform your vehicle’s appearance, protect its surface, and even boost its resale value. But how do you get started? How do you make sure the wrap looks smooth, professional, and lasts for years?
In this guide, you’ll discover easy, step-by-step tips that anyone can follow. By the end, you’ll feel confident enough to tackle your own vinyl wrap project and turn heads wherever you go. Let’s dive in and make your car truly stand out!
Credit: www.youtube.com
Choosing The Right Vinyl Wrap
Choosing the right vinyl wrap is the first step to a successful car wrap project. The material, color, and finish affect how the wrap looks and lasts. Picking the right tools also helps make the process smooth. This section guides you through these important choices.
Types Of Vinyl Wrap Material
Vinyl wraps come in several types. Cast vinyl is flexible and durable. It fits curves and lasts longer. Calendered vinyl is thicker and less flexible. It works well on flat surfaces. Also, there are specialty vinyls like carbon fiber or matte finishes. Choose a material that fits your car shape and usage.
Selecting The Best Color And Finish
Color sets the car’s mood. Bright colors stand out. Dark colors look sleek. Matte finishes reduce glare and hide dirt. Glossy finishes shine and look fresh. Satin finishes offer a soft shine. Pick a finish that matches your style and car type.
Tools And Supplies Needed
Prepare the right tools before starting. A squeegee helps smooth the vinyl. A heat gun makes the wrap flexible. A sharp knife cuts clean edges. Cleaning spray removes dirt before wrapping. Gloves protect your hands and keep the vinyl clean. Have these ready for a neat job.
Preparing The Car Surface
Preparing the car surface is a key step before applying a vinyl wrap. The wrap will stick better and last longer on a clean, smooth surface. Taking time to prepare the car properly helps avoid bubbles, wrinkles, and peeling later. Follow these steps carefully to get the best results.
Cleaning And Degreasing
Start by washing the car thoroughly. Use soap and water to remove dirt and dust. Rinse well and dry with a clean cloth. Next, use a degreaser to remove oils and wax from the surface. This step is important because oils prevent the vinyl from sticking properly. Wipe the car with a lint-free cloth soaked in degreaser. Let the surface dry completely before moving on.
Removing Obstacles And Accessories
Remove any parts that may block the wrap. Take off mirrors, badges, and antennae if possible. These parts can cause wrinkles or gaps in the vinyl. Removing them also allows you to wrap edges neatly. Use proper tools to avoid damage. Keep screws and small parts safe for reassembly later. Clear the workspace for easier application.
Repairing Surface Imperfections
Check the car surface for dents, scratches, or rust spots. Small dents and scratches can show through the vinyl wrap. Use a filler to smooth dents and sand rough areas gently. Rust spots should be treated or replaced before wrapping. A smooth, clean surface ensures the wrap looks smooth and lasts longer. Take time to fix imperfections before starting the wrap process.
Measuring And Cutting The Vinyl
Measuring and cutting the vinyl are important steps in wrapping a car. These steps help ensure the vinyl fits well and looks smooth. Taking care with measurements and cuts avoids waste and saves time.
Accurate measuring lets you cut vinyl pieces that match the car’s surface. Cutting vinyl panels with precision makes the wrap easier to apply. Marking guidelines helps keep your work neat and straight.
Taking Accurate Measurements
Start by cleaning the car surface. Use a tape measure to check each area you want to wrap. Measure the length and width carefully. Add extra inches for wrapping around edges. Write down all measurements to avoid mistakes. Double-check numbers before cutting the vinyl.
Cutting Vinyl Panels
Lay the vinyl flat on a clean surface. Use a sharp knife or scissors for cutting. Cut larger panels first, based on your measurements. Make straight cuts to match the car parts. Avoid jagged or uneven edges. Keep extra vinyl for possible adjustments later.
Marking Guidelines
Use a light pencil or chalk to draw lines on the vinyl. These lines should match your measurements. Mark edges and folds to guide wrapping. Guidelines help place the vinyl without errors. Clear marks make the process faster and cleaner.

Credit: wrapguys.com
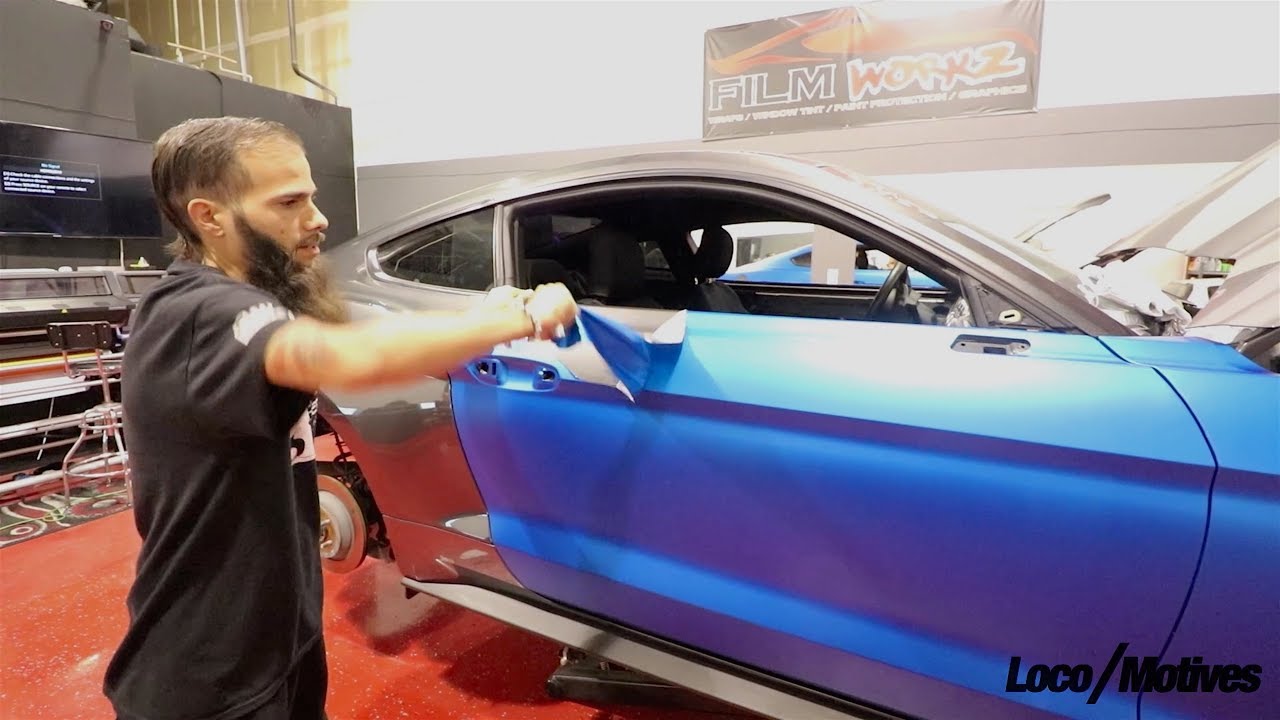
Applying The Vinyl Wrap
Applying the vinyl wrap is a key step in changing your car’s look. This process needs care and patience. Proper application helps the vinyl stick well and last longer. It also avoids bubbles and wrinkles.
Positioning The Vinyl On The Car
Start by cleaning the car surface thoroughly. Dirt or dust can ruin the wrap. Place the vinyl sheet on the car gently. Align it to cover the area fully. Use magnets or tape to hold it in place. Check the position from different angles. Adjust the vinyl until it fits perfectly.
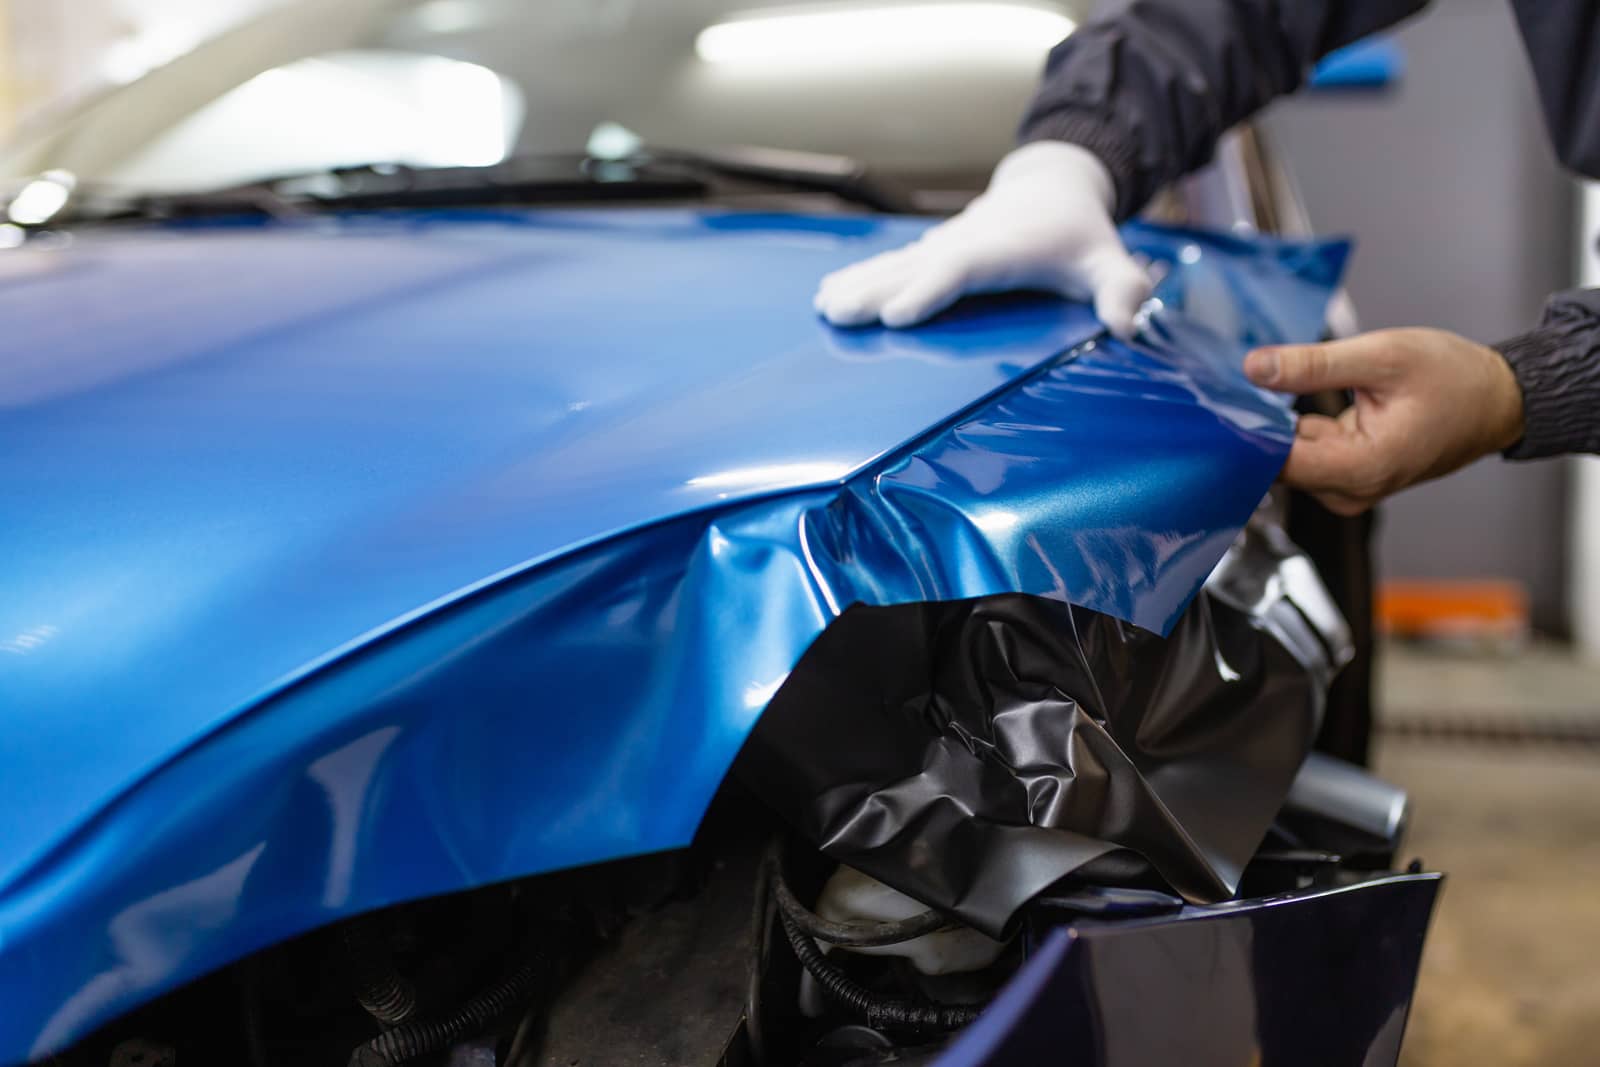
Using Heat And Squeegee Techniques
Use a heat gun to warm the vinyl slightly. Warm vinyl becomes soft and easier to work with. Use a squeegee to press the vinyl onto the car. Start from the center and move outwards. This pushes out air bubbles and smooths wrinkles. Keep the heat moving to avoid damage. Take time and work slowly for best results.
Handling Curves And Edges
Curves and edges need extra attention. Warm the vinyl more to make it flexible. Stretch the vinyl gently over curves. Use the squeegee to press it down firmly. Cut excess vinyl carefully near edges. Avoid cutting too close to the paint. Proper handling prevents peeling and bubbles later.
Finishing Touches
Finishing touches make your vinyl wrap look clean and last longer. They help protect the edges and keep the wrap smooth. These final steps ensure your car’s new look stays fresh and neat.
Trimming Excess Vinyl
Use a sharp blade to cut off extra vinyl carefully. Trim close to the edges but do not cut the car’s paint. Take your time to avoid mistakes. Clean cuts prevent peeling and give a professional look.
Sealing Edges And Corners
Apply edge sealer to corners and edges. This stops water and dirt from getting under the wrap. Use a small brush or applicator for even coverage. Proper sealing keeps the vinyl tight and secure.
Post-application Heat Treatment
Gently heat the vinyl with a heat gun or hair dryer. Heat helps the vinyl stretch and stick better to curves. Do not overheat to avoid damage. This step improves durability and smoothness of the wrap.
Maintenance And Care
Proper maintenance and care keep your car’s vinyl wrap looking fresh. A good routine helps the wrap last longer. It protects the colors and prevents damage. Follow simple steps to maintain your vinyl wrap’s shine and durability.
Cleaning Tips For Longevity
Wash your vinyl wrap gently. Use a mild soap and water mix. Avoid harsh chemicals or strong detergents. Use a soft cloth or sponge to clean the surface. Rinse thoroughly with clean water. Dry with a microfiber towel to avoid scratches. Clean your wrap regularly to prevent dirt buildup.
Avoiding Damage And Peeling
Park your car in shade when possible. Direct sunlight can fade or weaken the vinyl. Avoid high-pressure washers near edges and seams. Do not scrub the wrap hard. Be careful when opening doors or loading items. Sharp objects can cause tears or scratches. Inspect your wrap often for early signs of peeling.
When To Seek Professional Help
Small scratches or bubbles might need expert repair. If you see large peeling areas, contact a professional. They can fix damage without harming the wrap. Professionals can also reapply sections that loosen over time. Early repairs save money and keep your car looking great.
Credit: theartworks.com
Frequently Asked Questions
What Tools Are Needed For Vinyl Car Wrapping?
You need a squeegee, heat gun, utility knife, measuring tape, and cleaning supplies. These tools help apply vinyl smoothly without bubbles or wrinkles.
How Long Does Vinyl Wrap Last On A Car?
A quality vinyl wrap lasts 5 to 7 years with proper care. Exposure to sun and harsh weather can shorten its lifespan.
Can Vinyl Wrap Damage My Car’s Paint?
Vinyl wrap generally does not damage paint if applied and removed correctly. Proper surface preparation and professional removal are essential to avoid paint damage.
Is It Better To Wrap Or Paint A Car?
Vinyl wrap is cheaper, faster, and reversible. Paint lasts longer but is costly and permanent. Choose based on budget and style needs.
Conclusion
Vinyl wrapping a car can change its look without paint. Take your time and work carefully on each step. Clean the surface well before starting the wrap. Use a heat gun to smooth out wrinkles and bubbles. Small mistakes can be fixed with patience and care.
This skill improves with practice and attention to detail. Your car will stand out with a fresh, new style. Try this project for a fun and rewarding experience.


