Are you ready to transform your car, laptop, or furniture without spending a fortune? Learning how to do vinyl wrap yourself can save you money and give you complete control over your style.
Imagine turning any surface into a sleek, eye-catching masterpiece with just a few simple steps. In this guide, you’ll discover easy-to-follow tips that make vinyl wrapping less intimidating and more fun. By the end, you’ll have the confidence to tackle your own project and enjoy results that look professional.
Let’s dive in and unlock the secrets to mastering vinyl wrap!

Credit: www.youtube.com
Preparing Your Vehicle
Preparing your vehicle is the first step to a smooth vinyl wrap job. This phase ensures the vinyl sticks well and lasts longer. Taking time to prep saves you from problems later.
Cleaning The Surface
Clean the vehicle surface thoroughly. Dirt and grease stop vinyl from sticking properly. Use soap and water first. Then, wipe down with isopropyl alcohol. This removes oils and residues. Let the surface dry completely before wrapping.
Removing Obstacles
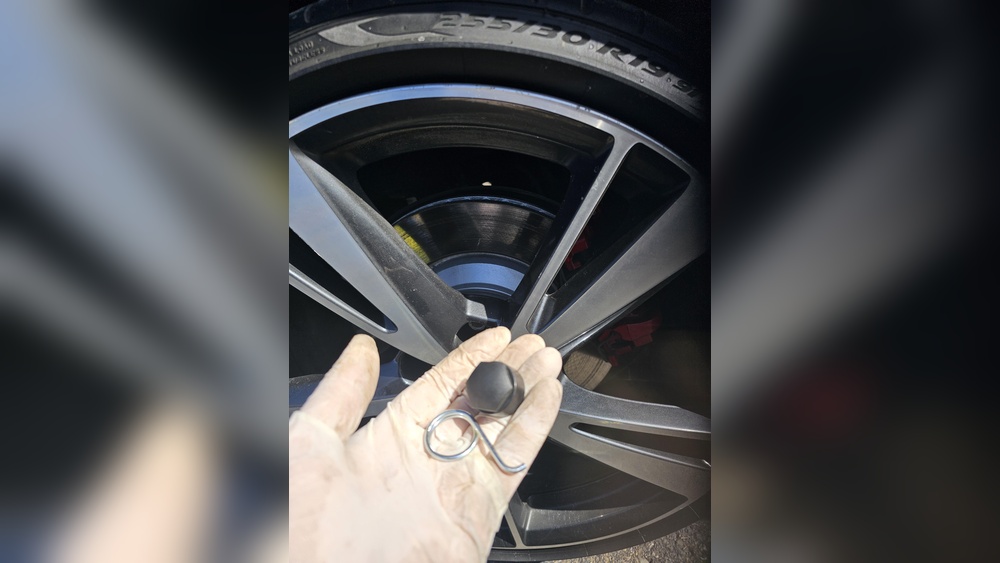
Take off parts that block your work. Remove mirrors, badges, and antennae. This makes wrapping easier and cleaner. It helps you reach corners and edges. Keep the parts safe to reattach later.
Choosing The Right Environment
Work in a clean, dust-free place. Avoid windy or humid areas. A garage or covered space works best. Good lighting helps you see bubbles and wrinkles. The temperature should be mild, around 60-80°F (15-27°C).
Selecting Vinyl Wrap Materials
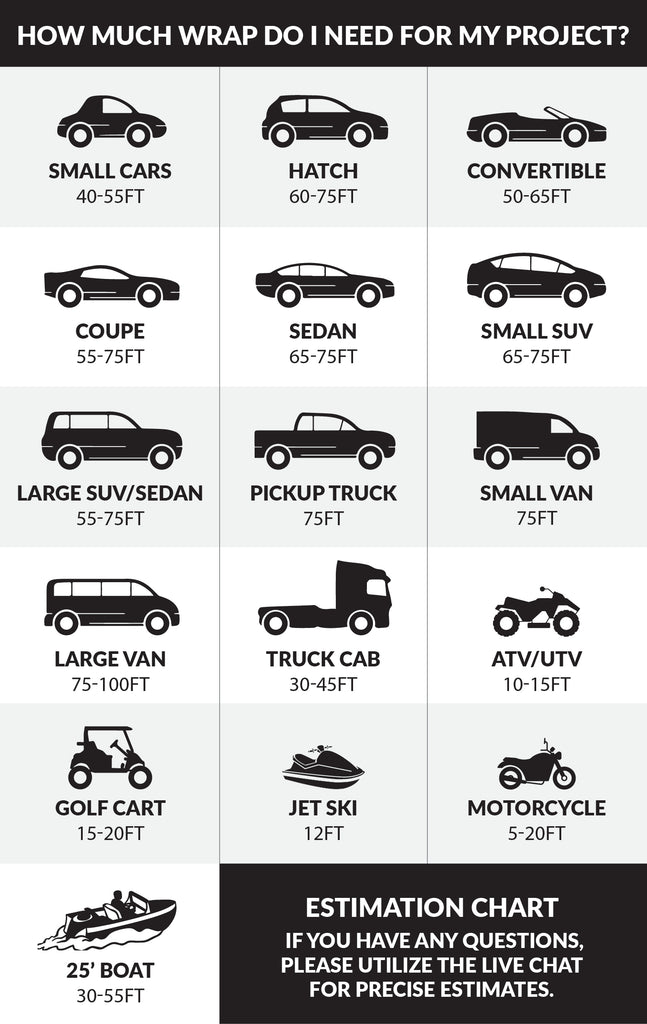
Selecting the right vinyl wrap materials is key to a smooth and lasting finish. The quality and type of vinyl affect how easy it is to apply and how well it sticks. Choosing good materials saves time and avoids problems like bubbles or peeling. It also helps the wrap look professional and last longer.
Types Of Vinyl Wrap
There are several types of vinyl wrap to choose from. Cast vinyl is thin and flexible. It molds well to curves and lasts longer. Calendered vinyl is thicker and less flexible. It works well on flat surfaces and costs less. Matte, gloss, and satin finishes offer different looks. Textured wraps, like carbon fiber, add style. Pick the type based on your project and budget.
Tools You’ll Need
Having the right tools makes the job easier. A squeegee helps smooth out bubbles and wrinkles. A heat gun or hair dryer warms the vinyl for better stretching. Sharp knives or blades cut the vinyl cleanly. A measuring tape and a microfiber cloth also help. Clean tools and workspace improve the wrap’s finish and durability.
Measuring And Cutting Vinyl
Measuring and cutting vinyl are key steps in a successful vinyl wrap project. Precise measurements ensure the vinyl fits perfectly on the surface. Cutting the vinyl correctly prevents waste and keeps edges clean. Both tasks require patience and attention to detail.
Taking Accurate Measurements
Start by cleaning the surface you want to wrap. Use a tape measure to get the length and width. Measure twice to avoid mistakes. Write down the numbers clearly. Add a small extra margin, about 2 inches, for adjustments. This helps cover curves and edges easily.
Cutting Techniques
Place the vinyl on a flat surface. Use a sharp utility knife or vinyl cutter for clean edges. Cut slowly and steadily along your marked lines. Avoid pressing too hard to prevent cutting the backing paper. Use a straight edge or ruler to guide your cuts. Keep the blade fresh to avoid ragged edges.
Credit: metrorestyling.com
Applying The Vinyl Wrap
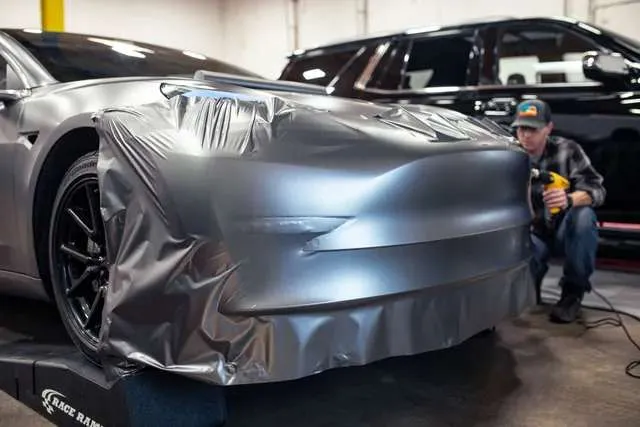
Applying the vinyl wrap takes patience and care. This step shapes the final look of your project. Proper application ensures the wrap sticks well and looks smooth. Follow each stage carefully for best results.
Positioning The Vinyl
Start by laying the vinyl over the surface. Align it to cover the area fully. Use masking tape to hold it in place. Check the fit before peeling the backing paper. Work slowly to avoid mistakes.
Smoothing Out Bubbles
Use a squeegee to press the vinyl down. Move from the center outward to push air out. Small bubbles can be popped with a pin. Avoid pressing too hard to prevent damage. Take your time for a clean finish.
Handling Curves And Edges
Heat the vinyl with a heat gun to make it flexible. Stretch it gently around curves and edges. Use a squeegee to press it down firmly. Cut excess vinyl carefully with a sharp blade. Ensure edges stick well for a neat look.
Trimming And Finishing
Trimming and finishing are the final steps in vinyl wrapping. This stage makes your wrap look neat and professional. Proper trimming removes extra vinyl without damaging the surface. Finishing touches seal the edges to stop peeling. Careful work here ensures a smooth, lasting wrap.
Precise Trimming Tips
Use a sharp blade to cut the vinyl. Cut slowly and follow the shape closely. Keep the blade angle low to avoid scratches. Trim small sections at a time for control. Always leave a tiny margin near edges to prevent gaps.
Sealing Edges
Press edges firmly with a squeegee or roller. Heat the edges gently with a heat gun to activate the adhesive. This step helps the vinyl stick well and stay put. Seal all corners and curves for better protection. Proper sealing stops dirt and moisture from getting under the vinyl.
Final Inspection
Check the entire wrap for bubbles or wrinkles. Smooth out any air pockets using a squeegee. Look closely at edges for any lifting or gaps. Touch up with heat and pressure if needed. Make sure the vinyl is tight and fully attached.
Credit: goldentouchwrapps.com
Maintenance And Care
Taking care of your vinyl wrap keeps it looking fresh and new. Proper maintenance helps avoid damage and extends its life. Small daily efforts can protect your investment and maintain its shine.
Cleaning Wrapped Surfaces
Use a soft cloth or sponge to clean the wrap. Mild soap mixed with water works best. Avoid strong chemicals or abrasive cleaners. Rinse thoroughly with clean water after washing. Dry the surface gently with a soft towel. Regular cleaning prevents dirt buildup and keeps colors bright.
Avoiding Damage
Do not use sharp tools near the wrap. Avoid high-pressure washers directly on edges. Park away from harsh sunlight to reduce fading. Be cautious of tree sap, bird droppings, and road salt. Quickly remove any contaminants to prevent stains. Handle wrapped parts gently to avoid peeling.
Longevity Tips
Keep your vehicle in a shaded area when possible. Wash the wrap regularly but gently. Inspect for small tears or bubbles and fix them fast. Use a vinyl-specific protectant for added defense. Avoid waxing or polishing with abrasive products. Proper care ensures your wrap lasts for years.
Frequently Asked Questions
What Tools Do I Need For Vinyl Wrapping?
You need a squeegee, heat gun, utility knife, and cleaning supplies. These tools help apply vinyl smoothly and remove air bubbles.
How Long Does A Vinyl Wrap Last?
A vinyl wrap typically lasts 5 to 7 years. Proper installation and maintenance can extend its lifespan.
Can Vinyl Wrap Damage My Vehicle’s Paint?
When applied and removed properly, vinyl wrap does not damage paint. Ensure the paint is in good condition before wrapping.
Is Vinyl Wrapping Cheaper Than A Paint Job?
Yes, vinyl wrapping is generally more affordable than repainting. It also offers quicker application and easy customization.
Conclusion
Vinyl wrapping can change the look of your vehicle quickly. It takes patience and care to do it well. Follow the steps carefully for smooth results. Small bubbles and wrinkles may appear but can be fixed. Practice makes the process easier over time.
You can save money by wrapping yourself instead of paying shops. Enjoy the new style and protect your paint. Try different colors or designs to make your car unique. Have fun with your project and see the difference vinyl wrap brings.