
Are you looking to give your car a fresh, stylish look without spending a fortune? Installing Aero wheel covers is one of the easiest and most affordable ways to upgrade your vehicle’s appearance.
But if you’ve never done it before, the process might seem tricky or confusing. Don’t worry—this guide will walk you through each step clearly and simply. By the end, you’ll know exactly how to install Aero wheel covers quickly and securely, so your car can stand out on the road.
Ready to transform your wheels? Let’s get started!
Choosing The Right Aero Wheel Covers
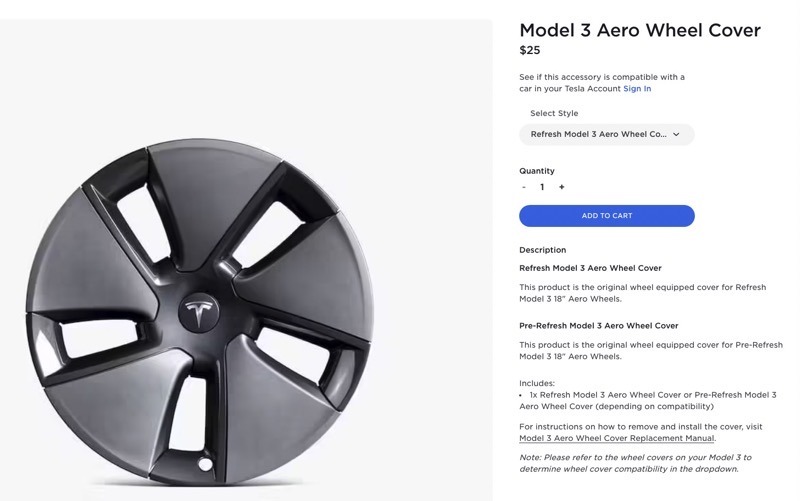
Choosing the right aero wheel covers is key for a smooth installation and a great look. The covers must fit your wheels perfectly. They should match your car’s style. Durability matters too. You want covers that last long and handle road wear well. Knowing where to buy quality covers helps you avoid poor products. Consider these points carefully before making a purchase.
Matching Size And Style
Start by checking your wheel size. Wheel covers come in standard sizes like 14, 15, or 16 inches. Measure your wheel diameter accurately. Choose covers that fit snugly to avoid rattling or falling off. Style is important too. Pick a design that suits your car’s look. Simple designs work well for most cars. Sporty or modern styles add flair. Matching the style keeps your car looking balanced.
Materials And Durability
Look for covers made from sturdy materials. Plastic is common and affordable. Some covers have a chrome finish for shine. Metal covers offer higher strength but cost more. Check if the material resists cracks and fading. Weather resistance is important for long life. Durable covers save money by lasting longer. Avoid thin or brittle materials that break easily.
Where To Buy
Buy from trusted stores or online shops. Auto parts stores offer a range of options. Online marketplaces provide many choices and prices. Read reviews to know about quality and fit. Some websites specialize in wheel covers. They may offer better support and return policies. Avoid unknown sellers with poor ratings. Reliable sellers ensure you get the right product on time.
Credit: www.tesery.com
Tools And Preparation
Preparing for the installation of aero wheel covers is vital. It saves time and prevents mistakes during the process. Gathering the right tools and preparing the wheels ensures a smooth fit and lasting results.
Gathering Necessary Tools
Collect all tools before starting the installation. You will need a flathead screwdriver, a rubber mallet, and a cleaning brush. Gloves protect your hands from dirt and sharp edges. Having a cloth and some soapy water helps with cleaning. These simple tools make the job easier and safer.
Cleaning The Wheels
Clean the wheels to remove dirt and grease. Use soapy water and a brush to scrub the surface. Rinse with clean water and dry with a cloth. Clean wheels help the covers stick better and prevent damage. Skip this step, and the covers might slip off quickly.
Checking For Damage
Inspect the wheels for cracks or dents. Damaged wheels can cause poor fit or safety risks. Look closely at the edges and surface. Replace or repair any damage before installing the covers. Safe wheels ensure the covers stay secure and protect your tires well.
Removing Old Wheel Covers
Removing old wheel covers is the first step before installing new Aero wheel covers. This process needs care to avoid damage to the wheels or the covers. Use the right tools and methods to make removal safe and easy. This section explains how to remove old wheel covers properly.
Safe Removal Techniques
Start by parking the car on a flat surface. Engage the parking brake to prevent movement. Use a flathead screwdriver or a wheel cover removal tool. Gently insert the tool between the wheel and the cover. Pry slowly and evenly around the cover’s edge. Avoid using too much force to prevent cracks or scratches. Work your way around the cover until it pops off.
Handling Clips And Fasteners
Most wheel covers attach with clips or fasteners. Handle these parts with care to avoid breaking them. If clips are stuck, wiggle the cover gently to loosen them. Keep the clips if you plan to reuse the covers. Broken clips can make the new covers fit poorly. Store clips and fasteners in a small container to avoid loss.
Installing Aero Wheel Covers
Installing Aero Wheel Covers is a straightforward process anyone can follow. The key is to take your time and ensure each step is done properly. This helps the covers fit well and stay secure on your wheels. Below are simple steps for a smooth installation.
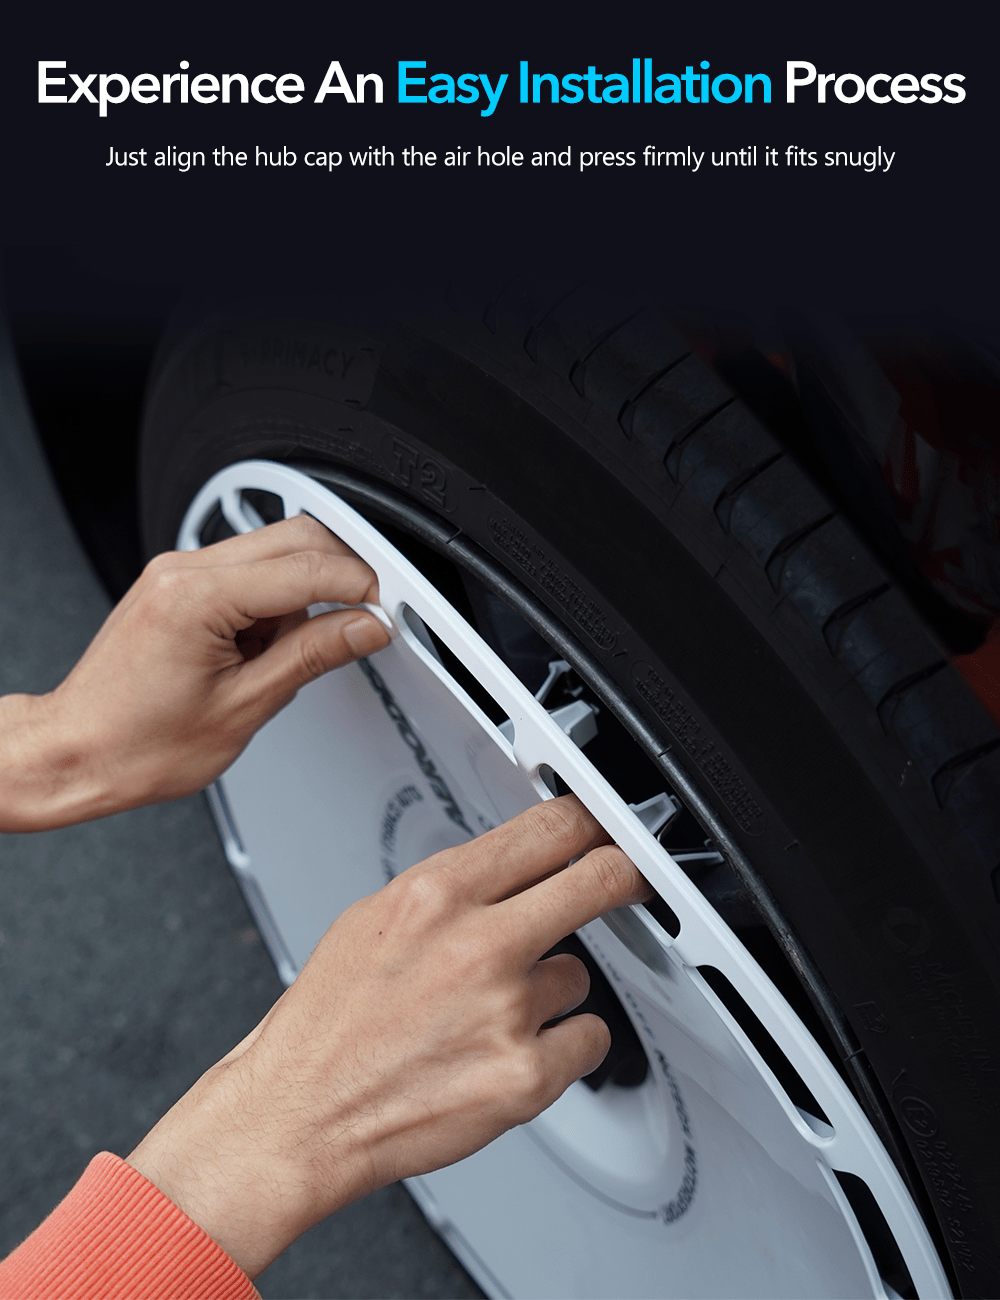
Aligning The Covers
Start by cleaning the wheel surface. This removes dirt and helps the cover stick better. Hold the Aero wheel cover close to the wheel. Match the cover’s valve hole with the tire’s valve stem. This alignment is important for a proper fit. Gently press the cover against the wheel. Check that all edges line up evenly. A well-aligned cover looks better and stays in place.
Securing The Fasteners
Most Aero wheel covers have clips or fasteners. Press each clip firmly onto the wheel rim. Make sure each fastener clicks or snaps into place. This prevents the cover from moving or falling off. Use your fingers to press around the cover’s edges. Confirm all fasteners hold tight without gaps. Secure fasteners ensure safety during driving.
Ensuring A Tight Fit
After clipping, press the cover firmly all around. Check for any loose spots or gaps. The cover should feel snug and not wiggle. If loose, remove and realign before trying again. A tight fit protects the wheel and improves car appearance. Test by gently pushing the cover to see if it stays put.
Post-installation Tips
After installing your aero wheel covers, some care is needed to keep them in good shape. Simple steps help ensure they stay attached and look great. Following these tips prevents damage and extends their life.
Checking For Stability
Check the covers right after installation. Push gently around the edges. Make sure they do not wiggle or move. Drive slowly for a short distance. Stop and check again. Secure covers reduce the chance of falling off.
Maintaining Your Aero Covers
Clean the covers regularly with a soft cloth. Use mild soap and water only. Avoid harsh chemicals that can damage the finish. Check for dirt and debris that may cause scratches. Keep your covers dry to prevent rust on metal parts.
Troubleshooting Common Issues
Loose covers can often be fixed by tightening the clips. If a clip breaks, replace it quickly. Scratches can be lightly buffed with a plastic polish. Watch for unusual noises while driving. These may mean covers are not fitted properly.

Credit: www.youtube.com
Credit: teslanorth.com
Frequently Asked Questions
How Do I Prepare My Wheels For Aero Wheel Covers?
Clean your wheels thoroughly before installation. Remove dirt and grease to ensure a secure fit. Dry the wheels completely to avoid slipping.
Can I Install Aero Wheel Covers Without Tools?
Yes, most Aero wheel covers snap on easily. However, a rubber mallet can help secure them tightly without damage.
How Long Does It Take To Install Aero Wheel Covers?
Installation typically takes 10-15 minutes per wheel. It’s a quick process suitable for beginners with basic instructions.
Are Aero Wheel Covers Compatible With All Tire Sizes?
Aero wheel covers fit most standard tire sizes. Always check the cover size against your tire diameter for compatibility.
Conclusion
Installing Aero wheel covers can be simple and quick. Follow each step carefully for a secure fit. Use the right tools to avoid damage. Check the covers often to keep them tight. Clean the covers regularly to maintain their look.
Enjoy the new style and protection for your wheels. Taking small steps makes a big difference. Drive safely and with confidence on the road.


