Are your brakes feeling less responsive or making strange noises? It might be time to machine your brake rotors.
But what does that mean, and how can you do it yourself without spending a fortune? You’re about to discover simple, clear steps to restore your rotors and improve your car’s braking performance. By the end of this guide, you’ll feel confident handling this task and saving both time and money.
Ready to take control of your car’s safety? Let’s dive in.
Credit: brakestogo.com
Why Machine Brake Rotors
Brake rotors wear down over time due to use and heat. This wear can cause uneven surfaces and reduce braking power. Machining brake rotors smooths out these surfaces. It restores the rotors to a flat, even state. This process improves the contact between the brake pads and rotors. It helps the brakes work better and last longer.
Machining is a cost-effective way to maintain your brake system. It can extend the life of the rotors. Instead of buying new rotors, machining fixes the existing ones. It keeps your vehicle safe on the road by ensuring proper braking performance.
Benefits Of Machining
Machining removes small grooves and rust from the rotors. It creates a smooth surface for better braking. This leads to less vibration and noise when braking. Machined rotors also help brake pads wear evenly.
It can save money because new rotors are expensive. Machining takes less time than replacing the rotors. The process helps keep the brake system balanced and safe.
Signs Rotors Need Machining
Listen for a squealing or grinding sound when braking. This can mean the rotors are uneven or damaged. Feel for vibrations or pulsing in the brake pedal. These are signs the rotor surface is rough or warped.
Visible grooves or rust on the rotor surface also indicate the need for machining. If the brake warning light turns on, check the rotors. Machining can fix many of these problems and improve braking safety.
Credit: www.youtube.com
Tools And Equipment Needed
Machine braking rotors requires the right tools and equipment. Having these ready ensures the job is done correctly and safely. This section covers what you need to prepare before starting.
Essential Tools
Start with a brake lathe. This machine reshapes the rotor surface evenly. You will also need a dial indicator to measure rotor runout. A torque wrench helps tighten bolts to the correct level. Use a socket set and wrenches to remove and install rotors. A wire brush cleans rust and dirt from the rotor hub. Lastly, have a caliper or micrometer to check rotor thickness.
Safety Gear
Wear safety glasses to protect your eyes from metal shavings. Use gloves to keep your hands safe and clean. Hearing protection is important if the lathe makes loud noise. A dust mask prevents inhaling brake dust or particles. Dress in clothes that cover your skin well. Keep a fire extinguisher nearby for emergencies. Safety keeps the work smooth and prevents injury.
Preparing For Machining
Preparing for machining brake rotors is a key step for a smooth and safe repair. This stage helps ensure the rotors are ready for the machine process. Proper preparation saves time and avoids mistakes. It also improves the final result and extends the rotor life.
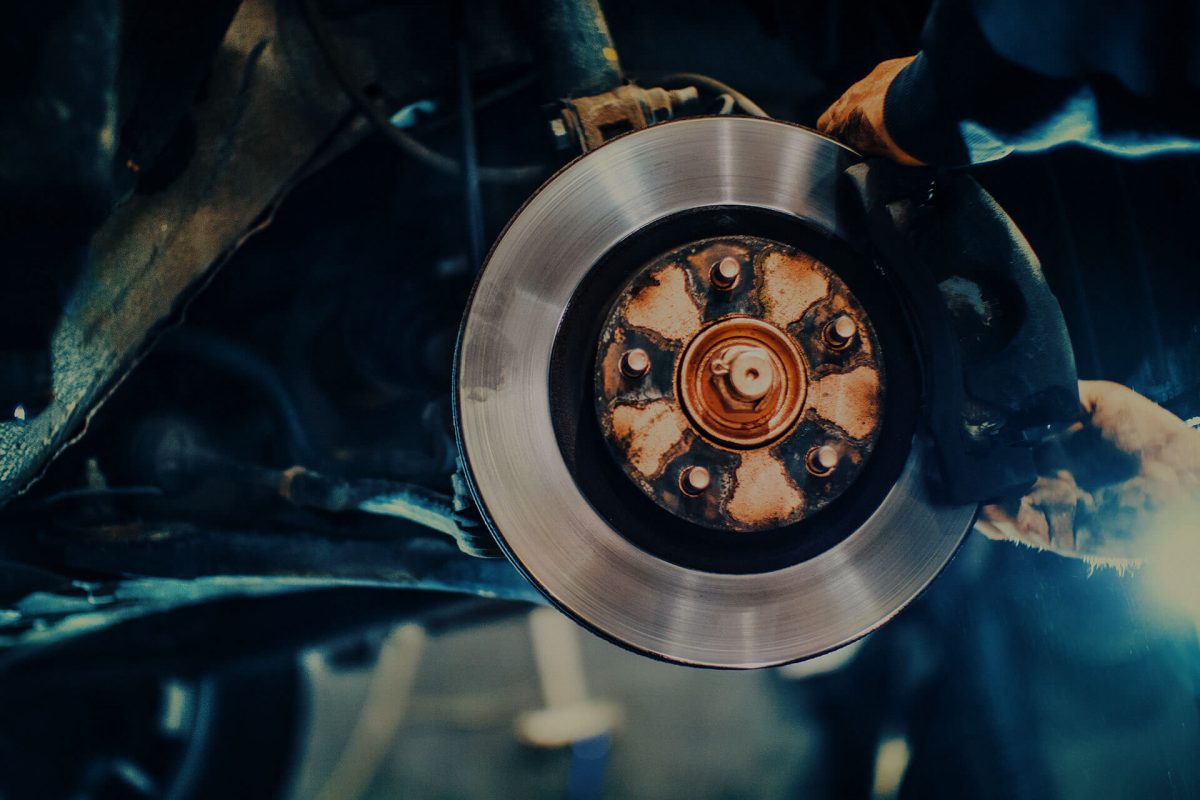
Removing The Rotor
Start by lifting the vehicle safely using a jack and stands. Remove the wheel to access the brake rotor. Next, take off the caliper carefully. Use a wrench to remove bolts holding the rotor. Gently pull the rotor off the hub. Some rotors may need light taps to loosen. Avoid damaging the rotor or hub during removal.
Cleaning And Inspection
Clean the rotor surface with a brake cleaner spray. Wipe off dirt, grease, and brake dust using a clean cloth. Check the rotor for cracks, deep grooves, or rust spots. Measure rotor thickness with a micrometer. Compare thickness to the manufacturer’s limit. Inspect the rotor for warping by spinning it on the hub. Any severe damage means replacement is better than machining.
Machining Process Steps
The machining process for brake rotors restores their smooth surface and proper thickness. It helps remove wear and warping. Careful steps ensure the rotor works well and lasts longer. Each step in the process matters.
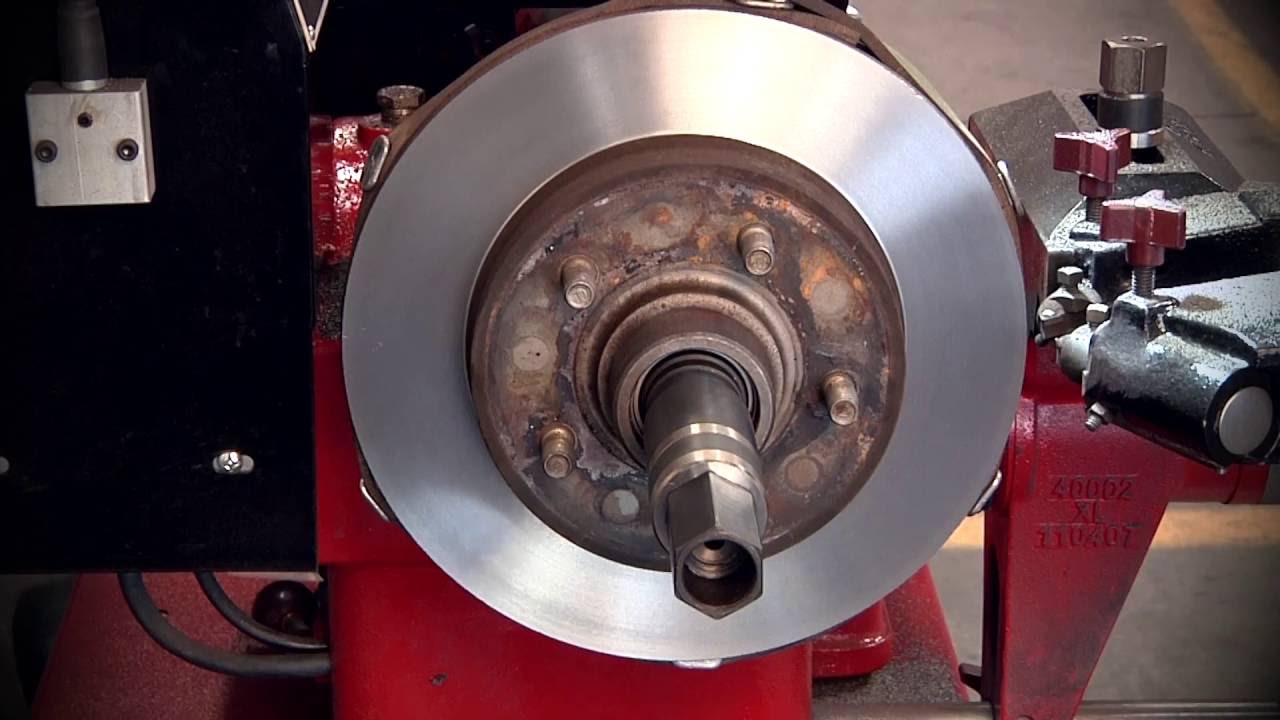
Setting Up The Lathe
First, secure the rotor on the lathe machine. Make sure it is centered correctly. A balanced rotor prevents vibrations during machining. Tighten clamps to hold the rotor firmly. Check for any wobble before starting.
Measuring Rotor Thickness
Use a micrometer or caliper to measure thickness. Measure at several points around the rotor. Compare these measurements to the manufacturer’s minimum thickness. This step ensures safety and proper function. Replace the rotor if it is too thin.
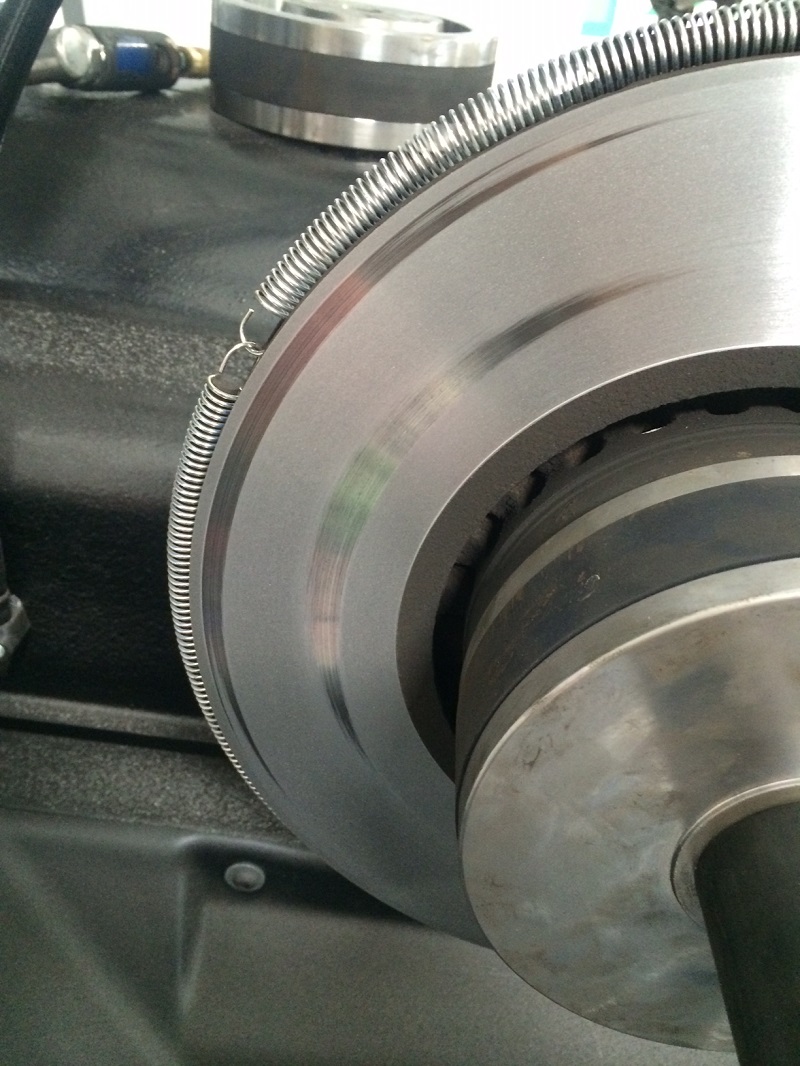
Turning The Rotor
Start the lathe and slowly begin turning the rotor. Use a cutting tool to remove the rotor’s surface layer. Keep the cut depth small for a smooth finish. Monitor the process closely to avoid over-cutting. The goal is a flat, even surface.
Finishing Touches
After turning, clean the rotor to remove metal dust. Inspect the surface for any imperfections. Use fine grit sandpaper to smooth rough spots if needed. Finally, measure thickness one more time. The rotor is ready for reinstallation.
Common Mistakes To Avoid
Machining brake rotors requires care and attention. Avoiding common mistakes is key for safety and performance. Small errors can cause big problems like uneven braking or rotor damage. Understanding these mistakes helps you do the job right the first time.
Over-machining Risks
Removing too much material weakens the rotor. It can cause warping and reduce the rotor’s life. Always check the minimum thickness before machining. Exceeding this limit makes the rotor unsafe. Over-machining also leads to poor braking feel and noise. Take small cuts and measure often to avoid this.
Ignoring Rotor Runout
Rotor runout means the rotor is not perfectly flat or centered. Ignoring this causes vibrations and brake pulsation. Use a dial indicator to measure runout before machining. Correct any runout to ensure smooth braking. Skipping this step results in uneven pad wear and poor brake performance. Always prioritize rotor alignment.
Credit: carspecmn.com
Post-machining Checks
After machining brake rotors, checking them carefully is essential. Post-machining checks confirm the rotors are safe and ready for use. These steps help avoid brake problems and ensure smooth driving.
Final Measurements
Measure the rotor thickness using a micrometer. Compare the reading to the manufacturer’s minimum thickness. Check for any warping or uneven surfaces. Use a dial indicator to measure runout. Keep the runout within the allowed limit for safe braking. Recheck all measurements twice for accuracy.
Test Installation
Place the rotor back on the vehicle’s hub. Tighten the lug nuts in a star pattern to the correct torque. Spin the rotor by hand to check for smooth rotation. Look for any wobbling or noise. Test the brake pedal for firmness. Proper installation ensures the rotor works well with the brake system.
Maintaining Machined Rotors
Maintaining machined rotors helps keep your brakes working well. Proper care stops damage and extends rotor life. Clean and smooth rotors give better stopping power and safety. Regular maintenance saves money on repairs and replacements.
Proper Bedding-in
Bedding-in new or machined rotors is important. It helps the brake pads and rotors work well together. Start by driving slowly and braking gently. Repeat this process several times to warm the brakes. Avoid hard stops during this time. This creates an even layer on the rotor surface. Proper bedding-in prevents noise and uneven wear.
Routine Inspections
Check your rotors regularly for signs of wear or damage. Look for cracks, grooves, or rust spots. Measure rotor thickness to ensure it meets safety standards. Listen for unusual noises when braking. Worn or damaged rotors reduce braking efficiency. Replace or machine rotors if needed. Routine inspections keep your brakes safe and reliable.
Frequently Asked Questions
What Tools Are Needed To Machine Brake Rotors?
You need a brake lathe, safety gear, cleaning supplies, and measuring tools. Proper tools ensure precise and safe rotor machining.
How Do You Know When To Machine Brake Rotors?
Machine rotors if they have uneven wear, scoring, or thickness variation. Use a micrometer to check rotor thickness against manufacturer specifications.
Can Machining Brake Rotors Improve Braking Performance?
Yes, machining removes surface imperfections, restoring smoothness. This enhances pad contact and braking efficiency, improving overall performance.
How Long Does It Take To Machine Brake Rotors?
Typically, machining rotors takes 30 to 60 minutes. Time varies based on equipment and rotor condition.
Conclusion
Machining brake rotors helps keep your vehicle safe and smooth. It removes uneven surfaces and extends rotor life. Doing the job carefully saves money and prevents damage. Always check the rotor’s thickness before machining. Use the right tools and follow safety steps closely.
Regular maintenance improves braking performance and your driving comfort. Keep an eye on rotor condition to avoid costly repairs later. Simple care can make a big difference in brake function. Trust the process, and your brakes will work better longer.