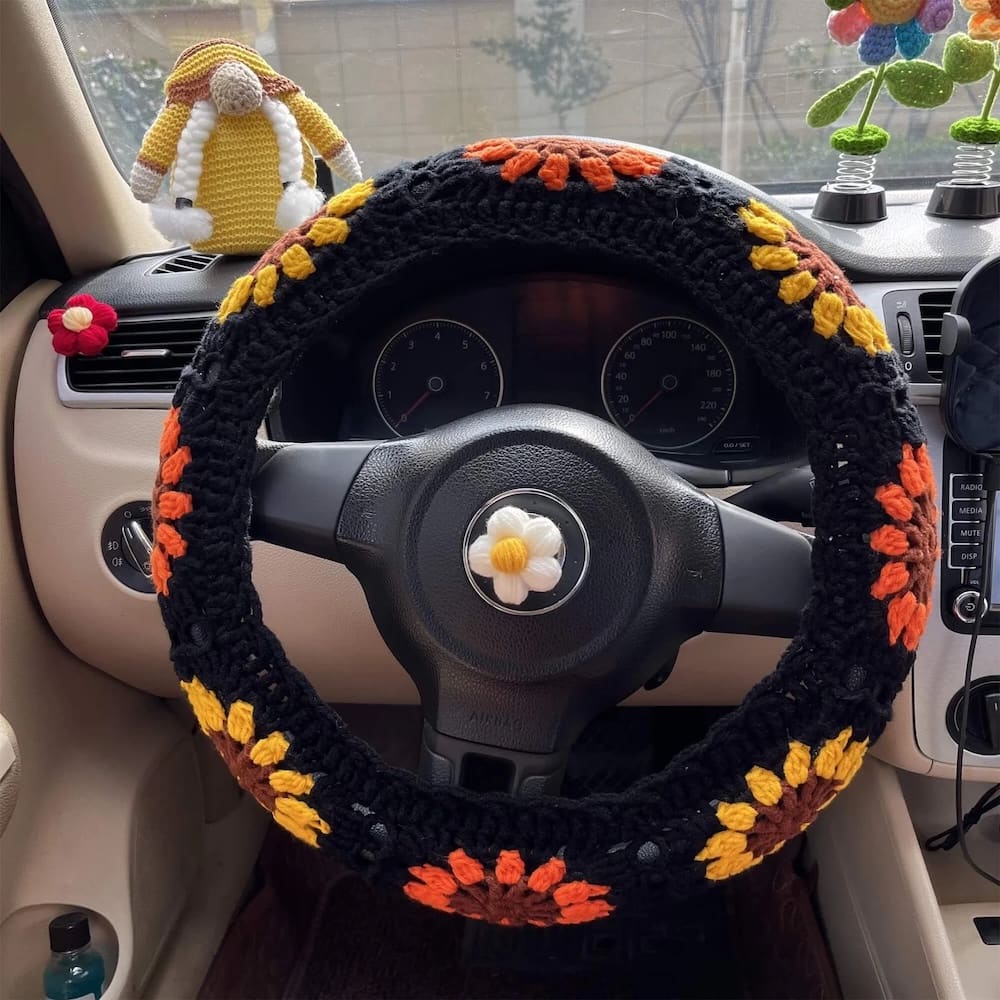
Are you tired of gripping a cold, slippery steering wheel every time you get behind the wheel? A crochet steering wheel cover can change that instantly.
Not only does it add a personal touch to your car’s interior, but it also makes driving more comfortable and stylish. In this guide, you’ll learn simple steps to create your own cover, even if you’re new to crochet. By the end, you’ll have a cozy, custom-made accessory that protects your steering wheel and feels great in your hands.
Ready to transform your driving experience? Let’s get started!
Materials Needed
Gathering the right materials makes your crochet steering wheel cover project smooth. Choosing quality supplies helps create a durable and comfortable cover. Prepare everything before starting to avoid interruptions.
Yarn Selection
Pick yarn that feels soft but strong. Cotton yarn works well because it is easy to wash. Thick yarn gives a cozy texture and good grip. Choose a color that matches your car interior or your style.
Choosing The Right Hook
Select a crochet hook size that fits your yarn. Usually, a 5mm or 6mm hook pairs well with medium-weight yarn. Using the right hook size ensures tight stitches and a neat finish. Avoid hooks that are too big or too small.
Additional Supplies
Keep a pair of sharp scissors handy for cutting yarn. Use stitch markers to keep track of your rounds. A yarn needle helps weave in ends cleanly. Measuring tape ensures your cover fits perfectly around the wheel.
Preparing The Steering Wheel
Preparing the steering wheel is the first step in making a crochet steering wheel cover. This step helps ensure the cover fits well and lasts longer. A clean and measured wheel makes the whole process easier.
Cleaning The Wheel
Start by cleaning the steering wheel. Use a damp cloth to wipe away dust and dirt. For stubborn grime, use a mild soap and water solution. Avoid harsh chemicals that can damage the wheel’s surface. Let the wheel dry completely before moving on. A clean wheel helps the cover stick better and look neat.
Measuring For Fit
Measure the steering wheel’s diameter and thickness. Use a flexible tape measure for accurate results. Wrap it around the wheel to find the circumference. Note the measurement in inches or centimeters. Measure the thickness from one side to the other. These numbers guide you in making the right-sized crochet cover. A good fit keeps the cover secure and comfortable to hold.
Basic Crochet Stitches
Before starting your crochet steering wheel cover, you need to know some basic crochet stitches. These stitches build the shape and texture of your cover. Learning them helps you follow patterns easily. Each stitch has a simple method and purpose.
Practice these stitches to get comfortable with your yarn and hook. They form the foundation for your project. Let’s explore three essential crochet stitches for your steering wheel cover.
Chain Stitch
The chain stitch is the first stitch in almost every crochet project. It creates a base row to work on. To make it, wrap the yarn around your hook and pull through the loop on the hook. Repeat this motion to form a chain of stitches.
Chain stitches are easy and quick. They set the length of your cover. Count your chains carefully to fit your steering wheel size.
Single Crochet
Single crochet is a tight and sturdy stitch. It gives your cover a solid texture. To make it, insert the hook into the stitch, yarn over, pull through, yarn over again, and pull through both loops on the hook.
This stitch is perfect for a firm grip on the wheel. It’s simple to learn and makes your cover last long.
Slip Stitch
Slip stitch is a small, flat stitch. Use it to join rounds or finish edges neatly. To make it, insert the hook into the stitch, yarn over, and pull through both the stitch and the loop on your hook.
Slip stitch keeps your work tight and clean. It helps connect pieces without adding bulk.
Creating The Base Round
Creating the base round is the first step in making a crochet steering wheel cover. This round forms the center of your cover. It must be tight and even to fit well on the steering wheel. A strong base helps the cover keep its shape and last longer.
Start with a small circle. Then, make it wider by adding stitches. This process shapes the cover to match the wheel’s size. Careful counting and smooth increases keep the circle flat and round.
Starting The Circle
Begin with a slip knot on your hook. Chain two stitches to start the round. Work six single crochets into the second chain from the hook. This forms a small ring. Pull the tail tight to close the circle. Join with a slip stitch to the first stitch.
Increasing Stitches
To make the circle larger, add stitches evenly. In the second round, make two single crochets in each stitch. This doubles the stitch count. Next, increase by adding one extra stitch every few stitches. Keep counting to avoid bumps. Stop increasing when the circle fits the wheel’s center size.
Crocheting The Body
Crocheting the body of your steering wheel cover is the main step. This part shapes the cover and gives it strength. Focus on making even stitches for a neat look. The body should fit snugly around your steering wheel.
Maintaining Consistent Tension
Keep your yarn tension steady throughout the project. Too tight stitches make the cover stiff. Too loose stitches cause gaps. Hold the yarn firmly but relaxed. Practice a few rows before starting the cover. This helps you find the right tension.
Working In The Round
Start crocheting in the round to form a circle. Use a stitch marker to track your rounds. This prevents losing count and keeps the shape even. Join each round carefully to avoid bumps. Keep your stitches uniform for a smooth finish.

Credit: www.instructables.com
Adding Texture And Patterns
Adding texture and patterns to your crochet steering wheel cover makes it unique and stylish. Texture gives your cover a nice feel and grip. Patterns bring color and design that catch the eye. Both make your cover more fun and personal. You can use simple ideas to create interesting looks. Let’s explore easy ways to add texture and patterns.
Using Different Stitches
Different stitches create various textures. Simple stitches like single crochet make a smooth surface. Puff stitches add bumps and softness. Shell stitches form pretty, round shapes. Mixing stitches changes how the cover feels and looks. Try combining tight and loose stitches for contrast. Textured stitches improve your grip on the wheel. Experiment with stitches to find your favorite style.
Incorporating Color Changes
Color changes add life to your steering wheel cover. Switch yarn colors every few rows for stripes. Use two colors in one row for neat patterns. Color blocks create bold, simple designs. Choose colors that match your car’s interior. Bright colors make the cover stand out. Soft shades give a calm, elegant look. Plan your colors before you start for best results.
Fitting The Cover
Fitting the crochet steering wheel cover is an important step. It ensures the cover stays in place and feels good while driving. Take your time with this part to get the best result. A well-fitted cover adds style and comfort to your car.
Stretching Over The Wheel
Start by holding the cover with both hands. Gently stretch the crochet cover over the top of the steering wheel. Use slow and steady movements to avoid tearing the yarn. Work your way around the wheel, pulling the cover down evenly. The cover should fit snugly but not too tight.
Adjusting For Comfort
Once the cover is on, check how it feels in your hands. Move the cover slightly to remove any wrinkles or loose spots. Make sure it does not slip when you turn the wheel. Adjust the cover until it feels comfortable and secure. A good fit improves grip and driving safety.
Finishing Touches
Finishing touches make your crochet steering wheel cover neat and durable. These final steps improve the look and the life of your project. Pay attention to small details for the best results.
Weaving In Ends
Weave in all loose yarn ends carefully. Use a yarn needle to hide ends inside the stitches. This stops unraveling and keeps the cover tidy. Trim extra yarn close to the fabric without cutting stitches. Secure ends firmly for a clean finish.
Optional Embellishments
Add decorations to personalize your cover. Sew on buttons, beads, or small patches for style. Use colorful yarn to crochet flowers or shapes. Keep embellishments light to avoid slipping or discomfort. Choose items that match your car’s interior or your taste.
Care And Maintenance
Taking care of your crochet steering wheel cover keeps it fresh and long-lasting. Proper care helps maintain its color, shape, and softness. Follow simple steps to clean and store it well.
Cleaning Instructions
Hand wash your crochet cover with mild soap and cold water. Avoid hot water to prevent shrinking. Gently rub dirt spots without twisting the fabric. Rinse thoroughly to remove all soap. Lay flat on a towel to dry. Do not use a dryer or direct sunlight. This keeps the yarn strong and colors bright.
Storage Tips
Store your crochet cover in a cool, dry place. Keep it away from direct sunlight to stop fading. Fold it loosely to avoid stretching or misshaping. Avoid heavy objects on top that can crush the crochet. Use a breathable bag or box for extra protection. Proper storage keeps the cover neat and ready for use.
Credit: jototheworld.com

Credit: www.youtube.com
Frequently Asked Questions
How Do I Start Crocheting A Steering Wheel Cover?
Begin by measuring your steering wheel’s diameter. Choose a suitable yarn and hook size. Start with a foundation chain that fits around the wheel. Crochet in rounds, increasing evenly for a snug fit. This ensures your cover fits perfectly.
What Materials Are Best For Crochet Steering Wheel Covers?
Use durable, washable yarn like cotton or acrylic. These materials provide comfort and grip. Avoid slippery or stretchy yarns. Choose colors that resist dirt and match your car’s interior. Proper materials improve the cover’s durability and appearance.
How Long Does It Take To Crochet A Steering Wheel Cover?
It typically takes 3 to 5 hours, depending on skill level. Beginners may need more time to practice stitches. Experienced crocheters can finish faster. The time varies with pattern complexity and yarn type.
Can I Wash A Crochet Steering Wheel Cover?
Yes, most crochet covers made from cotton or acrylic yarn are washable. Hand wash gently with mild detergent. Air dry flat to maintain shape. Always check yarn care instructions before washing.
Conclusion
Making a crochet steering wheel cover is simple and fun. You can choose any color or pattern you like. It adds comfort and style to your car’s interior. Plus, it protects your steering wheel from wear and tear. With just basic crochet skills, anyone can create one.
Give it a try and enjoy a cozy drive every day. Small handmade touches make a big difference. Your car will feel more personal and warm. Keep practicing, and your skills will grow with each project.


