Have you ever wanted to give your car a professional, spotless wash without spending hours scrubbing? A foam cannon could be your secret weapon.
It blasts thick, soapy foam that clings to your vehicle, loosening dirt and grime with less effort. If you’re wondering how to make a foam cannon yourself, you’re in the right place. This guide will walk you through simple steps to create an effective foam cannon that saves time and makes washing your car more fun.
Keep reading to discover how easy it is to upgrade your car wash game.
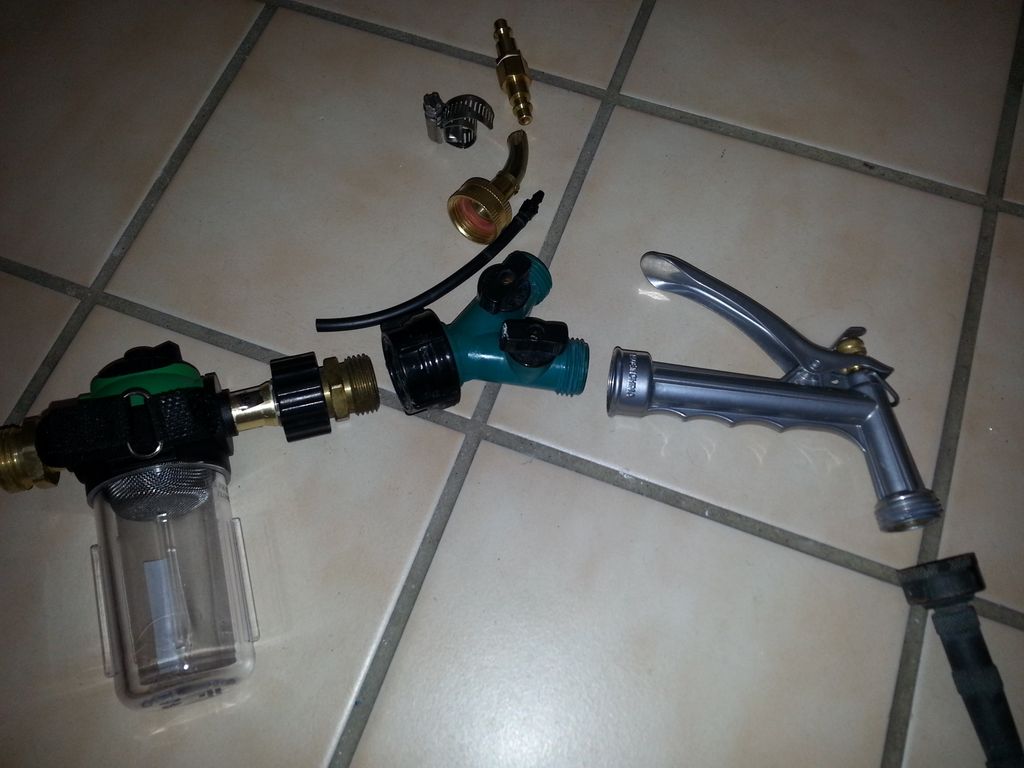
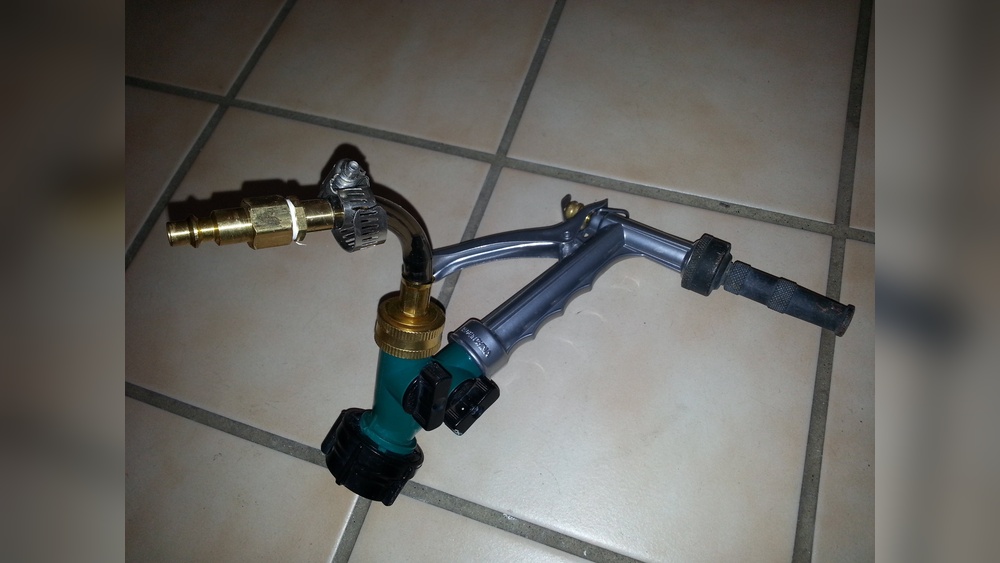
Credit: www.instructables.com
Choosing The Right Foam Cannon
Choosing the right foam cannon is important for a good car wash. It affects how well the soap spreads and how easy the washing is. A foam cannon that fits your needs saves time and water. It also protects your car’s paint from scratches.
Several factors matter when picking a foam cannon. These include the type, material, and compatibility with your pressure washer. Knowing these helps you make the best choice.
Types Of Foam Cannons
Foam cannons come in different styles. Some have adjustable spray nozzles to control foam thickness. Others focus on creating thick foam quickly. Choose a type based on how much control you want over the foam. Some models include built-in soap containers. These make mixing soap and water easier. Consider your washing habits to pick the right style.
Material And Build Quality
Look for foam cannons made from strong materials like metal or durable plastic. Metal parts last longer and resist damage. Plastic can be lighter but less durable. Check if the seals and connectors are tight to avoid leaks. A good build means fewer breaks and better foam pressure. Quality parts improve your washing experience.
Compatibility With Pressure Washers
Not all foam cannons work with every pressure washer. Check the fitting size before buying. Most foam cannons fit standard 1/4-inch quick-connects. Some need adapters for different models. Also, confirm the pressure range the foam cannon can handle. Using the wrong pressure can damage the cannon or reduce foam quality. Match your washer’s pressure to the foam cannon’s limits for best results.

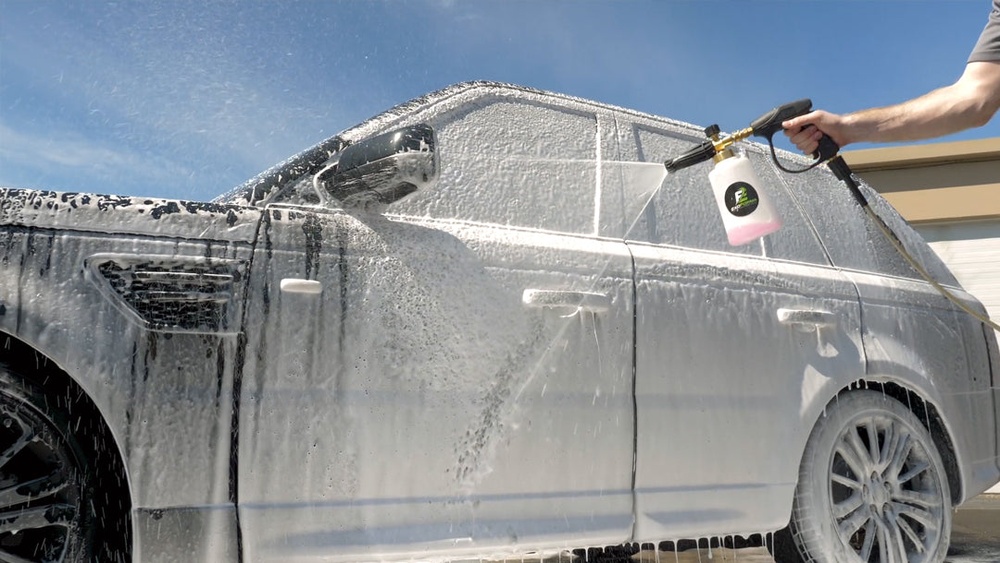
Credit: www.shinsancarcare.com
Gathering Necessary Materials
Before building a foam cannon, gather all necessary materials. Having the right supplies makes the process smooth and safe. Prepare each item carefully to avoid interruptions. This section covers essential tools, cleaning solutions, and safety gear.
Essential Tools
You need a pressure washer with a spray lance. A foam cannon attachment fits onto this lance. A funnel helps pour liquids without spills. Use a measuring cup for accurate soap amounts. Have a clean bucket ready for mixing.
Recommended Cleaning Solutions
Choose car wash soap designed for foam cannons. Avoid harsh detergents that can damage paint. Use water-based solutions for better foam quality. Some prefer specialized foam cannon soap for thick suds. Always check the label for compatibility with your washer.
Safety Gear
Wear safety glasses to protect your eyes from splashes. Gloves keep your hands safe from soap and water. Use old clothes or a waterproof apron to stay dry. Work in a well-ventilated area to avoid inhaling fumes. Keep a first-aid kit nearby for emergencies.
Assembling The Foam Cannon
Assembling the foam cannon is the step that brings all parts together. It shapes the tool you will use to create thick foam for cleaning. Careful assembly ensures the foam cannon works well and lasts longer.
Connecting Components
Start by attaching the foam cannon body to the pressure washer wand. Use the quick-connect fittings or threaded connectors provided. Make sure each piece fits tightly to avoid leaks. Connect the foam bottle to the cannon body. Tighten by hand, ensuring a firm seal. Do not use tools that may crack plastic parts.
Adjusting Nozzle Settings
Adjust the nozzle to control foam thickness and spray pattern. Turn the nozzle clockwise for a narrower spray. Turn it counterclockwise for a wider spray. Some foam cannons have a soap mixture dial. Adjust it to control how much soap mixes with water. Set the nozzle to match your cleaning needs.
Testing For Leaks
Turn on the water supply and pressure washer. Look closely at all connection points. Watch for any water or foam escaping. Tighten any loose fittings or connections. Check the foam bottle cap for a proper seal. A leak-free cannon performs better and saves soap.
Mixing Soap Solutions
Mixing the right soap solution is key to making a foam cannon work well. The soap mix creates thick foam that sticks to surfaces. Using the correct soap and water ratio helps produce dense foam without wasting soap. Simple steps can help you mix the best solution for your foam cannon.
Choosing The Right Soap
Pick a soap that can create lots of foam. Car wash soaps or dish soaps work well. Avoid soaps with added wax or lotions. These can leave a slippery residue on your car. Look for clear or light-colored soaps. They rinse off easily and do not harm paint.
Dilution Ratios
Soap must be diluted with water before use. A common ratio is one part soap to ten parts water. This creates thick foam without wasting soap. You can adjust the ratio slightly to get more or less foam. Test small batches to find the best mix for your cannon.
Avoiding Common Mistakes
Do not use pure soap without water. It can clog the foam cannon. Avoid using hard water, as it reduces foam quality. Use soft or filtered water instead. Avoid mixing soap with other chemicals. They can damage your foam cannon and car paint.
Using The Foam Cannon Effectively
Using a foam cannon correctly makes a big difference in cleaning results. It helps cover the surface evenly with foam. This foam loosens dirt and grime for an easy wash. Following the right methods saves time and effort. It also protects your paint from damage.
Proper Application Techniques
Start by rinsing the vehicle to remove loose dirt. Hold the foam cannon about 12 inches from the surface. Spray in smooth, steady motions for full coverage. Avoid spraying in one spot too long to prevent foam from drying. Work from top to bottom to use gravity to your advantage. Let the foam sit for 3 to 5 minutes to break down grime.
Optimal Spray Patterns
Use a wide spray pattern to cover large areas quickly. Adjust the nozzle for a fan-shaped spray to reach corners and edges. Narrow sprays help target tough spots with heavy dirt. Change spray angles to cover all surfaces evenly. Avoid direct spraying on hot surfaces or under the sun to stop foam from drying too fast.
Time Management For Best Results
Apply foam in sections for better control and coverage. Wait a few minutes after spraying before rinsing. Do not let foam dry completely on the surface. Rinse thoroughly with water using moderate pressure. Dry the vehicle with a soft cloth or chamois to avoid water spots. Proper timing keeps the cleaning effective and safe for your paint.
Maintaining And Cleaning Your Foam Cannon
Maintaining and cleaning your foam cannon keeps it working well for a long time. Dirt and soap build-up can block the nozzle or damage parts. Regular care helps avoid costly repairs and ensures strong foam every use.
Post-use Cleaning Steps
Start by rinsing the foam cannon with clean water. Fill the soap container with water only. Spray water through the cannon until it runs clear. This removes leftover soap from the inside. Wipe the outside with a damp cloth. Let the parts dry fully before storing.
Storage Tips
Store the foam cannon in a dry place. Avoid direct sunlight or freezing temperatures. Keep the soap container empty and clean. Store the cannon upright to stop leaks. Check it regularly for cracks or damage before use.
Troubleshooting Common Issues
If foam is weak, check for clogs in the nozzle or hose. Clean any dirt or debris carefully. Low foam could mean the soap mix is too thin. Tighten all connections to stop leaks. Replace worn parts to keep the cannon working well.

Credit: www.amazon.com
Frequently Asked Questions
What Materials Do I Need To Make A Foam Cannon?
You need a pressure washer, foam cannon attachment, soap, and water. Use a high-quality car wash soap for best foam.
How Do I Attach The Foam Cannon To A Pressure Washer?
Connect the foam cannon to the pressure washer’s spray gun nozzle securely. Ensure a tight fit to prevent leaks during use.
What Is The Best Soap For Foam Cannons?
Choose a pH-balanced, thick car wash soap designed for foam cannons. It creates dense, long-lasting foam without damaging paint.
How Do I Adjust Foam Thickness On A Foam Cannon?
Adjust the foam cannon’s soap-to-water ratio and spray nozzle settings. More soap and a tighter nozzle increase foam thickness.
Conclusion
Making a foam cannon is simple and fun. You only need a few parts and some patience. Follow the steps carefully, and you will build one quickly. A foam cannon helps clean your car better and saves time. Enjoy the thick foam and watch dirt disappear easily.
Now, you can try making a foam cannon yourself. It’s a great project for anyone who likes DIY tasks. Give it a shot and see the results!