
Are you looking to add a personal touch to your cups or create unique gifts that stand out? Making vinyl cup wraps is easier than you think, and you don’t need to be a design expert to get started.
In this guide, you’ll discover simple steps to create eye-catching vinyl wraps that fit perfectly on your cups. Whether you want to customize a tumbler for yourself or start a small business, this article will give you the tools and tips to make your ideas come alive.
Ready to turn your plain cups into something special? Keep reading to learn how!

Credit: www.youtube.com
Materials Needed
To create vinyl cup wraps, gather adhesive vinyl sheets, a cutting machine or scissors, transfer tape, and a scraper tool. A clean cup and measuring tape help ensure the wrap fits perfectly. Simple supplies make crafting easy and fun.
Types Of Vinyl
Vinyl is the key material for cup wraps. Choose between permanent and removable vinyl. Permanent vinyl lasts longer and resists water well. Removable vinyl is easy to peel off without damage. Heat transfer vinyl (HTV) works well for fabric cups. Adhesive vinyl suits plastic or metal cups. Pick vinyl that fits your cup type and design needs.
Tools And Accessories
Basic tools make the process smooth. A cutting machine like Cricut or Silhouette helps cut vinyl precisely. Use weeding tools to remove extra vinyl parts. Transfer tape moves the vinyl design to the cup. Scissors and a ruler help with measurements. A scraper or credit card smooths out air bubbles. A heat press or hairdryer can help vinyl stick better.
Choosing The Right Cup
Select cups with smooth surfaces for best results. Stainless steel, plastic, or glass cups work well. Avoid textured or curved cups; vinyl won’t stick well. Consider cup size and shape for your design. Clean the cup surface before applying vinyl. A clean cup helps vinyl stick firmly and last longer.
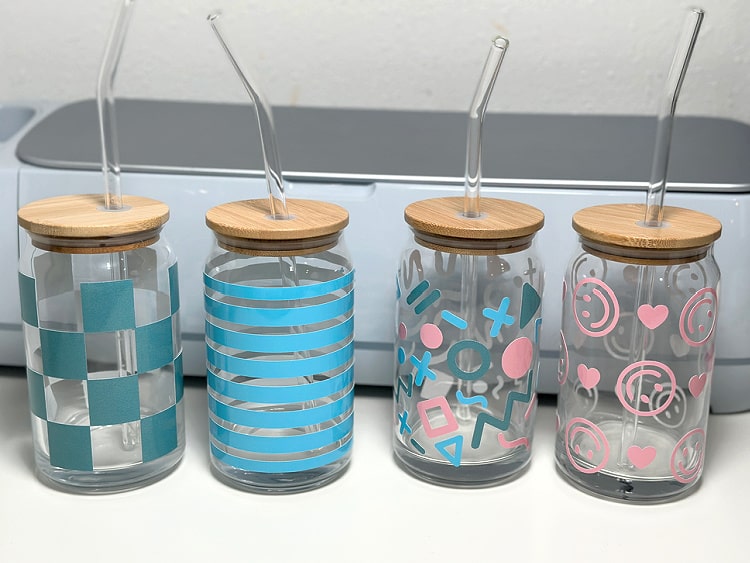
Credit: www.5littlemonsters.com
Design Planning
Design planning is the first step in making vinyl cup wraps. It helps you organize ideas and make your wrap look great. Careful planning saves time and material. It also ensures the wrap fits perfectly and matches your style.
Selecting A Theme
Choose a theme that matches the cup’s use or the person’s taste. Themes can be simple, like colors or shapes. They can also be more detailed, like animals or holidays. A clear theme makes the design look neat and focused.
Measuring Your Cup
Measure the cup’s height and width carefully. Use a soft tape measure for best results. Write down the measurements. These numbers help create a wrap that fits snugly without gaps or overlaps.
Creating A Design Template
Draw a template based on your cup’s measurements. Use paper or a computer program for accuracy. Mark areas for text or images on the template. This guide helps place vinyl pieces correctly during cutting and sticking.
Cutting The Vinyl
Cutting the vinyl is a key step in making vinyl cup wraps. It shapes the design that will stick to your cup. Precise cuts help your wrap look clean and professional. You need to follow careful steps to get the best results.
Using A Cutting Machine
A cutting machine can make cutting vinyl fast and easy. You upload your design to the machine’s software. The machine then cuts the vinyl exactly as planned. It is great for detailed designs or many copies. Make sure the vinyl is placed flat and smooth. Choose the right blade and settings for vinyl. This helps avoid tearing or messy edges.
Hand Cutting Techniques
Hand cutting works well for simple shapes or small projects. Use sharp scissors or a craft knife. Cut slowly and carefully along the lines. Keep your hands steady to avoid mistakes. You can use a cutting mat to protect surfaces. Practice on scrap vinyl to build confidence. Hand cutting gives you full control over the design.
Weeding The Design
Weeding means removing the extra vinyl parts after cutting. Use a weeding tool or tweezers for small pieces. Peel away the vinyl that is not part of the design. Take your time to avoid lifting the design itself. Good weeding makes the wrap look neat and clear. It prepares the vinyl for easy transfer to the cup.
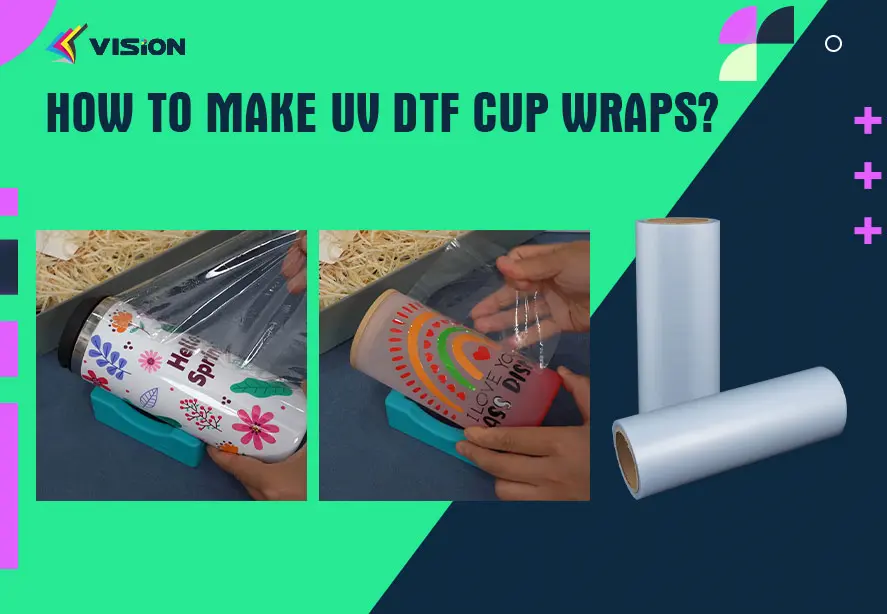
Credit: www.visionsub.com
Applying The Wrap
Applying the vinyl wrap to your cup is a careful process. Each step matters for a smooth, lasting finish. Follow these steps to ensure your wrap sticks well and looks great.
Preparing The Cup Surface
Clean the cup surface with soap and water. Remove all dirt, dust, and oils. Dry the cup completely with a soft cloth. Use rubbing alcohol on a cloth to wipe the surface again. This helps the vinyl stick better. Avoid touching the cleaned area to keep it free of oils.
Transferring The Vinyl
Cut the vinyl to the correct size before starting. Peel the backing paper slowly from one edge. Align the vinyl with the cup’s surface carefully. Start applying from one side and press gently. Avoid stretching the vinyl too much. Use a steady hand to prevent wrinkles or bubbles.
Smoothing And Securing
Use a squeegee or a credit card to smooth the vinyl. Start from the center and push outwards. This removes air bubbles and creases. If bubbles remain, gently lift the vinyl and reapply. Press firmly on the edges to secure the wrap. Let the wrap set for a few minutes before use.
Finishing Touches
Finishing touches make your vinyl cup wraps look complete and professional. These final steps protect your design and add a personal style. Small details can change how your cup wraps feel and last.
Adding Protective Coatings
Apply a clear vinyl laminate or spray to protect your wrap. This layer keeps the colors bright and stops scratches. Use a matte or glossy finish based on your style. Let the coating dry fully before using the cup wrap.
Personalizing With Extras
Add small decorations like glitter, stickers, or rhinestones for a unique look. Place these extras carefully to avoid peeling or damage. Personal touches make your wraps stand out from others. Keep the design balanced and not too crowded.
Care And Maintenance Tips
Clean your vinyl cup wraps gently with a soft cloth and mild soap. Avoid scrubbing hard or using strong chemicals. Hand wash your wrapped cups to keep the design safe. Store cups away from direct sunlight to prevent fading.
Troubleshooting Tips
Troubleshooting vinyl cup wraps can save time and improve results. Small problems often happen, but they are easy to fix. Knowing common issues and how to solve them helps you get smooth, clean wraps every time.
Common Issues And Fixes
Wrinkles appear if the vinyl is stretched too much. Try heating the vinyl slightly before applying. Use a squeegee to press out air bubbles gently. If the vinyl won’t stick, clean the cup surface well first. Use rubbing alcohol to remove oils or dust. Peeling edges mean the vinyl did not bond well. Press the edges down firmly or use a heat gun carefully.
Avoiding Wrinkles And Bubbles
Start with a clean, dry cup surface. Slowly apply vinyl from one side to the other. Use a squeegee or credit card to smooth the vinyl. Work from the center outward to push out air bubbles. Heat the vinyl with a heat gun for better flexibility. Avoid stretching the vinyl too far, which causes wrinkles. Small bubbles can be popped with a pin and pressed flat.
Removing Vinyl Wraps Safely
Peel the vinyl slowly from one corner. Use a heat gun to warm the vinyl first. Warm vinyl comes off easier without tearing. Avoid using sharp tools that can scratch the cup. Remove leftover adhesive with rubbing alcohol. Clean the cup before applying a new wrap. Proper removal keeps your cups in good condition for reuse.
Frequently Asked Questions
What Materials Do I Need For Vinyl Cup Wraps?
You need adhesive vinyl sheets, a cutting machine, transfer tape, and a clean cup surface. These materials ensure a smooth application and durable design.
How Do I Measure Cups For Vinyl Wraps?
Measure the cup’s height and circumference accurately. This ensures your vinyl wrap fits perfectly without gaps or overlaps.
Can I Use Any Vinyl For Cup Wraps?
No, use waterproof and heat-resistant vinyl. This type withstands washing and maintains design quality over time.
How Do I Apply Vinyl Wraps Smoothly?
Clean the cup, position the vinyl carefully, and use a squeegee to remove air bubbles. This ensures a flawless finish.
Conclusion
Making vinyl cup wraps is simple with the right steps. Choose good vinyl and measure your cup carefully. Cut your design with care and apply it slowly for best results. Practice helps you get better each time. Personalizing cups can be fun and creative.
Try different colors and patterns to suit your style. Enjoy crafting unique wraps that last long and look great. Keep experimenting and sharing your work with friends. Your skills will grow, and so will your collection of cool cup wraps.

