
Thinking about giving your car a fresh, eye-catching look with a vinyl wrap? Before you dive in, there’s one crucial step you can’t afford to skip: measuring your car accurately.
If you don’t get this right, you could end up wasting time, money, and materials. But don’t worry—measuring your car for a vinyl wrap isn’t as tricky as it sounds. You’ll discover simple, step-by-step tips that anyone can follow to get perfect measurements every time.
Ready to make sure your wrap fits like a glove? Keep reading to find out how!
Gathering Tools
Before measuring your car for a vinyl wrap, gather all the necessary tools. Having the right tools makes the process easier and more accurate. It helps you avoid mistakes and saves time. Prepare everything in one place to work smoothly.
Measuring Tape Essentials
A flexible measuring tape is the most important tool. Choose one that is at least 25 feet long. This length covers most cars without needing to move the tape often. Pick a tape with clear, easy-to-read markings. A metal or fiberglass tape works best for durability and accuracy.
Make sure the tape locks in place. This feature helps keep the tape steady during measurement. Also, check that the tape’s end hook is secure. It should grip edges well to avoid slipping.
Additional Tools Needed
Use a notepad or digital device to record measurements. Write down each number clearly to avoid confusion later. A camera can help capture the car’s shape and details. Take photos from different angles for reference.
Consider using masking tape to mark measuring points on the car. It prevents mistakes and shows where to measure next. A helper can be useful to hold the tape or record measurements. This teamwork speeds up the process and improves accuracy.

Credit: www.youtube.com
Preparing The Car
Preparing the car is an important step before measuring it for a vinyl wrap. A clean and well-positioned vehicle gives accurate measurements. This step helps avoid mistakes and saves time. Take your time to get the car ready for the best results.
Cleaning The Surface
Start by washing the car thoroughly. Dirt and dust can make the surface uneven. Use soap and water to remove all grime. Dry the car completely with a soft cloth. Avoid using wax or polish before measuring. A clean surface ensures the vinyl sticks well.
Positioning The Vehicle
Park the car on a flat surface. This keeps the measurements accurate. Make sure there is enough light around. Good lighting helps see all curves and edges. Keep the doors, hood, and trunk closed. This gives a true shape of the car to measure.
Measuring Key Areas
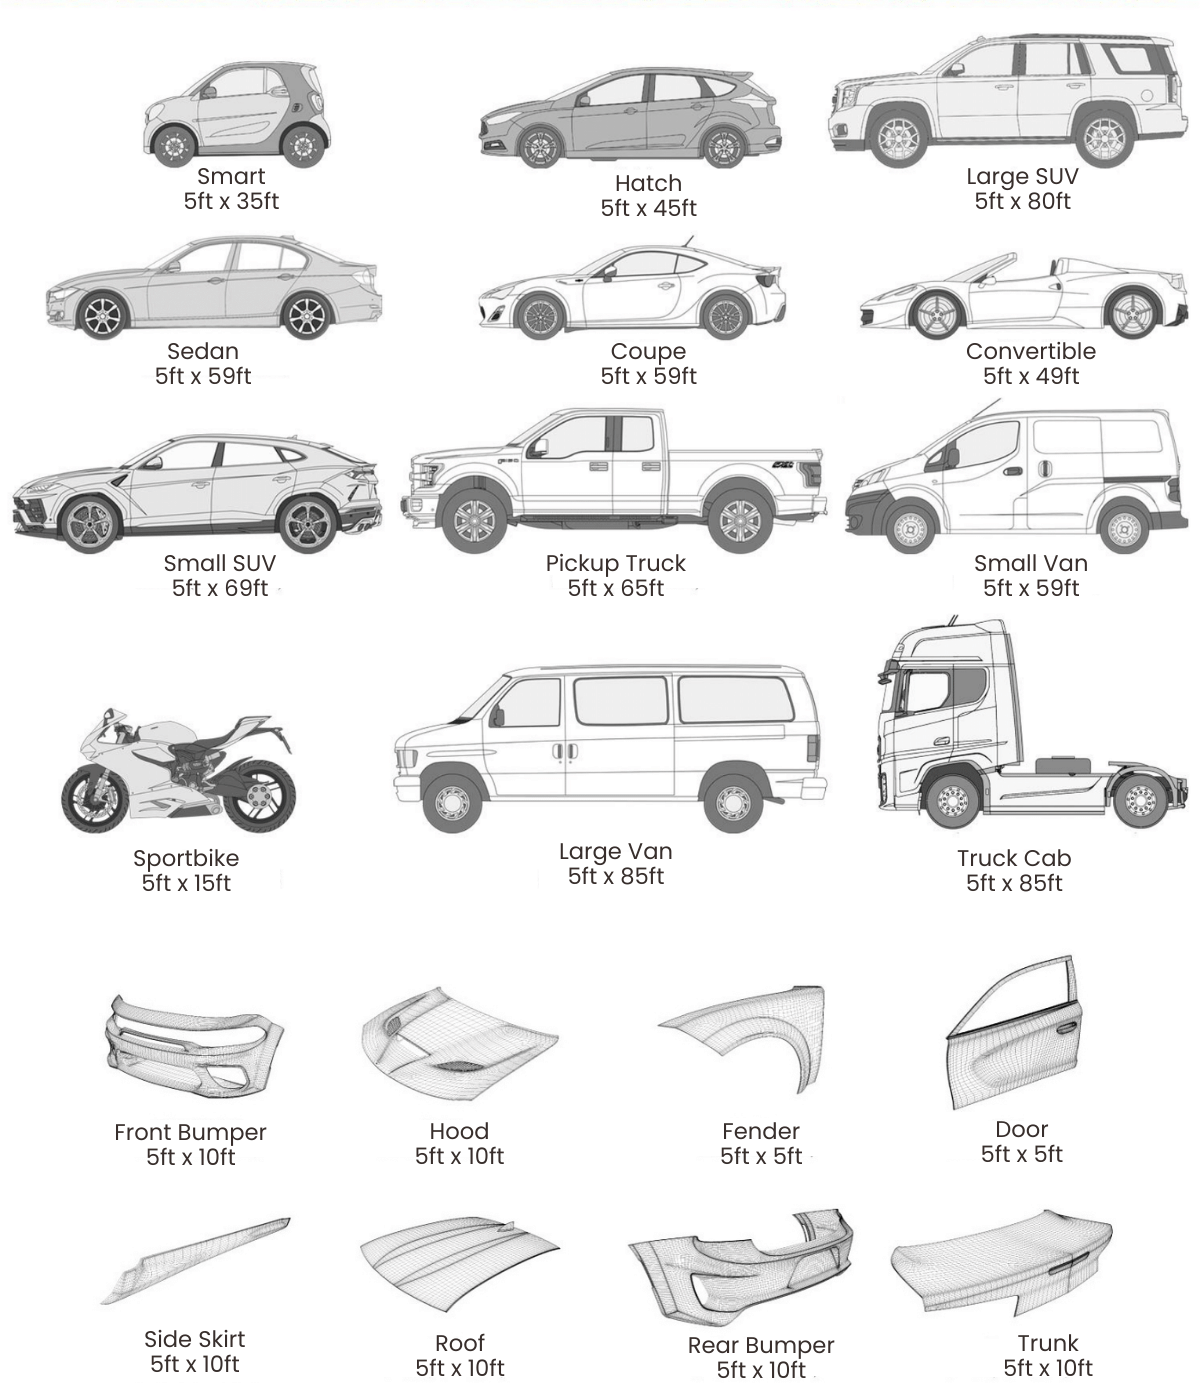
Measuring key areas of your car is important before applying a vinyl wrap. Accurate measurements help you buy the right amount of vinyl. You avoid wasting material and save money. Focus on large and curved sections first. These parts need the most vinyl and careful measurement.
Hood And Roof
Start with the hood and roof. Use a tape measure to get the width and length. Measure from edge to edge. Add a few extra inches for overlap. This ensures full coverage and smooth wrapping. Check for curves or bumps that need more vinyl.
Doors And Side Panels
Measure each door separately. Include both height and width. Don’t forget the side panels between doors and below windows. These areas are wide and often curved. Add extra length for folding over edges. This helps avoid gaps and bubbles.
Bumpers And Mirrors
Measure bumpers carefully. They have many curves and edges. Note the height, width, and depth. Mirrors need individual attention too. Measure each side of the mirror. Add extra vinyl for wrapping around corners. This prevents tearing during installation.
Recording Measurements
Recording measurements is a key step in wrapping your car with vinyl. It helps you avoid mistakes and saves time. Accurate notes make cutting and fitting easier. This part of the process needs focus and care. Below are two important tips for recording your car’s measurements clearly.
Creating A Measurement Chart
Start by making a simple chart. List each part of the car you want to wrap. Write down the length and width for every section. Use a notebook or a digital tool. Keep the chart neat and easy to read. This helps you check your work and plan your vinyl cuts.
Noting Curves And Contours
Cars are not flat. Curves and bumps affect how vinyl fits. Mark these areas on your chart. Note if a curve is sharp or gentle. Measure the height and depth of any bumps. These details guide you during cutting and stretching. They make the wrap look smooth and professional.
Calculating Vinyl Needed
Calculating the amount of vinyl needed is a key step in wrapping a car. Accurate measurements save money and avoid running short. It also ensures a smooth, clean finish without gaps or bubbles. Start by measuring the car’s length, width, and height. Then, use these numbers to estimate the total surface area. This helps find how much vinyl to buy for full coverage.
Adding Extra For Overlaps
Always add extra vinyl for overlaps and seams. Overlaps help join different vinyl sections firmly. Without extra material, edges might lift or peel. Add at least 10-15% more vinyl than the surface area. This extra amount covers overlaps and allows adjustments during wrapping.
Accounting For Errors
Measure carefully but expect some errors or mistakes. Cutting and fitting vinyl can cause waste. Add a small buffer, around 5-10%, for mistakes. This extra vinyl prevents running out mid-project. It gives room to fix small errors without stress.

Credit: carlikewrap.com
Tips For Accurate Measurement
Measuring a car for vinyl wrap needs care and precision. Accurate measurements ensure the wrap fits perfectly. Mistakes can cause wasted material and extra costs. Follow these tips to get the best results.
Double Checking Dimensions
Measure each part of the car twice. Write down the numbers clearly. Check length, width, and height carefully. Use a tape measure that is easy to read. Small errors can cause big problems during wrapping. Take your time for accuracy. Double checking helps catch mistakes early.
Working With A Partner
Having a partner makes measuring easier and safer. One person holds the tape measure steady. The other reads and records measurements. Talk clearly to avoid confusion. Partners can help reach high or wide areas. Two sets of eyes reduce errors. This teamwork speeds up the measuring process.
Credit: yeswrap.com
Frequently Asked Questions
How Do I Measure My Car For A Vinyl Wrap?
Measure your car’s length, width, and height using a tape measure. Include doors, mirrors, and bumpers for accuracy. Record all dimensions to estimate vinyl wrap size.
What Tools Are Needed To Measure A Car For Wrapping?
You need a tape measure, notepad, pen, and optionally a camera. These tools help capture precise car dimensions and details for vinyl wrap planning.
Which Car Parts Need Measurement For Vinyl Wrapping?
Measure the hood, roof, doors, bumpers, fenders, and mirrors. Ensure all visible surfaces are included to avoid shortage of vinyl material.
How To Calculate Vinyl Wrap Material From Measurements?
Add all measurements and add 10-15% extra for errors. This buffer ensures enough vinyl to cover curves and trimming during installation.
Conclusion
Measuring a car for vinyl wrap takes care and attention. Start with clean, dry surfaces for best results. Use a tape measure to get accurate length and width. Don’t forget to include curves and edges in your measurements. Double-check your numbers to avoid mistakes later.
Taking your time helps ensure the wrap fits perfectly. This process saves money and prevents material waste. Now, you can confidently prepare your car for a vinyl wrap. Ready to give your vehicle a fresh, new look?


