
Are you ready to take your car washing game to the next level? Adding a foam cannon to your pressure washer is one of the easiest ways to get a thick, rich foam that cleans better and looks professional.
But if you’re unsure how to connect it or worried about making mistakes, don’t worry—this guide will walk you through every step. By the end, you’ll know exactly how to put a foam cannon on your pressure washer, so you can enjoy faster, safer, and more effective cleaning every time.
Keep reading, and let’s make your car shine like never before!
Choosing The Right Foam Cannon
Choosing the right foam cannon is key to getting good results with your pressure washer. The right foam cannon makes washing easier and more efficient. It helps create thick foam that cleans dirt well. Picking the best one depends on several important factors. These factors affect how well the foam cannon works and fits your needs.
Types Of Foam Cannons
Foam cannons come in different types. Some use a soap reservoir that mixes with water automatically. Others have adjustable nozzles to change foam thickness. There are also foam lances, which connect directly to the pressure washer wand. Each type offers different levels of foam control and ease of use. Choose a type that fits your cleaning style and tasks.
Compatibility With Pressure Washers
Not all foam cannons fit every pressure washer. Check the connection type on your pressure washer. Most use quick-connect fittings or threaded adapters. The foam cannon must match this connection for proper attachment. Also, consider the pressure and flow rate your washer produces. The foam cannon should handle this pressure without damage.
Material And Build Quality
Strong materials ensure the foam cannon lasts long. Look for parts made of durable plastic or metal. Brass fittings resist rust and leaks better than plastic. The soap bottle should be thick and sturdy. Good build quality prevents leaks and breaks during use. A well-made foam cannon works better and lasts longer.
Preparing Your Pressure Washer
Preparing your pressure washer is the first step before attaching a foam cannon. It ensures smooth operation and better cleaning results. Taking time to check your equipment avoids problems during use. Follow these simple steps to get ready.
Checking Hose And Nozzle
Start by inspecting the hose for any cracks or leaks. A damaged hose reduces water pressure. Make sure the nozzle is clean and free of blockages. A clogged nozzle can affect foam output. Tighten all connections to prevent leaks during use.
Ensuring Proper Water Supply
Connect your pressure washer to a steady water source. The water supply must be strong and consistent. Low water flow can harm the machine. Use a garden hose without kinks or bends. Turn on the water fully before starting the washer.
Safety Precautions
Wear protective gloves and safety goggles to protect yourself. Keep children and pets away from the work area. Check the power cord for damage if using an electric washer. Avoid using the pressure washer in wet conditions to prevent shocks.
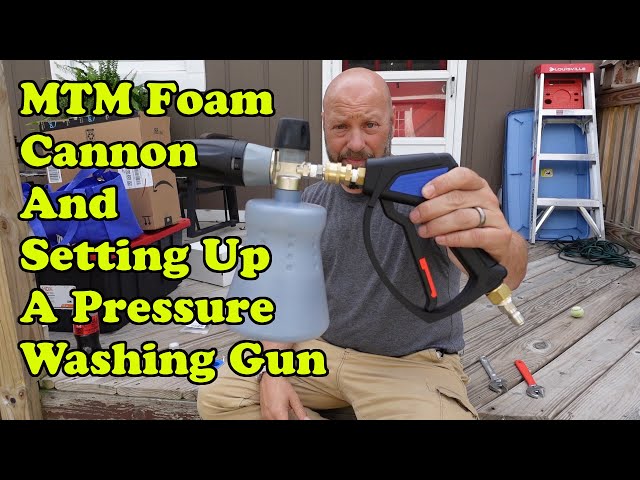
Assembling The Foam Cannon
Assembling the foam cannon is the first step to get your pressure washer ready. It helps you spray thick foam on your car or surfaces. This foam cleans dirt gently but well. Follow these steps carefully to set it up right.
Attaching The Foam Cannon To The Lance
Start by locating the lance on your pressure washer. The lance is the long tube where water comes out. Take the foam cannon and connect its quick-connect fitting to the lance tip. Push it firmly until you hear a click. This ensures the cannon stays in place during use.
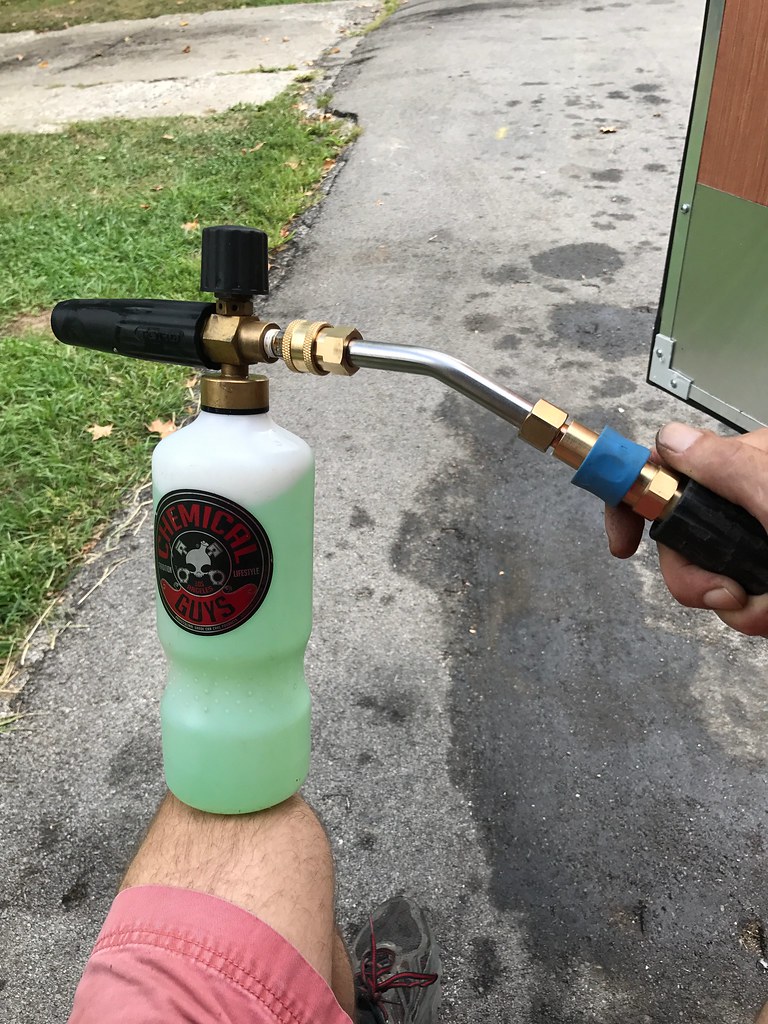
Connecting The Soap Bottle
Next, find the soap bottle attached to the foam cannon. Unscrew the bottle cap and fill it with the soap solution. Screw the cap back tightly to avoid leaks. Then, connect the soap bottle to the foam cannon base. Make sure it fits snugly to allow soap flow.
Adjusting The Foam Settings
Your foam cannon has knobs or dials to control foam thickness. Turn the soap mix knob to adjust how much soap mixes with water. Twist the spray nozzle to change the foam pattern from narrow to wide. Test the foam on a small area to find the best setting.
Credit: www.youtube.com
Mixing Soap Solution
Mixing the soap solution correctly is key for a foam cannon to work well. The soap must be the right type and mixed in the right amount. This makes sure the foam is thick and covers your car or surface evenly. Using too much or too little soap can reduce cleaning power and waste soap.
Choosing The Right Soap
Select a soap made for foam cannons or pressure washers. These soaps create thick foam and clean without harming paint or surfaces. Avoid dish soap or strong detergents. They can damage your car’s finish or leave streaks. Look for biodegradable, pH-balanced soaps for safe and effective cleaning.
Dilution Ratios
Follow the soap maker’s instructions for mixing. Common ratios are one part soap to 10 parts water. Too much soap makes foam runny and hard to rinse. Too little soap gives weak foam and poor cleaning. Use a measuring cup to get exact amounts. Correct dilution saves soap and improves results.
Filling The Soap Bottle
Fill the foam cannon’s soap bottle with your soap solution. Pour slowly to avoid spills. Leave some space at the top for air. Screw the bottle tightly to stop leaks. Check the bottle for cracks or damage before use. A secure bottle helps the foam cannon work well and safely.
Operating The Foam Cannon
Operating the foam cannon is simple and effective. It helps you cover your vehicle with thick foam quickly. Proper use ensures the best cleaning results. This section explains how to start the pressure washer, apply foam evenly, and adjust spray patterns.
Starting The Pressure Washer
First, connect the foam cannon to the pressure washer’s spray gun. Make sure the soap container is filled with the right detergent mix. Turn on the water supply and plug in or start the pressure washer. Hold the spray gun firmly and press the trigger gently to test the foam flow.
Applying Foam Evenly
Spray the foam in smooth, even strokes. Keep the nozzle about 2 to 3 feet from the surface. Move the gun slowly to cover all parts equally. Avoid spraying too close to prevent soap from running off. Let the foam sit for a few minutes to break down dirt.
Adjusting Spray Patterns
Most foam cannons have an adjustable nozzle. Twist the nozzle to change the spray from narrow to wide. Use a wide spray for large areas and a narrow spray for corners. Adjust the foam thickness by turning the soap mix knob. Find the right pattern for your cleaning task.
Credit: www.torquedetail.com
Cleaning And Maintenance
Cleaning and maintenance keep your foam cannon working well. Dirt and soap buildup can block parts. This lowers foam quality and pressure washer performance. Regular care helps avoid damage and saves money. Follow simple steps to rinse, store, and fix common problems.
Rinsing The Foam Cannon
After each use, rinse the foam cannon with clean water. Remove any leftover soap from the bottle. Run water through the cannon to clear the nozzle and tube. This stops clogging and keeps foam flow smooth. Use warm water to remove stubborn soap. Do not use harsh chemicals or brushes.
Storing Properly
Store the foam cannon in a dry place. Avoid direct sunlight and freezing temperatures. Keep the bottle empty and dry before storing. Detach it from the pressure washer. Store parts separately if needed. Proper storage prevents rust and damage. It keeps the foam cannon ready for the next use.
Troubleshooting Common Issues
If the foam cannon sprays weak foam, check for clogs. Clean the nozzle and tube thoroughly. Make sure soap mix is correct and not too thin. Check if the pressure washer’s pressure is strong enough. Tighten all connections to avoid leaks. Replace worn or damaged parts quickly. Regular checks help keep good foam quality.
Credit: autogeekonline.net
Frequently Asked Questions
How Do I Attach A Foam Cannon To My Pressure Washer?
To attach a foam cannon, first connect the pressure washer’s spray gun to the cannon’s inlet. Ensure the fittings are secure. Then, fill the foam cannon’s reservoir with soap and water. Adjust the nozzle for desired foam thickness before use.
What Pressure Washer Psi Is Best For Foam Cannons?
A pressure washer with 1,300 to 2,000 PSI is ideal for foam cannons. This PSI range provides enough pressure for thick foam without damaging surfaces. Higher PSI may be too strong and reduce foam quality.
Can I Use Any Soap In A Foam Cannon?
Use only foam cannon-specific soaps or car wash detergents. These soaps create thick, clingy foam and prevent damage. Avoid harsh chemicals or household detergents, as they may harm your pressure washer or vehicle paint.
How Do I Adjust Foam Thickness On A Foam Cannon?
Adjust foam thickness by turning the foam cannon’s nozzle or dial. Increasing soap concentration in the reservoir also thickens foam. Experiment to find the perfect balance between foam density and coverage.
Conclusion
Attaching a foam cannon to your pressure washer is simple and quick. Follow the steps carefully for the best results. Use the right soap and adjust the nozzle for perfect foam. This tool saves time and cleans better than a regular wash.
Practice a few times to get comfortable with it. Soon, you will enjoy cleaner cars and surfaces with less effort. Keep your equipment clean and store it safely after use. Foam cannons make washing easier and more effective every time.


