Are you ready to transform your car’s look without spending a fortune? Putting on a vinyl car wrap is a smart way to give your vehicle a fresh, eye-catching style.
But if you’ve never tried it before, the idea can feel a bit overwhelming. Don’t worry—this guide will walk you through every step, making the process simple and stress-free. By the end, you’ll know exactly how to wrap your car like a pro and enjoy a stunning new finish that turns heads wherever you go.
Keep reading to discover the secrets to a flawless vinyl car wrap!
Tools And Materials Needed
Putting on a vinyl car wrap needs the right tools and materials. These help you get a smooth and lasting finish. Having everything ready saves time and avoids mistakes. Each item plays a key role in the process.
Essential Tools
You need a few basic tools to apply vinyl wrap. A squeegee helps press the vinyl onto the car without bubbles. A heat gun softens the vinyl for curves and edges. A sharp utility knife cuts the vinyl precisely. Gloves keep fingerprints off the wrap. A microfiber cloth cleans the surface well.
Choosing The Right Vinyl
Pick vinyl designed for car wrapping. It should be flexible and strong. Look for cast vinyl, which stretches and resists fading. The adhesive must stick well but peel off without damage. Choose a vinyl finish that matches your style—matte, gloss, or satin.
Preparing The Surface
Clean the car surface thoroughly before wrapping. Dirt and grease cause bubbles and poor adhesion. Use soap and water first, then wipe with rubbing alcohol. Make sure the surface is dry and smooth. Remove any stickers, wax, or old adhesive residue.
Preparing Your Car
Preparing your car is the first step before applying a vinyl wrap. Proper preparation helps the wrap stick well and last longer. It also prevents bubbles and wrinkles. Taking time to prepare ensures a smooth and clean surface for the vinyl.
Cleaning The Exterior
Start by washing your car thoroughly. Use soap and water to remove dirt and grease. Avoid wax or polish as they can stop the vinyl from sticking. Dry the car completely with a clean cloth. Any dust or dirt left can cause bubbles.
Removing Obstacles
Remove all parts that block the wrap, like mirrors, badges, and trims. This makes wrapping easier and cleaner. Use proper tools to avoid damage. Keep screws and parts safe for reassembly. Wrapping around edges looks better without obstacles.
Temperature And Environment Tips
Work in a clean, dust-free area. Avoid windy or dusty places. The best temperature is between 60°F and 80°F (15°C to 27°C). Cold weather makes vinyl stiff and hard to stretch. Hot weather can make it too soft and sticky.
Measuring And Cutting Vinyl
Measuring and cutting vinyl correctly is key to a smooth car wrap. This step helps avoid mistakes that waste material or cause poor fit. Taking your time here saves effort later.
Start with careful measurements and precise cutting. Add extra space to fit curves and edges well. These details make the wrap look clean and professional.
Taking Accurate Measurements
Use a soft measuring tape for curves and edges. Measure each car part separately for better accuracy. Write down all numbers clearly before cutting.
Double-check every measurement. Small errors can cause big problems later. Measure width and height of each panel twice.
Cutting Techniques
Use a sharp utility knife or vinyl cutter. Cut slowly along straight lines to avoid jagged edges. Keep the vinyl flat on a clean surface.
Cut slightly outside the measured lines. This helps adjust the vinyl during application. Avoid cutting too close to the edge at first.
Allowing For Overlap
Leave about 2 to 3 inches extra vinyl on all sides. This overlap helps cover corners and curves fully. It also gives room to reposition the wrap if needed.
Trim excess vinyl after applying the wrap. Use a sharp blade and steady hand for clean edges. Overlap ensures a neat final look.
Credit: www.toplinetints.com
Applying The Vinyl Wrap
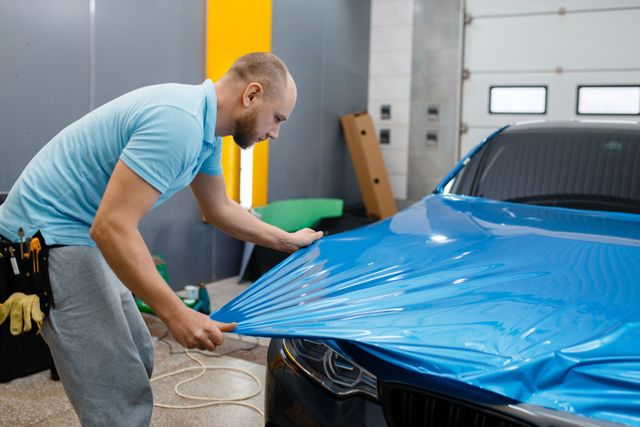
Applying a vinyl car wrap needs careful steps to get a smooth finish. The wrap must fit the car shape exactly. This part of the process needs patience and steady hands. Small mistakes can cause wrinkles or bubbles. Take your time to place the wrap right before pressing it down.
Positioning The Vinyl
Start by cleaning the car surface well. Dirt or dust stops the wrap from sticking. Peel the backing paper a little bit. Place the vinyl on the car surface carefully. Align the edges with the car parts. Make sure it covers the area you want. Use magnets or tape to hold the vinyl in place. Check for any folds or misalignment before pressing.
Using The Squeegee
A squeegee helps press the vinyl firmly on the car. Use a soft cloth squeegee to avoid scratches. Start from the center and push outwards. This method removes air and smooths the wrap. Work slowly and do not rush. Apply even pressure to avoid damage. Keep the vinyl tight as you go along the edges.
Handling Air Bubbles
Air bubbles can spoil the look of the wrap. Use the squeegee to push small bubbles to the edge. For bigger bubbles, use a pin to prick a tiny hole. Press the air out gently after pricking. Avoid leaving holes open for a long time. The vinyl will stick better without air trapped underneath. Check the entire surface for hidden bubbles.
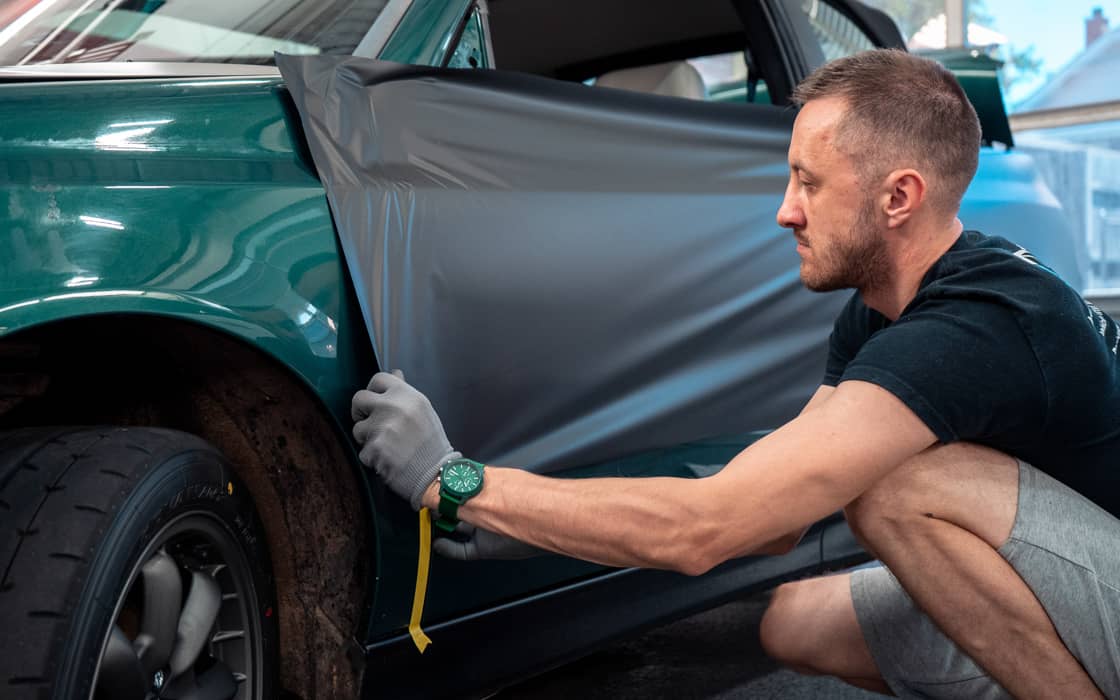
Dealing With Curves And Edges
Wrapping a car with vinyl is simple on flat surfaces. Curves and edges need special care. They can cause wrinkles or bubbles if not handled well. Taking time with these tricky parts makes the wrap look smooth and neat. Follow these steps to handle curves and edges like a pro.
Stretching The Vinyl
Stretch vinyl gently over curves. Pull slowly and evenly to avoid tears. The vinyl should fit snugly without pulling too hard. Let it relax a bit before sticking it down. This helps the wrap mold to the shape smoothly.
Heating For Flexibility
Use a heat gun or hair dryer to warm the vinyl. Warm vinyl becomes soft and easier to shape. Heat small areas at a time for better control. Avoid overheating to prevent damage. Warm vinyl stretches more without breaking.
Trimming Excess Material
Cut away extra vinyl near edges carefully. Use a sharp blade for clean cuts. Trim little by little to avoid mistakes. Leave a small margin to tuck under edges. This keeps the wrap secure and neat over time.
Finishing Touches
After applying the vinyl wrap, the final steps make a big difference. These finishing touches help the wrap last longer and look smooth. Pay attention to details for the best result.
Sealing The Edges
Press down all edges firmly with a squeegee or your fingers. This step prevents air and water from getting under the wrap. Use a heat gun to soften edges for better adhesion. Make sure corners are tight and smooth without wrinkles.
Post-application Heating
Gently heat the entire wrapped area using a heat gun or hair dryer. This action activates the adhesive and helps the vinyl conform to curves. Move the heat source evenly and avoid staying too long in one spot. Heating prevents peeling and bubbles later.
Curing Time And Care
Let the wrap cure for 24 to 48 hours before washing or driving in rain. During this time, the adhesive sets fully and becomes strong. Keep the car in a shaded, dry place to avoid fast cooling. Wash the car carefully after curing to keep the wrap looking fresh.
Common Mistakes To Avoid
Putting on a vinyl car wrap needs care and attention. Many beginners make mistakes that cause bubbles, wrinkles, or peeling later. Avoid these common errors to get a smooth, long-lasting finish. Taking time and following steps correctly saves effort and money.
Rushing The Process
Hurrying can ruin your wrap. Vinyl needs slow, steady application. Pressing too hard or moving fast causes wrinkles. Take time to smooth out each section. Patience helps avoid air bubbles and creases. Work in small parts for better control.
Ignoring Surface Prep
Skipping cleaning is a big mistake. Dirt, dust, and grease stop vinyl from sticking well. Wash the car fully and dry it before starting. Use alcohol or a cleaner to remove oils. A clean surface gives the wrap a stronger hold.
Improper Vinyl Handling
Touching the sticky side with dirty hands leaves marks. Folding or bending the vinyl can cause damage. Keep the vinyl flat and clean during work. Use gloves if needed to avoid fingerprints. Proper handling keeps the vinyl smooth and sticky.
Credit: www.tintingchicago.com
Maintenance Tips For Longevity
Taking care of your vinyl car wrap helps keep it fresh and durable. Proper maintenance stops dirt buildup and prevents damage. A few simple habits can extend the life of the wrap.
Cleaning Wrapped Surfaces
Wash the wrap gently with water and mild soap. Use a soft sponge or cloth to avoid scratches. Rinse well to remove all soap residue. Dry with a clean, soft towel to stop water spots.
Avoiding Harsh Chemicals
Do not use strong cleaners or solvents on the wrap. These can break down the vinyl and fade colors. Stay away from products with alcohol, ammonia, or bleach. Stick to car wash solutions made for vinyl.
Regular Inspections
Check the wrap often for tears or peeling edges. Early fixes stop small problems from growing. Look for dirt under the edges that can lift the wrap. Keep an eye on seams and corners for damage.

Credit: www.youtube.com
Frequently Asked Questions
How Do I Prepare My Car For Vinyl Wrapping?
Clean your car thoroughly to remove dirt and grease. Dry it completely. Remove any accessories or trims that may interfere with the wrap application.
What Tools Are Essential For Applying Vinyl Car Wrap?
You need a squeegee, heat gun, utility knife, microfiber cloth, and gloves. These tools help smooth out air bubbles and cut the vinyl precisely.
Can I Apply Vinyl Wrap On A Curved Car Surface?
Yes, vinyl wraps are flexible and can stretch over curves. Use a heat gun to soften the vinyl and carefully stretch it over curved areas for a smooth finish.
How Long Does It Take To Wrap A Car With Vinyl?
It typically takes 1 to 3 days, depending on car size and complexity. Proper preparation and careful application extend the process but ensure quality results.
Conclusion
Applying a vinyl car wrap takes patience and care. Clean your car surface well before starting. Work slowly to avoid bubbles or wrinkles. Use a heat gun to help the vinyl stretch smoothly. Take time to trim edges neatly for a clean look.
Practice on small areas to build confidence. With steady hands and attention, your car will look fresh and new. Enjoy the process and the final result!