
Are you ready to give your car a fresh, eye-catching look without spending a fortune? Putting a vinyl wrap on your car can transform its appearance quickly and easily.
But if you’ve never done it before, the process might seem tricky or overwhelming. Don’t worry—this guide will walk you through every step, helping you avoid common mistakes and achieve a smooth, professional finish. Keep reading, and soon your car will be turning heads everywhere you go.
Preparing Your Car
Preparing your car is the first step to a smooth vinyl wrap process. The surface must be clean and free of dirt. Any obstacles can cause bubbles or wrinkles. Also, the environment plays a big role in how well the wrap sticks. Taking time to prepare will save effort later.
Cleaning The Surface
Start by washing your car with soap and water. Remove all dirt, dust, and grease. Use a microfiber cloth for better results. After washing, dry the surface completely. For stubborn grime, use isopropyl alcohol. This step ensures the vinyl sticks properly.
Removing Obstacles
Take off badges, mirrors, and trims that may block the wrap. Use tools designed for car parts to avoid damage. Remove windshield wipers and antenna if needed. Clearing obstacles helps to apply the wrap smoothly. It also prevents bubbles and creases.
Choosing The Right Environment
Work in a clean, shaded, and dust-free area. Avoid direct sunlight or windy places. The ideal temperature is between 60°F and 80°F. A garage or covered space works best. Good lighting helps to see any mistakes during application.
Credit: www.apexcustoms.com
Gathering Materials
Gathering the right materials is the first step to a smooth vinyl wrap project. Preparation saves time and effort. It also helps avoid mistakes during the application. This section covers what you need to get started.
Selecting Vinyl Wrap
Choose vinyl wrap made for cars. It should be durable and flexible. Look for a product with good adhesive strength. Matte, gloss, or satin finishes are common options. Pick a color or pattern that matches your style. Make sure the vinyl is wide enough to cover large panels.
Tools You’ll Need
Get a squeegee with a soft edge to smooth out bubbles. A sharp utility knife helps trim excess wrap. Use a heat gun or hairdryer to warm the vinyl. This makes it easier to stretch and mold. A measuring tape and a microfiber cloth will also come in handy. Clean the car surface well before wrapping.
Safety Equipment
Protect your hands with gloves. They prevent cuts and keep the vinyl clean. Wear safety glasses to guard against flying debris. Work in a well-ventilated area to avoid inhaling fumes. Use a mask if needed. Taking these steps keeps you safe during the process.
Measuring And Cutting
Measuring and cutting vinyl wrap is an important step in wrapping a car. It helps to make sure the vinyl fits well on the surface. Accurate measurements and careful cutting avoid mistakes and save time.
Taking time to measure and cut properly gives a smooth finish. It also prevents wasting vinyl material. The process needs patience and precision for good results.
Taking Accurate Measurements
Use a soft measuring tape for the car surface. Measure the area you want to cover. Add extra inches for edges and curves. Double-check each measurement for accuracy. Write down all measurements to avoid confusion.
Cutting The Vinyl
Place the vinyl on a flat, clean surface. Use a sharp knife or vinyl cutter for clean cuts. Cut slowly along the marked lines. Avoid cutting too close to the edge. Leave some extra vinyl for adjustments.
Marking Guidelines
Use a pencil or light marker to draw cutting lines. Mark where folds or edges will be. Make small marks for reference points. These guidelines help place vinyl evenly. They guide you during the wrapping process.
Credit: www.youtube.com
Applying The Vinyl
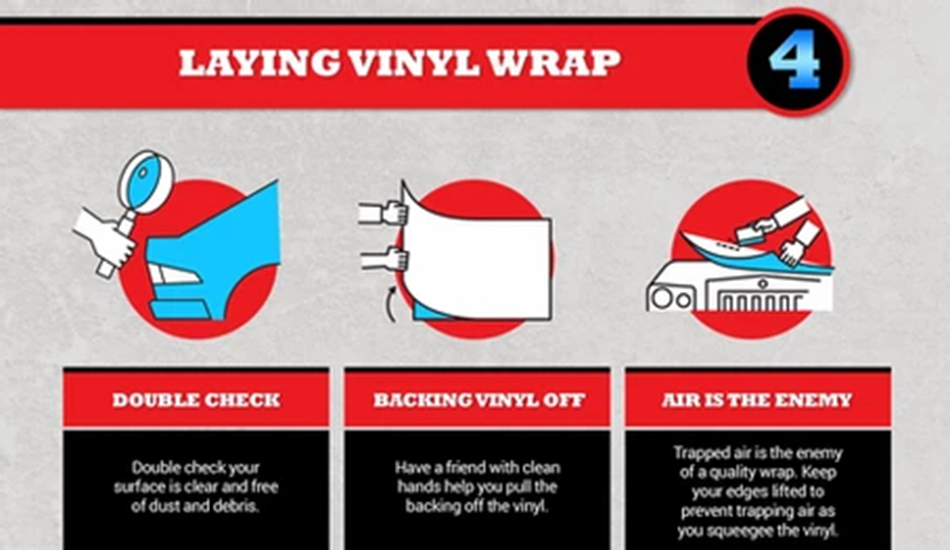
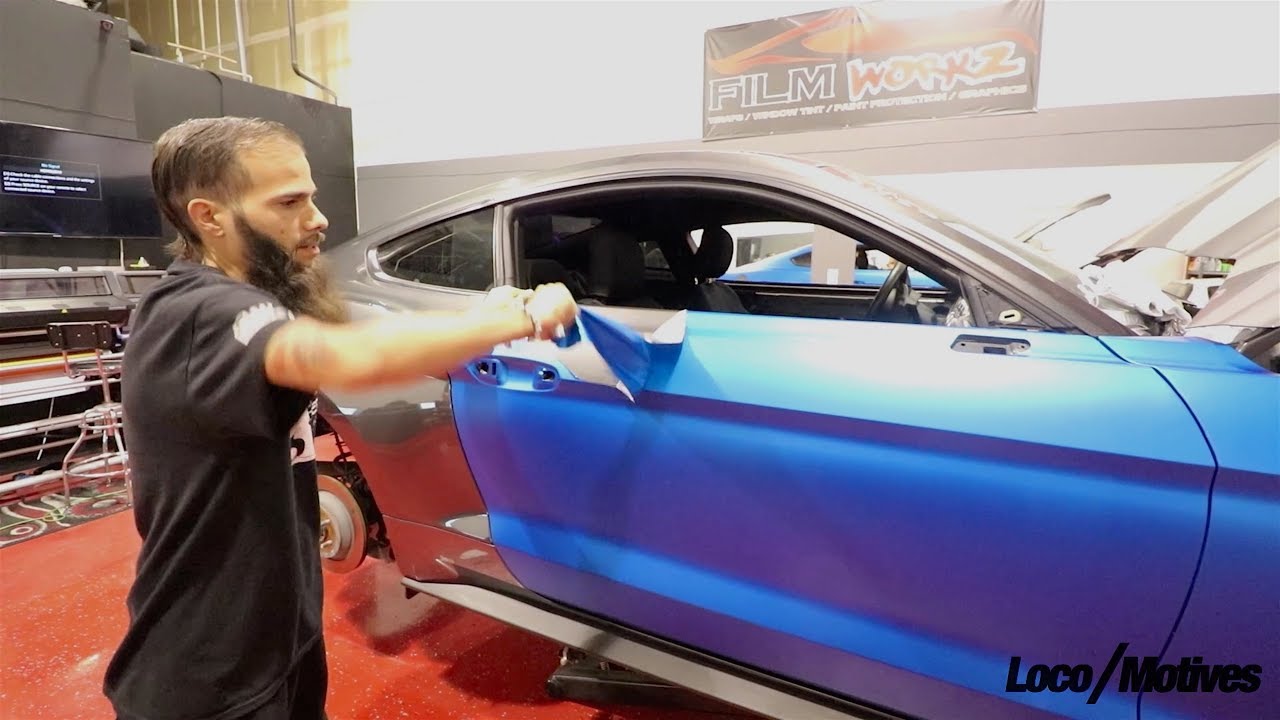
Applying the vinyl wrap to your car requires care and patience. This step shapes how smooth and lasting the wrap will be. It’s important to handle the vinyl gently to avoid damage. The process includes peeling, positioning, and shaping the vinyl to fit the car’s surface perfectly. Follow each part carefully for a professional look.
Peeling The Backing
Start by peeling the backing paper from the vinyl slowly. Pull it back just enough to expose a small section of the adhesive. Avoid touching the sticky side to prevent dirt or oils from sticking. Keep the rest of the backing attached until you need more vinyl exposed. This helps control the wrap and reduces wrinkles.
Positioning The Wrap
Place the vinyl on the car’s surface gently. Align it with the edges and any curves. Use light pressure to hold it in place but do not press down fully yet. Adjust the vinyl as needed before sticking it firmly. Make sure the wrap covers the entire area without stretching too much.
Using Heat For Flexibility
Use a heat gun or hairdryer on low to warm the vinyl. Warm vinyl becomes soft and easier to stretch. This helps the wrap conform to curves and corners smoothly. Heat also removes small bubbles and creases. Move the heat source evenly and avoid overheating the vinyl to prevent damage.
Smoothing And Securing
Smoothing and securing the vinyl wrap is a key step in the process. It ensures the wrap looks neat and stays on the car for a long time. Without proper smoothing, air bubbles and wrinkles can appear. These flaws make the wrap look bad and can cause it to peel early.
Securing the wrap firmly helps it resist weather and car washes. It also gives a clean, professional finish. The next parts explain how to remove air bubbles, stretch and align the wrap, and seal the edges properly.
Removing Air Bubbles
Air bubbles form when air gets trapped under the vinyl. Use a soft squeegee to push the bubbles out. Start from the center and move towards the edges. For small bubbles, use a pin to make a tiny hole. Press the air out gently. Avoid sharp tools that can damage the vinyl.
Stretching And Aligning
Vinyl wraps need to stretch to fit curves and corners. Heat the vinyl with a heat gun to make it flexible. Pull the wrap gently but firmly. Keep checking the alignment to avoid wrinkles. Work slowly and adjust as needed. Proper stretching gives a smooth, tight fit.
Sealing The Edges
Edges are the most vulnerable spots for peeling. Use a heat gun to warm the edges. Press them down firmly with a squeegee or your fingers. This helps the vinyl stick better. Make sure all edges are flat and secure. Well-sealed edges prevent dirt and water from getting under the wrap.
Final Touches
After applying the vinyl wrap, focus on the final touches. These steps help your wrap look smooth and last longer. Pay close attention to details. This part is key for a clean, professional finish. Take your time and check your work carefully.
Trimming Excess Vinyl
Use a sharp blade to trim extra vinyl around edges. Cut slowly to avoid damaging the car’s paint. Leave a small margin near curves to prevent peeling. Always trim along seams or edges for a natural look. Dispose of scraps safely to keep your workspace clean.
Reinstalling Removed Parts
Put back any parts you removed before wrapping. This includes mirrors, trims, and handles. Make sure screws and clips fit tightly. Check for any loose pieces and tighten them. Reinstalling parts properly helps the wrap fit better and look smooth.
Curing And Maintenance Tips
Let the vinyl cure by keeping the car dry for 24-48 hours. Avoid washing or driving in rain during this time. Use a soft cloth and mild soap for cleaning. Avoid harsh chemicals that can damage the vinyl. Regularly check edges for lifting and press them down if needed.
Common Mistakes To Avoid
Applying vinyl wrap to a car can transform its look. Mistakes are common for beginners. Avoiding these errors will save time and money. Focus on doing each step carefully. Here are some common mistakes to watch out for.
Rushing The Process
Taking your time is key to a good wrap. Moving too fast causes wrinkles and bubbles. It also makes alignment harder. Patience helps the vinyl stick smoothly. Slow and steady wins here.
Ignoring Surface Prep
Clean the car surface well before wrapping. Dirt, dust, and grease prevent vinyl from sticking. Use soap and water, then dry fully. Any leftover debris will create bumps. Surface prep ensures a smooth finish.
Incorrect Heating Techniques
Heat helps vinyl stretch and mold to curves. Too much heat can damage the vinyl. Too little heat causes poor adhesion. Use a heat gun carefully and evenly. Practice on a test piece first.

Credit: wrapguys.com
Frequently Asked Questions
What Tools Do I Need To Apply Vinyl Wrap On A Car?
You need a squeegee, heat gun, utility knife, microfiber cloth, and gloves. These tools help smooth, cut, and adhere the vinyl properly without damage.
How Long Does It Take To Wrap A Car With Vinyl?
Wrapping a car typically takes 1 to 3 days. Time varies by car size, wrap complexity, and installer experience.
Can I Remove Vinyl Wrap Without Damaging My Car Paint?
Yes, vinyl wraps can be removed safely if done slowly. Use heat to soften adhesive and peel gently to avoid paint damage.
Is Vinyl Wrap Durable Against Weather And Scratches?
Vinyl wraps resist UV rays, rain, and minor scratches. Proper care extends their lifespan, typically 5 to 7 years outdoors.
Conclusion
Applying vinyl wrap on your car takes patience and care. Clean the surface well before you start. Work slowly to avoid bubbles and wrinkles. Use the right tools for smooth results. Practice makes the process easier over time. Enjoy the fresh look your car gets.
This skill saves money on paint jobs. Vinyl wrap offers a quick way to change style. Keep your wrap clean to make it last longer. Try it step by step, and you will do fine.


