
Have you ever spent time waxing your car, only to find dried wax stuck stubbornly on plastic parts? It’s frustrating, isn’t it?
That stubborn residue can make your car look less than perfect, and you might worry about damaging the plastic while trying to clean it. But don’t worry—removing dried car wax from plastic is easier than you think. You’ll discover simple, effective methods to get your plastic surfaces spotless again.
Keep reading, and you’ll have your car looking sharp in no time.
Causes Of Dried Wax On Plastic
Dried wax on plastic can be frustrating. It sticks tightly and looks messy. Knowing what causes wax to dry on plastic helps avoid the problem. It also guides the best way to clean it.
Wax usually dries on plastic due to heat, time, or improper cleaning. Each cause changes how the wax sticks and hardens. Understanding these helps remove the wax safely.
Heat Exposure Causes Wax To Harden
High temperatures make wax melt and spread on plastic. When the wax cools, it hardens and sticks firmly. Sunlight or hot environments speed up this process.
Long Time Left On Plastic
Wax left on plastic for days or weeks gets dry. It loses its soft texture and becomes brittle. The longer the wax stays, the harder it is to remove.
Using Wrong Cleaning Methods
Cleaning wax with harsh chemicals or rough tools can make it worse. It can cause wax to spread or dry faster. This leads to a tough, sticky layer on plastic.
Risks Of Using Harsh Chemicals
Using harsh chemicals to remove dried car wax from plastic can cause serious problems. These substances may seem effective but often damage the plastic surface. Understanding the risks helps you choose safer methods.
Harsh chemicals can eat away the plastic’s finish. This leads to discoloration, dullness, or even cracks. Once damaged, plastic looks worn and loses its shine.
Strong chemicals may leave harmful residues. These residues can attract dirt and make the surface sticky. The plastic becomes harder to clean afterward.
Many harsh cleaners release toxic fumes. Breathing these fumes can harm your health. Always consider safer options to protect yourself and the environment.
Damage To Plastic Surface
Harsh chemicals can cause the plastic to weaken. They break down the material’s structure. This results in cracks or brittleness over time.
Surface scratches or cloudiness may also appear. This ruins the smooth look of plastic parts on your car.
Health Hazards From Toxic Fumes
Some chemicals release strong smells that irritate your eyes and lungs. Prolonged exposure can cause headaches or dizziness.
Using these substances in closed spaces increases health risks. Proper ventilation is essential but not always enough.
Residue And Dirt Attraction
Chemical residues can leave a sticky film on plastic surfaces. Dirt and dust stick to this film easily.
Sticky surfaces require more frequent cleaning and may look dirty quickly. This defeats the purpose of removing wax.
Tools Needed For Wax Removal
Removing dried car wax from plastic surfaces requires the right tools. Using proper tools makes the job easier and protects the plastic from damage. Gather everything before starting to save time and effort.
Soft Microfiber Cloth
A soft microfiber cloth helps remove wax without scratching plastic. It absorbs wax residue and cleans the surface gently. Use a clean cloth for the best results.
Plastic Scraper
A plastic scraper gently lifts dried wax from the surface. It prevents scratching that metal tools might cause. Choose a scraper with a smooth edge for safety.
Warm Soapy Water
Warm soapy water softens the wax, making removal easier. Use mild dish soap mixed with warm water. It cleans the plastic without harming it.
Rubbing Alcohol
Rubbing alcohol breaks down wax quickly. Apply it to a cloth and rub gently on the wax spots. Test on a small area first to avoid damage.
Soft-bristle Brush
A soft-bristle brush helps reach small crevices and textured surfaces. It loosens wax stuck in tight spots. Use it gently to avoid scratching.
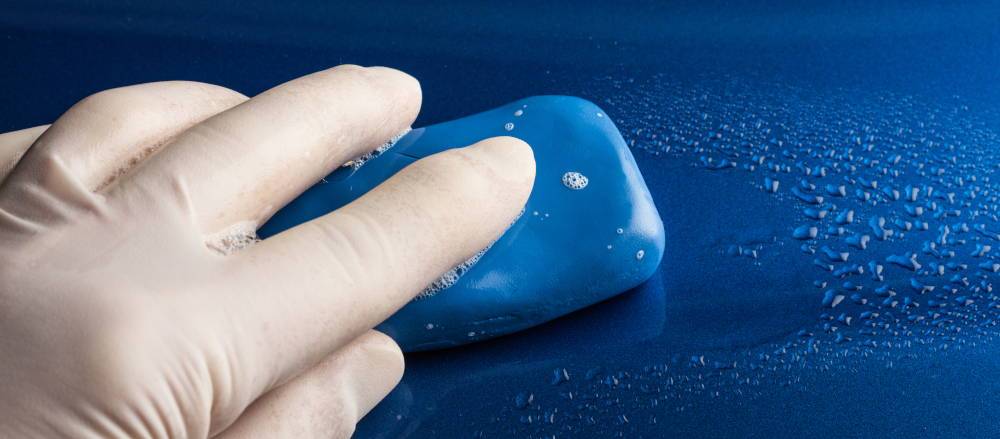
Credit: www.torquedetail.com
Using Warm Water And Soap
Removing dried car wax from plastic can be simple. Warm water and soap help break down wax without harming plastic surfaces. This method is gentle and effective for light wax stains.
Soap cuts through wax residue. Warm water softens the wax, making it easier to wipe away. Together, they clean plastic safely and quickly.
Prepare Warm Soapy Water
Fill a bucket with warm water, not hot. Add a few drops of mild dish soap. Stir to create bubbles. Avoid harsh detergents that can damage plastic.
Soak A Soft Cloth
Dip a clean, soft cloth into the soapy water. Wring out extra water so the cloth is damp, not dripping. A soft cloth prevents scratches on plastic surfaces.
Gently Wipe The Waxed Area
Use the damp cloth to rub the waxed plastic gently. Move in small circles to lift wax. Avoid harsh scrubbing that could damage the plastic.
Rinse And Dry
Rinse the plastic with clean water to remove soap and wax residue. Use a dry, soft cloth to wipe the surface dry. This prevents water spots on plastic.
Applying Rubbing Alcohol Safely
Applying rubbing alcohol to remove dried car wax from plastic needs care. It cleans well but can harm some plastics. Use it right to keep your plastic safe and clean.
Test Rubbing Alcohol On A Small Plastic Area
Always test rubbing alcohol first on a hidden plastic spot. Wait a few minutes. Check for any damage or color change. This step protects your plastic from harm.
Use A Soft Cloth Or Cotton Ball
Apply rubbing alcohol with a soft cloth or cotton ball. Avoid rough materials that can scratch plastic. Gently rub the waxed area in small circles.
Work In A Well-ventilated Space
Rubbing alcohol has a strong smell. Use it where air moves freely. Open windows or use a fan. This keeps the air fresh and safe to breathe.
Wear Gloves To Protect Your Skin
Rubbing alcohol can dry your skin. Wear gloves to protect your hands. It also helps avoid irritation during cleaning.
Wipe The Area With Water After Cleaning
After removing wax, wipe the plastic with a damp cloth. This removes leftover rubbing alcohol. Dry the plastic with a clean towel to prevent spots.
Using Vinegar For Stubborn Wax
Vinegar is a natural and safe way to remove dried wax from plastic surfaces. It helps break down the wax without damaging the plastic. This method is especially useful for stubborn wax that does not come off easily.
The acetic acid in vinegar softens the wax, making it easier to wipe away. It also cleans the surface, leaving it smooth and clear. Vinegar is gentle and easy to find in most homes.
Preparing The Vinegar Solution
Mix equal parts of white vinegar and warm water in a bowl. This creates a mild solution that is safe for plastic. Avoid using pure vinegar as it may be too strong.
Applying The Vinegar To The Wax
Dip a soft cloth or sponge into the vinegar solution. Gently press it onto the wax spots. Let it sit for 5 to 10 minutes to soften the wax.
Removing The Softened Wax
Use the cloth or a plastic scraper to wipe off the softened wax. Work slowly to avoid scratching the plastic. Repeat the process if some wax remains.
Cleaning And Drying The Surface
Rinse the plastic with clean water to remove vinegar residue. Dry it with a soft towel to prevent water spots. The plastic should look clean and smooth.
Softening Wax With Heat
Removing dried car wax from plastic surfaces can be tricky. Wax hardens and sticks tightly. Softening the wax first makes removal easier. Heat helps to melt and loosen the wax. This method reduces the risk of scratching the plastic. It also saves time and effort.
Use A Hair Dryer To Warm The Wax
A hair dryer is a safe tool for heating wax on plastic. Hold it a few inches away from the wax spot. Use a medium heat setting to avoid melting the plastic. Move the dryer in small circles. Watch as the wax starts to soften and become sticky.
Apply Warm Water To Loosen The Wax
Warm water helps soften wax gently. Soak a soft cloth in warm water. Place it on the wax for a few minutes. The heat and moisture will soften the wax. This method is gentle and protects plastic surfaces.
Use A Heat Gun With Caution
A heat gun can quickly soften wax but use it carefully. Keep it at a safe distance from the plastic. Use the lowest heat setting. Constantly move the heat gun to avoid melting or warping plastic. Test on a small area first to check safety.
Scraping Wax Without Scratching
Removing dried car wax from plastic can be tricky. Scraping the wax risks scratching the surface. Plastic is softer than metal, so extra care is needed. You can scrape wax without causing damage by using the right tools and techniques. This section explains how to do it safely and effectively.
Choose The Right Tool
Use plastic scrapers or old credit cards. Avoid metal tools like knives or screwdrivers. Metal can easily scratch or gouge plastic surfaces. Soft, flexible tools work best to lift wax gently.
Soften The Wax First
Warm the wax slightly with a hairdryer. Heat makes wax softer and easier to remove. Keep the heat low to avoid melting plastic. Soft wax is less likely to scratch when scraped.
Scrape At A Low Angle
Hold the scraper almost flat against the plastic. A low angle reduces pressure on the surface. Push gently and slowly to lift wax pieces. Avoid digging into the plastic with sharp edges.
Clean Residue With A Soft Cloth
After scraping, wipe the area with a microfiber cloth. Use mild soap and water to remove leftover wax. This prevents scratches from tiny wax particles. Dry the surface carefully to avoid streaks.
Preventing Wax Buildup On Plastic
Preventing wax buildup on plastic surfaces helps keep your car looking clean and shiny. Wax residue can stick to plastic parts and become hard to remove. Regular care and simple habits can stop wax from drying and piling up.
Taking small steps to protect plastic areas saves time and effort later. Clean surfaces before waxing and avoid applying wax on plastic. These habits keep wax buildup under control and maintain the plastic’s appearance.
Clean Plastic Surfaces Before Waxing
Always wash plastic parts before applying wax nearby. Dirt and dust can trap wax and cause buildup. Use a gentle cleaner to remove grime from plastic surfaces. Dry the plastic fully before starting the waxing process.
Avoid Applying Wax Directly On Plastic
Wax formulas work best on painted metal, not plastic. Applying wax on plastic makes it sticky and dull. Use painter’s tape to cover plastic areas during waxing. This prevents wax from sticking and reduces cleanup time.
Use Plastic-safe Products For Protection
Choose cleaners and protectants made for plastic parts. These products keep plastic shiny without causing buildup. Avoid wax-based products on plastic to stop residue buildup. Regular use of plastic-safe protectants keeps surfaces clean and smooth.
Wipe Excess Wax Immediately
Remove any wax drips from plastic parts right away. Use a soft microfiber cloth to wipe away wax. Early removal stops wax from drying hard on plastic. Quick action prevents stubborn buildup and keeps plastic looking fresh.
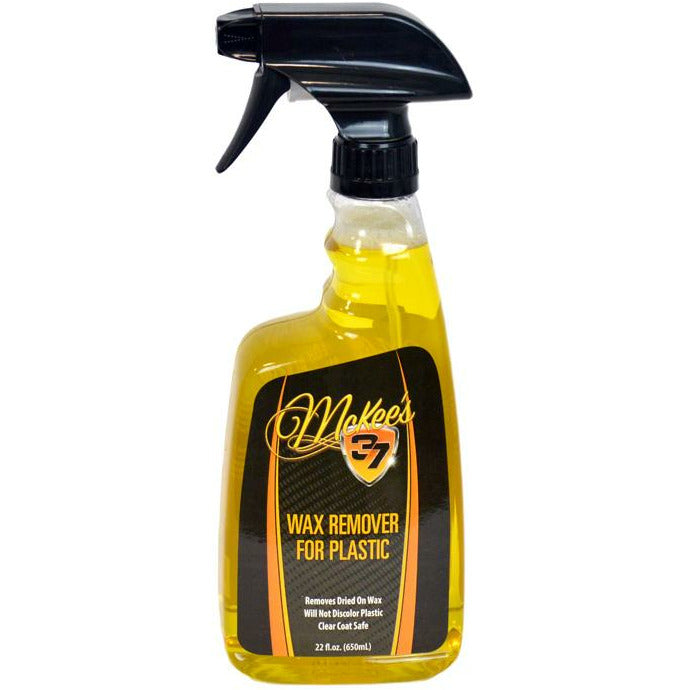
Credit: mckees37.com
Maintaining Plastic After Wax Removal
Removing dried car wax from plastic surfaces is just the first step. Maintaining the plastic after wax removal keeps it looking clean and new. Proper care prevents damage and extends the life of the plastic.
Follow easy steps to protect plastic and keep it smooth. Avoid harsh chemicals or rough tools that can cause scratches or discoloration. Regular care helps plastic stay clear and bright over time.
Cleaning Plastic Gently
Use a soft cloth and mild soap with water to clean plastic. Avoid scrubbing hard, as this may cause scratches. Rinse with clean water and dry with a soft towel. This keeps the surface free from dirt and leftover wax.
Applying Plastic Protectant
Choose a plastic protectant made for car surfaces. Apply a small amount using a microfiber cloth. Spread evenly and let it absorb. This adds a layer of protection from sun and dirt, preserving the plastic’s shine.
Regular Inspection For Damage
Check plastic surfaces regularly for cracks or dull spots. Early detection helps fix problems before they worsen. Replace or repair damaged parts to keep the plastic safe and attractive.
Storing The Vehicle Properly
Park the car in shaded areas or use a cover. Sun and weather cause plastic to fade or warp. Proper storage reduces wear and keeps plastic looking fresh longer.

Credit: www.youtube.com
Frequently Asked Questions
How Can I Safely Remove Dried Car Wax From Plastic?
Use warm soapy water and a soft cloth to gently clean the wax. Avoid harsh chemicals that damage plastic. For stubborn wax, apply a plastic-safe cleaner or rubbing alcohol carefully. Always test on a small area first to prevent damage.
What Household Items Remove Car Wax From Plastic Surfaces?
Common items like warm water, dish soap, and rubbing alcohol work well. Use a microfiber cloth to gently wipe the wax. Avoid abrasive tools that scratch plastic. These household solutions effectively dissolve wax without harming plastic finishes.
Is It Safe To Use Rubbing Alcohol On Plastic?
Yes, rubbing alcohol is safe on most plastics if used sparingly. Apply a small amount on a soft cloth and wipe gently. Test on a hidden area first to ensure no discoloration or damage occurs. Avoid soaking the plastic.
Can Heat Help Remove Dried Wax From Plastic?
Mild heat softens wax, making it easier to remove. Use a hairdryer on low heat, keeping it at a distance. Gently wipe softened wax with a microfiber cloth. Avoid high heat to prevent warping or damage to plastic.
Conclusion
Removing dried car wax from plastic is simple with the right steps. Use gentle cleaners and soft cloths to avoid damage. Take your time and be patient during the process. Small efforts lead to clean, clear plastic surfaces. Keep these tips handy for future car care tasks.
Clean plastic looks better and lasts longer. Try these methods today to keep your car looking fresh.


