Is your car’s braking feeling less responsive or making strange noises? You might be dealing with glazed brake rotors.
This common problem can reduce your braking power and make driving unsafe. But don’t worry—removing glaze from your brake rotors is easier than you think. You’ll learn simple, step-by-step methods to restore your rotors and get your brakes working like new again.
Keep reading to find out how to bring back the smooth, reliable stopping power you deserve.

Credit: www.renntech.org
Signs Of Glazed Brake Rotors
Glazed brake rotors cause problems that affect your car’s safety. Recognizing the signs early helps you fix the issue fast. This section explains common signs to spot glazed rotors.
Noise And Vibration Issues
Glazed rotors often create strange noises. You might hear squeaking or squealing sounds. Vibrations can be felt through the brake pedal or steering wheel. These vibrations happen because the brake pads do not grip well.
Reduced Braking Performance
Your brakes may feel weak or less responsive. The car might take longer to stop. This happens because glaze reduces friction between pads and rotors. Braking distance increases, which can be dangerous on the road.
Visual Inspection Tips
Look closely at the rotor’s surface. Glazed rotors have a shiny, smooth finish instead of a rough texture. You may also see blue or dark spots from overheating. Check for grooves or cracks that show wear or damage.
Tools And Materials Needed
Removing glaze from brake rotors needs the right tools and materials. Having these ready makes the job easier and safer. This section lists everything you need for a smooth cleaning process.
Essential Cleaning Tools
- Sandpaper or sanding block (medium to fine grit)
- Wire brush (handheld or drill attachment)
- Brake cleaner spray
- Clean rags or microfiber cloths
- Socket wrench set
- Jack and jack stands
Safety Equipment
- Protective gloves
- Safety goggles
- Dust mask or respirator
- Closed-toe shoes
Optional Supplies
- Anti-seize lubricant
- Torque wrench
- Brake caliper tool
- Rust remover spray
Preparing Your Vehicle
Preparing your vehicle is the first step in removing glaze from brake rotors. Proper preparation ensures safety and makes the job easier. Follow these steps carefully to get ready before working on the brake rotors.
Taking time to prepare your vehicle properly helps avoid accidents. It also protects your car and tools during the process.
Securing The Car
Park your car on a flat surface. Engage the parking brake to stop the car from moving. Use wheel chocks on the opposite wheels to add extra safety. Never skip this step, as it keeps your vehicle stable.
Removing The Wheel
Loosen the lug nuts with a wrench before lifting the car. Use a jack to raise the car until the wheel is off the ground. Remove the lug nuts completely and take off the wheel. Keep the nuts in a safe place for later.
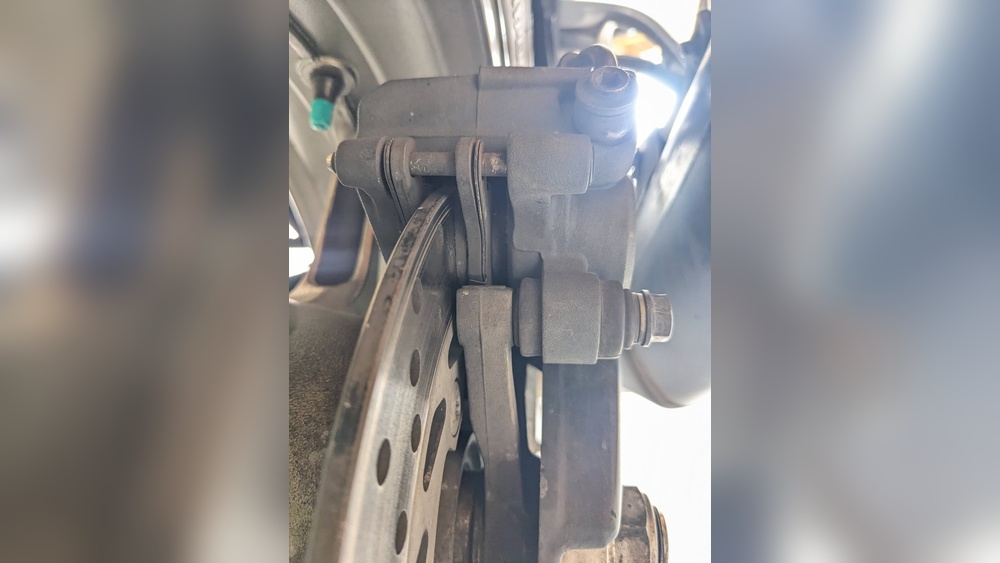
Accessing The Brake Rotors
Look behind the wheel to find the brake caliper. Remove the caliper bolts using the correct tool. Gently slide the caliper away from the rotor without stretching the brake line. Secure the caliper so it does not hang by the brake hose. Now, the brake rotor is fully exposed and ready for work.

Credit: www.youtube.com
Removing Glaze From Rotors
Removing glaze from brake rotors improves braking performance and safety. Glaze forms as a smooth, shiny layer caused by heat and friction. This layer reduces the grip between the brake pads and rotors. Removing glaze restores proper contact and stops brake noise.
The process can be done with simple tools or machines. Choose the method based on how severe the glaze is and the tools you have available.
Manual Sanding Technique
Use fine-grit sandpaper (around 120-150 grit) for sanding the rotor surface. Wear gloves and eye protection for safety. Rub the sandpaper evenly across the rotor in a circular motion. Sand until the shiny glaze disappears and a dull finish shows. Clean off dust with a cloth before reinstalling.
Using Brake Cleaner And A Brush
Spray brake cleaner generously on the rotor surface. Let it sit for a minute to break down dirt and grease. Use a wire brush or stiff nylon brush to scrub the rotor. Focus on areas with visible glaze. Wipe the rotor with a clean cloth to remove residue. Repeat if needed for better results.
Applying A Brake Lathe (if Needed)
A brake lathe removes a thin layer of the rotor surface. This machine smooths out deep glaze and uneven wear. Use the lathe only if sanding does not fix the issue. A professional shop usually performs this service. After lathe work, clean the rotor well before installing it back.
Reassembly And Testing
After removing the glaze from your brake rotors, putting everything back and testing the brakes is key. This step ensures your brakes work smoothly and safely. Follow each part carefully to avoid future problems.
Reinstalling Components
Start by placing the brake rotor back on the hub. Secure it with the screws or clips you removed earlier. Next, put the brake pads in their holders. Make sure they fit snugly without moving. Reattach the caliper over the pads and rotor. Tighten the bolts to the recommended torque. Check that all parts are firmly in place.
Brake System Testing
Before driving, test the brake system. Press the brake pedal slowly. It should feel firm, not soft or spongy. If the pedal sinks, bleed the brakes to remove air. Check for any unusual noises or vibrations. Test in a safe area at low speed. Confirm the brakes stop the vehicle smoothly and evenly.
Breaking In The Brakes
Newly cleaned rotors and pads need a break-in period. Drive slowly and gently apply the brakes several times. Avoid hard stops for the first 100 miles. This helps the pads and rotors adjust to each other. Proper break-in improves brake performance and lifespan. Your brakes will work better and last longer.

Credit: www.reddit.com
Preventing Rotor Glazing
Preventing rotor glazing is key to keeping brakes working well. Glazing happens when brake rotors get too hot. This heat creates a smooth, hard layer on the rotor surface. That layer makes braking less effective and can cause noise. Avoiding glaze means better safety and longer brake life. Follow simple steps to protect your rotors from glazing.
Proper Driving Habits
Drive smoothly to avoid sudden stops. Hard braking causes heat build-up fast. Use engine braking on downhill roads to reduce brake use. Let brakes cool down after heavy use. Avoid riding the brakes for long periods. These habits lower the risk of rotor glazing.
Regular Maintenance
Check brake pads and rotors often. Replace worn pads before they damage rotors. Clean rotors to remove dust and debris. Inspect brakes for signs of overheating or glazing. Early care helps keep the brake system in good shape.
Choosing Quality Brake Pads
Pick brake pads made from good materials. Cheap pads wear out quickly and heat up more. Quality pads create less dust and heat. They reduce the chance of glazing on rotors. Invest in reliable pads for safer, smoother braking.
Frequently Asked Questions
How Do I Know If My Brake Rotors Are Glazed?
Glazed brake rotors appear shiny and smooth, causing reduced braking power. You may notice squeaking or vibrations when braking. Inspect the rotors for a polished surface, which indicates glazing. This condition affects braking efficiency and requires prompt attention to restore safety.
What Tools Are Needed To Remove Rotor Glaze?
To remove rotor glaze, you need sandpaper or a brake rotor resurfacing tool. A jack and lug wrench to remove wheels are essential. Additionally, a brake cleaner helps remove debris. These tools ensure a proper and safe removal of the glaze.
Can I Remove Brake Rotor Glaze Without Removing Wheels?
It is possible but not recommended to remove glaze without removing wheels. Access is limited, and cleaning may be incomplete. Removing the wheels allows thorough inspection and resurfacing for effective glaze removal. Proper access ensures better brake performance and safety.
How Often Should Brake Rotors Be Resurfaced?
Brake rotors should be resurfaced every 30,000 to 70,000 miles or when glazing occurs. Regular inspection during brake maintenance helps identify glazing early. Resurfacing improves braking efficiency and prolongs rotor life. Follow your vehicle’s maintenance schedule for best results.
Conclusion
Removing glaze from brake rotors helps improve your car’s stopping power. Clean rotors reduce noise and vibration while driving. Use simple tools and follow safe steps carefully. Regular checks keep your brakes working well. Taking time to fix rotors saves money on repairs later.
A smooth brake surface means safer, more reliable driving. Keep your brakes in good shape for peace of mind. Small efforts make a big difference on the road.