If you own a Simplicity Sunstar 18, you know how important smooth wheel movement is for a great ride. But when it’s time to remove the wheel bearing covers, it can feel tricky and frustrating.
You might worry about damaging parts or not knowing the right steps to take. Don’t worry—this guide will walk you through the process clearly and simply. By the end, you’ll have the confidence to remove those covers safely and quickly, saving you time and effort.
Ready to get started? Let’s dive in!

Credit: navigatepa.com
Tools Needed
Removing the wheel bearing covers on a Simplicity Sunstar 18 requires certain tools. Having the right tools makes the job safer and easier. Prepare all tools before starting to avoid interruptions.
Essential Tools
- Socket wrench set – for loosening bolts and nuts
- Flathead screwdriver – to pry off the bearing cover carefully
- Rubber mallet – to tap the cover without damage
- Needle-nose pliers – to handle small clips or pins
- Work gloves – to protect your hands during the process
Optional Tools For Easier Removal
- Gear puller – helps pull the bearing cover smoothly
- Penetrating oil – loosens rusted or stuck parts
- Cleaning brush – removes dirt and debris around the cover
- Magnetic tray – holds bolts and small parts safely
Preparing The Tractor
Start by parking the tractor on a flat surface and turning off the engine. Remove the wheel and clean the area around the bearing cover. Use the right tools to carefully pry off the cover without damaging it.
Safety Precautions
Start by turning off the engine and removing the key. This stops any accidental starts. Wear gloves to protect your hands from sharp parts. Use safety glasses to shield your eyes from dust and debris. Ensure the tractor is on a flat surface to avoid slipping. Keep children and pets away from the work area. Have a fire extinguisher nearby just in case. Avoid loose clothing that can get caught in moving parts.
Positioning The Sunstar 18
Park the Sunstar 18 on a level, firm ground. Engage the parking brake to keep the tractor still. Lower any attachments to the ground to add stability. Use wheel chocks behind the tires for extra safety. Make sure there is enough space around the tractor. This space allows easy access to the wheel bearing covers. Clear away tools and clutter that might cause tripping. Check the lighting to have a clear view of all parts.
Accessing The Wheel Bearing Covers
Accessing the wheel bearing covers on the Simplicity Sunstar 18 is the first step in bearing maintenance. Proper access allows easy inspection and removal without damage. Follow simple steps to reach these covers safely and quickly.
Start by preparing the mower to prevent any movement. Safety first to avoid accidents during the process.
Removing The Wheels
Begin by lifting the mower using a jack or sturdy blocks. Make sure it is stable before you remove the wheels. Use a lug wrench to loosen and take off the lug nuts. Pull the wheels straight off the axle. Set them aside carefully to avoid losing any parts.
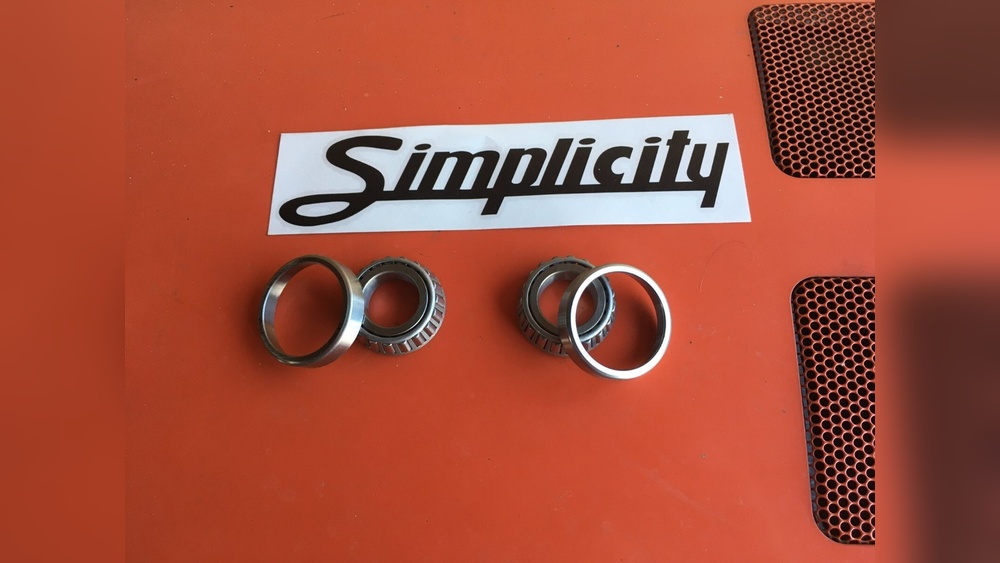
Locating The Bearing Covers
With the wheels removed, look at the center of the wheel hub. The bearing covers are usually round plates or caps there. They may be secured with bolts or clips. Clean the area to see the covers clearly. This helps prevent dirt from entering the bearings during removal.

Credit: www.ebay.com
Removing The Bearing Covers
Removing the bearing covers on the Simplicity Sunstar 18 is a key step in maintaining your mower. This task lets you access the wheel bearings for cleaning or replacement. Proper removal protects the bearing and prevents damage.
Take your time and use the right tools. Follow clear steps to avoid problems during the process.
Loosening The Cover
Start by cleaning the area around the cover. Dirt can cause tools to slip or damage the cover. Use a wrench or socket that fits the cover bolts exactly. Turn the bolts slowly to loosen them. Avoid forcing the bolts to prevent stripping.
Using The Right Technique
Apply steady pressure while turning the bolts. Use a breaker bar for extra leverage if needed. Keep tools straight to avoid slipping. Work on all bolts evenly, loosening a little at a time. This method helps the cover come off evenly without bending.
Handling Stubborn Covers
Stubborn covers may stick due to rust or debris. Tap gently around the cover edge with a rubber mallet. Use penetrating oil on the bolts and wait 10-15 minutes. Try loosening bolts again after the oil works. Avoid using metal hammers to prevent damage.
Cleaning And Inspecting
Cleaning and inspecting the wheel bearing covers on your Simplicity Sunstar 18 is important. Dirt and damage can cause problems with your mower’s performance. Proper cleaning helps the bearing last longer. Careful inspection catches issues before they get worse. Follow these steps to keep your mower running smoothly.
Cleaning The Bearing Area
Start by removing any loose dirt around the bearing area. Use a clean cloth or soft brush to wipe away grime. Avoid using water directly on the bearing to prevent rust. Apply a small amount of degreaser to tough spots. Let it sit for a minute, then wipe clean. Make sure the area is dry before moving on.
Inspecting For Damage
Look closely at the bearing and surrounding parts. Check for cracks, rust, or unusual wear. Spin the bearing by hand to feel for roughness or noise. Any grinding or stiffness means it may need replacing. Also, check the seals for tears or leaks. Replace damaged parts to avoid bigger repair costs later.
Reinstalling Or Replacing Covers
Reinstalling or replacing wheel bearing covers on your Simplicity Sunstar 18 is important. It protects the bearings from dirt and moisture. This step keeps the mower running smoothly and extends its life. Careful handling ensures the covers fit well and work properly.
Choosing Replacement Parts
Choose covers that match the original size and shape. Use parts made for the Simplicity Sunstar 18 model. Avoid generic covers that may not fit well. Quality parts help prevent damage to the bearings. Check the material for durability and resistance to rust.
Proper Installation Tips
Clean the area before fitting the new cover. Remove dirt and old grease from the bearing seat. Align the cover carefully to avoid bending or warping. Press the cover evenly using a soft tool or rubber mallet. Make sure it sits flush and seals tightly. Test the wheel for smooth rotation after installation.
Credit: navigatepa.com
Frequently Asked Questions
How Do I Remove Wheel Bearing Covers On Simplicity Sunstar 18?
To remove the wheel bearing covers, first, lift the mower safely. Use a socket wrench to unscrew the cover bolts, then gently pry off the covers. Avoid damaging the seals or bearings during removal.
What Tools Are Needed For Bearing Cover Removal?
You will need a socket wrench, flathead screwdriver or pry bar, and possibly a hammer. These tools help loosen bolts and carefully remove covers without damaging components.
How To Avoid Damaging Wheel Bearings During Removal?
Work slowly and use gentle prying motions. Avoid using excessive force or metal tools that could scratch or dent the bearing surface. Protect bearings with clean rags after removal.
How Often Should Wheel Bearing Covers Be Inspected?
Inspect wheel bearing covers every 6 months or after heavy use. Regular checks prevent dirt buildup and ensure bearings stay lubricated and protected for longer life.
Conclusion
Removing wheel bearing covers on the Simplicity Sunstar 18 is simple. Follow the steps carefully to avoid damage. Use the right tools and take your time. Clean the area before reassembly for best results. Regular checks help keep your machine working well.
Now you can handle this task with confidence. Keep your equipment in good shape and enjoy smooth rides. Easy maintenance saves time and money in the long run.