If your lawn mower isn’t running as smoothly as it used to, a clogged fuel filter might be the culprit. Replacing the fuel filter is a simple step that can save you time, money, and frustration.
In this guide, you’ll learn exactly how to replace the fuel filter on your lawn mower quickly and safely. By the end, you’ll have the confidence to keep your mower running like new. Ready to get started? Let’s dive in.

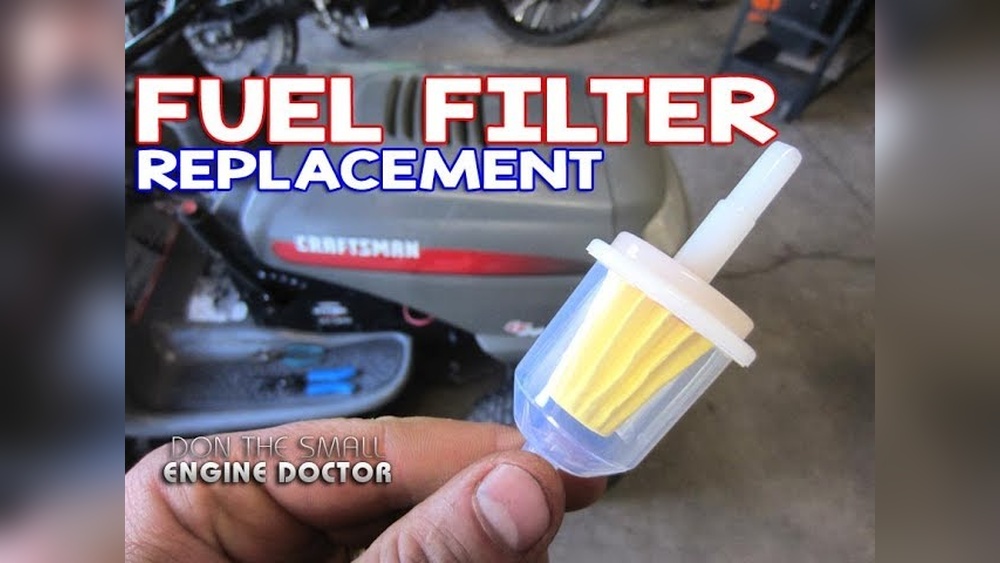
Credit: www.youtube.com
Signs Of A Bad Fuel Filter
A fuel filter plays a key role in your lawn mower’s engine health. It stops dirt and debris from entering the fuel system. Over time, the filter can get clogged or damaged. This causes problems that affect how your mower runs. Spotting signs of a bad fuel filter early helps avoid bigger engine issues. Watch out for these common symptoms.
Reduced Engine Performance
Your mower may lose power during use. It might run slower or stall often. A dirty fuel filter limits fuel flow to the engine. This makes the engine work harder and less efficiently. You may notice the mower struggles on thick grass or hills. Reduced engine power is a clear sign the fuel filter needs checking.
Difficulty Starting
The mower may take many tries to start or not start at all. A blocked fuel filter can stop fuel from reaching the engine. Without enough fuel, the engine won’t ignite properly. If you turn the key and hear the engine struggle, the fuel filter might be the cause. This problem usually gets worse over time.
Fuel Odor And Leaks
Smelling strong fuel near the mower is unusual and unsafe. A bad fuel filter may cause leaks or spills in the fuel line. Look for wet spots or fuel stains under the mower. Fuel leaks waste fuel and can create fire hazards. Check the filter and surrounding parts if you notice a fuel smell or leakage.
Tools And Materials Needed
Before starting the fuel filter replacement, gather all necessary tools and materials. Having everything ready makes the job faster and safer. Each part plays an important role in the process.
Replacement Fuel Filter
Choose the right fuel filter for your lawn mower model. Check the manual or label for the exact type. Using the correct filter ensures proper fuel flow and engine performance.
Screwdrivers And Wrenches
Prepare a set of screwdrivers and wrenches. These tools help remove the old filter and secure the new one. Different mower models may require different sizes.
Safety Gear
Wear gloves to protect your hands from fuel and dirt. Use safety glasses to shield your eyes. Safety gear prevents injuries during the replacement process.
Preparing Your Lawn Mower
Preparing your lawn mower is an important first step before replacing the fuel filter. This helps you work safely and avoid damage. Follow simple steps to get your mower ready for maintenance.
Taking these precautions makes the process easier and protects your mower parts. Let’s start with turning off and cooling down the engine.
Turn Off And Cool Down
Always turn off the lawn mower before starting any work. Let the engine cool down for at least 15 minutes. Hot parts can cause burns or damage. Cooling also prevents fuel from igniting during the replacement.
Disconnect The Spark Plug
Remove the spark plug wire to stop the mower from accidentally starting. This is a key safety step. Use gloves if needed and pull the wire gently from the spark plug. Keep it away until the job is done.
Drain The Fuel Tank
Empty the fuel tank to avoid spills and leaks. Use a fuel container to catch the gas safely. Draining prevents old fuel from entering the new filter. Work outside or in a well-ventilated area.

Credit: www.ifixit.com
Locating The Fuel Filter
Finding the fuel filter on your lawn mower is the first step in replacing it. The fuel filter cleans the gas before it reaches the engine. Dirt or debris in the fuel can cause the mower to run poorly or stop working. Knowing where to find the fuel filter helps you keep the mower in good shape.
Check The Fuel Line
The fuel filter is usually along the fuel line. This line carries gas from the tank to the engine. Follow the fuel line starting at the gas tank. Look for a small, clear or opaque plastic part. It may have metal ends or clamps holding it in place. The filter is often near the carburetor or fuel pump.
Identify Filter Type
Fuel filters come in different styles. Some are small cylinders, others look like tiny canisters. Some filters are inside the fuel line, and others are inside the fuel tank. Check your mower’s manual if you can. It shows the exact type and location of the filter. Knowing the type helps buy the correct replacement.
Removing The Old Fuel Filter
Removing the old fuel filter is the first step in replacing it. This task needs care to avoid fuel spills or damage. Taking your time helps ensure a smooth process and keeps your lawn mower safe.
Start by preparing your workspace. Have a small container or cloth ready to catch any leaking fuel. Wear gloves to protect your hands from fuel contact. Now, let’s move on to detaching the fuel lines and removing the filter itself.
Detach Fuel Lines Carefully
Locate the fuel lines connected to the filter. These lines carry gasoline, so handle them with care. Use pliers to loosen any clamps holding the lines in place. Gently pull the fuel lines off the filter. Avoid pulling too hard to prevent damaging the hoses. Some fuel may leak out; catch it with your cloth or container.
Remove Filter From Mount
After detaching the fuel lines, check how the filter is attached. It may be held by a bracket or clips. Use a screwdriver or your hands to release these fasteners. Remove the old fuel filter from its mount carefully. Keep it upright to avoid spilling leftover fuel. Dispose of the old filter properly according to local rules.

Credit: www.ifixit.com
Installing The New Fuel Filter
Installing the new fuel filter is a key step in lawn mower maintenance. It ensures clean fuel flows to the engine, which keeps the mower running smoothly. Take time to place the filter correctly and secure the fuel lines well. This prevents leaks and engine problems later.
Position The Filter Correctly
Check the new fuel filter for an arrow or label. This shows the direction of fuel flow. Point the arrow toward the engine. Place the filter in the same spot as the old one. Make sure it fits snugly and is not loose. A wrong position can stop fuel flow and cause engine trouble.
Reconnect Fuel Lines Securely
Slide the fuel lines onto the new filter’s ends. Push them in firmly to avoid leaks. Use clamps if the mower has them. Tighten clamps enough to hold the lines but do not crush them. Double-check both fuel lines for a secure fit before starting the mower.
Testing The Lawn Mower
Testing the lawn mower after replacing the fuel filter is crucial. It confirms the mower runs well and safely. This step helps spot any issues early. Follow these simple checks to ensure your mower performs at its best.
Reconnect Spark Plug
First, reconnect the spark plug wire to the spark plug. This step restores the electrical connection needed to start the engine. Make sure the wire fits tightly to avoid any spark loss.
Start The Engine
Next, start the lawn mower engine. Listen for smooth running sounds and steady operation. The engine should start quickly without hesitation or sputtering. This means the new fuel filter is working properly.
Check For Leaks And Performance
Look under the mower for any fuel leaks around the filter area. No leaks mean the filter and connections are secure. Also, watch how the mower cuts grass. It should run evenly without stalling or losing power.
Maintenance Tips For Fuel Filters
Maintaining your lawn mower’s fuel filter is key to its smooth running. Clean fuel filters stop dirt and debris from reaching the engine. This keeps the mower working well and lasts longer. Simple care steps help avoid costly repairs and keep the mower ready to use anytime.
Regular Inspection
Check the fuel filter often for dirt and damage. Look for cracks or blockages. A dirty filter slows fuel flow and hurts engine performance. Inspect before each mowing season and during long breaks. Early detection saves time and money.
Fuel Quality Tips
Use clean, fresh fuel to protect the filter. Old or dirty fuel clogs the filter fast. Store fuel in a clean, sealed container. Avoid filling the tank from dusty or rusty cans. Clean fuel helps the filter last longer.
Replacement Frequency
Change the fuel filter based on the mower’s manual. Usually, replace it every season or after 25 hours of use. More frequent changes may be needed in dusty areas. Regular replacement keeps fuel flowing freely and the engine healthy.
Frequently Asked Questions
How Often Should I Replace A Lawn Mower Fuel Filter?
Replace your lawn mower fuel filter every 25 hours of use or once per season. This ensures clean fuel flow and prevents engine problems. Regular replacement maintains mower efficiency and prolongs engine life by blocking dirt and debris.
What Tools Do I Need To Replace A Fuel Filter?
You typically need a screwdriver, pliers, and a new fuel filter. Some models may require a wrench. Always check your mower’s manual for specific tools. Having a container to catch fuel spills is also helpful for safety.
Can I Replace The Fuel Filter Without Draining Fuel?
It’s best to drain or clamp the fuel line before replacing the filter. This prevents fuel spills and reduces fire risk. If you cannot drain the fuel, work carefully to minimize leaks and wear protective gloves.
What Are Signs Of A Clogged Fuel Filter?
Symptoms include engine stalling, poor acceleration, and difficulty starting the mower. A clogged filter restricts fuel flow, causing these issues. If your mower runs unevenly or loses power, inspect and replace the fuel filter promptly.
Conclusion
Replacing a fuel filter keeps your lawn mower running smooth. Clean fuel means better engine performance and longer life. Regular filter changes stop dirt from clogging the system. Take safety steps and use the right tools. This simple task saves money on repairs later.
Keep your mower ready for the next cut. A little care goes a long way in lawn mower maintenance. Try it yourself and enjoy a healthier engine.

