
If you own a Duramax diesel engine, you know how important it is to keep it running smoothly. One key part that often gets overlooked is the fuel filter housing.
When it starts to wear out or leak, your engine’s performance can suffer, and ignoring it could lead to costly repairs. But don’t worry—you don’t have to be a mechanic to replace it yourself. You’ll discover simple, step-by-step instructions to replace your Duramax fuel filter housing quickly and safely.
Keep reading, and you’ll save time, money, and avoid unnecessary trips to the shop.
Signs Of A Faulty Fuel Filter Housing
The fuel filter housing in your Duramax truck plays a vital role in protecting the engine. It keeps dirt, rust, and other particles from reaching the fuel system. When the housing becomes faulty, it can cause several issues. Recognizing the signs early helps avoid serious engine damage and costly repairs. Below are the common symptoms and how a bad fuel filter housing affects engine performance.
Common Symptoms
One clear sign is fuel leaks around the filter area. Cracks or damage in the housing cause these leaks. Another symptom is a strong smell of fuel near the engine. This happens when fuel escapes from the faulty housing. Also, you might notice difficulty starting the engine. The fuel flow gets blocked or reduced. Sometimes, the check engine light turns on. It signals a problem with the fuel system. Noises from the fuel pump may increase. This happens because the pump works harder to push fuel through a bad filter housing.
Impact On Engine Performance
A faulty fuel filter housing disrupts fuel delivery. The engine may run rough or stall unexpectedly. You could feel a loss of power during acceleration. This happens as the engine struggles to get enough fuel. Poor fuel flow leads to lower fuel efficiency. The engine uses more fuel to perform basic tasks. Long-term use without fixing the housing can cause engine damage. Contaminants may enter the engine, causing wear and tear. Immediate replacement ensures smooth and reliable engine operation.

Credit: www.dirtydieselcustom.ca
Tools And Materials Needed
Replacing the fuel filter housing on a Duramax engine requires the right tools and parts. Having everything ready makes the job easier and faster. This section lists all the essentials you need before starting the repair. Prepare carefully to avoid delays or mistakes.
Essential Tools
- Socket wrench set for loosening bolts
- Flathead screwdriver for prying clips
- Pliers to remove clamps and hoses
- Drain pan to catch fuel spills
- Clean rags to wipe surfaces
- Safety gloves to protect your hands
- Eye protection to guard against splashes
- Torque wrench to tighten bolts correctly
Replacement Parts
- New fuel filter housing compatible with Duramax
- Replacement fuel filter element
- New O-rings or seals for tight fit
- Fuel line clamps if old ones are worn
- Fuel-resistant lubricant for seals
Preparing Your Duramax For Replacement
Preparing your Duramax for fuel filter housing replacement starts with careful steps. This preparation helps avoid damage and keeps you safe. A clean workspace and the right tools matter. Follow simple instructions to make the job easier and faster.
Understanding the location and setup of the fuel filter housing is key. This knowledge saves time and prevents mistakes. Take a moment to get familiar with your Duramax engine and parts. Preparation sets the stage for a smooth replacement process.
Safety Precautions
Always wear safety glasses to protect your eyes. Gloves help keep your hands clean and safe. Work in a well-ventilated area to avoid inhaling fumes. Keep a fire extinguisher nearby. Fuel is flammable and dangerous. Disconnect the battery to stop electrical sparks. Avoid open flames and smoking near the truck. Take your time and stay alert.
Locating The Fuel Filter Housing
The fuel filter housing sits near the engine block. Look for a round or oval-shaped container with fuel lines attached. It usually has a plastic or metal cover. Check the driver’s side of the engine compartment. Use a flashlight if needed. Refer to your Duramax manual for exact location. Knowing this saves time and avoids confusion during replacement.
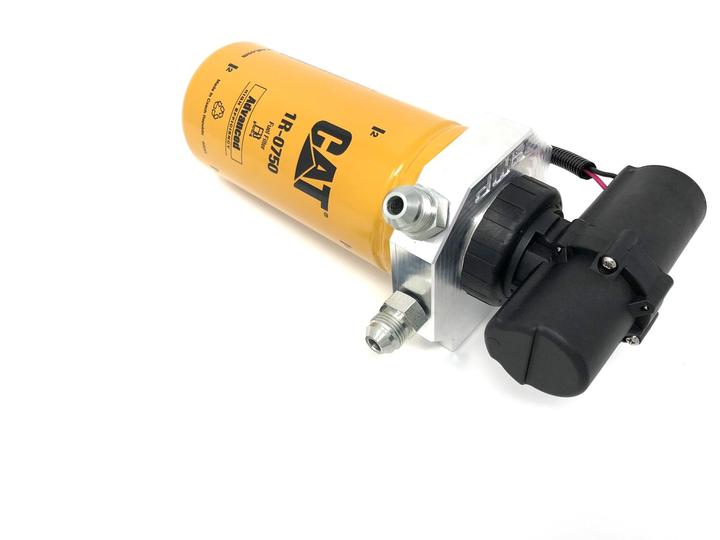
Credit: www.rpidiesel.com
Removing The Old Fuel Filter Housing
Removing the old fuel filter housing on a Duramax is a key step in maintaining your engine. This process helps avoid fuel leaks and keeps the fuel system clean. Follow these clear steps for a safe and smooth removal.
Draining Fuel System
Start by draining the fuel system to reduce pressure. Locate the fuel drain valve on the filter housing. Use a container to catch the draining fuel. Wear gloves to protect your hands. This step prevents fuel spills and makes the next steps safer.
Disconnecting Fuel Lines
Next, carefully disconnect the fuel lines attached to the housing. Use a wrench or special tool if needed. Press the release tabs on quick-connect fittings. Pull the lines gently to avoid damage. Keep a rag nearby to catch any remaining fuel drips.
Detaching The Housing
Finally, remove the mounting bolts or clips holding the housing. Use the correct size socket or screwdriver. Gently pull the housing away from its mount. Check for any remaining fuel inside. Dispose of the old housing properly and clean the area before installing the new part.
Installing The New Fuel Filter Housing
Installing the new fuel filter housing on your Duramax is a key step for proper engine performance. This part holds the fuel filter and connects to fuel lines. Correct installation prevents leaks and ensures smooth fuel flow. Follow the steps carefully for a secure fit and long-lasting operation.
Positioning The New Housing
Place the new fuel filter housing in the same spot as the old one. Align it with the mounting points on the engine. Make sure the housing sits flush and does not tilt. Proper positioning is important to avoid strain on the fuel lines.
Connecting Fuel Lines
Attach the fuel lines to the new housing carefully. Push the lines fully onto the connectors to create a tight seal. Check for any dirt or debris before connecting. Loose or dirty connections can cause leaks or engine problems.
Securing The Housing
Use the original bolts or clamps to secure the housing in place. Tighten them evenly to avoid warping the housing. Do not overtighten, as this can damage the housing or threads. A firm, stable fit ensures the housing stays secure during operation.
Testing After Replacement
Testing after replacing the fuel filter housing on your Duramax is crucial. It ensures the job is done right and your engine runs smoothly. Skipping this step can cause leaks or performance issues. Follow these simple steps to check your work and confirm everything functions properly.
Checking For Leaks
Start by inspecting the fuel filter housing and nearby connections. Look closely for any signs of fuel dripping or wet spots. Use a clean cloth to wipe around the area. Watch for fresh fuel appearing. Tighten any loose fittings if you spot leaks. Do not start the engine before ensuring no leaks remain.
Starting The Engine
Once you confirm no leaks, start the engine. Let it run for a few minutes at idle. Listen for unusual noises or rough running. The engine should start easily without hesitation. If it struggles or stalls, turn it off and check your installation again. A smooth start means the filter housing is installed correctly.
Monitoring Performance
Drive your vehicle for a short distance to test performance. Pay attention to acceleration and power delivery. The engine should feel steady and responsive. Watch the fuel gauge and warning lights on the dashboard. Any drop in power or warning signals may indicate a problem. Stop and inspect the fuel filter housing if issues occur.
Maintenance Tips For Longevity
Proper maintenance helps your Duramax fuel filter housing last longer. Simple steps keep your engine running smoothly. Avoid costly repairs by caring for your fuel system regularly.
Check the fuel filter housing and fuel quality often. Clean parts work better and protect your engine from damage. Follow these tips to extend the life of your Duramax fuel filter housing.
Regular Inspection
Look at the fuel filter housing every few months. Search for cracks, leaks, or dirt buildup. Clean the area around the housing to stop dust from entering. Replace worn parts to avoid fuel leaks. Early checks prevent bigger problems later.
Fuel Quality Recommendations
Use clean, high-quality diesel fuel only. Poor fuel clogs the filter and damages the housing. Avoid buying fuel from unknown or dirty sources. Add fuel additives to keep fuel fresh and clean. Good fuel helps your engine and filter last longer.

Credit: www.youtube.com
Frequently Asked Questions
What Tools Are Needed To Replace Duramax Fuel Filter Housing?
You need basic hand tools like wrenches, sockets, screwdrivers, and pliers. A new fuel filter housing and gloves are essential. Safety glasses are recommended to protect your eyes from fuel splashes during replacement.
How Often Should Duramax Fuel Filter Housing Be Replaced?
Replace the fuel filter housing every 25,000 to 30,000 miles or when leaks occur. Regular replacement prevents contaminants from damaging the engine and ensures optimal fuel system performance.
Can I Replace The Duramax Fuel Filter Housing Myself?
Yes, you can replace it yourself with proper tools and safety precautions. Follow the vehicle manual and disconnect the battery before starting. If unsure, consult a mechanic to avoid damage or injury.
What Signs Indicate A Failing Duramax Fuel Filter Housing?
Look for fuel leaks, engine misfires, or difficulty starting your Duramax. These symptoms often mean the fuel filter housing is cracked or clogged and needs replacement promptly.
Conclusion
Replacing the fuel filter housing on a Duramax keeps your engine running well. It protects the fuel system from dirt and damage. Following the right steps makes the job easier and safer. Use the correct tools and parts to avoid issues.
Regular maintenance helps your truck last longer and perform better. Taking time to do this repair saves money in the long run. Keep your Duramax strong and reliable by changing the fuel filter housing when needed. Simple care goes a long way.


