
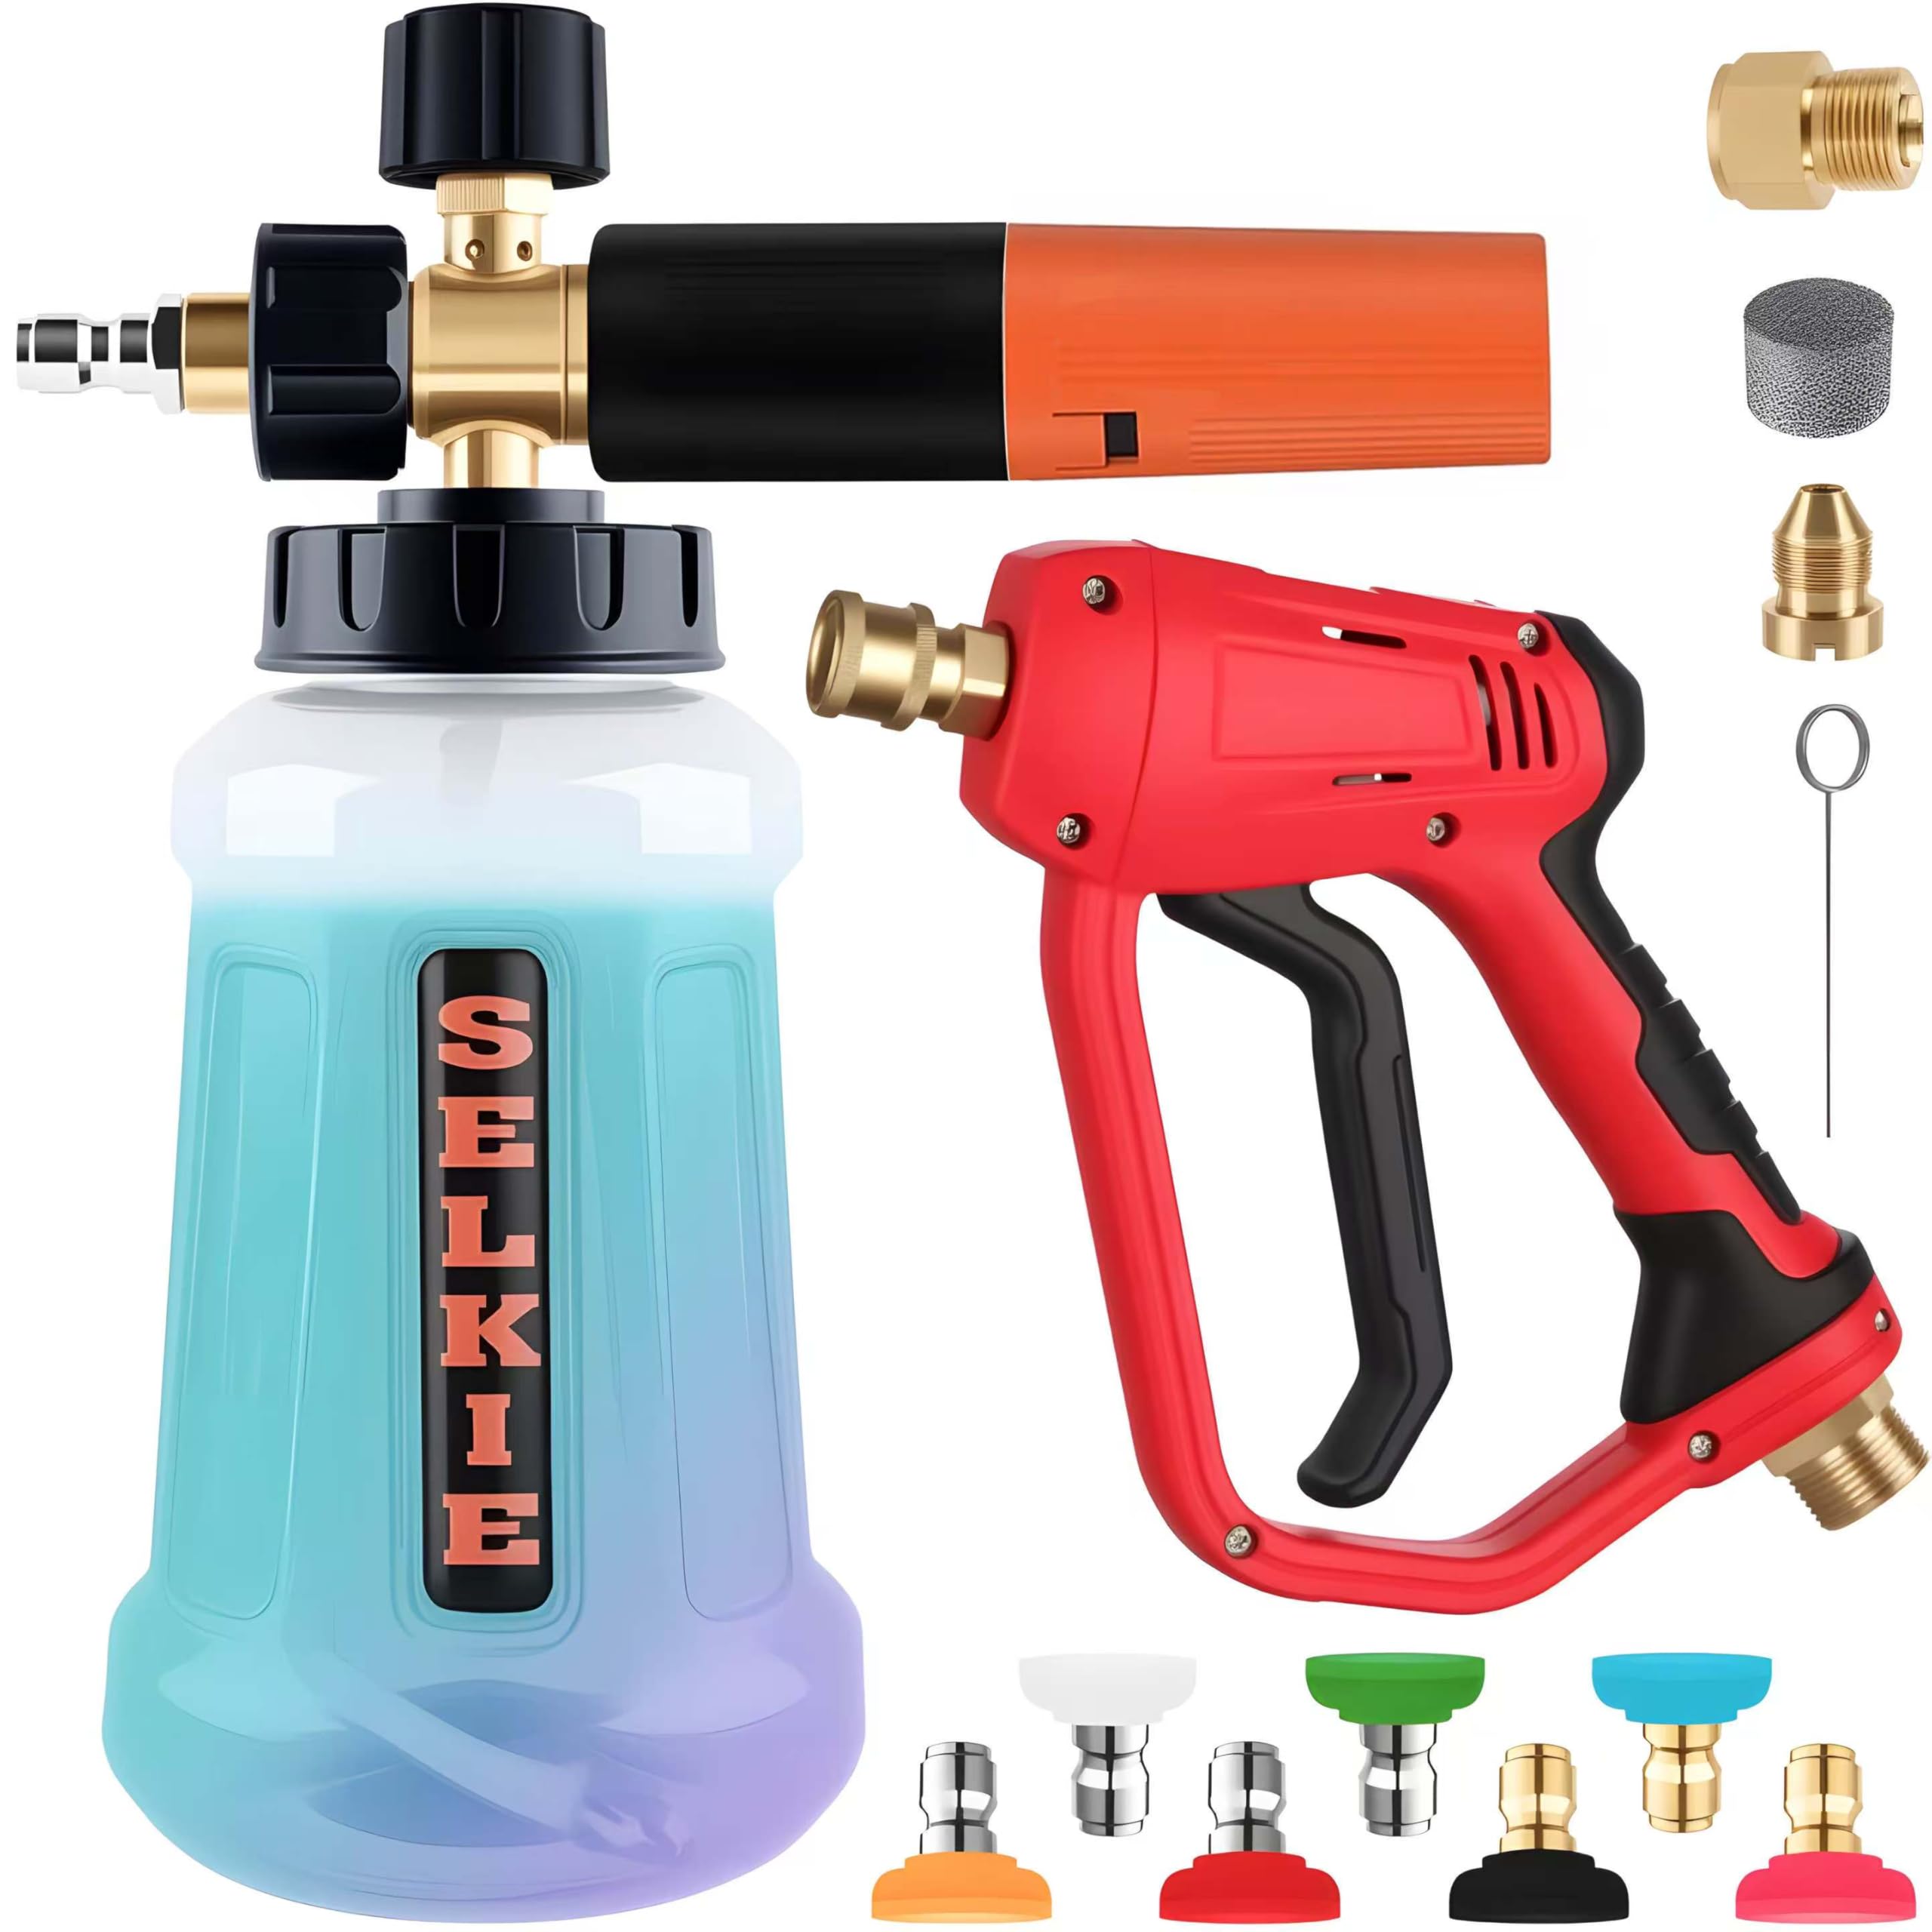
If you own a Selky Foam Cannon, you know how important it is to keep it clean and working smoothly. But when it stops spraying like it should, knowing how to take it apart can save you time and money.
In this guide, you’ll learn simple, step-by-step instructions to disassemble your foam cannon safely and effectively. By the end, you’ll feel confident fixing any clogs or issues yourself—no need to wait for help or buy a new one. Ready to get your foam cannon back in top shape?
Let’s dive in.
Tools Needed
Taking apart a Selky foam cannon is easier with the right tools. Having the correct equipment helps avoid damage and saves time. Some tools are essential, while others make the job smoother.
Essential Tools
- Screwdriver: A flathead or Phillips screwdriver fits most screws on the foam cannon.
- Pliers: Useful for gripping small parts and removing tight fittings.
- Wrench: Helps loosen or tighten nuts on the foam cannon body.
- Cleaning Brush: Small brushes help clean parts during disassembly.
- Towel or Cloth: For wiping dirt or foam residue off parts.
Optional Accessories
- Needle Nose Pliers: Reach into narrow spaces with precision.
- Lubricant: Keeps moving parts smooth after reassembly.
- Container: Holds small screws and parts to avoid loss.
- Gloves: Protect your hands from soap or dirt.
- Magnifying Glass: Helps see tiny parts clearly.

Credit: www.youtube.com
Safety Precautions
Taking apart a Selky Foam Cannon needs care and attention. Safety is the first step. It protects you from injury and keeps your tools safe. Follow these safety tips before you start disassembling the foam cannon.
Protective Gear
Wear gloves to protect your hands from sharp parts. Use safety glasses to guard your eyes from splashes or debris. A mask can help if you are sensitive to dust or sprays. Dress in old clothes to avoid stains.
Work Area Setup
Choose a clean and flat surface to work on. Make sure the area is well-lit so you can see small parts. Keep tools organized and within reach. Avoid distractions to stay focused on the task. Have a container ready to hold tiny screws and parts safely.
Preparing The Foam Cannon
Preparing the foam cannon is the first step before taking it apart. It helps avoid mess and damage. Proper preparation makes the process smooth and safe.
Follow these steps carefully to get the foam cannon ready for disassembly.
Emptying The Reservoir
Remove the foam cannon from the pressure washer. Pour out any soap or foam solution left inside the reservoir. Rinse the reservoir with clean water to clear soap residues. This prevents clogs and keeps parts clean.
Disconnecting From Pressure Washer
Turn off the pressure washer before disconnecting. Release any built-up pressure by squeezing the trigger. Twist or pull the foam cannon off the pressure washer nozzle carefully. Handle the parts gently to avoid damage.
Removing The Nozzle
Removing the nozzle is the first step in taking apart your Selky Foam Cannon. This part controls the foam spray, so handling it carefully is important. Proper removal helps maintain the cannon’s performance and avoid damage.
Loosening The Nozzle
Start by holding the foam cannon firmly. Twist the nozzle counterclockwise. It might be tight from use or factory settings. Use a cloth for better grip if needed. Avoid using tools that can scratch or break the nozzle. Turn slowly to loosen it without force.
Cleaning The Nozzle Components
After removing the nozzle, check each piece carefully. Rinse parts with warm water to remove dirt and foam residue. Use a soft brush to clean small holes and crevices. Dry the pieces completely before reassembling. Clean components ensure smooth foam flow and longer nozzle life.
Detaching The Bottle
Detaching the bottle from your Selky Foam Cannon is a simple first step in taking it apart. This part holds the soap mixture and connects directly to the main unit. Removing it carefully helps in cleaning or replacing the bottle without damage. Follow clear steps to keep your equipment in good shape.
Unscrewing The Bottle
Hold the bottle firmly with one hand. Twist the bottle counterclockwise to unscrew it. Avoid using too much force to prevent breaking the threads. If the bottle feels stuck, gently wiggle it while turning. Set the bottle aside once it is free from the cannon.
Inspecting The Bottle For Damage
Check the bottle for cracks or leaks after removal. Look closely at the threading and the seal area. Any damage here can cause leaks during use. If you see wear, consider replacing the bottle. Keeping the bottle in good condition improves foam quality and safety.
Credit: www.seriouseats.com
Disassembling Internal Parts
Disassembling the internal parts of a Selky Foam Cannon is key to keeping it clean and working well. This process helps remove dirt and buildup that can block the spray. Taking it apart carefully protects the delicate components inside.
Follow clear steps to access and clean each part. Doing this regularly extends the life of your foam cannon. Let’s break down how to handle the internal pieces safely.
Accessing Internal Components
Start by unscrewing the foam cannon’s main body. Hold the base firmly and twist the top counterclockwise. Remove the top section gently to avoid damaging small parts inside.
Once open, you will see the inner components. These include the filter, nozzle, and tubing. Keep track of each piece as you remove it to ease reassembly later.
Removing The Filter
The filter stops dirt from entering the nozzle. Locate it inside the foam cannon’s main chamber. It often fits snugly, so pull it out slowly.
Check the filter for debris and damage. Replace it if torn or worn. Clean filters ensure smooth foam flow and better spray performance.
Cleaning The Internal Parts
Use warm water and mild soap to wash the internal parts. Avoid harsh chemicals that can harm plastic or rubber pieces. Rinse everything well to remove soap residue.
Use a soft brush to scrub hard-to-reach areas gently. Let all parts dry completely before reassembling. Dry parts prevent mold and keep the foam cannon working properly.
Reassembling Tips
Reassembling your Selky Foam Cannon is a key step after cleaning or fixing it. Careful reassembly ensures your foam cannon works well and lasts longer. Taking time to put parts back correctly saves headaches later.
Follow simple tips to align parts and check for leaks. These steps keep your foam cannon running smoothly and avoid damage.
Aligning Components Properly
Place each part where it belongs. Check the manual or photos if needed. Make sure all seals and washers sit flat. Tighten screws and connections just enough. Too tight can break parts. Too loose causes leaks. Proper alignment helps foam spray evenly.
Testing For Leaks
Fill the foam cannon with water before use. Spray a small amount to see if water escapes. Watch all joints and seals closely. Look for drips or wet spots. Fix leaks by tightening or replacing parts. A leak-free foam cannon saves soap and water. It also keeps your cleaning efficient.
Troubleshooting Common Issues
Troubleshooting common issues with your Selky Foam Cannon helps keep it working well. Problems may stop the foam from spraying or reduce foam quality. Fixing these issues saves time and frustration.
Foam Cannon Not Spraying
Check if the foam cannon is connected tightly to the pressure washer. Loose connections cause no spray. Make sure the water supply is on and pressure is strong. Clean the nozzle if it looks blocked. Dirt or soap buildup stops foam from spraying. Remove the nozzle and rinse it with warm water. Look inside the foam cannon for clogs. Clear any dirt or soap residue. Also, check if the soap bottle is empty. Refill it with the right soap for foam cannons.
Low Foam Output
Low foam output often happens due to weak water pressure. Increase the pressure on your washer for better foam. Use high-quality foam cannon soap designed for thick foam. Thin or wrong soap lowers foam volume. Adjust the soap mix ratio to add more soap. Clean the foam cannon filter to remove dirt. A dirty filter blocks soap flow and reduces foam. Make sure the foam cannon parts are assembled correctly. Loose or wrong parts can cause low foam output.
Credit: www.amazon.com
Frequently Asked Questions
How Do I Safely Disassemble A Selky Foam Cannon?
To safely disassemble, first disconnect the cannon from the pressure washer. Then, carefully unscrew the foam container and nozzle. Avoid forcing parts to prevent damage. Clean components gently before reassembly to ensure proper function.
What Tools Are Needed To Take Apart A Selky Foam Cannon?
You typically need no special tools. Hands are enough to unscrew the foam container and nozzle. A soft cloth helps clean parts. If stuck, a wrench with a cloth can be used gently to avoid scratching.
How To Clean Parts During Selky Foam Cannon Disassembly?
Rinse all parts with warm water to remove soap residue. Use a soft brush to clean nozzles. Avoid harsh chemicals that may damage seals. Dry parts thoroughly before reassembly to prevent mold or damage.
Can I Replace Worn Parts In A Selky Foam Cannon?
Yes, you can replace worn seals, nozzles, or containers. Check the manufacturer’s website for compatible parts. Replacing parts can extend the cannon’s lifespan and improve foam quality.
Conclusion
Taking apart your Selky Foam Cannon is simple with these steps. Always work carefully to avoid damage. Keep track of each part as you remove it. Clean parts gently to maintain performance. Reassemble slowly, checking each connection. Doing this keeps your foam cannon working well.
Regular care helps you enjoy better foam every time. Now, you can handle your foam cannon with confidence and ease.


