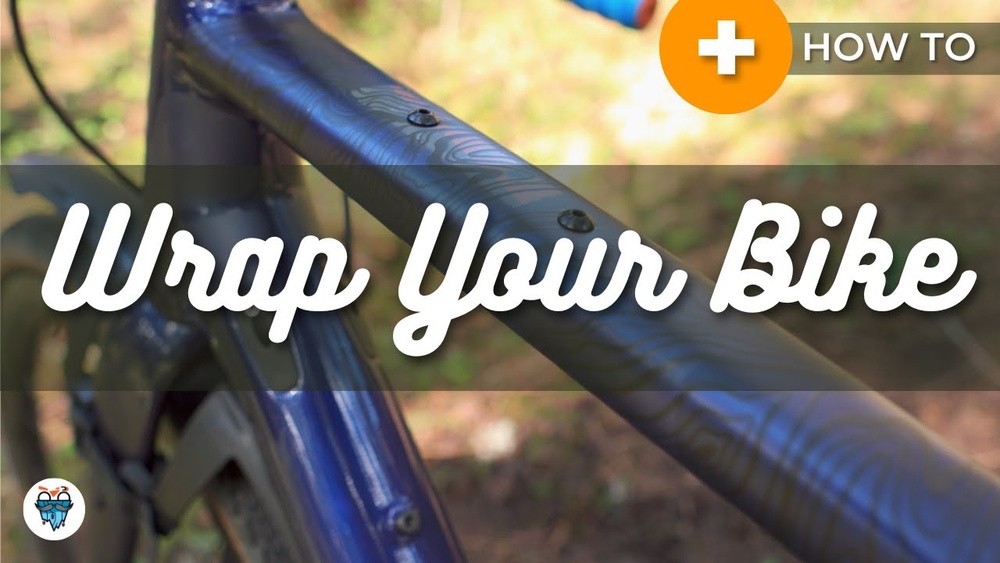
Are you ready to give your bicycle a fresh, unique look without spending a fortune? Vinyl wrapping your bike frame is a smart and creative way to do just that.
Imagine turning your ordinary ride into a standout masterpiece that reflects your style—all with a simple, step-by-step process you can do yourself. In this guide, you’ll discover exactly how to vinyl wrap your bicycle frame, from prepping the surface to applying the wrap flawlessly.
By the end, you’ll have the confidence and know-how to transform your bike and turn heads wherever you go. Let’s get started!

Credit: www.youtube.com
Materials Needed
Vinyl wrapping a bicycle frame needs specific materials. These help you get a smooth, lasting finish. Choose quality items for the best results. Prepare all tools and supplies before starting the project.
Choosing The Right Vinyl Wrap
Select vinyl wrap made for outdoor use. It should resist water, sunlight, and scratches. Look for flexible vinyl that bends around curves. Matte, gloss, or textured finishes all work well. Choose a color or pattern that fits your style. Pick vinyl with adhesive backing for easy application.
Essential Tools And Accessories
Gather a squeegee to smooth the vinyl and remove air bubbles. Use a heat gun or hair dryer to soften the vinyl for curves. A sharp utility knife helps trim excess vinyl cleanly. Have microfiber cloths ready to clean the frame before wrapping. Use gloves to avoid fingerprints on the adhesive side. Painter’s tape can hold vinyl in place during fitting. Also, prepare rubbing alcohol to clean the frame surface.
Preparing The Bicycle Frame
Preparing the bicycle frame is the first step in vinyl wrapping. A clean and smooth surface helps the vinyl stick better. It also prevents bubbles and wrinkles. Taking time in this stage saves effort later.
Cleaning And Degreasing
Start by washing the frame with soap and water. Remove dirt, dust, and grease completely. Use a soft cloth or sponge to avoid scratches. After washing, dry the frame well with a clean towel.
Next, use a degreaser to clear off any oily residue. This step is important for good vinyl adhesion. Apply the degreaser with a lint-free cloth. Wipe the frame carefully and let it dry fully before moving on.
Removing Components
Remove parts like wheels, pedals, and brakes from the frame. This makes wrapping easier and neater. Take off the seat, handlebars, and cables too. Use the right tools to avoid damage.
Keep all screws and parts in a safe place. Label them if needed for easy reassembly later. A bare frame lets you wrap without obstacles or uneven surfaces.
Measuring And Cutting Vinyl
Measuring and cutting vinyl correctly is the key to a smooth bicycle frame wrap. Accurate measurements help avoid waste and ensure a perfect fit. Cutting the vinyl carefully prevents tears and wrinkles. This step sets the foundation for a neat and long-lasting wrap.
Taking Accurate Measurements
Start by cleaning the bike frame. Use a soft cloth to remove dirt and dust. Measure each section of the frame carefully with a flexible tape measure. Note the length and width of every part you want to cover. Add an extra inch to each measurement. This extra space helps during application and trimming. Double-check your numbers before cutting the vinyl.
Cutting Techniques
Place the vinyl on a flat surface. Use a sharp utility knife or scissors for clean cuts. Cut slowly along the measured lines to avoid mistakes. Keep the vinyl flat and steady while cutting. Avoid cutting too close to the edge. Leave a small margin for adjustments during wrapping. Store leftover vinyl in a clean, dry place for future use.

Credit: roadbikeaction.com
Applying The Vinyl Wrap
Applying the vinyl wrap to your bicycle frame is a careful but rewarding step. This process requires patience and attention to detail. Proper application ensures the wrap looks smooth and lasts long. Follow the steps below to apply the vinyl correctly.
Positioning The Vinyl
Start by cleaning the bike frame thoroughly. Remove dirt and grease for better adhesion. Place the vinyl wrap gently on the frame. Align the edges carefully before sticking it down. Make small adjustments to avoid misplacement. Do not peel off the backing paper completely at first. Work in sections for better control.
Using Heat For Flexibility
Use a heat gun or hairdryer on low heat. Warm the vinyl slightly to make it flexible. Heat helps the wrap bend around curves and tight spots. Avoid overheating, which can stretch or damage the vinyl. Keep the heat source moving to prevent burns. Warm vinyl sticks better and forms a smooth finish.
Smoothing Out Bubbles And Wrinkles
Use a squeegee or soft cloth to smooth the vinyl. Start from the center and move toward the edges. Push out air bubbles and wrinkles gently. Work slowly to avoid tearing the vinyl. For stubborn bubbles, lift the vinyl and reapply with heat. A clean, smooth wrap improves the bike’s look and durability.
Trimming And Finishing Touches
Trimming and finishing touches give your bicycle wrap a clean, professional look. This step removes extra vinyl and secures the wrap tightly. A neat finish protects the edges from peeling and damage. Care and patience during this stage make your bike stand out with a smooth, flawless surface.
Precision Trimming
Use a sharp blade to cut away excess vinyl. Follow the bike frame’s curves carefully. Trim close but leave a tiny margin to avoid cutting too deep. Small, slow cuts prevent mistakes. Keep the blade steady and replace it if it gets dull.
Securing Edges
Press down the vinyl edges firmly with a squeegee or your fingers. Heat the edges gently with a heat gun or hairdryer. This softens the vinyl, helping it stick better. Be careful not to overheat or burn the wrap. Tuck edges into frame joints or crevices for a tight fit.
Reassembling The Bicycle
Once the wrap is trimmed and edges sealed, start reassembling the bike. Attach the parts you removed earlier, like wheels and handlebars. Check each piece fits well without stretching the wrap. Tighten bolts carefully to avoid damaging the vinyl. Your bike is ready to ride with a fresh, new look.
Maintenance Tips
Maintaining a vinyl-wrapped bicycle frame keeps it looking fresh and new. Proper care helps the wrap last longer and stay vibrant. Follow simple steps to protect your investment.
Cleaning Wrapped Surfaces
Use a soft cloth or sponge for cleaning. Mild soap and water work best. Avoid harsh chemicals that can damage the vinyl. Gently wipe the surface to remove dirt and grime. Rinse with clean water and dry with a soft towel. Clean regularly to prevent buildup.
Avoiding Damage
Keep sharp objects away from the wrap. Avoid scraping or scratching the surface. Park your bike where it won’t get hit or scratched. Use a bike cover if storing outside. Avoid high-pressure water sprays directly on the wrap. Take care during rides to reduce wear and tear.

Credit: breezeresidency.com
Frequently Asked Questions
What Tools Are Needed To Vinyl Wrap A Bicycle Frame?
You need vinyl wrap film, a heat gun, a squeegee, scissors, and cleaning supplies. These tools ensure a smooth, bubble-free application.
How Long Does Vinyl Wrapping A Bicycle Frame Take?
Vinyl wrapping typically takes 1 to 3 hours depending on frame complexity and your experience. Proper prep and careful application save time.
Can Vinyl Wrap Protect The Bicycle Frame?
Yes, vinyl wrap adds a protective layer against scratches, dirt, and UV damage. It preserves your bike’s paint underneath.
Is Vinyl Wrap Removable Without Damaging The Frame?
Vinyl wrap can be removed without damage if done carefully. Use heat and peel slowly to avoid paint or frame harm.
Conclusion
Vinyl wrapping a bicycle frame can refresh its look quickly. Take your time to clean and prepare the frame well. Apply the vinyl carefully, avoiding wrinkles and bubbles. Use heat to help the wrap fit curves smoothly. Trim the edges neatly for a clean finish.
This simple process protects the frame and adds style. Enjoy your bike’s new appearance and personal touch. Try it yourself and see how rewarding it feels.


