
Want to give your fridge a fresh, stylish look without spending a fortune? Wrapping your fridge with vinyl is a simple and effective way to transform its appearance.
Whether you want to add a splash of color, match your kitchen decor, or protect the surface, vinyl wrap is a smart choice. In this guide, you’ll learn easy, step-by-step tips to wrap your fridge like a pro. By the end, you’ll have the confidence to tackle this project yourself and enjoy a brand-new look that turns heads every time you open the door.
Ready to get started? Let’s dive in!
Choosing The Right Vinyl
Choosing the right vinyl is the first step to wrap your fridge well. The type and color of vinyl affect the look and durability. Picking the right kind helps the wrap stick better and last longer. It also makes the fridge look good and fit your style.
Types Of Vinyl Wraps
There are different types of vinyl for fridge wraps. Cast vinyl is thin and flexible. It fits curved surfaces well. Calendered vinyl is thicker and less flexible. It works best on flat surfaces. Glossy vinyl gives a shiny look. Matte vinyl has a flat, non-reflective finish. Textured vinyl adds a unique feel. Choose the type that suits your fridge shape and style.
Measuring Your Fridge
Measure your fridge carefully before buying vinyl. Use a tape measure for height, width, and depth. Add a few extra inches to cover edges and corners. Measure twice to avoid mistakes. Accurate measurements help you get enough vinyl. It saves money and prevents gaps or bubbles.
Picking The Best Color And Finish
Choose a vinyl color that matches your kitchen or personal taste. Light colors make the kitchen look bigger. Dark colors hide dirt better. Pick a finish that fits your style. Glossy finishes are bright and modern. Matte finishes look soft and calm. Consider how much light your kitchen gets. This helps you decide the best finish for your fridge wrap.
Preparing The Fridge Surface
Preparing the fridge surface is the first step to a smooth vinyl wrap. A clean, smooth surface helps the vinyl stick well. Dirt, grease, and bumps can cause bubbles or peeling. Take time to get the fridge ready. This process ensures the wrap looks neat and lasts longer.
Cleaning And Drying
Start by unplugging the fridge. Use warm water and mild soap to clean all sides. Wipe away dirt, dust, and grease carefully. Avoid harsh chemicals that can damage the fridge surface. Rinse with clean water and dry with a soft cloth. Make sure the surface is completely dry before moving on.
Removing Handles And Accessories
Handles and magnets can block the vinyl wrap. Remove all detachable parts gently. Use a screwdriver if needed. Keep screws and small pieces safe. This step makes wrapping easier and prevents wrinkles around handles. You can reattach them after wrapping is complete.
Smoothing Out Imperfections
Check the fridge for dents or rough spots. Small dents can be filled with a light filler or left as is. Use fine sandpaper to smooth rough areas carefully. Wipe away dust after sanding. A smooth surface helps the vinyl lay flat and look professional.
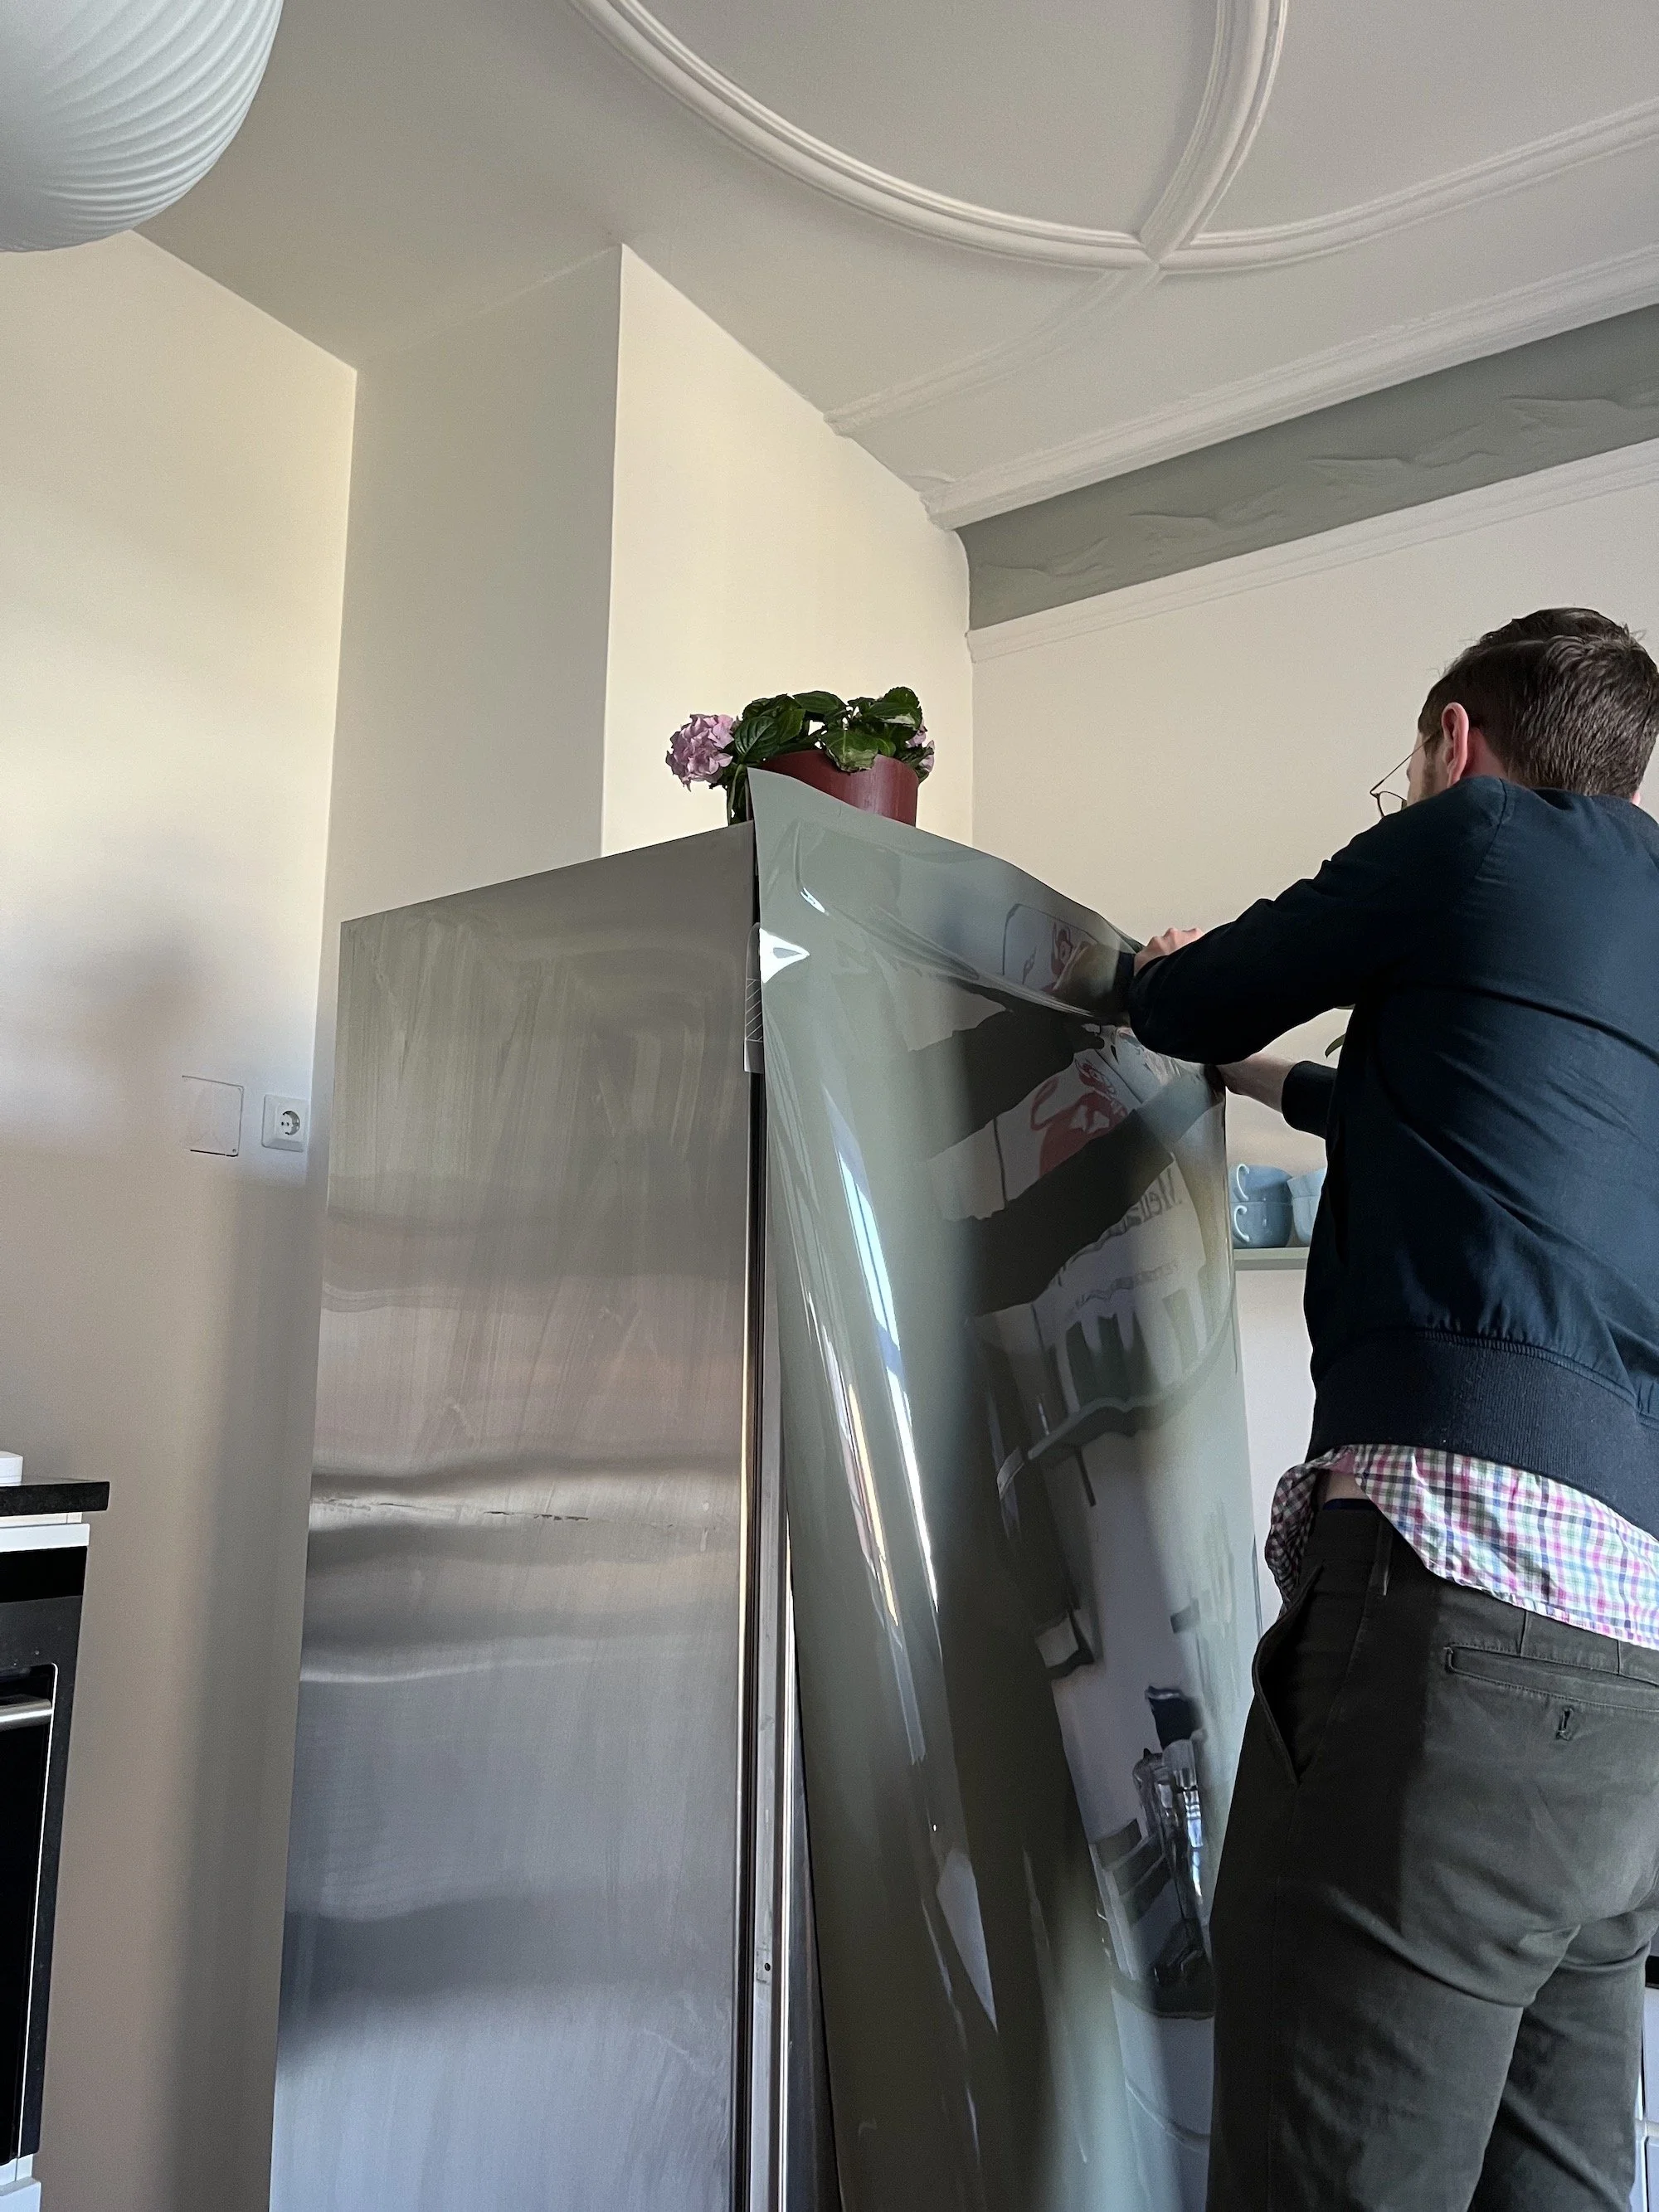
Cutting And Aligning The Vinyl
Cutting and aligning vinyl is a key step in wrapping your fridge neatly. Proper cutting ensures the vinyl fits perfectly. Correct alignment avoids bubbles and wrinkles. This step needs patience and accuracy for the best results.
Measuring And Cutting Panels
Measure each fridge surface carefully. Use a tape measure for exact dimensions. Add a small extra margin for mistakes. Cut the vinyl panels with a sharp blade. Straight edges make the vinyl easier to apply.
Positioning The Vinyl Correctly
Start from the top and work downwards. Align the vinyl with fridge edges first. Smooth it gently with your hand. Avoid stretching the vinyl too much. Check alignment before pressing it fully.
Using Guides And Tools
Use a level or ruler for straight lines. A squeegee helps remove air bubbles. A heat gun softens the vinyl for curves. Cut excess vinyl carefully with a craft knife. These tools make the wrapping process easier.
Credit: www.meganmckean.com
Applying The Vinyl Wrap
Applying the vinyl wrap to your fridge is a careful process. Doing it right makes the wrap look smooth and neat. It takes patience and steady hands. Follow simple steps to get the best results. This part explains how to apply the vinyl without mistakes.
Peeling And Sticking Techniques
Start by peeling a small corner of the vinyl backing. Do not remove the whole backing at once. Stick the exposed corner to the fridge surface. Slowly peel more backing as you press the vinyl down. Use your fingers or a soft cloth. Press from the center outwards to avoid folds. Work little by little for better control.
Avoiding Air Bubbles And Wrinkles
Air bubbles ruin the smooth look. Push bubbles gently toward the edges with a flat tool. A credit card or squeegee works well. If a bubble is big, lift the vinyl and reapply carefully. Wrinkles happen if the vinyl folds. Stretch the vinyl slightly but not too much. Smooth out wrinkles by pressing firmly with your hand.
Heating And Stretching The Vinyl
Use a heat gun or hair dryer to warm the vinyl. Warm vinyl becomes soft and easier to stretch. Heat edges and curves gently to fit the fridge shape. Do not overheat, or the vinyl may melt. Stretch the vinyl slowly while heating. This step helps the vinyl stick tightly without gaps.
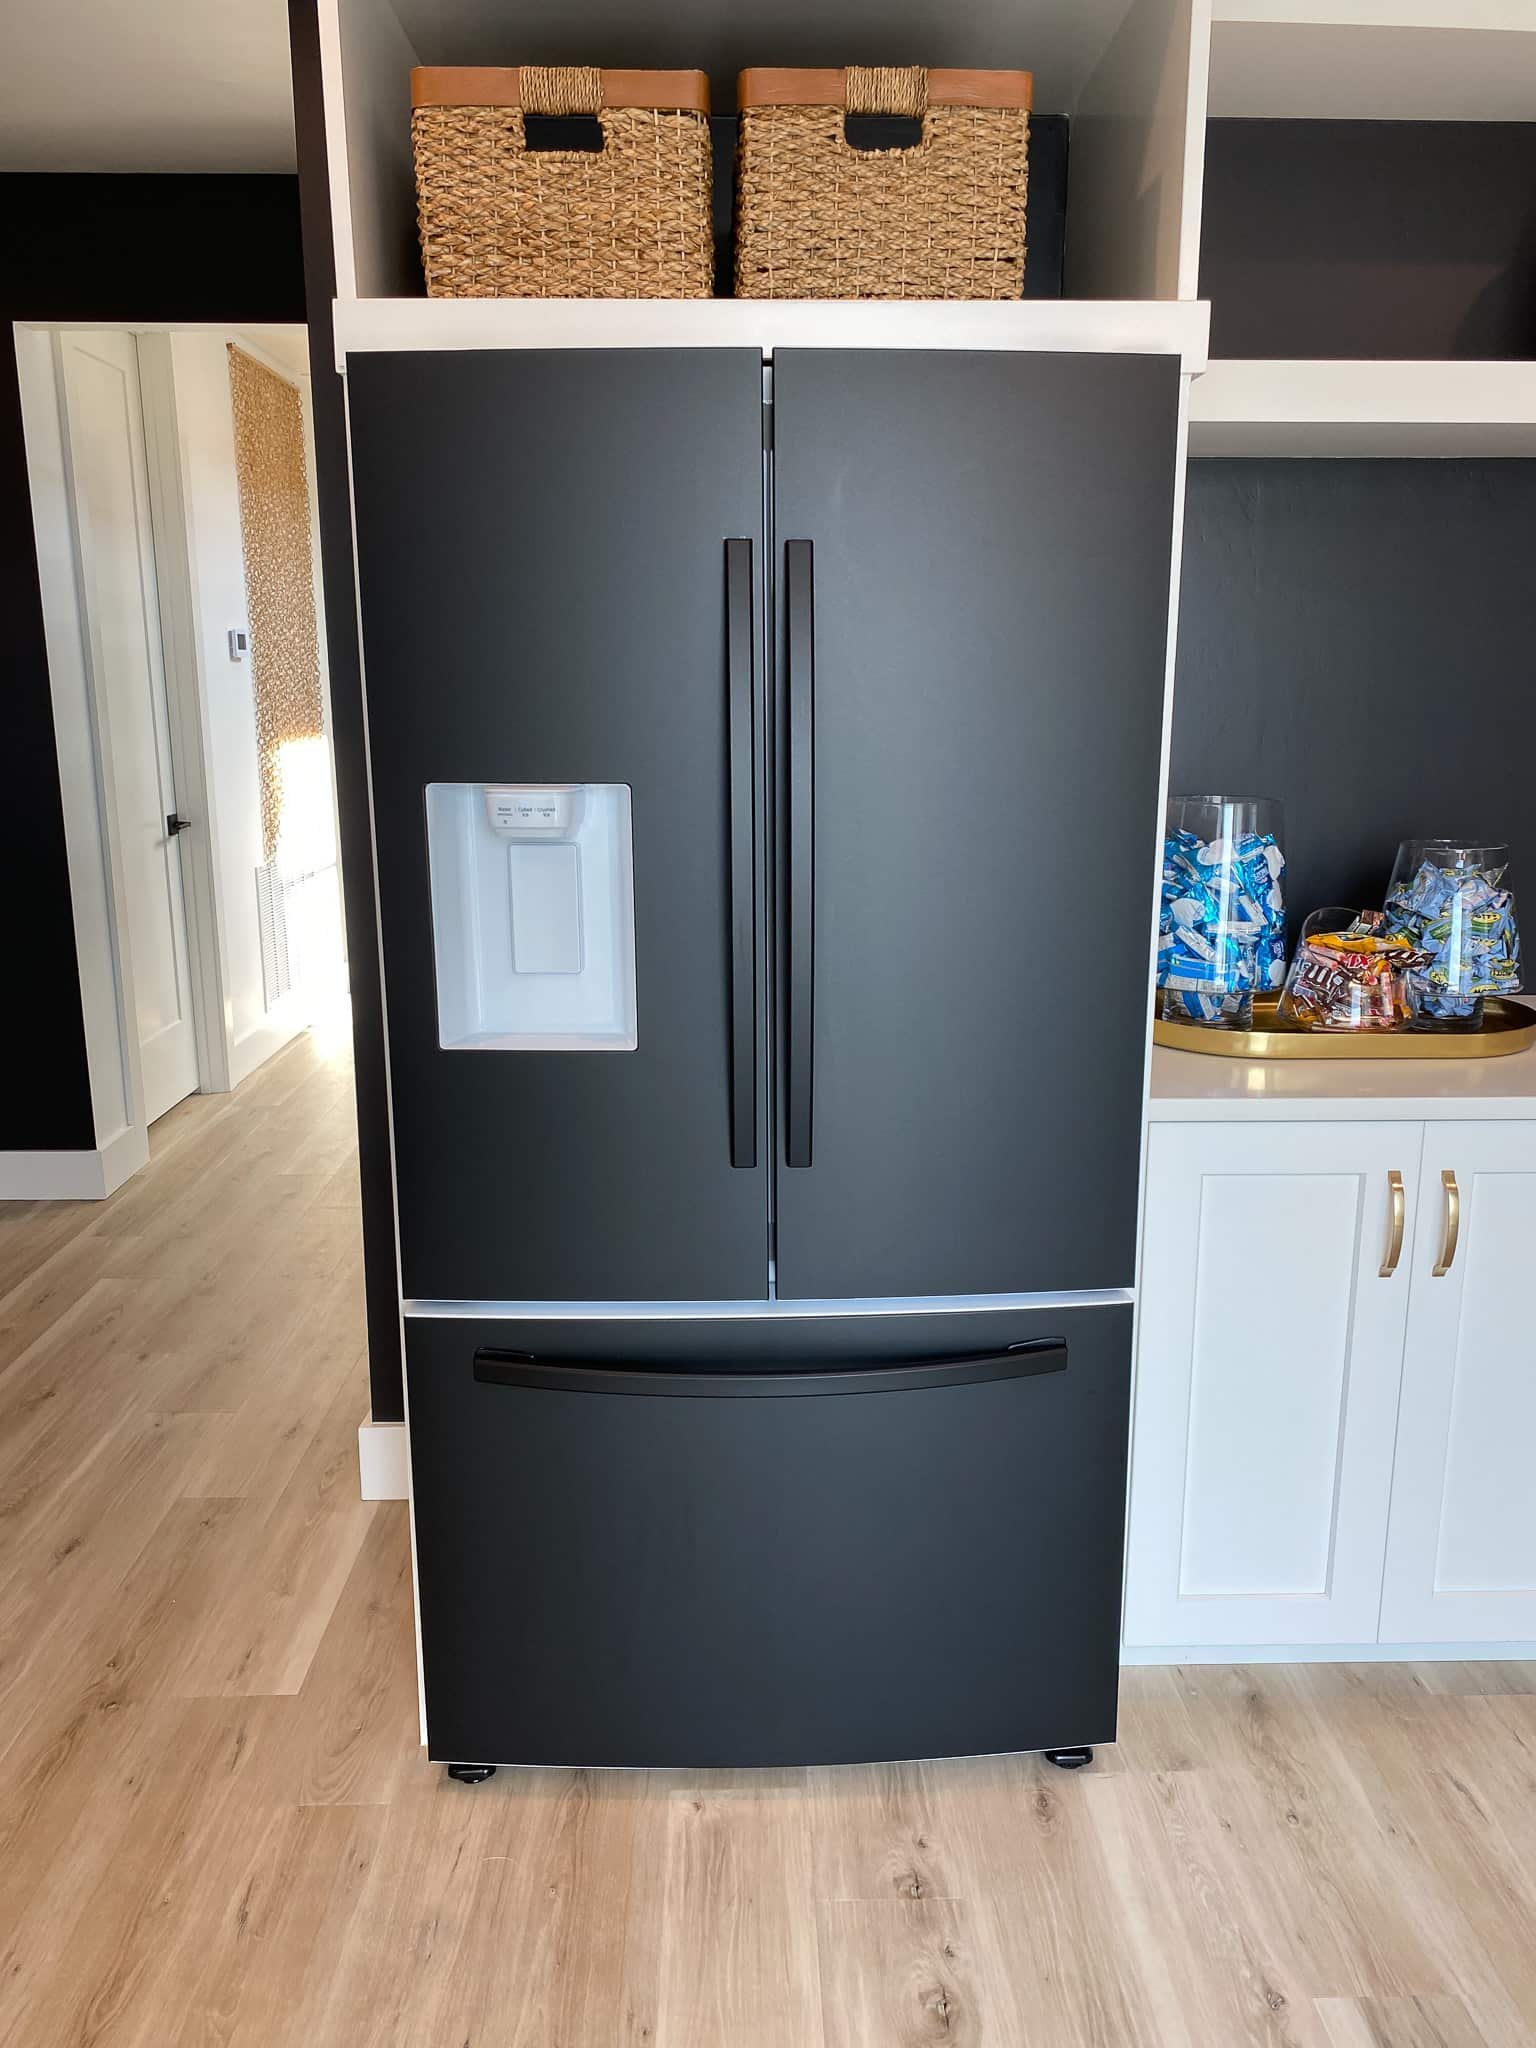
Finishing Touches
After applying vinyl to your fridge, the finishing touches make all the difference. They help the wrap look neat and last longer. These small steps ensure your fridge looks great and stays protected.
Trimming Excess Vinyl
Use a sharp utility knife to trim extra vinyl. Cut close to edges for a clean look. Take care not to scratch the fridge surface. Work slowly around corners and handles. Smooth edges prevent peeling later.
Reattaching Handles
Remove tape or paper from handle areas carefully. Screw the handles back firmly but gently. Check that handles sit flush against the vinyl. Tighten screws evenly to avoid damage. Handles add to the fridge’s finished look.
Sealing Edges For Durability
Apply edge sealer or clear silicone along vinyl edges. This stops moisture and dirt from getting under the wrap. Use a small brush or applicator for even coverage. Press edges firmly to bond the vinyl well. Sealing helps the wrap last longer.
Credit: www.rmwraps.com
Maintaining Your Vinyl-wrapped Fridge
Keeping your vinyl-wrapped fridge looking fresh takes some care. Proper maintenance helps the wrap last longer. It also keeps your kitchen stylish and neat. Follow simple steps to clean and protect the vinyl. Learn when it is time to change the wrap. This guide makes your fridge look great every day.
Cleaning Tips
Use a soft cloth to clean the vinyl surface. Avoid rough sponges or brushes that may scratch it. Mild soap and warm water work best for dirt. Wipe gently in a circular motion. Dry with a clean, dry cloth to avoid water spots. Do not use harsh chemicals or bleach. These can damage the vinyl and fade colors.
Preventing Damage And Peeling
Keep the fridge away from sharp objects and rough handling. Avoid placing magnets directly on the vinyl. They may peel or leave marks. Maintain a moderate room temperature to prevent warping. Do not use heat sources near the wrap. Check edges regularly and press them down if lifting. Early fixing stops peeling from spreading.
When To Replace The Wrap
Replace the wrap if it shows cracks or deep scratches. Fading colors also signal the need for a new wrap. Peeling that you cannot fix means replacement time. If the fridge gets a new style, change the vinyl wrap. A fresh wrap keeps your kitchen modern and clean. Regular checks help decide the right time to replace.

Credit: www.youtube.com
Frequently Asked Questions
How Do I Prepare A Fridge Before Vinyl Wrapping?
Clean the fridge surface thoroughly with mild soap and water. Remove all dirt, grease, and moisture. Dry it completely before applying vinyl for better adhesion and a smooth finish.
What Tools Are Needed To Wrap A Fridge With Vinyl?
You need vinyl wrap, a squeegee, a utility knife, a heat gun, and a measuring tape. These tools help measure, cut, apply, and smooth the vinyl accurately.
Can Vinyl Wrap Be Removed From A Fridge Easily?
Yes, vinyl wrap can be peeled off without damage. Warm the vinyl with a heat gun to soften the adhesive. Then, slowly peel it off for a clean removal.
How Long Does Vinyl Wrap Last On A Fridge?
Vinyl wrap typically lasts 5 to 7 years with proper care. Avoid harsh cleaners and scratches to maintain its appearance and durability.
Conclusion
Wrapping a fridge with vinyl is a smart way to change its look. It protects the surface and hides scratches well. The process is simple if you follow the right steps. Take your time to measure and apply the vinyl carefully.
Smooth out bubbles for a clean finish. This DIY project saves money compared to buying new appliances. Your fridge can match your kitchen style in no time. Try it yourself and enjoy the fresh, new look today.

