
Have you ever looked at your car door handles and wished they had a fresh, custom look? Vinyl wrapping your car door handles is an easy and affordable way to give your vehicle a sleek, personalized touch.
But if you’re unsure where to start or worried about making mistakes, don’t worry—you’re in the right place. In this guide, you’ll discover simple, step-by-step tips that make the process smooth and stress-free. Keep reading, and you’ll soon be able to transform your car’s appearance with confidence and style.

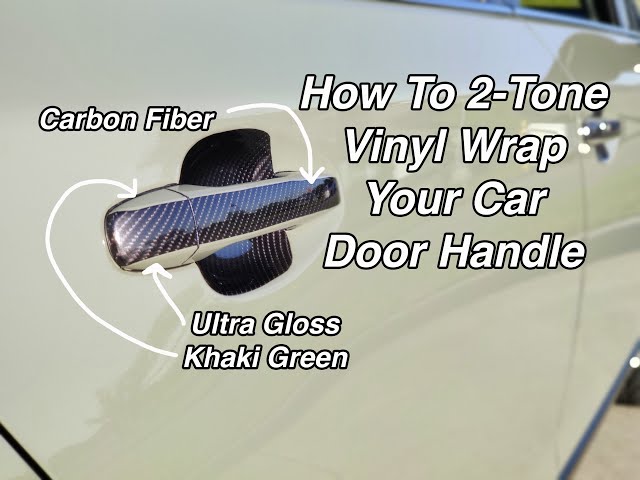
Credit: teckwrap.com
Tools And Materials Needed
Preparing to vinyl wrap a car door handle requires the right tools and materials. Having everything ready helps the process go smoothly. It also ensures a neat, long-lasting finish. This section covers what you need before starting.
Choosing The Right Vinyl Wrap
Select vinyl wrap designed for automotive use. It should be flexible and durable. Look for a vinyl with air-release technology. This feature prevents bubbles under the wrap. Pick a color or finish that matches your car’s style. Matte, gloss, or carbon fiber are popular choices.
Essential Tools For The Job
Prepare a heat gun or hair dryer to soften the vinyl. Use a plastic squeegee to smooth out the wrap. A sharp utility knife helps trim excess vinyl precisely. Have rubbing alcohol and a clean cloth to clean the handle. Gloves protect your hands and keep the wrap clean.
Credit: www.youtube.com
Preparing The Car Door Handle
Start by cleaning the door handle thoroughly to remove dirt and grease. Use a cloth and mild cleaner for best results. Next, dry the surface completely to help the vinyl stick well.
Preparing the car door handle is the first step in vinyl wrapping. A clean and smooth surface helps the vinyl stick better. Dirt, dust, and oils can stop the vinyl from sticking properly. Taking time to prepare the handle well makes the whole process easier and the finish neater.
Handle preparation ensures a long-lasting wrap. It reduces the chance of bubbles or peeling. A well-prepared surface also makes the vinyl look smooth and professional.
Cleaning And Drying The Surface
Start by washing the door handle with soap and water. Use a soft cloth or sponge. Remove all dirt and grime from every corner. Rinse the handle thoroughly with clean water. Dry the handle completely with a microfiber cloth. Any moisture left can affect the vinyl’s grip.
Make sure no water spots remain. These spots can cause bubbles under the vinyl. A dry handle ensures the wrap stays in place longer.
Removing Dirt And Oils
After drying, clean the handle with isopropyl alcohol. Use a clean cloth soaked in alcohol. Wipe the entire surface to remove oils and residues. Oils from your fingers can prevent vinyl from sticking well. Alcohol evaporates quickly and leaves the surface clean.
Do not skip this step. A handle free of dirt and oils gives the vinyl a strong hold. The wrap will look smooth and last longer.
Measuring And Cutting The Vinyl
Measuring and cutting the vinyl are key steps in wrapping a car door handle. These steps help the vinyl fit perfectly and look smooth. Taking time to measure and cut carefully saves effort later. It stops mistakes and makes the wrap last longer. Follow simple steps to get clean, neat results.
Taking Accurate Measurements
Start by cleaning the door handle surface. Use a soft cloth to remove dirt and dust. Use a flexible tape measure or a ruler. Measure the length and width of the handle. Include any curves or edges in your measurements. Write down the numbers clearly. Double-check measurements to avoid errors. Precise measurements ensure the vinyl fits the handle well.
Cutting The Vinyl To Size
Place the vinyl on a flat surface. Use a sharp blade or scissors for cutting. Cut slightly larger than your measurements. Leave extra vinyl for wrapping edges and curves. Cut slowly and follow your measurement marks. Avoid jagged or uneven edges. Smooth edges help the vinyl stick better. Trim the extra vinyl carefully during installation for a perfect fit.

Credit: twraps.com
Applying The Vinyl Wrap
Applying the vinyl wrap to a car door handle requires care and patience. It is important to place the vinyl correctly and make sure it fits tightly. This step gives the handle a smooth and neat look. Follow each step carefully to avoid wrinkles or bubbles.
Positioning The Vinyl On The Handle
Start by placing the vinyl wrap over the car door handle. Align it so that it covers the entire handle evenly. Leave a little extra vinyl on the edges to wrap around the sides. This helps in getting full coverage and a clean finish.
Smoothing Out Air Bubbles
Use a soft cloth or a squeegee to press the vinyl onto the handle. Move from the center outwards to push out any air bubbles. Take your time to smooth the surface gently. Air bubbles can cause bumps and spoil the look of your wrap.
Using Heat For A Tight Fit
Apply heat with a heat gun or hairdryer to make the vinyl more flexible. Warm vinyl wraps better around curves and edges. Carefully heat the wrap and press it into place. This step ensures the vinyl sticks well and stays tight on the handle.
Finishing Touches
Finishing touches are key to a perfect vinyl wrap on your car door handle. They ensure a clean look and long-lasting result. Taking time for these steps improves durability and appearance.
Trimming Excess Vinyl
Start by carefully cutting away extra vinyl around the edges. Use a sharp blade for clean cuts. Trim slowly to avoid damaging the wrap or handle. Leave a tiny margin to prevent peeling later.
Sealing Edges For Durability
Press down all edges firmly using a squeegee or your fingers. Heat the vinyl slightly with a heat gun to help it stick better. This seals the edges and stops water or dirt from getting underneath. Sealed edges keep the wrap looking fresh longer.
Maintenance Tips
Maintaining your vinyl wrapped car door handles keeps them looking fresh and new. Proper care extends the life of the wrap and prevents peeling or fading. Simple habits and gentle cleaning make a big difference.
Cleaning Wrapped Handles
Use a soft cloth or sponge to clean the handles. Avoid rough brushes or abrasive materials. Mild soap mixed with water works best for cleaning. Rinse thoroughly to remove all soap residue. Dry the handles with a microfiber towel. Avoid high-pressure water sprays directly on the handles.
Avoiding Damage
Do not use sharp objects near the wrapped handles. Avoid scraping or scratching the vinyl surface. Keep keys and rings away from the handles when possible. Park away from tight spaces to reduce accidental bumps. Protect handles from harsh chemicals like gasoline or solvents. Regular checks help catch small tears early.
Frequently Asked Questions
How Do I Prepare A Car Door Handle For Vinyl Wrapping?
Clean the handle thoroughly with soap and water. Remove dirt, grease, and wax. Use isopropyl alcohol to wipe it down. This ensures better vinyl adhesion and a smooth finish.
What Tools Are Needed To Vinyl Wrap A Door Handle?
You need vinyl wrap film, a heat gun, a squeegee, scissors, and a microfiber cloth. These tools help you apply the vinyl smoothly and trim excess material precisely.
Can I Vinyl Wrap Door Handles Without Removing Them?
Yes, you can wrap door handles without removal. Carefully apply the vinyl, use heat to stretch it, and trim edges neatly. Removing handles may make wrapping easier but isn’t always necessary.
How Long Does Vinyl Wrapping A Car Door Handle Take?
Vinyl wrapping a door handle usually takes 20 to 30 minutes. This includes cleaning, applying, heating, and trimming the vinyl for a perfect fit.
Conclusion
Vinyl wrapping a car door handle can change its look fast. It protects the handle from scratches and dirt too. Take your time and follow each step carefully. Clean the surface well before you start. Smooth out bubbles for a neat finish.
A small effort brings a big difference in style. Try it yourself and enjoy the new look. Practice makes it easier with each wrap. Simple tools and patience lead to great results. Your car will look fresh and unique.

