
Are you ready to give your golf cart a fresh, eye-catching look without spending a fortune? Vinyl wrapping is the perfect way to transform your cart quickly and easily.
Whether you want a sleek matte finish, a vibrant color, or a custom design, wrapping your golf cart can make it stand out on the course. In this guide, you’ll discover simple, step-by-step instructions that anyone can follow—even if you’ve never tried vinyl wrapping before.
By the end, you’ll know exactly how to turn your golf cart into a personalized masterpiece that turns heads every time you drive by. Keep reading to unlock the secrets to a flawless vinyl wrap that lasts.
Materials And Tools Needed
Wrapping a golf cart with vinyl needs the right materials and tools. These help you get smooth, lasting results. Using poor materials can cause bubbles, tears, or fading. Tools make the process easier and more precise. Prepare everything before starting to avoid delays and mistakes.
Choosing The Right Vinyl Wrap
Select vinyl made for outdoor use. It must resist sun, water, and scratches. Choose a thickness of 2-3 mils for durability. Glossy or matte finishes change the look. Pick colors or patterns that suit your style. Make sure the vinyl has air-release channels to avoid bubbles. Buy enough vinyl to cover your golf cart fully.
Essential Tools For Wrapping
Use a good heat gun to soften the vinyl. This helps it stretch around curves and edges. A squeegee with a soft edge removes air bubbles. Scissors or a sharp utility knife cut the vinyl precisely. Cleaning supplies like rubbing alcohol remove dirt and grease. Gloves protect your hands and keep the vinyl clean. Tape helps hold pieces in place during wrapping.

Credit: golfcargraphics.com
Preparing The Golf Cart
Preparing your golf cart before applying vinyl wrap is very important. It helps the wrap stick better and last longer. Take time to get the cart ready. This makes the wrapping process easier and cleaner. Focus on two main steps: cleaning the surface and dealing with accessories.
Cleaning The Surface
Start by washing the golf cart. Use soap and water to remove dirt and dust. Dirt stops the vinyl from sticking well. After washing, dry the cart completely. Use a clean cloth to avoid water spots. Next, use rubbing alcohol or a cleaner to remove grease and oils. Clean surfaces help the vinyl stick tight and smooth. Skip this step, and the wrap may peel off early.
Removing Or Covering Accessories
Remove all loose parts like mirrors, lights, and decals. These can block the wrap or cause bubbles. If removal is hard, cover these parts with tape or plastic. Covering protects them from damage and paint overspray. Removing or covering accessories makes the wrap look neat and professional. It also helps you wrap every corner perfectly.
Measuring And Cutting The Vinyl
Measuring and cutting the vinyl is an important step in wrapping your golf cart. Accurate measurements ensure the vinyl fits well. Cutting the vinyl correctly prevents waste and helps achieve a smooth finish. Take your time with these steps for the best results.
Taking Accurate Measurements
Use a tape measure to get the exact size of each part. Measure twice to avoid mistakes. Write down the length and width for every section you plan to cover. Include extra inches for wrapping around edges. Check curves and corners carefully. Good measurements make the vinyl fit perfectly.
Pre-cutting Vinyl Pieces
Lay the vinyl flat on a clean surface. Use your measurements to mark the vinyl with a pencil or chalk. Cut slowly and follow the marks closely. Cut each piece a bit larger than the measurement. This extra vinyl helps during installation. Organize the pieces by section to stay neat. Pre-cut pieces save time and reduce errors later.
Applying The Vinyl Wrap
Applying the vinyl wrap is the most important step in this project. This part needs patience and care. The wrap must fit perfectly on the golf cart’s surface. This ensures the best look and long-lasting results.
Positioning The Vinyl
Start by laying the vinyl on the golf cart. Hold it in place without stretching. Check the alignment carefully. The wrap should cover every area you want. Use magnets or light tape to hold it.
Make sure the vinyl is straight and smooth. Avoid wrinkles or bubbles now. This step sets the foundation for a neat finish. Adjust the vinyl slowly. Take your time to get it right.
Smoothing And Stretching Techniques
Use a squeegee to smooth the vinyl. Begin from the center and move outward. Push air bubbles and wrinkles toward the edges. Heat the vinyl gently with a heat gun. This makes it more flexible and easier to stretch.
Stretch the vinyl over curves carefully. Do not pull too hard to avoid tears. Use your hands and squeegee together. Work slowly over edges and corners. This helps the vinyl stick tightly without damage.
Handling Edges And Curves
Handling edges and curves is a key part of vinyl wrapping a golf cart. These areas need special care for a smooth, clean look. Wrapping edges and curves can be tricky. The vinyl must stretch and fit without wrinkles or bubbles. Proper handling makes the wrap last longer and look professional.
Understanding how to soften the vinyl and trim it carefully helps create sharp edges. This section explains the best steps to handle these parts effectively.
Heating For Flexibility
Heat makes vinyl soft and easy to stretch around curves. Use a heat gun or hair dryer on low heat. Warm the vinyl slowly and evenly. Do not overheat, or the vinyl can melt or tear. Heat small sections at a time. Stretch the vinyl gently over curves while warm. This helps avoid wrinkles and bubbles. Let the vinyl cool before pressing it firmly.
Trimming Excess Material
Trim extra vinyl close to edges for a neat finish. Use a sharp utility knife or scissors. Cut slowly and carefully to avoid cutting the cart’s surface. Leave a little vinyl on edges to prevent peeling. Trim after the vinyl cools and sets. Clean cuts help the wrap last longer and look better. Proper trimming also prevents dirt from getting under the vinyl.
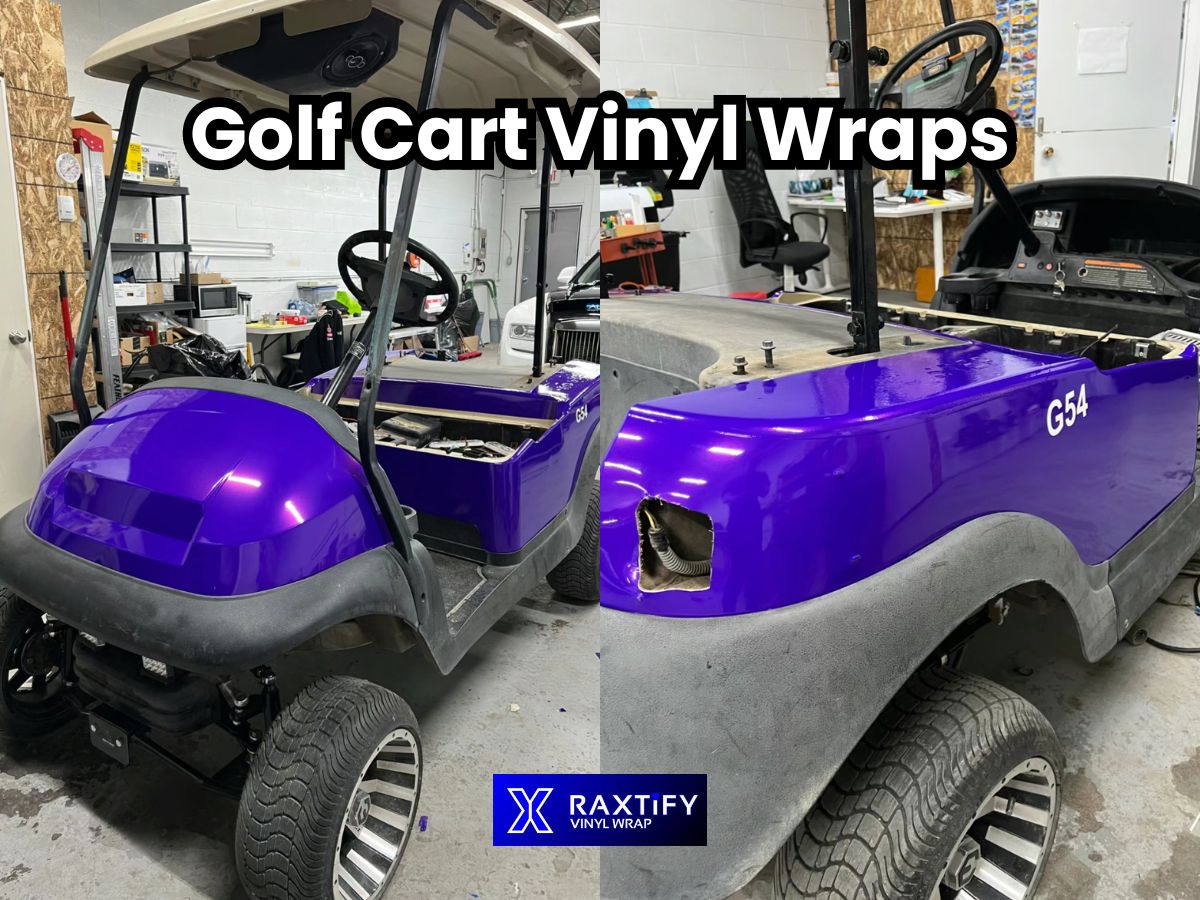
Credit: raxtify.com
Final Touches
After applying the vinyl wrap on your golf cart, the final touches make all the difference. These steps ensure the wrap stays smooth and lasts longer. Taking time to finish properly protects your work and keeps your cart looking sharp.
Sealing Edges
Check all edges of the vinyl wrap carefully. Use a heat gun to warm the edges slightly. This makes the vinyl more flexible and easier to press down. Press the edges firmly with a squeegee or your fingers. Sealing edges stops water and dirt from getting underneath. It also prevents the wrap from peeling off over time.
Removing Air Bubbles
Air bubbles can spoil the smooth look of your wrap. Use a pin or needle to poke small holes in any bubbles. Press out the trapped air gently with a squeegee or cloth. Work from the center of the bubble toward the edges. Smooth vinyl looks clean and professional. Take your time to remove all bubbles for the best finish.
Maintenance Tips
Maintaining your vinyl wrap keeps your golf cart looking fresh and new. Proper care extends the life of the wrap. Follow simple steps to protect your investment and enjoy a clean, vibrant cart for years.
Cleaning Wrapped Surfaces
Use a soft cloth or sponge with mild soap and water. Avoid harsh chemicals or abrasive materials that can scratch the wrap. Rinse thoroughly with clean water to remove soap residue. Dry with a soft towel to prevent water spots. Clean your golf cart regularly to keep dirt and grime from building up.
Avoiding Damage
Park your golf cart in shaded areas to protect the wrap from sun damage. Avoid parking under trees to prevent sap and bird droppings on the wrap. Do not use high-pressure washers as they can peel the edges of the wrap. Be gentle when loading or unloading items to avoid scratches. Check the wrap often for any lifting edges and press them down carefully.
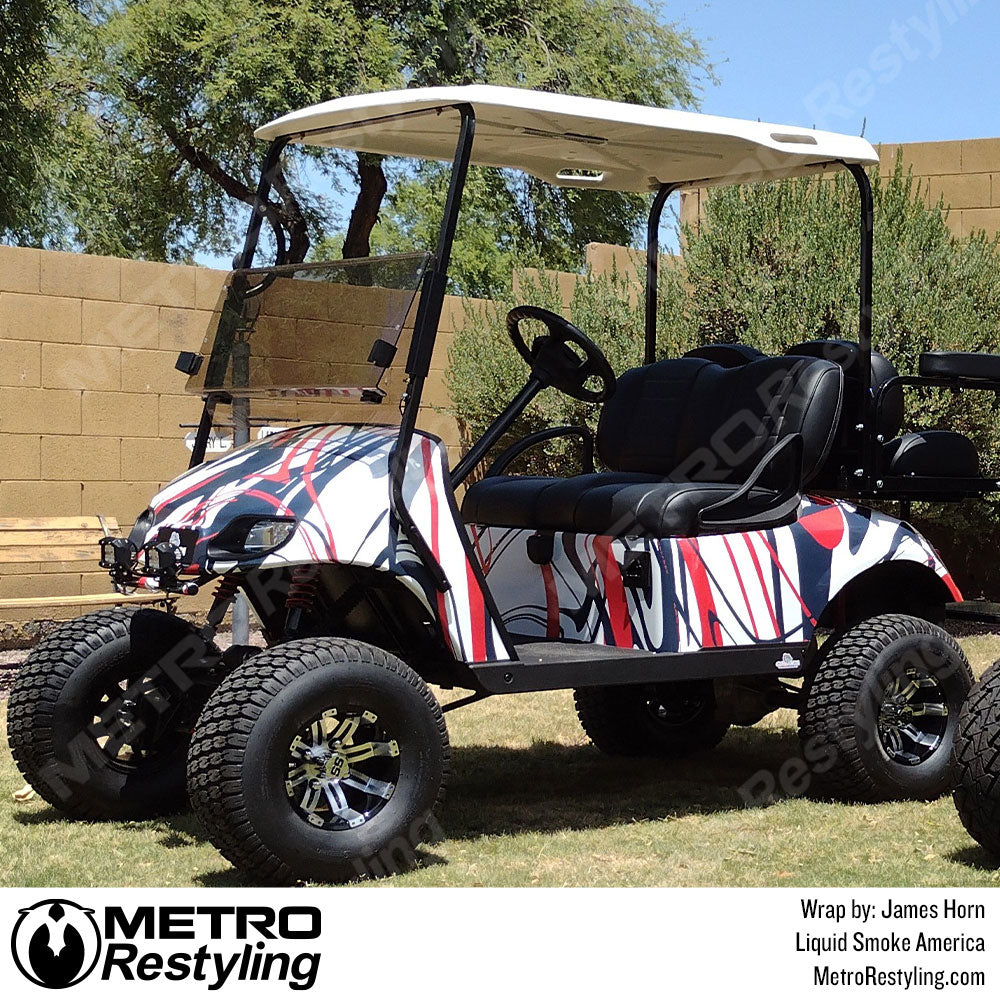
Credit: metrorestyling.com
Frequently Asked Questions
How Long Does Vinyl Wrap Last On A Golf Cart?
Vinyl wraps typically last 5 to 7 years with proper care. Avoid harsh chemicals and direct sunlight to extend lifespan. Regular cleaning with mild soap helps maintain appearance. Quality vinyl and professional installation also improve durability and resistance to peeling or fading over time.
Can I Vinyl Wrap A Golf Cart Myself?
Yes, you can vinyl wrap a golf cart yourself if you have patience and basic skills. Clean the surface thoroughly and work in a dust-free area. Use a heat gun for smooth application and avoid air bubbles. Watching tutorials can help ensure a professional finish.
What Tools Are Needed For Vinyl Wrapping A Golf Cart?
Essential tools include a squeegee, heat gun, utility knife, and microfiber cloths. A cleaning solution and isopropyl alcohol help prep the surface. Measuring tape and gloves are useful for precise application and handling. These tools ensure smooth, bubble-free vinyl installation.
Is Vinyl Wrap Better Than Paint For Golf Carts?
Vinyl wrap is more affordable, quicker to apply, and offers design flexibility. It protects the original paint and can be removed without damage. Paint provides a more permanent solution but is costlier and time-consuming. Wraps allow easy customization and frequent style changes.
Conclusion
Vinyl wrapping a golf cart can change its look easily. Clean the surface well before starting. Take your time to avoid bubbles and wrinkles. Use a heat gun to make the wrap smooth. Trim the edges carefully for a neat finish.
With patience, your cart will look fresh and unique. This simple project saves money compared to paint. Enjoy your new style on the golf course or around your neighborhood. Try different colors or patterns for a personal touch. Keep the wrap clean to make it last longer.


