Thinking about giving your car a fresh, stylish look without spending a fortune? Vinyl wrapping your roof is one of the smartest ways to do just that.
But maybe you’re wondering if it’s too complicated or if you’ll make mistakes along the way. Don’t worry — you’re in the right place. This guide will walk you through every step, making the process simple and manageable. By the end, you’ll have the confidence and know-how to transform your roof like a pro.
Ready to start? Let’s dive in.
Preparing The Roof Surface
Preparing the roof surface is the first step in a smooth vinyl wrap process. A clean, smooth surface helps the vinyl stick better and last longer. Skipping this step can cause bubbles, peeling, or uneven finish. Take time to do it right for a professional look.
Cleaning And Degreasing
Start by washing the roof with soap and water. Remove dirt, dust, and grime completely. Use a degreaser to get rid of oils or wax. Oils prevent the vinyl from sticking properly. Rinse well and dry the surface fully before moving on.
Removing Old Wraps Or Paint
Check for any old vinyl wraps or paint on the roof. Peel off old wraps carefully to avoid damage. Use a heat gun if needed to soften the wrap. For paint, sand the surface to remove loose flakes. A smooth base ensures better vinyl adhesion.
Inspecting For Damage
Look closely for dents, scratches, or rust spots. Small damages can cause wrinkles or bubbles in the vinyl. Fix dents by gently hammering or filling them. Sand rough areas and treat rust with a rust remover. A flawless surface guarantees a clean finish.
Gathering Necessary Tools And Materials
Before starting to vinyl wrap a roof, gather all tools and materials. Preparation is key for a smooth, successful project. Having everything ready saves time and avoids frustration. Each item plays a role in achieving a clean, lasting finish.
Choosing The Right Vinyl Wrap
Pick vinyl wrap made for roofs or cars. It should be weather-resistant and durable. Choose a color or finish that fits your style. Matte, gloss, or satin options are common. Check the thickness; thicker wraps last longer. Ensure the vinyl can stretch without tearing.
Essential Tools List
Collect basic tools before starting. A heat gun helps soften the vinyl for easy shaping. Use a squeegee to smooth out air bubbles. A sharp utility knife cuts the wrap cleanly. Have cleaning supplies to prepare the roof surface. Gloves protect your hands and keep the wrap clean. Masking tape helps hold vinyl in place temporarily. Measuring tape and a marker aid precise cutting. These tools ensure a neat and efficient wrap job.
Measuring And Cutting The Vinyl
Measuring and cutting the vinyl correctly sets the foundation for a smooth roof wrap. Precise measurements ensure the vinyl fits well without wrinkles or gaps. Careful cutting helps avoid waste and makes installation easier. This section explains how to measure the roof and cut the vinyl properly.
Accurate Roof Measurements
Start by cleaning the roof surface. Dirt can affect measurement accuracy. Use a tape measure to get the length and width of the roof. Measure from edge to edge at several points. Check for any curves or slopes and note their dimensions. Write down all measurements clearly. Add a few extra inches for overlap and trimming. Double-check your numbers before cutting. Accuracy here saves time and material later.
Cutting Techniques
Use a sharp utility knife or vinyl cutter for clean edges. Place the vinyl on a flat surface. Smooth out any wrinkles or bubbles. Mark your measurements with a pencil or chalk. Cut slowly along the marks to avoid jagged edges. Keep the knife blade sharp to prevent tearing. Cut extra vinyl around the edges for easier handling. Trim excess after applying the vinyl to the roof.
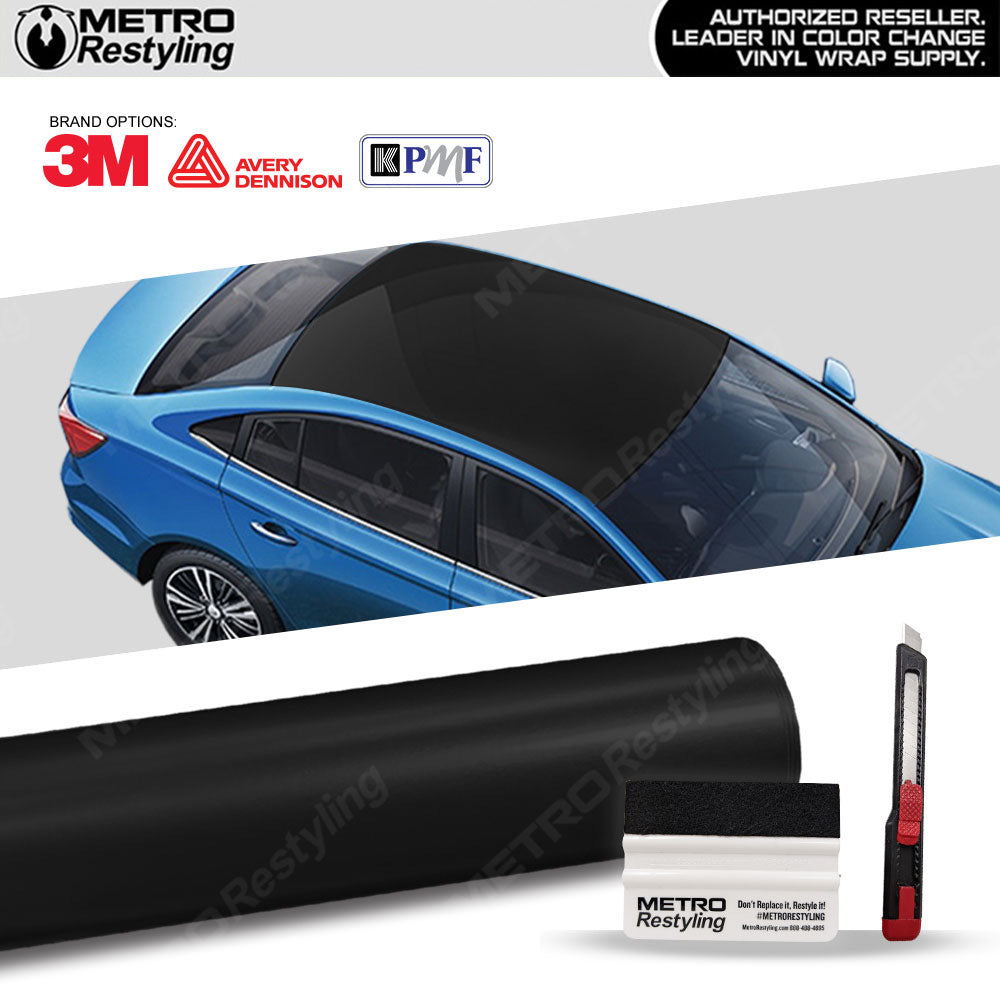
Credit: metrorestyling.com
Applying Primer And Adhesive
Applying primer and adhesive is a crucial step in vinyl wrapping a roof. This process ensures the vinyl sticks well and lasts longer. Skipping or rushing this step can cause bubbles or peeling later. Take your time to prepare the surface and apply the right materials carefully.
Selecting The Proper Primer
Choose a primer that matches your roof material. Some primers work best on metal, while others suit plastic or painted surfaces. Check the product label for compatibility. A good primer improves the vinyl’s grip and prevents peeling. Use a clean cloth or brush to apply it evenly. Let it dry fully before moving on.
Applying Adhesive Evenly
Use a high-quality adhesive designed for vinyl wraps. Apply it in thin, even layers to avoid lumps or streaks. Spread the adhesive smoothly using a roller or brush. Cover the entire area where the vinyl will go. Avoid leaving gaps or thick spots. Let the adhesive become tacky before placing the vinyl. This helps it stick better and prevents wrinkles.
Installing The Vinyl Wrap
Installing the vinyl wrap on your roof is a careful process. It needs patience and attention to detail. Proper installation ensures the wrap looks smooth and lasts longer. Follow these steps to get a clean and professional finish.
Positioning The Vinyl
Start by laying the vinyl on the roof surface. Make sure it covers the entire area. Align it carefully to avoid wrinkles later. Use magnets or tape to hold the vinyl in place. Check the alignment from different angles.
Stretching And Smoothing
Use a heat gun to warm the vinyl slightly. This makes it more flexible and easier to stretch. Pull the vinyl gently to remove wrinkles. Use a squeegee to smooth out air bubbles. Work from the center outward for best results.
Handling Curves And Edges
Curves and edges need extra care. Heat the vinyl well before bending it around corners. Stretch the vinyl slowly over curves to avoid tears. Trim excess vinyl near edges for a neat look. Press firmly to secure the vinyl at edges.
Trimming Excess Vinyl
Trimming excess vinyl is a key step in wrapping a roof. It helps to achieve a neat and smooth finish. Removing extra material prevents wrinkles and bubbles. A clean trim also makes the wrap look professional and lasts longer.
Using Sharp Cutting Tools
Use a sharp utility knife or blade for trimming. Dull blades can tear the vinyl or leave rough edges. Change blades often to keep cuts clean and precise. Cut slowly and carefully to avoid mistakes. A steady hand ensures a straight and smooth line.
Ensuring Clean Edges
Hold the vinyl tight while trimming to avoid lifting. Use a straight edge or ruler as a guide. Trim small sections at a time for better control. After cutting, press the edges down firmly. This seals the vinyl and stops it from peeling.
Heating And Stretching Techniques
Heating and stretching are key steps in vinyl wrapping a roof. These techniques help the vinyl fit smoothly over curves and corners. Proper heating makes the vinyl more flexible. Stretching ensures it sticks tight without damage. Use the right tools and methods for best results.
Safe Use Of Heat Guns
Heat guns soften vinyl, making it easier to stretch. Keep the heat gun moving to avoid burns or melting. Hold it about 6 to 8 inches away from the surface. Use medium heat settings to control temperature well. Never point the heat gun at one spot for too long. Wear heat-resistant gloves for safety. Let the vinyl cool before touching it to keep its shape.
Avoiding Wrinkles And Bubbles
Start heating the vinyl gently to prevent wrinkles. Stretch the vinyl slowly and evenly over the roof. Use a squeegee to push out air bubbles as you go. Work from the center outward to smooth the surface. Apply more heat to stubborn areas, but avoid overheating. If bubbles appear, lift the vinyl slightly and reapply heat. Take time and patience to get a smooth finish.

Credit: yeswrap.com
Securing The Vinyl And Final Checks
Securing the vinyl wrap on your roof is a crucial step. It ensures the vinyl stays in place and looks smooth. Final checks help catch any issues before finishing the job. This step gives your wrap a neat and professional finish.
Tucking And Sealing Edges
Start by carefully tucking the vinyl edges into gaps or seams. Use a plastic squeegee or your fingers to press the vinyl firmly. This prevents lifting and water from getting underneath. Seal the edges with automotive-grade tape or heat to keep them tight. Make sure no air bubbles or wrinkles remain near the edges. Proper sealing increases durability and keeps dirt out.
Inspecting For Imperfections
Look closely at the entire wrapped area. Check for bubbles, creases, or dirt trapped under the vinyl. Use a pin to pop tiny air bubbles and smooth them out. Clean any dust or debris on the vinyl surface. Inspect under different lights to find hidden flaws. Fix all imperfections before the vinyl fully sets. This step ensures a perfect, long-lasting finish on your roof.
Maintenance Tips For Longevity
Keeping your vinyl-wrapped roof in top shape helps it last longer. Simple care steps protect the wrap from dirt and damage. Regular attention keeps the wrap looking fresh and new. Follow these tips to maintain your roof wrap well.
Cleaning The Wrapped Roof
Clean the vinyl roof gently to avoid scratches. Use a soft cloth or sponge with mild soap. Rinse with clean water to remove soap residue. Avoid harsh chemicals and strong pressure washers. Clean the roof regularly to stop dirt buildup. Dry the surface with a soft towel to prevent water spots.
Repairing Minor Damages
Check the wrap often for small tears or bubbles. Fix tiny damages quickly to stop them from growing. Use vinyl wrap repair kits for small cuts and holes. Press out air bubbles carefully with a squeegee. Replace damaged sections if repairs do not hold. Timely repairs keep the wrap tight and smooth.

Credit: www.youtube.com
Frequently Asked Questions
What Tools Are Needed To Vinyl Wrap A Roof?
You need a heat gun, squeegee, utility knife, cleaning solution, and microfiber cloth. These tools ensure smooth application and proper adhesion.
How Long Does Vinyl Wrap On A Roof Last?
A high-quality vinyl wrap lasts 5 to 7 years with proper care and maintenance. Longevity depends on weather exposure and installation quality.
Can I Vinyl Wrap A Roof Myself?
Yes, with patience and the right tools, DIY vinyl wrapping is possible. However, professional help ensures a flawless finish and durability.
How To Prepare The Roof Before Vinyl Wrapping?
Clean the roof thoroughly to remove dirt and grease. Smooth any dents or imperfections for better adhesion and a smooth finish.
Conclusion
Vinyl wrapping a roof can change your vehicle’s look quickly. Take your time and prepare the surface well. Measure carefully and apply the vinyl smoothly for best results. Avoid bubbles by using a squeegee and heat gun gently. Small mistakes can be fixed with patience and care.
This project saves money compared to a paint job. Enjoy the fresh, new style your car gains. Practice makes the process easier next time. Ready to try? Your vehicle will thank you.