Are you tired of your plain fridge ruining the look of your kitchen? Imagine turning it into a stylish centerpiece without spending a fortune on a new appliance.
Vinyl wrapping your fridge is an easy and affordable way to give it a fresh, custom look that matches your style perfectly. In this guide, you’ll discover simple steps to transform your fridge quickly and smoothly. Keep reading, and by the end, you’ll have the confidence to tackle this fun DIY project yourself.
Your kitchen makeover starts here!

Credit: www.youtube.com
Preparing The Fridge Surface
Preparing the fridge surface is a key step before applying vinyl wrap. A clean and smooth surface helps the vinyl stick better. This step also makes the wrap look neat and last longer.
Take time to prepare the fridge carefully. Each small detail can affect the final result.
Cleaning And Drying
Start by wiping the fridge with a soft cloth and mild soap. Remove all dirt, grease, and dust. Use a sponge or cloth to clean every corner well. After cleaning, dry the surface with a clean towel. A dry surface keeps the vinyl from peeling off.
Removing Handles And Accessories
Take off all handles, magnets, and stickers. These parts can cause bumps under the vinyl. Use a screwdriver to remove handles carefully. Keep screws in a safe place for reassembly. Removing these parts helps get a flat surface.
Smoothing Out Imperfections
Check the fridge for dents or rough spots. Use fine sandpaper to smooth any rough areas. Clean dust from sanding before wrapping. A smooth surface makes the vinyl look clean and smooth. Fixing imperfections helps the wrap stick well and last longer.
Choosing The Right Vinyl Wrap
Choosing the right vinyl wrap is key to a great fridge makeover. The wrap must fit well and look good. Picking the right type, color, and size will make the process easier. It will also give the best results. This section helps you find the perfect vinyl wrap for your fridge.
Types Of Vinyl Wraps
There are several types of vinyl wraps. Some are glossy, while others have a matte finish. You can find textured wraps that mimic wood or metal. Choose a wrap made for appliances. This ensures it sticks well and lasts long. Avoid cheap vinyl; it may peel or bubble.
Selecting Color And Finish
Color changes the whole look of your fridge. Pick a color that matches your kitchen style. Light colors make the space feel bigger. Dark colors add a modern touch. Finish matters too. Glossy vinyl looks shiny and new. Matte finish hides fingerprints and scratches better.
Measuring For Accurate Sizing
Measure your fridge carefully before buying vinyl. Include the doors, sides, and any handles. Write down height, width, and depth. Add a few extra inches for errors. Accurate sizing helps avoid gaps or overlaps. It also reduces waste and saves money.
Tools Needed For Wrapping
Wrapping a fridge with vinyl needs the right tools. These tools help you get a smooth, clean finish. Using proper equipment saves time and avoids mistakes. Prepare your workspace and gather everything before you start. This way, the process is easier and more enjoyable.
Essential Tools List
- Vinyl wrap roll – choose the right size and color
- Squeegee – for smoothing out air bubbles and wrinkles
- Utility knife – to cut the vinyl precisely
- Measuring tape – to measure the fridge and vinyl pieces
- Heat gun or hairdryer – to soften vinyl for curves and edges
- Cleaning cloth and rubbing alcohol – to clean the fridge surface
- Gloves – to protect your hands and avoid fingerprints
Optional Accessories For Ease
- Magnets or clips – to hold vinyl in place temporarily
- Edge roller – for pressing vinyl edges firmly
- Masking tape – to mark cutting lines or sections
- Soft brush – to remove dust or dirt before wrapping
- Spray bottle with soapy water – to reposition vinyl easily
Credit: www.rmwraps.com
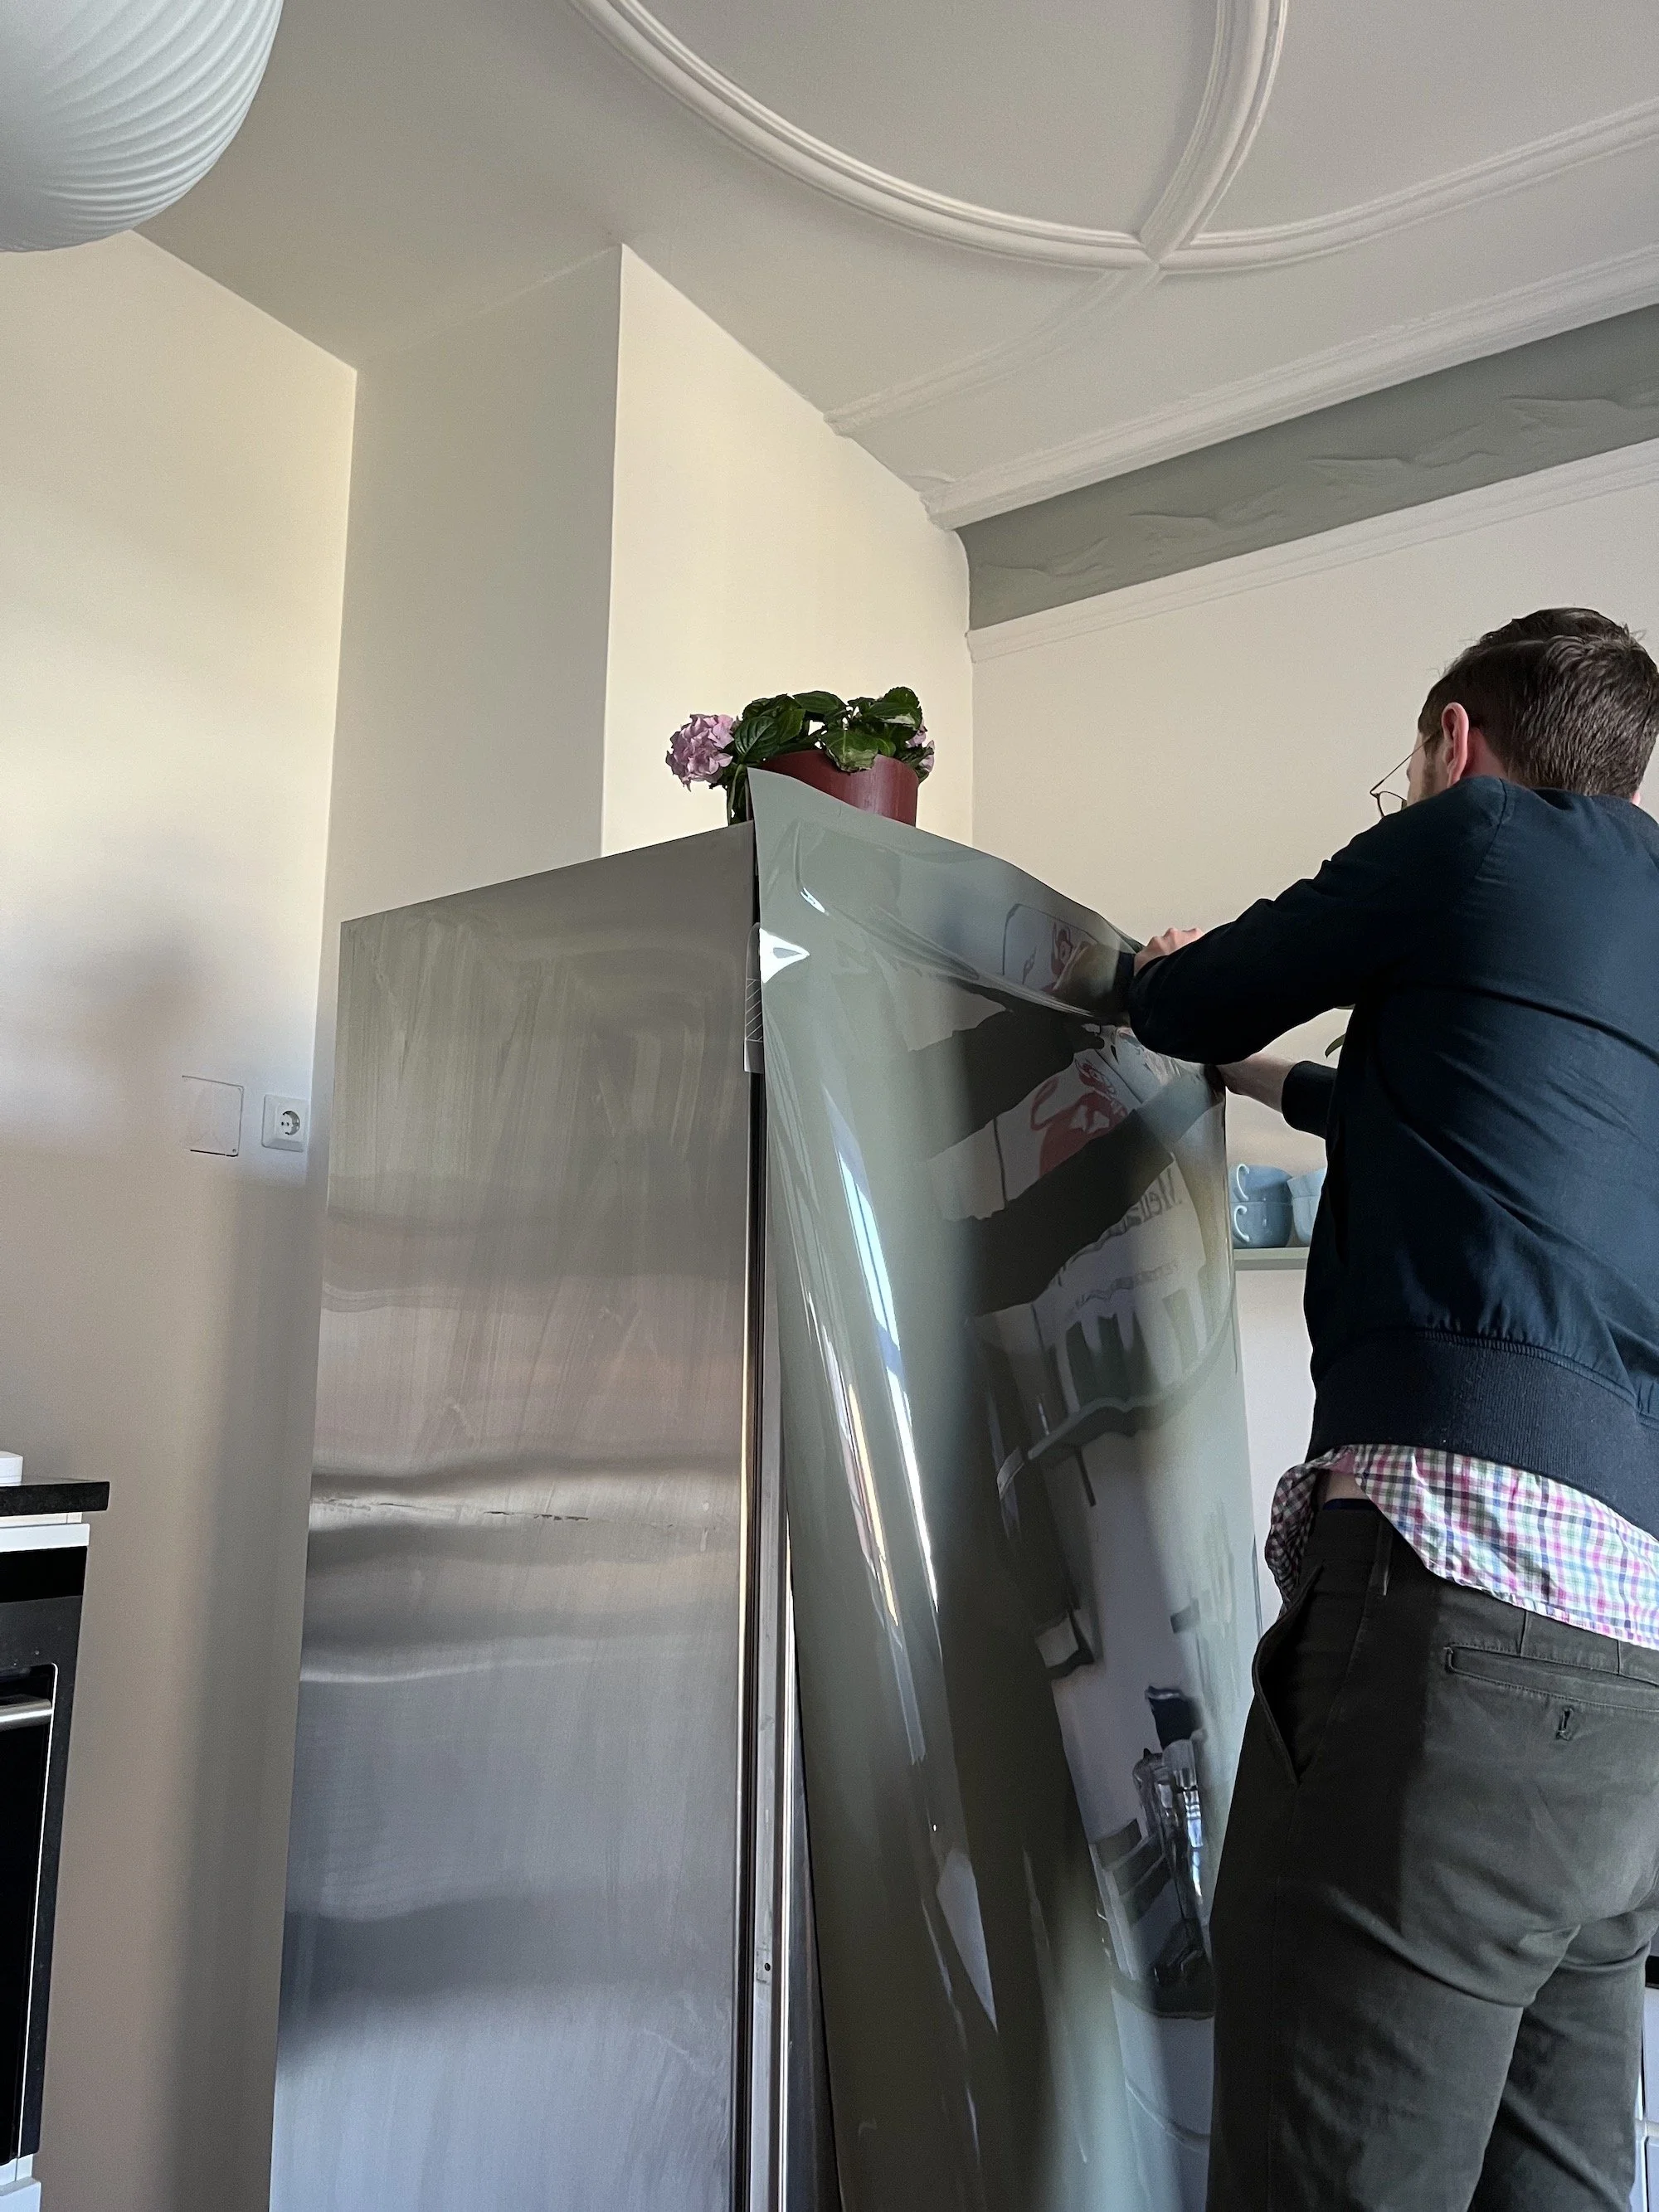
Applying The Vinyl Wrap
Applying the vinyl wrap on your fridge needs care and patience. This step shapes the final look and ensures the wrap lasts long. Follow each part closely for a smooth finish.
Cutting The Vinyl To Size
Measure the fridge sides and doors carefully. Cut the vinyl a little larger than these measurements. This extra margin helps cover edges and corners perfectly. Use a sharp blade or scissors for clean cuts.
Positioning The Wrap
Peel off the backing paper slowly. Align the vinyl with the fridge surface. Start from the top and let the rest hang down. Check that the vinyl stays straight. Adjust it gently to avoid wrinkles.
Smoothing And Eliminating Bubbles
Use a squeegee or soft cloth to smooth the vinyl. Push air bubbles toward the edges. Work from the center outwards for best results. Small bubbles can be popped with a pin. Take your time; smooth vinyl looks best.
Handling Edges And Corners
Handling edges and corners is a key step in vinyl wrapping a fridge. These areas need special care to avoid bubbles and wrinkles. Proper techniques make the wrap look smooth and neat. Edges and corners are tricky because the vinyl must bend without tearing or lifting.
Good handling ensures the vinyl sticks well and lasts longer. It also gives the fridge a professional finish. Use the right tools and methods for trimming, folding, and heating. These steps help the vinyl fit perfectly around curves and sharp angles.
Trimming Excess Vinyl
Start by cutting extra vinyl around the edges. Use a sharp blade for clean cuts. Cut slowly to avoid damaging the fridge surface. Leave a small margin to fold over corners. This prevents gaps and peeling later. Trim in small sections for better control.
Folding Techniques For Clean Lines
Fold vinyl carefully at corners to create sharp lines. Use your fingers or a plastic tool to press folds. Avoid stretching the vinyl too much. Tuck the edges neatly for a smooth finish. Folding helps the wrap follow the fridge shape closely.
Using Heat For Flexibility
Apply gentle heat to soften the vinyl around edges. Use a heat gun or hairdryer at low settings. Heat makes the vinyl stretch and bend easily. Move the heat source evenly to avoid burns. Cooling the vinyl quickly helps it keep its shape.
Finishing Touches
After carefully applying the vinyl wrap on your fridge, the finishing touches make a big difference. These steps help your wrap look neat and last longer. Paying attention to details ensures a smooth and clean result.
Reattaching Handles
Remove any tape or protective coverings before putting the handles back. Screw the handles carefully to avoid scratching the wrap. Tighten screws just enough to keep handles secure. Avoid overtightening, which can damage the vinyl or fridge surface.
Sealing The Wrap
Use a heat gun or hairdryer to warm the edges of the wrap. Press edges firmly to stick them well and prevent lifting. Seal all corners and seams with gentle pressure. This step stops water and dust from getting under the wrap.
Maintenance Tips For Longevity
Clean the vinyl with a soft cloth and mild soap. Avoid abrasive cleaners or rough sponges that can scratch the wrap. Wipe spills quickly to prevent stains or damage. Keep the fridge away from direct sunlight to avoid fading.
Troubleshooting Common Issues
Troubleshooting common issues is key to a smooth vinyl wrap project. Small problems can spoil the look if not fixed early. This guide helps solve typical challenges during fridge wrapping.
Removing Wrinkles And Bubbles
Wrinkles and bubbles often appear after applying vinyl wrap. Use a soft squeegee to push air out gently. Start from the center and move toward the edges. For stubborn bubbles, use a pin to create a tiny hole. Press the air out slowly. Heat the vinyl lightly with a hairdryer to make it more flexible. Avoid too much heat, or the wrap may stretch or warp.
Fixing Peeling Edges
Peeling edges reduce the wrap’s durability. Clean the edges with rubbing alcohol before reapplying. Use a heat gun to warm the edges slightly. Press the vinyl firmly with a squeegee. Add extra adhesive if needed, but be careful not to damage the surface. Trim any excess vinyl carefully to prevent future peeling.
Dealing With Dust And Debris
Dust and debris can trap under the vinyl, causing bumps. Always clean the fridge surface thoroughly before wrapping. Use a lint roller or tape to remove tiny particles. If dust gets trapped, lift the wrap gently and remove the debris. Avoid touching the sticky side of the vinyl to keep it clean. Work in a clean, dust-free area to reduce this problem.
Credit: www.meganmckean.com
Frequently Asked Questions
What Materials Are Needed To Vinyl Wrap A Fridge?
You need vinyl wrap film, a squeegee, a utility knife, cleaning supplies, and a heat gun. These tools ensure a smooth, bubble-free application and a professional finish.
How Long Does It Take To Vinyl Wrap A Fridge?
Vinyl wrapping a fridge typically takes 1 to 3 hours. Time depends on fridge size, surface prep, and your experience level.
Can Vinyl Wrap Protect The Fridge Surface?
Yes, vinyl wrap acts as a protective layer. It shields the fridge from scratches, minor dents, and stains, preserving its original surface.
Is It Easy To Remove Vinyl Wrap From A Fridge?
Vinyl wrap is easy to remove without damaging the fridge. Use heat to soften the adhesive, then peel gently for residue-free removal.
Conclusion
Vinyl wrapping your fridge can change its look quickly and easily. Follow the steps carefully for a smooth finish. Take your time to avoid bubbles and wrinkles. Use the right tools and clean the surface well first. This simple project can refresh your kitchen without much cost.
Enjoy your new fridge style and protect it from scratches. Try different colors or patterns to match your space. With patience, anyone can do it well. Give your fridge a fresh look today!