
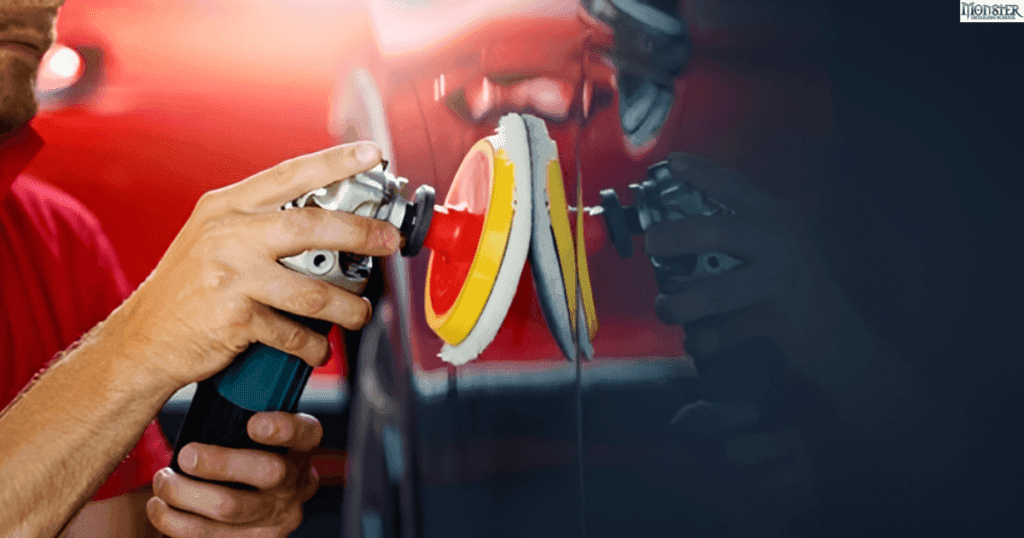
Want your car to shine like new without spending hours on your hands and knees? Waxing your car with a dual action polisher is the secret to achieving a professional, glossy finish quickly and easily.
If you’ve ever struggled with uneven wax or streaks, this method will change the game for you. In this guide, you’ll learn simple, step-by-step tips to get a flawless shine that turns heads wherever you drive. Ready to make your car look its absolute best?
Keep reading—you’re about to discover how easy and satisfying car waxing can be.
Credit: monsterdetailing.com
Choosing The Right Dual Action Polisher
Choosing the right dual action polisher is key to waxing your car effectively. The right tool makes the process easier and protects your car’s paint. This section breaks down what to consider before buying one. Focus on the type, power, speed, and pad compatibility to find the best fit.
Types Of Dual Action Polishers
There are two main types of dual action polishers: corded and cordless. Corded polishers offer constant power, best for long sessions. Cordless models give more freedom of movement but need charging. Choose based on your workspace and how often you plan to wax your car.
Power And Speed Settings
Power is important for removing wax evenly and quickly. Look for polishers with adjustable speed settings. Lower speeds help with delicate surfaces, while higher speeds handle tough wax layers. A polisher with variable speed gives better control over the waxing process.
Pad Compatibility
Pads come in different sizes and materials. Foam pads are soft and good for applying wax smoothly. Microfiber pads offer better polishing for stubborn spots. Check if your polisher fits common pad types. Easy pad changes save time and improve results.
Selecting The Best Car Wax
Choosing the right car wax is key to getting the best results with a dual action polisher. The wax protects your paint and gives your car a shiny, smooth finish. Different waxes work better on different types of paint and offer various levels of protection. Picking the right one helps your car look great and stay safe from damage.
Wax Types Explained
Car wax comes in several types. Paste wax is thick and lasts a long time. It gives a deep shine but takes more effort to apply. Liquid wax is easier to spread and works faster. It may not last as long as paste wax but still protects well. Spray wax is the easiest to use. It offers quick shine but less protection. Synthetic waxes are made from man-made materials. They last longer than natural waxes and give strong protection. Natural waxes, like carnauba, give a warm, rich shine. They may need more frequent application.
Wax For Different Paint Finishes
Different paints need different waxes. Clear coat paint works well with synthetic wax. It bonds tightly and lasts longer. Older paint may need a softer wax like carnauba to avoid damage. Matte finishes need special waxes made for flat surfaces. Regular wax can add unwanted shine or streaks. Metallic paints look best with waxes that boost sparkle. Always check the wax label to match your paint type. Using the right wax keeps your paint safe and looking fresh.
Preparing Your Car For Waxing
Preparing your car for waxing is a key step to get a smooth, shiny finish. Dirt, dust, and old residue can stop wax from sticking well. This makes the wax job less effective and less durable. Follow these steps to clean and ready your car before waxing with a dual action polisher.
Washing And Drying
Start by washing your car thoroughly. Use a car shampoo and soft sponge or mitt. Rinse away all dirt and grime carefully. Avoid household soaps that can strip wax and damage paint. After washing, dry the car fully with a clean microfiber towel. Wet spots can cause watermarks and mess up waxing.
Removing Contaminants
Some particles do not wash off easily. These include brake dust, tree sap, and road tar. Use a specialized cleaner or clay bar lubricant to spot-clean these areas. Removing these stubborn spots will prevent scratches during polishing. Your car’s surface will feel smoother and ready for the next step.
Claying The Surface
Claying removes tiny embedded dirt and contaminants from the paint. Use a clay bar with lubricant and gently rub small sections at a time. The surface will become slick and clean. This step helps the wax bond better and last longer. It also improves the shine and smoothness of your car’s finish.

Credit: malcoautomotive.com
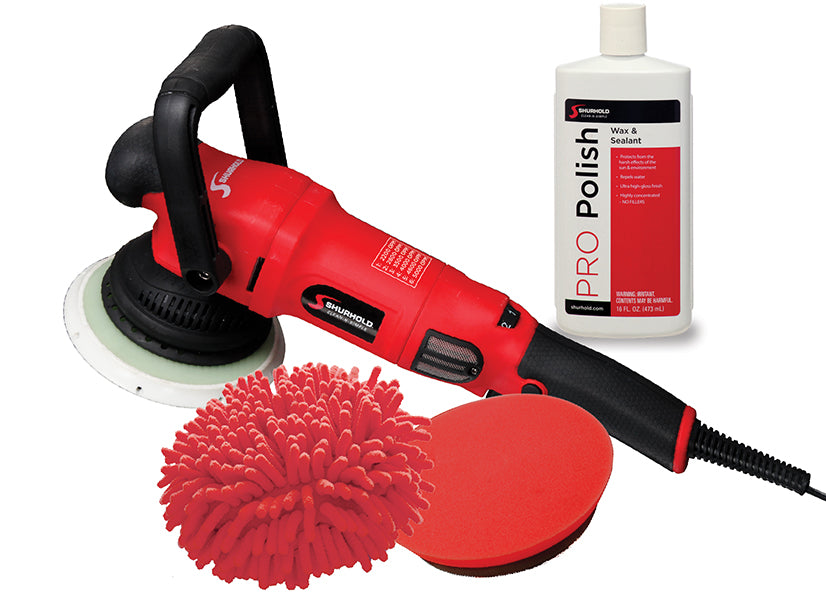
Setting Up The Polisher
Setting up your dual action polisher correctly is key to a smooth waxing job. This step ensures even wax application and protects your car’s paint. Take time to prepare your tools and materials before starting.
Attaching The Correct Pad
Choose a soft foam pad for waxing. Hard or abrasive pads can damage the paint. Align the pad with the polisher’s backing plate. Press firmly to secure the pad in place. Make sure the pad is centered to avoid wobbling.
Applying Wax To The Pad
Put a small amount of wax on the pad. Dab wax in four or five spots across the pad. Avoid overloading the pad with wax. Too much wax can cause uneven spreading and mess. Start with less; you can add more as needed.
Adjusting Speed Settings
Set the polisher to a low speed first. This helps spread the wax gently on the surface. Increase speed slightly if the wax does not spread well. Use medium speed for buffing after wax application. High speeds can burn the wax or paint.
Waxing Techniques With A Polisher
Waxing a car with a dual action polisher makes the process faster and easier. It helps spread wax evenly and creates a smooth, shiny finish. Using the right techniques will protect your car’s paint and improve its look. This section covers key waxing techniques to use with a polisher.
Applying Wax Evenly
Start by placing a small amount of wax on the polisher pad. Spread it gently over the surface before turning the machine on. Move the polisher slowly and evenly to cover the area. This avoids thick spots or missed patches. Even application ensures consistent shine and protection.
Working In Small Sections
Divide your car’s surface into small parts. Wax one section at a time to control the process. It helps the wax dry properly and makes buffing easier. Working in small sections also prevents wax from drying too fast or becoming sticky.
Using Proper Pressure
Hold the polisher with light to medium pressure. Pressing too hard can damage the paint or polish unevenly. Let the machine’s weight do the work. Smooth, gentle pressure helps spread wax without causing swirl marks or scratches.
Removing Excess Wax
Removing excess wax is an important step after applying wax with a dual action polisher. It helps bring out a smooth shine and prevents streaks. Proper removal keeps your car’s surface clean and glossy.
Take your time to remove all leftover wax carefully. This step ensures the wax layer is even and protects the paint well. Use the right tools and techniques for the best results.
Buffing With A Microfiber Towel
Use a clean, soft microfiber towel to buff the wax. Gently wipe the surface in small sections. Move the towel in circular motions to lift off extra wax. Avoid pressing too hard to protect the paint.
Microfiber towels trap wax particles well. This prevents scratches and keeps the surface smooth. Change towels if they get too dirty or waxy during the process.
Checking For Residue
After buffing, check the car’s surface for leftover wax. Look under sunlight or bright light for any cloudy spots. These areas need more buffing to remove residue completely.
Use your hand to feel the surface. It should feel smooth and even. If you find rough or sticky patches, buff again gently with a microfiber towel.
Finishing Touches
Once all wax is removed, give the car a final light buff. Use a clean towel to bring out a deep shine. This step enhances the wax’s protective layer and the car’s look.
Check edges and hard-to-reach spots last. These areas often hold excess wax. A careful finish makes your car look polished and well cared for.
Maintaining Your Polisher And Pads
Maintaining your dual action polisher and pads is key for smooth waxing sessions. Clean tools work better and last longer. Proper care saves money and keeps your car’s finish perfect.
Cleaning After Use
Remove the pads from the polisher right after use. Rinse them with warm water to remove wax and dirt. Use a mild soap if pads are very dirty. Let pads air dry completely before storing. Wipe the polisher body with a soft cloth. Avoid water near the motor area to prevent damage.
Storing Equipment Properly
Store your polisher in a dry, cool place away from dust. Keep pads in a sealed container or bag to stop dust buildup. Avoid stacking heavy items on top of the polisher. Check cords for damage before storing. Proper storage prevents accidents and keeps equipment ready for use.
Common Mistakes To Avoid
Waxing a car with a dual action polisher can give great results. Avoiding common mistakes is key to a smooth process and a shiny finish. These errors can waste your time and damage your car’s paint.
Focus on the right steps and tools for a perfect wax job.
Overloading Wax
Putting too much wax on the pad or car surface causes problems. It leads to uneven application and hard removal. The polisher can clog, reducing its effectiveness. Use a small amount of wax and add more if needed. This helps spread wax thinly and evenly for a better shine.
Using Incorrect Pads
Not all pads work the same. Using the wrong pad can harm your paint or give poor results. Soft foam pads are best for waxing, while hard pads suit polishing. Check the pad type before starting. Match the pad to the wax and paint type for safe, smooth work.
Skipping Surface Preparation
Skipping cleaning or drying the car before waxing is a common error. Dirt and dust trapped under wax cause scratches. Always wash and dry your car fully. Use a clay bar if needed to remove contaminants. A clean surface helps wax bond better and last longer.
Credit: shurhold.com
Frequently Asked Questions
What Is A Dual Action Polisher For Car Waxing?
A dual action polisher is a tool that spins and oscillates simultaneously. It evenly applies wax, reducing swirl marks and enhancing shine. It’s safer for beginners and provides professional-quality results without damaging your car’s paint.
How Do I Prepare My Car Before Waxing?
Wash and dry your car thoroughly before waxing. Remove any dirt, grime, and previous wax layers. Use clay bars if needed to smooth the surface. This preparation ensures better wax adhesion and a flawless finish.
Can I Use Any Wax With A Dual Action Polisher?
Most carnauba and synthetic waxes work well with a dual action polisher. Choose a wax compatible with your car’s paint type. Avoid abrasive compounds unless you want to polish or correct paint imperfections.
How Long Does Waxing With A Dual Action Polisher Take?
Waxing typically takes 30 to 60 minutes depending on car size and wax type. The polisher speeds up application and buffing compared to hand waxing. Allow wax to haze before buffing for best results.
Conclusion
Waxing a car with a dual action polisher gives a smooth, shiny finish. It protects your paint from dirt and sun damage. Using the right technique makes waxing easier and better. Take your time and work in small sections. Clean your car well before starting the wax.
Always use quality wax and pads for best results. Regular waxing keeps your car looking new longer. Enjoy the shine and the feeling of a well-cared-for car. Simple steps lead to great results every time.

